Edwardian Table W.I.P. [Increasingly Image Heavy]

UKworkshop.co.uk

Help Support UKworkshop.co.uk:

This site may earn a commission from merchant affiliate links, including eBay, Amazon, and others.

Jelly

Established Member
Joined
20 Sep 2012
Messages
1,366
Reaction score
338
Location
Sheffield
I started looking at the feasibility of making an repro of an Edwardian Table, probably two months back now and buoyed by encouragement from the Hand-Tools forum, did some practice legs in laminated softwood which went well...

So on Friday I took delivery of 0.147m³ of Meranti (or Lauan, if you prefer) in 4"×4" section, I didn't want to buy a sixth of a cube of it, but that was how big the only piece of Meranti in a suitable thickness I could lay my grubby little mitts on was and I paid next to nothing for the regularising and re-sawing, and discussions in the family indicated that I could easily find a home for enough furniture for me to use up all those 4×4 leg blanks in a year or two.

UQpltQg.jpg


4hB75QJ.jpg


As you can see in the pics, I've just got it into the workshop, stickered it and will now need to start making templates for all the curved bits, whilst I wait for the MC to equalise. This wouldn't usually be reason for a photo, but it had to come up from the basement level to the second floor via a spiral staircase as the lift had broken (again), which I feel is an achiement all by itself.
 
Looking forward to seeing the WIP - have you got a pic of the prototype and/or a drawing to show what it'll look like? Cheers, W2S
 
Woody2Shoes":39gt82lk said:
Looking forward to seeing the WIP - have you got a pic of the prototype and/or a drawing to show what it'll look like? Cheers, W2S

Ish... originally my plan was to recreate a Georgian/Regency era table for my grandmother, who got flooded.

She doesn't have space to accommodate in her temporary accommodation at the moment, but my mother has some lovely Edwardian furniture which is essentially a repro of the Regency stuff I was originally looking at and asked if I'd do a piece to match that, so I have a good idea of the form (Inc. Sketches, which I'll post later), but I'm still confirming aesthetic details like the shape of the table top, mouldings, carving and inlay/stringing (if any) on the top.

Luckily she's happy with the design of the frame & legs, so I'll get on with that first.
 
The last week or so has been hectic, so I never really got going in earnest, I just had enough time to make a start at all, As most of the little workshop time I got was used up scraping a damaged lathe bearing for a friend.

Sketch:

vwjdSzv.jpg


(I got very confused laying out the decorative bit, as I was trying to calculate the chord of each segment and use my compass like dividers, but borrowed the missuses weird HP calculator, that took longer to figure out than doing the drawing did... T.I. all the way for future reference!)

You can hopefully see that the aprons are intended to be curved to match the top, with a gentle curve up from the legs to the middle.

Now that could be steam bent and made from three pieces... But, as: Meranti doesn't bend well, I have almost no steam bending experience, and I like showing off endgrain; the plan is to cut it from an over-thickness apron (in a manner similar to making the legs).

I've cut the blanks for the legs (with a sharp handsaw, twas like sawing through butter) and they need shooting to be perfectly flat and equal, as one of the saw cuts came off square in the vertical direction (by about 1mm in 100mm, but still perceptibly so), and was going to rip the material for the aprons, but need to clear the area behind the bandsaw before I can do that.

The other thing I quickly did was take the offcut, plane up a face, sand down to 320grit, wipe with linseed varnish thinned to an almost watery consistency, then sanded the wet surface again with 320 and wiped another coat of varnish... Curious to see how that looks and feels. I'll then plane the next face up and do a dry run of the fluted decorative carving.
 
Do you want the apron to conform to the shape of the top? And is this on all four sides?

I don't think anyone would steam it, the choices are lamination, cut from the solid, or have the aprons straight (in plan view) and just shape the top. If you go for cutting from the solid (I would) then remember the golden rule, joint first and shape second, so you'd cut the mortice and tenons on over sized aprons and only when you're satisfied that you've got gap free, tight joints would you move on to the shaping. If you shape first you won't have the clean reference surfaces that will make life so much simpler.

Good luck!
 
custard":1njussxs said:
Do you want the apron to conform to the shape of the top? And is this on all four sides?

I don't think anyone would steam it, the choices are lamination, cut from the solid, or have the aprons straight (in plan view) and just shape the top. If you go for cutting from the solid (I would) then remember the golden rule, joint first and shape second, so you'd cut the mortice and tenons on over sized aprons and only when you're satisfied that you've got gap free, tight joints would you move on to the shaping. If you shape first you won't have the clean reference surfaces that will make life so much simpler.

Good luck!

The piece I took the inspiration from has aprons made from steam bent walnut... It looks like an impossible task!

Thanks for the advice with regards to forming the joints first, logically it makes sense to make a functional thing first, then shape it once you've made it work... Otherwise you're doing the time consuming, complex decorative work before knowing it will do it's actual job.


If I think about the time to do each "unit operation", I'd estimate it to take 120 ish hours of work, plus an amount of unavoidable non-working time for finish to cure between coats... realistically however experience tells me to expect the whole thing to take me in the region of 250-300 hours, that's 4ish months if I'm lucky with how much time I can dedicate.

I'm quietly confident I can do this, if and only if I'm methodical, careful and attentive, with no desire to rush the process (including walking away if I reach the point that I'm getting impatient with a specific task).
 
I've no experience of making anything like this - I'll come along for the ride though!

What I can offer is a nice illustration of the wisdom of Custard's advice about cutting joints from full section timber, then shaping - from one of Charles Hayward's books:

20160229_152316_zpsxiuqxyuo.jpg


These are the other pics, just in case they are any use:

20160229_152331_zps6g8kfoe9.jpg


20160229_152325_zpsjckq405b.jpg
 
I'm finally back in the workshop tonight, so will post pics of how far I get.

Edit: No, No I'm not, nor am I likely to be for most of the rest of the month :(

In the mean time I've been thinking about what mouldings to use on the top itself.

hiRj4tA.jpg


I like the little Grecian Ogee 2., but the Cyma 1. is a close copy of the piece it's inspired by

MB3nxf3.jpg


Whichever I choose, a big scratch stock is required!
 
Unexpectedly got an evening in the workshop, so made a little progress.

Big chunk of time was used up re-setting the thicknesser bed on the P/T to parallel with the cutters, annoyingly the cutters themselves have been chipped in four of five places, meaning that the finish was poor and still required some handwork to remove the small lines left behind to be truly flat.

All the legs have been planed to 95mm square, had the top face squared up and morticed, meant to get some 'in progress' photos, but got carried away with actually having a chance to get something done, so only got one shot of them bundled up for storage.

lf6dtZ7.jpg


As you can see the walls of one haunch are slightly skewed, I'll have to correct that with careful paring of the haunch, and then mortice wall, before I start with the aprons, as that tenon will need to be fractionally wider for a tight fit; I'm annoyed at myself for that.

The other things I got done were ripping stock for the aprons to thickness and planing them, I regret not cutting to near final length before doing this, as the 9' lengths were awkward to manuver (especially with the dismal roller stands we have), but it's done at least and a quick trial of the decorative carving I want to use on the aprons, Meranti is not an ideal carving wood, and predictably I got poor results with what I now know was an excessively aggressive approach, that however was exactly the point of the exercise, so to build on my succesful failure I now know to take a lot of very shallow cuts on the cross-grain parts of the carving to make it work, also the desired form does seem to look good even with a painfully poor surface finish.

3roHpJQ.jpg
 
Spraying on a mixture of water and alcohol sometimes helps when carving cross-grain.
 
I've managed to squeeze some more work on this in, and a lot of progress has been made...

EecCEIt.jpg


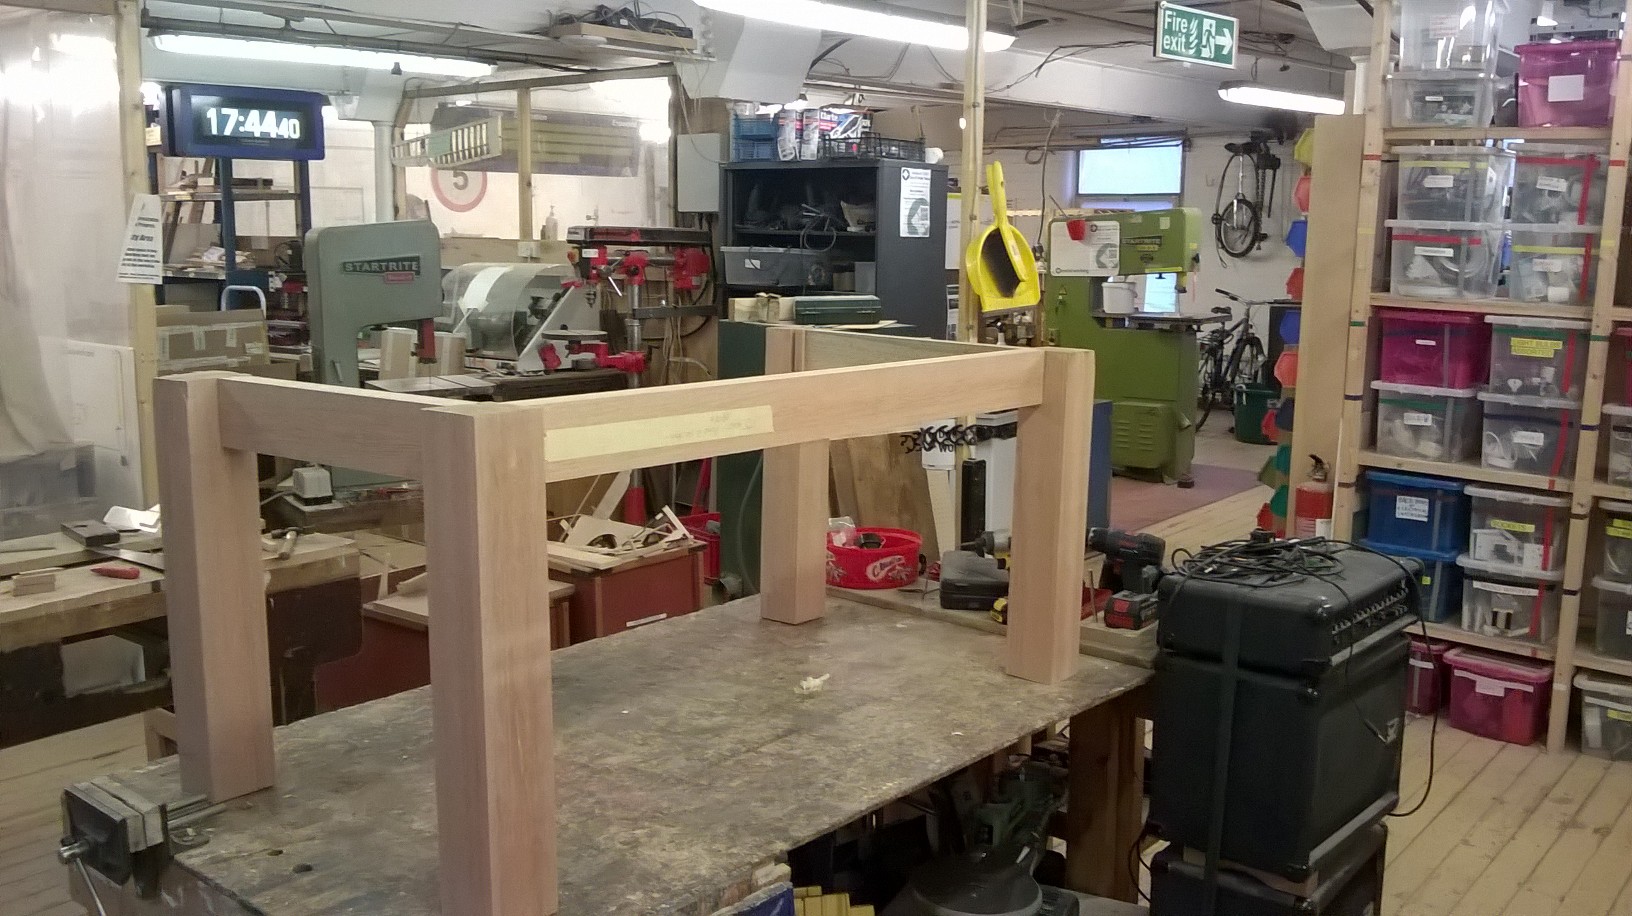
So that looks vaguely table like, no?


BW2kmHb.jpg


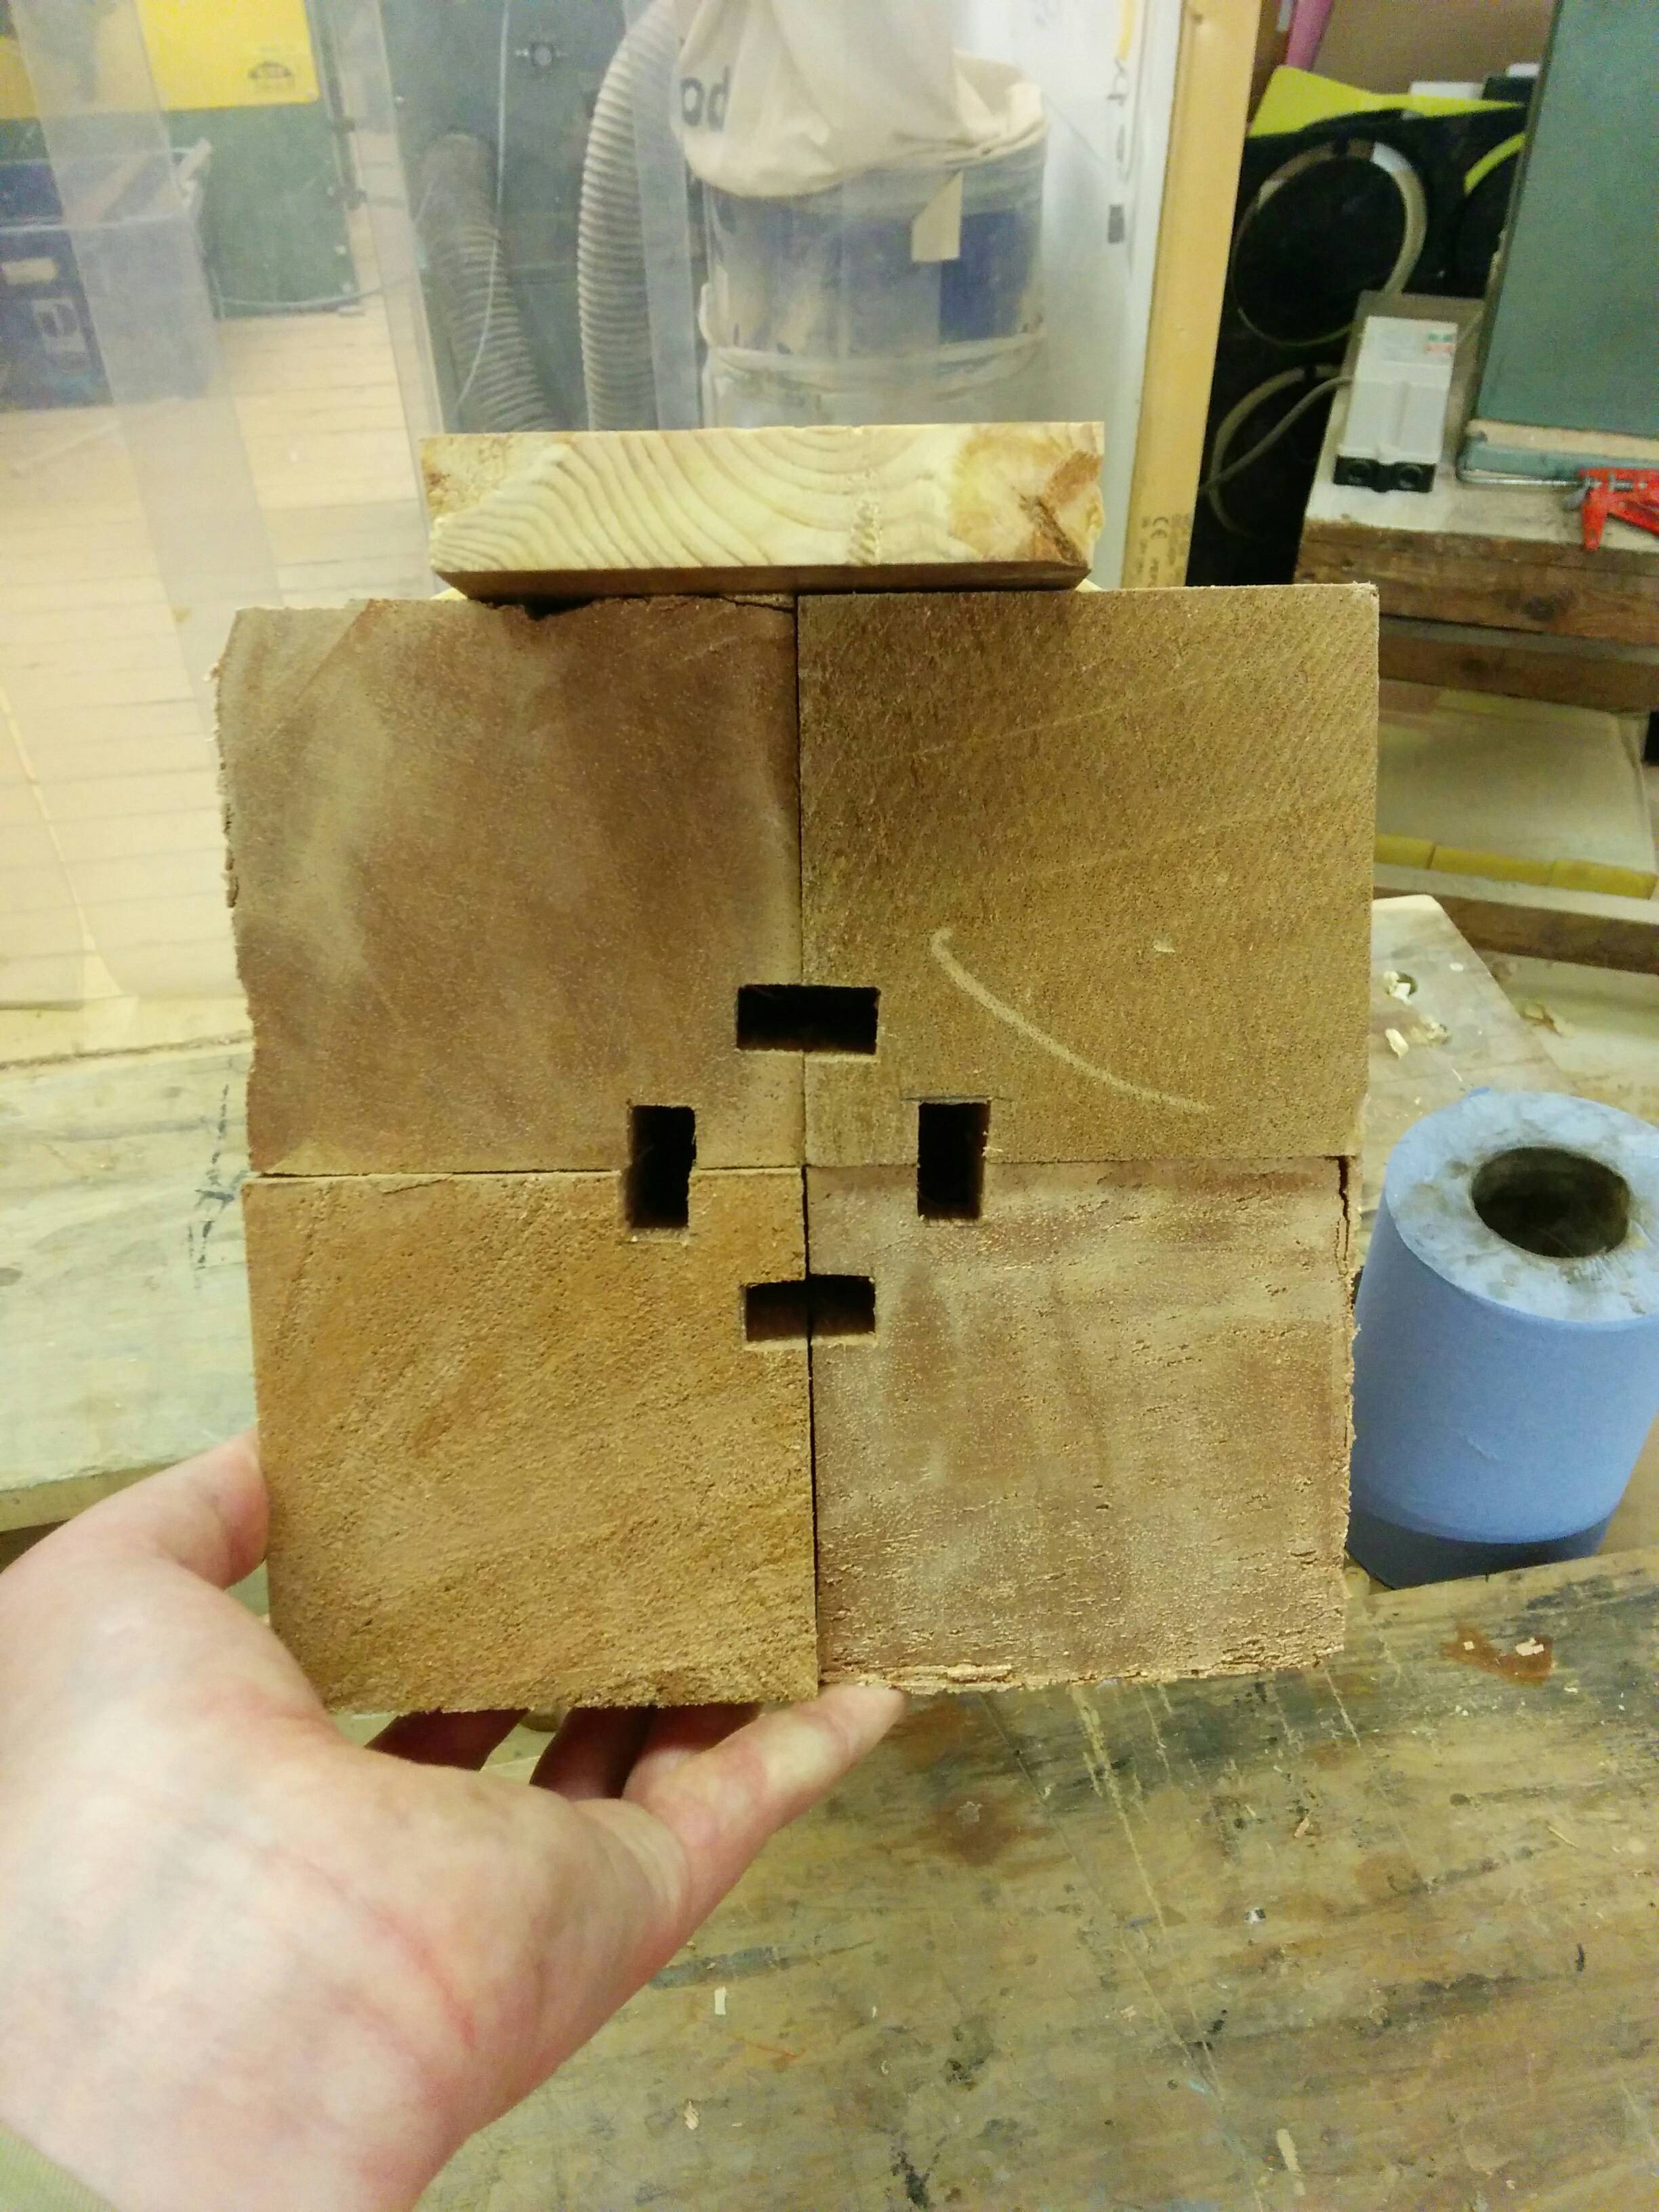
Apart from the missing apron... In adjusting the mitred tenons to fit as closely as possible, I caused some spelching on one of the tenons, (in spite of relieving the end with a chamfer first, paring across was all it took) so that had to be repaired, an inauspicious start.


thBwhEa.jpg


RxZu6EM.jpg


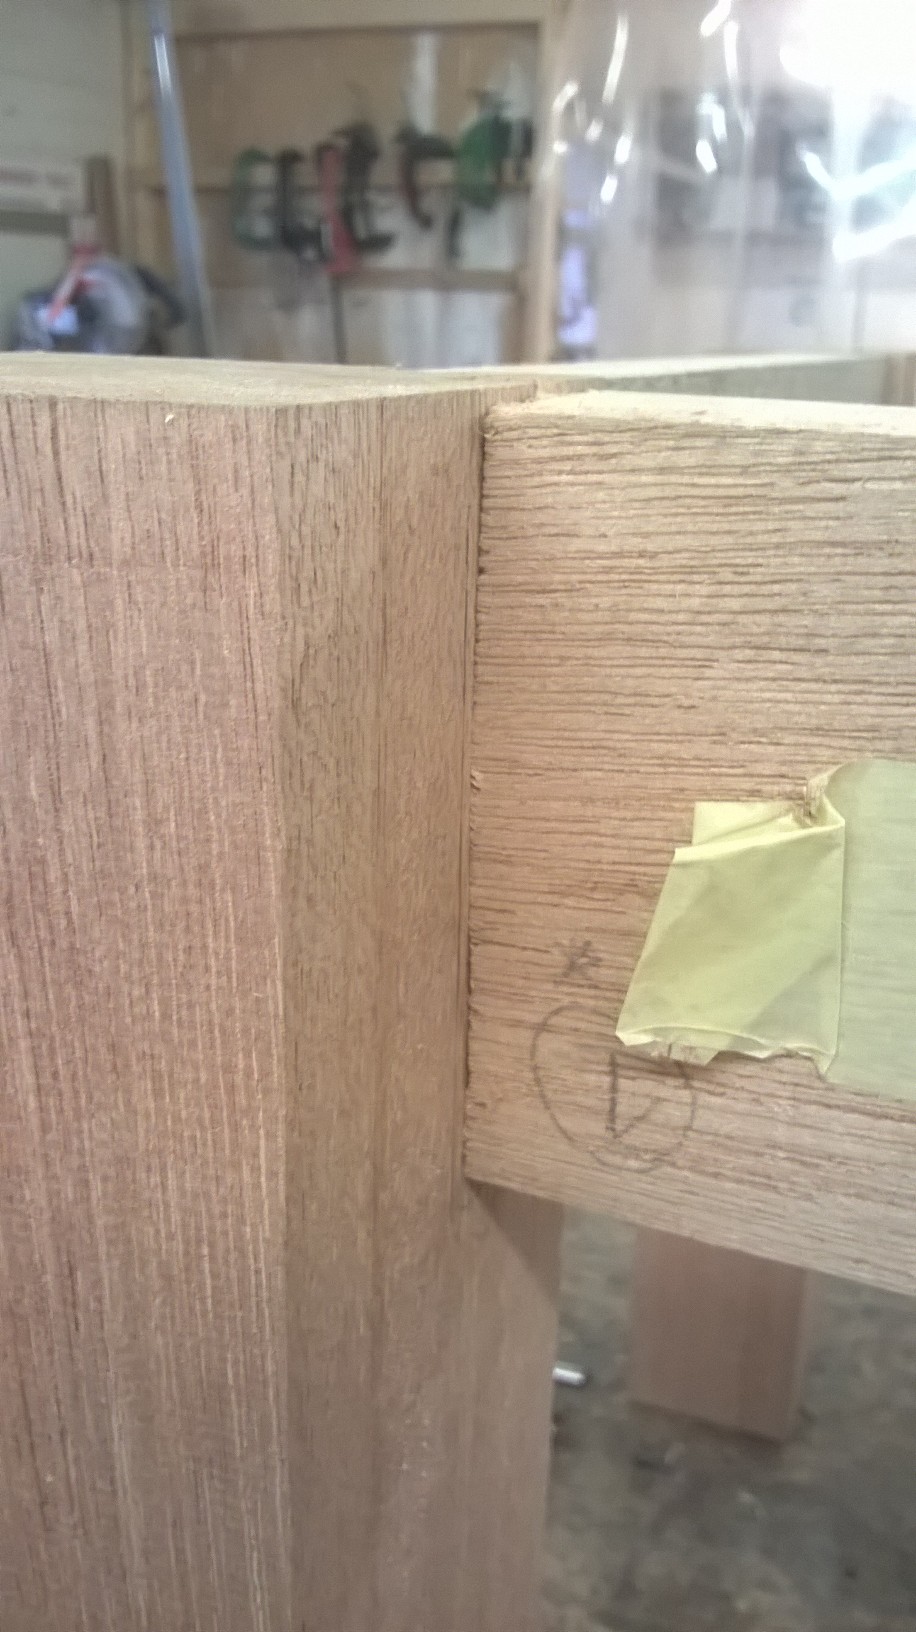
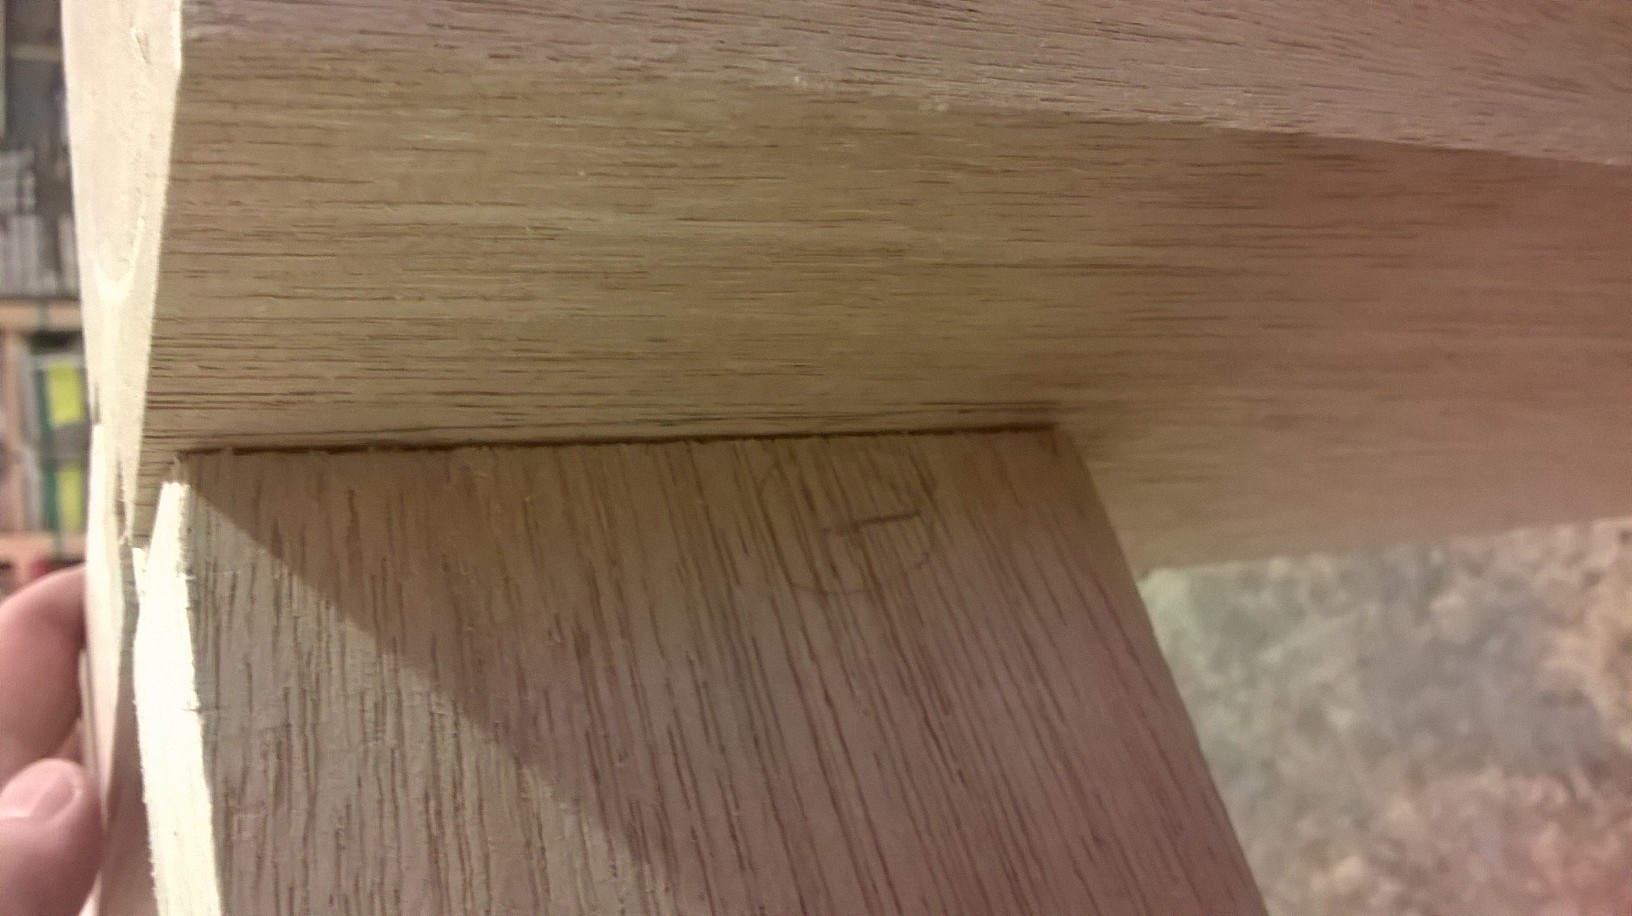
I then noticed a less pressing problem, when I established my "knifewall™" to cut the tennon shoulders, I worked the wrong way round leaving a little, inconsistent chamfer right at the glueline... It makes the workmanship look imperfect (because it is) right now, but as the actual shoulder is flat, in the right plane and perfectly fitted I'm inclined to leave it be rather than risk making an buttocks of it for the sake of perfectionism. I say this as, that part of the apron with the tiny chamfer on it will be removed when the curves are shaped, leaving (in theory) a nice tight glueline... Were it something which would remain in place, I'd have gone ahead and taken 1-1.5mm off each shoulder with a shoulder plane (also, found the shoulder plane which has disappeared to the bottom of assorted tool bags).

That was one session in the workshop completed.


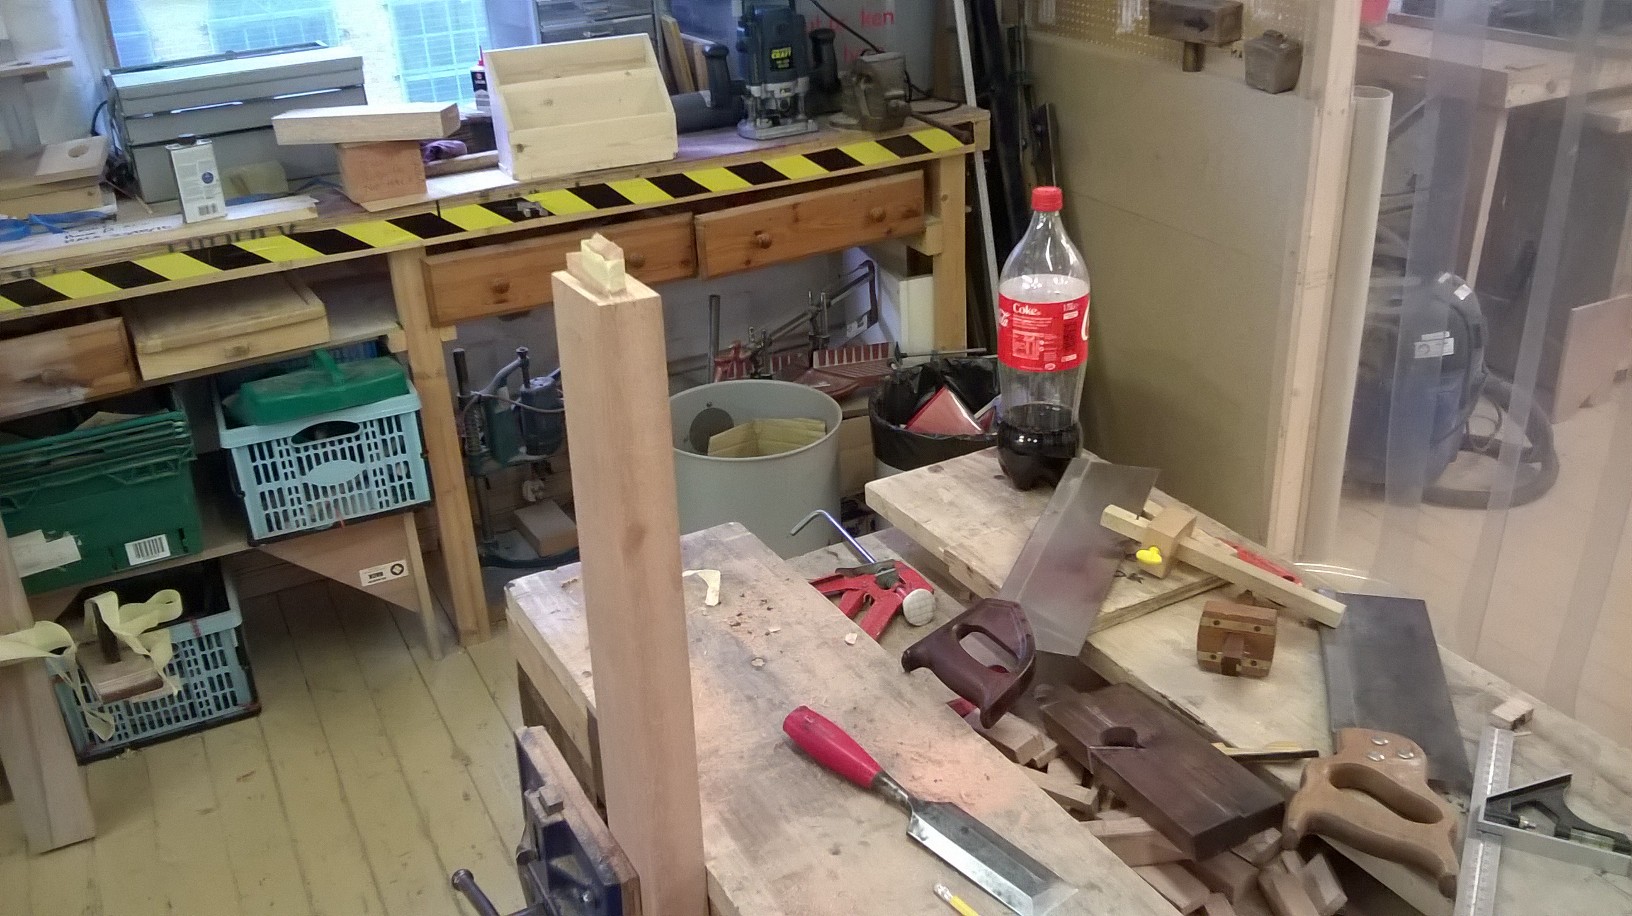
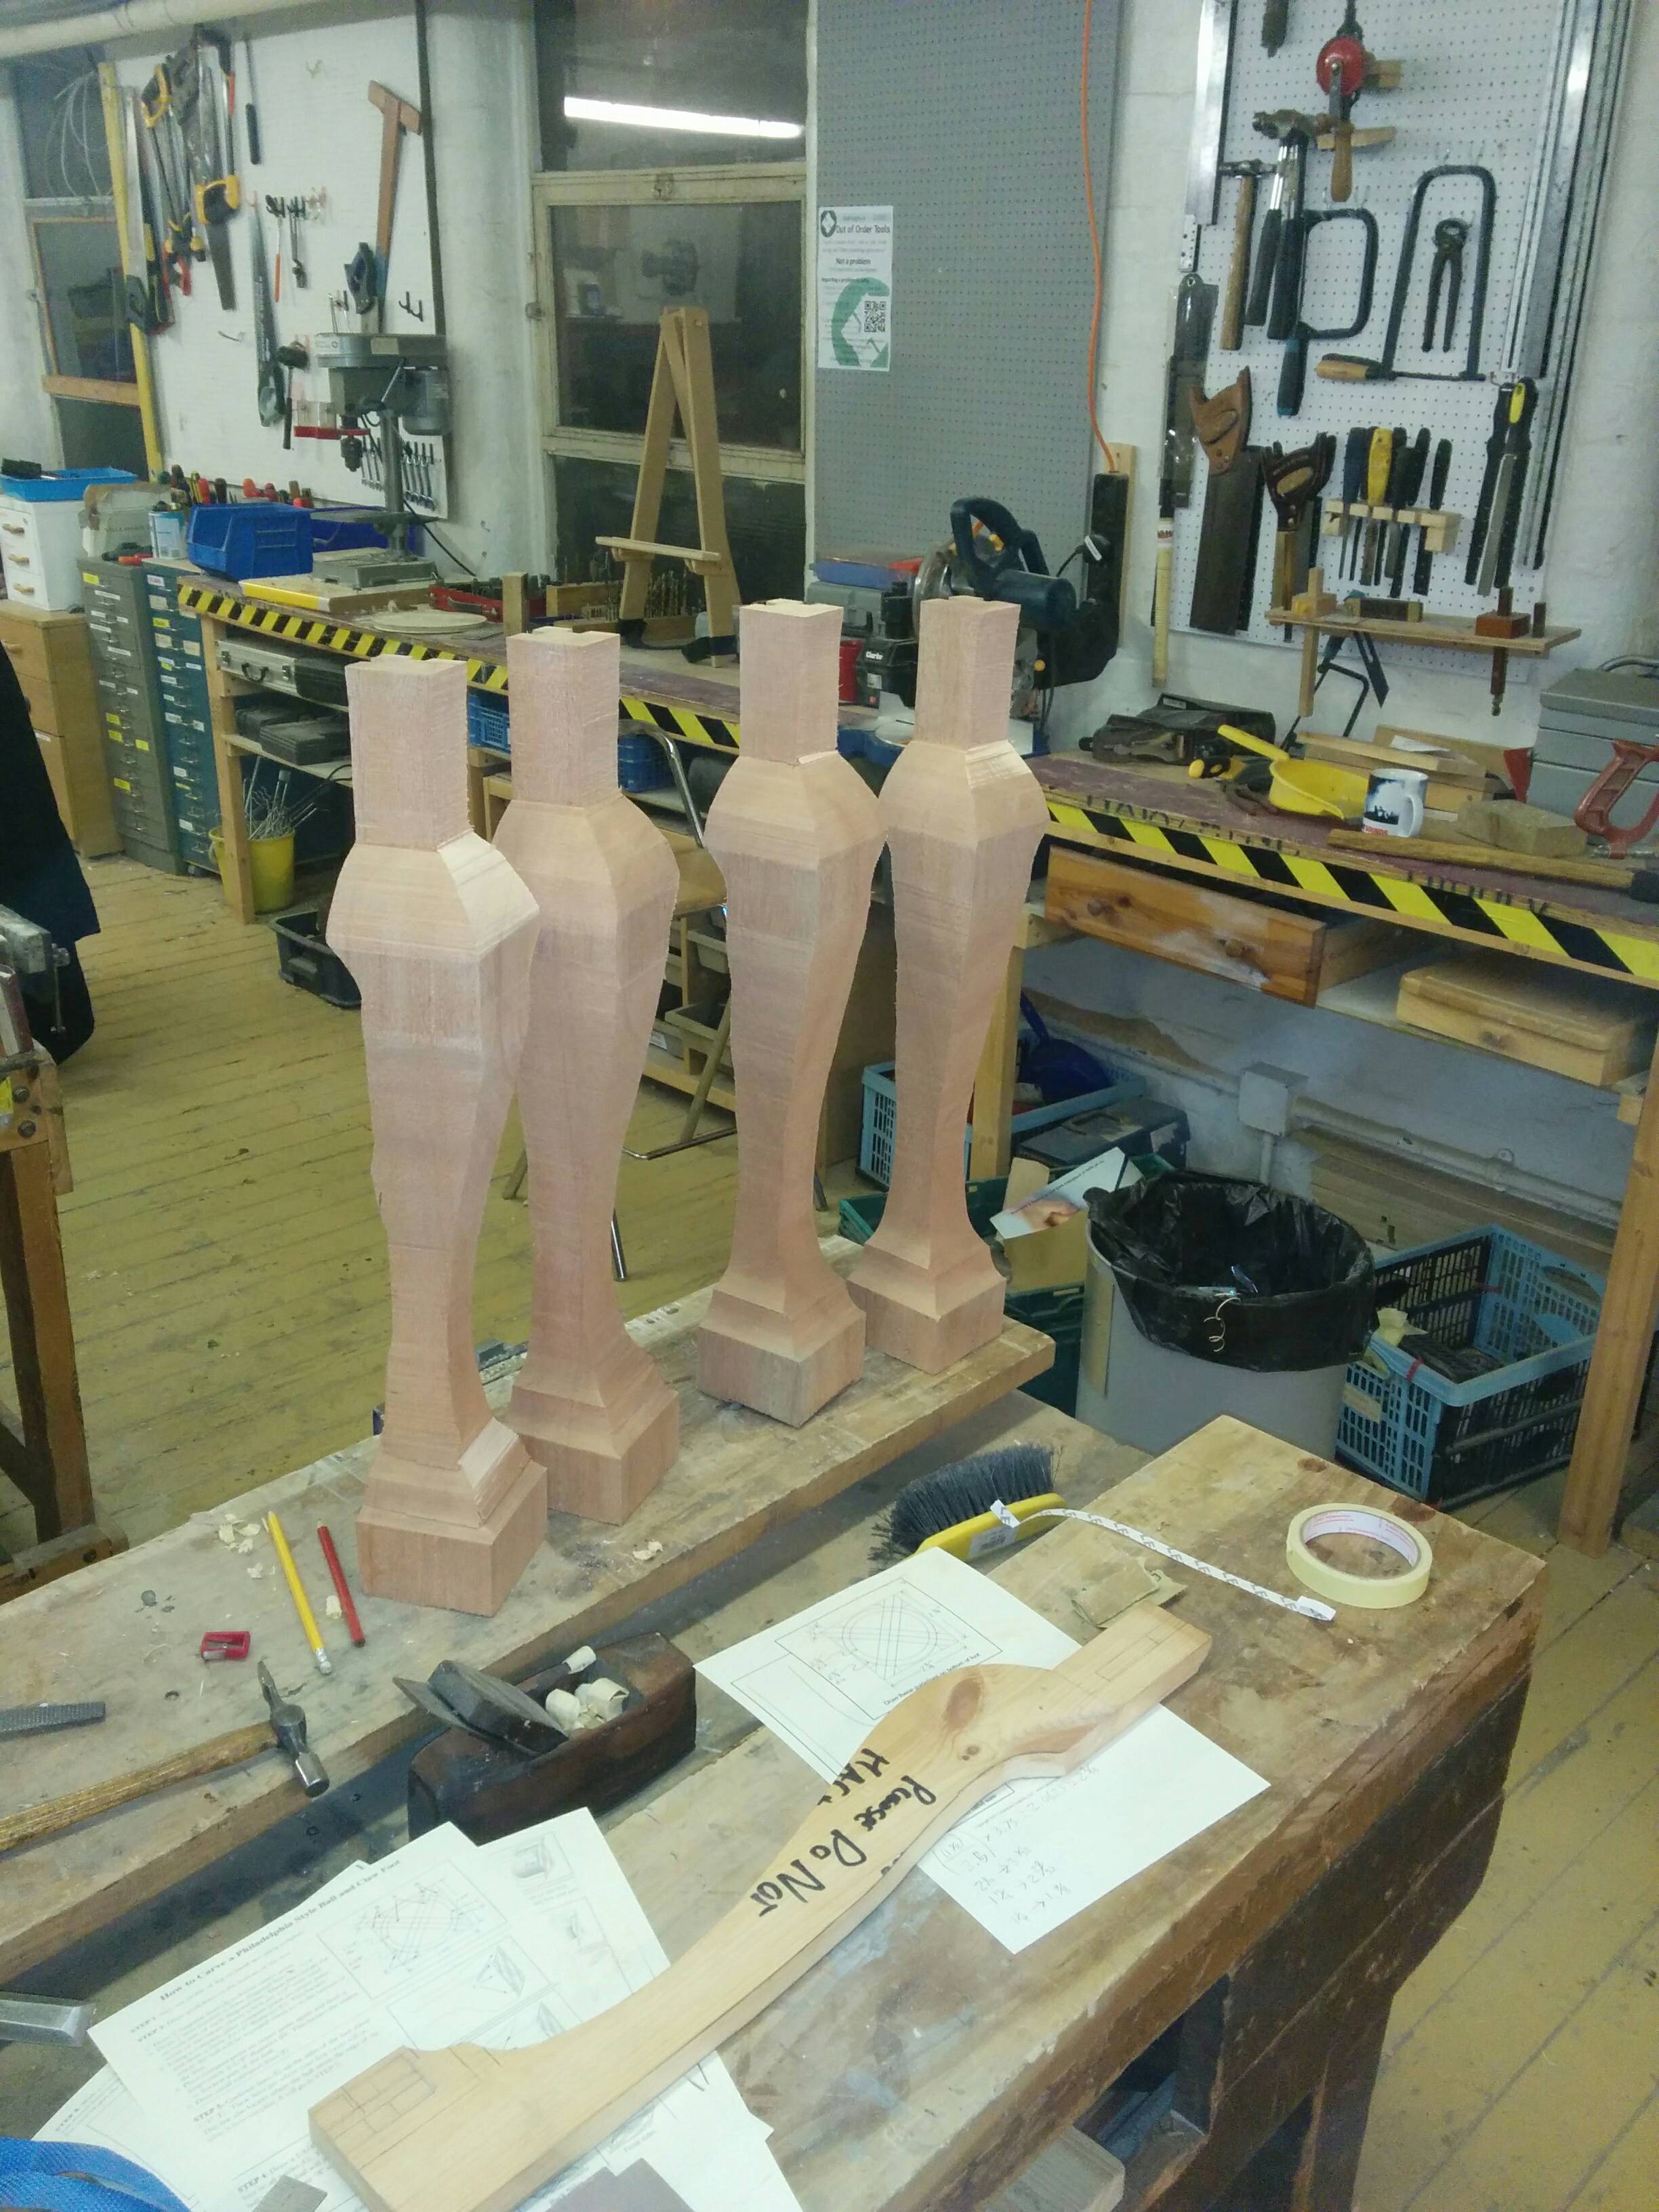
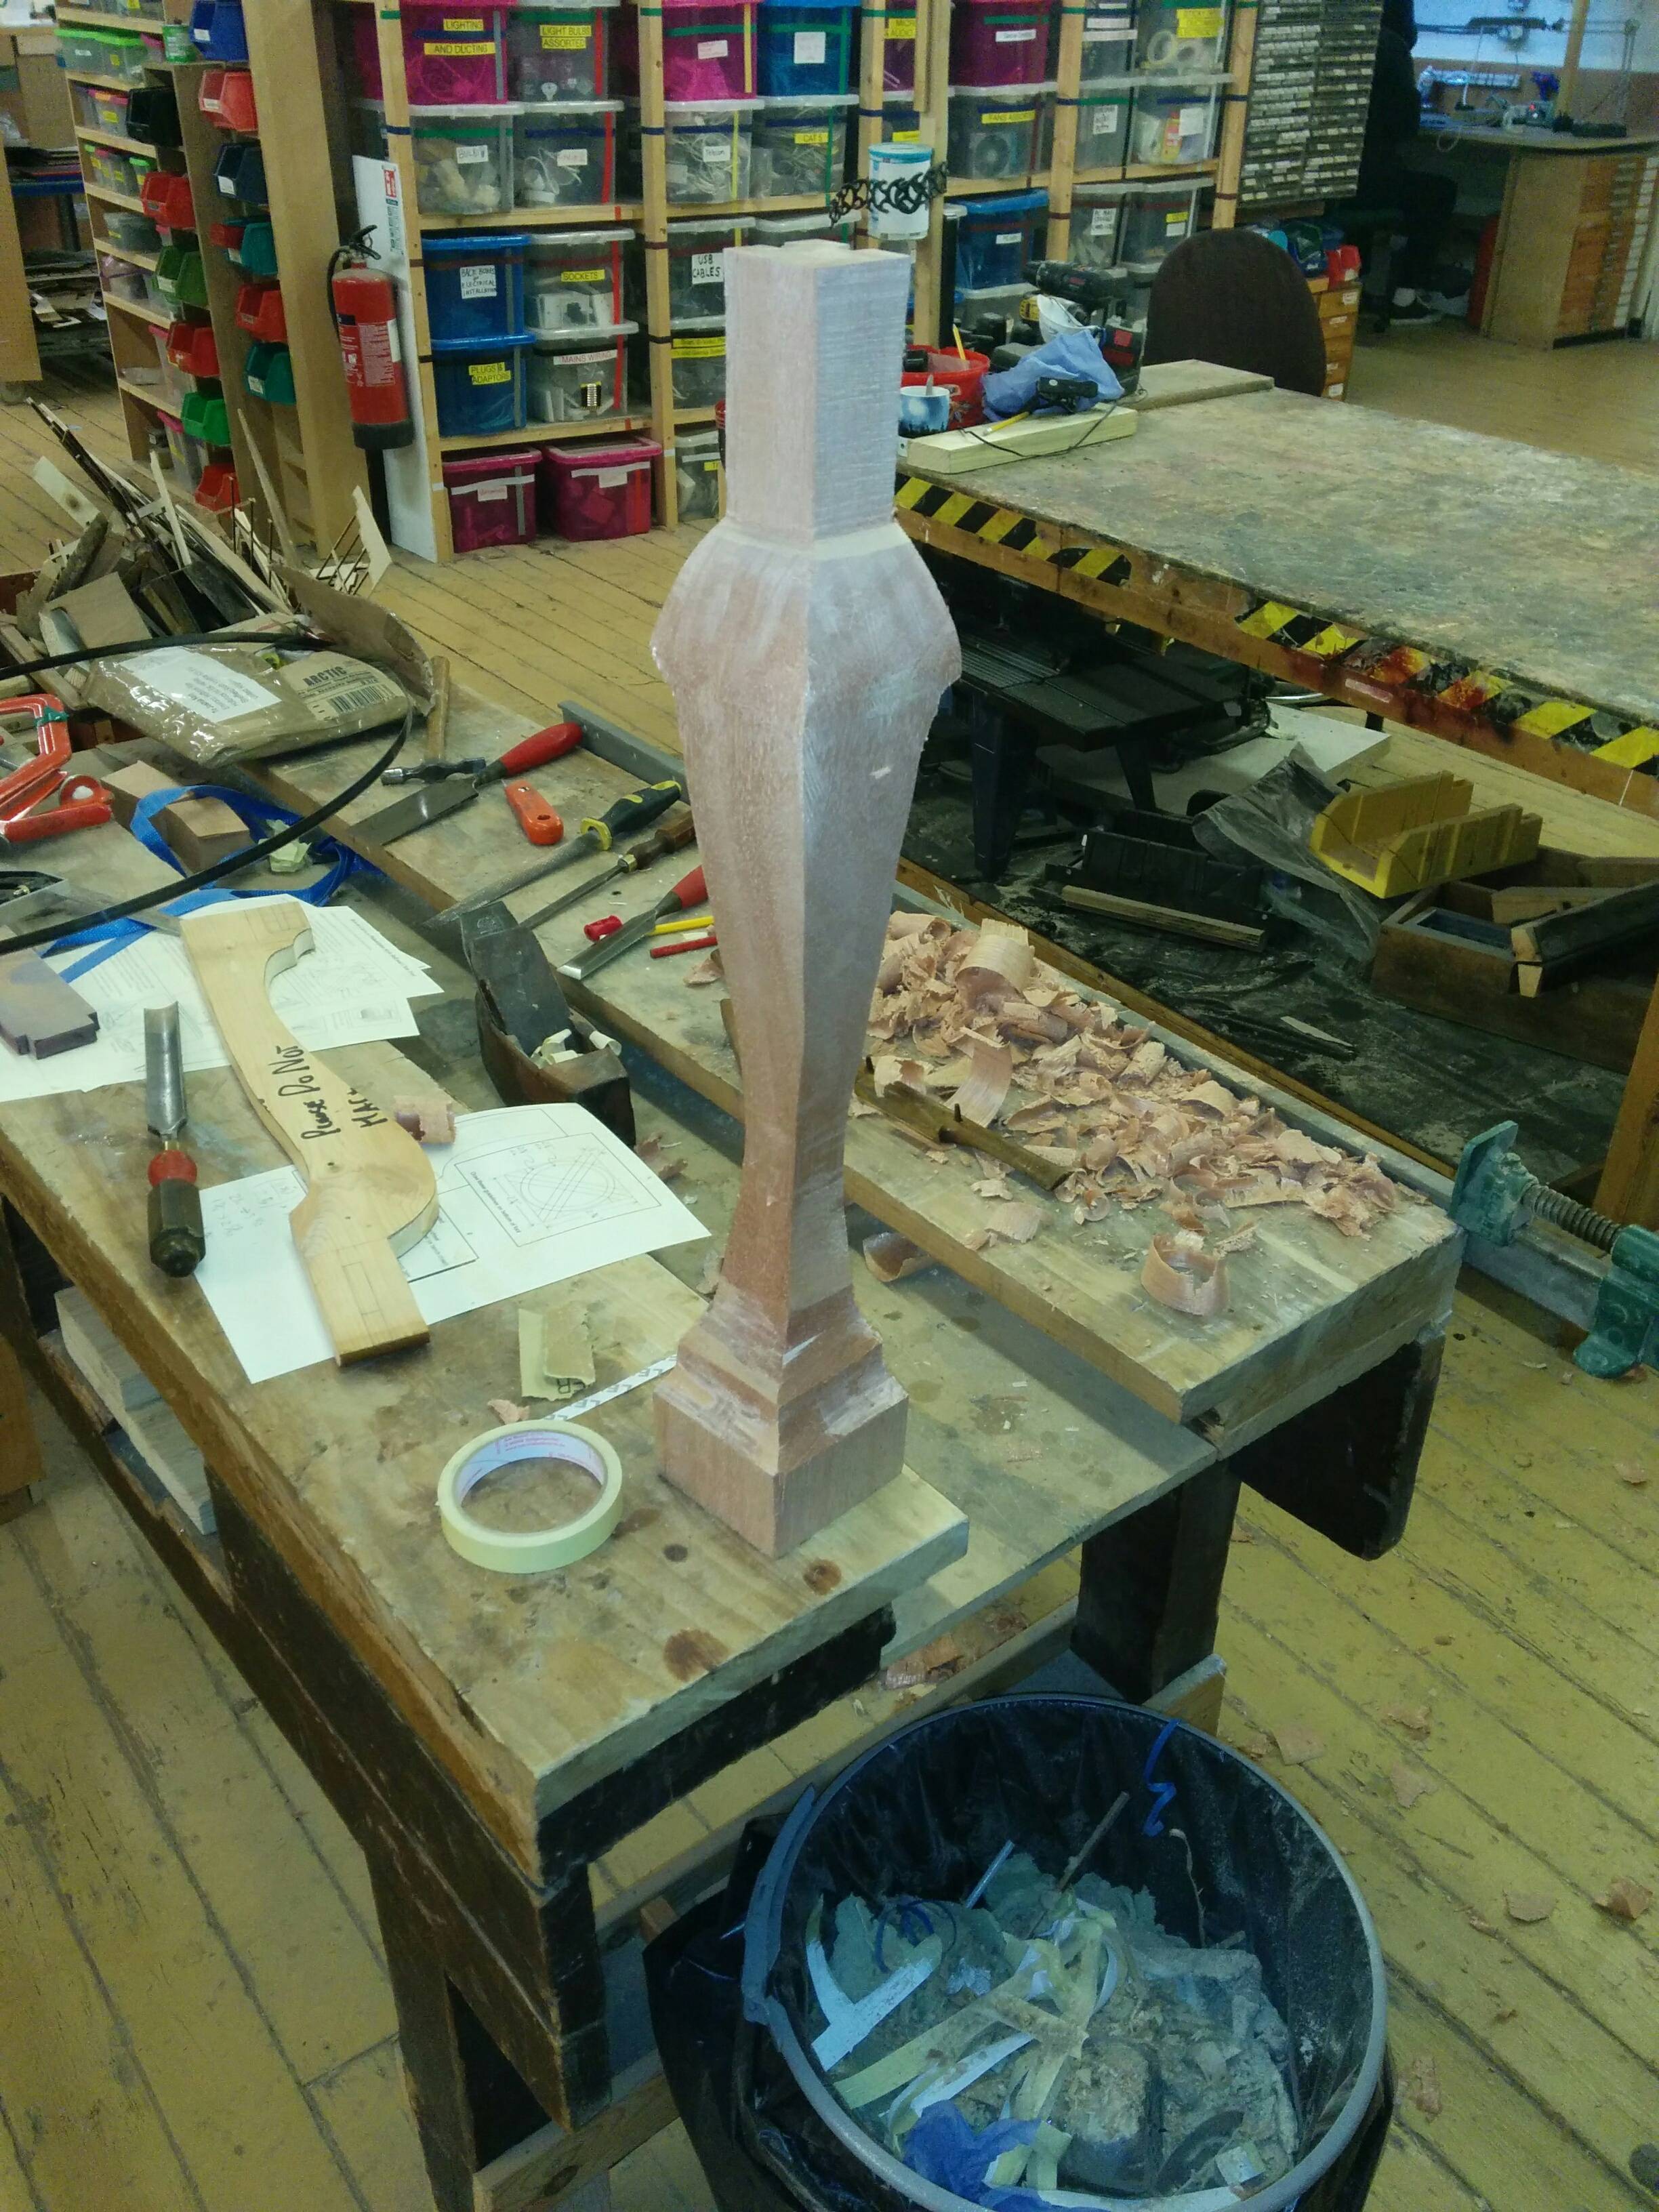
Next came the 'fun bit', shaping the legs; I'm not even going to attempt to describe it in how to detail, there are far more competent methods and explanations on both UKW and the internet at large than I could hope to achieve (indeed they taught me how)...
I have gone into a bit more detail however, more as a way of showing that it's easier than you might think (by which I mean not wholly impossible).

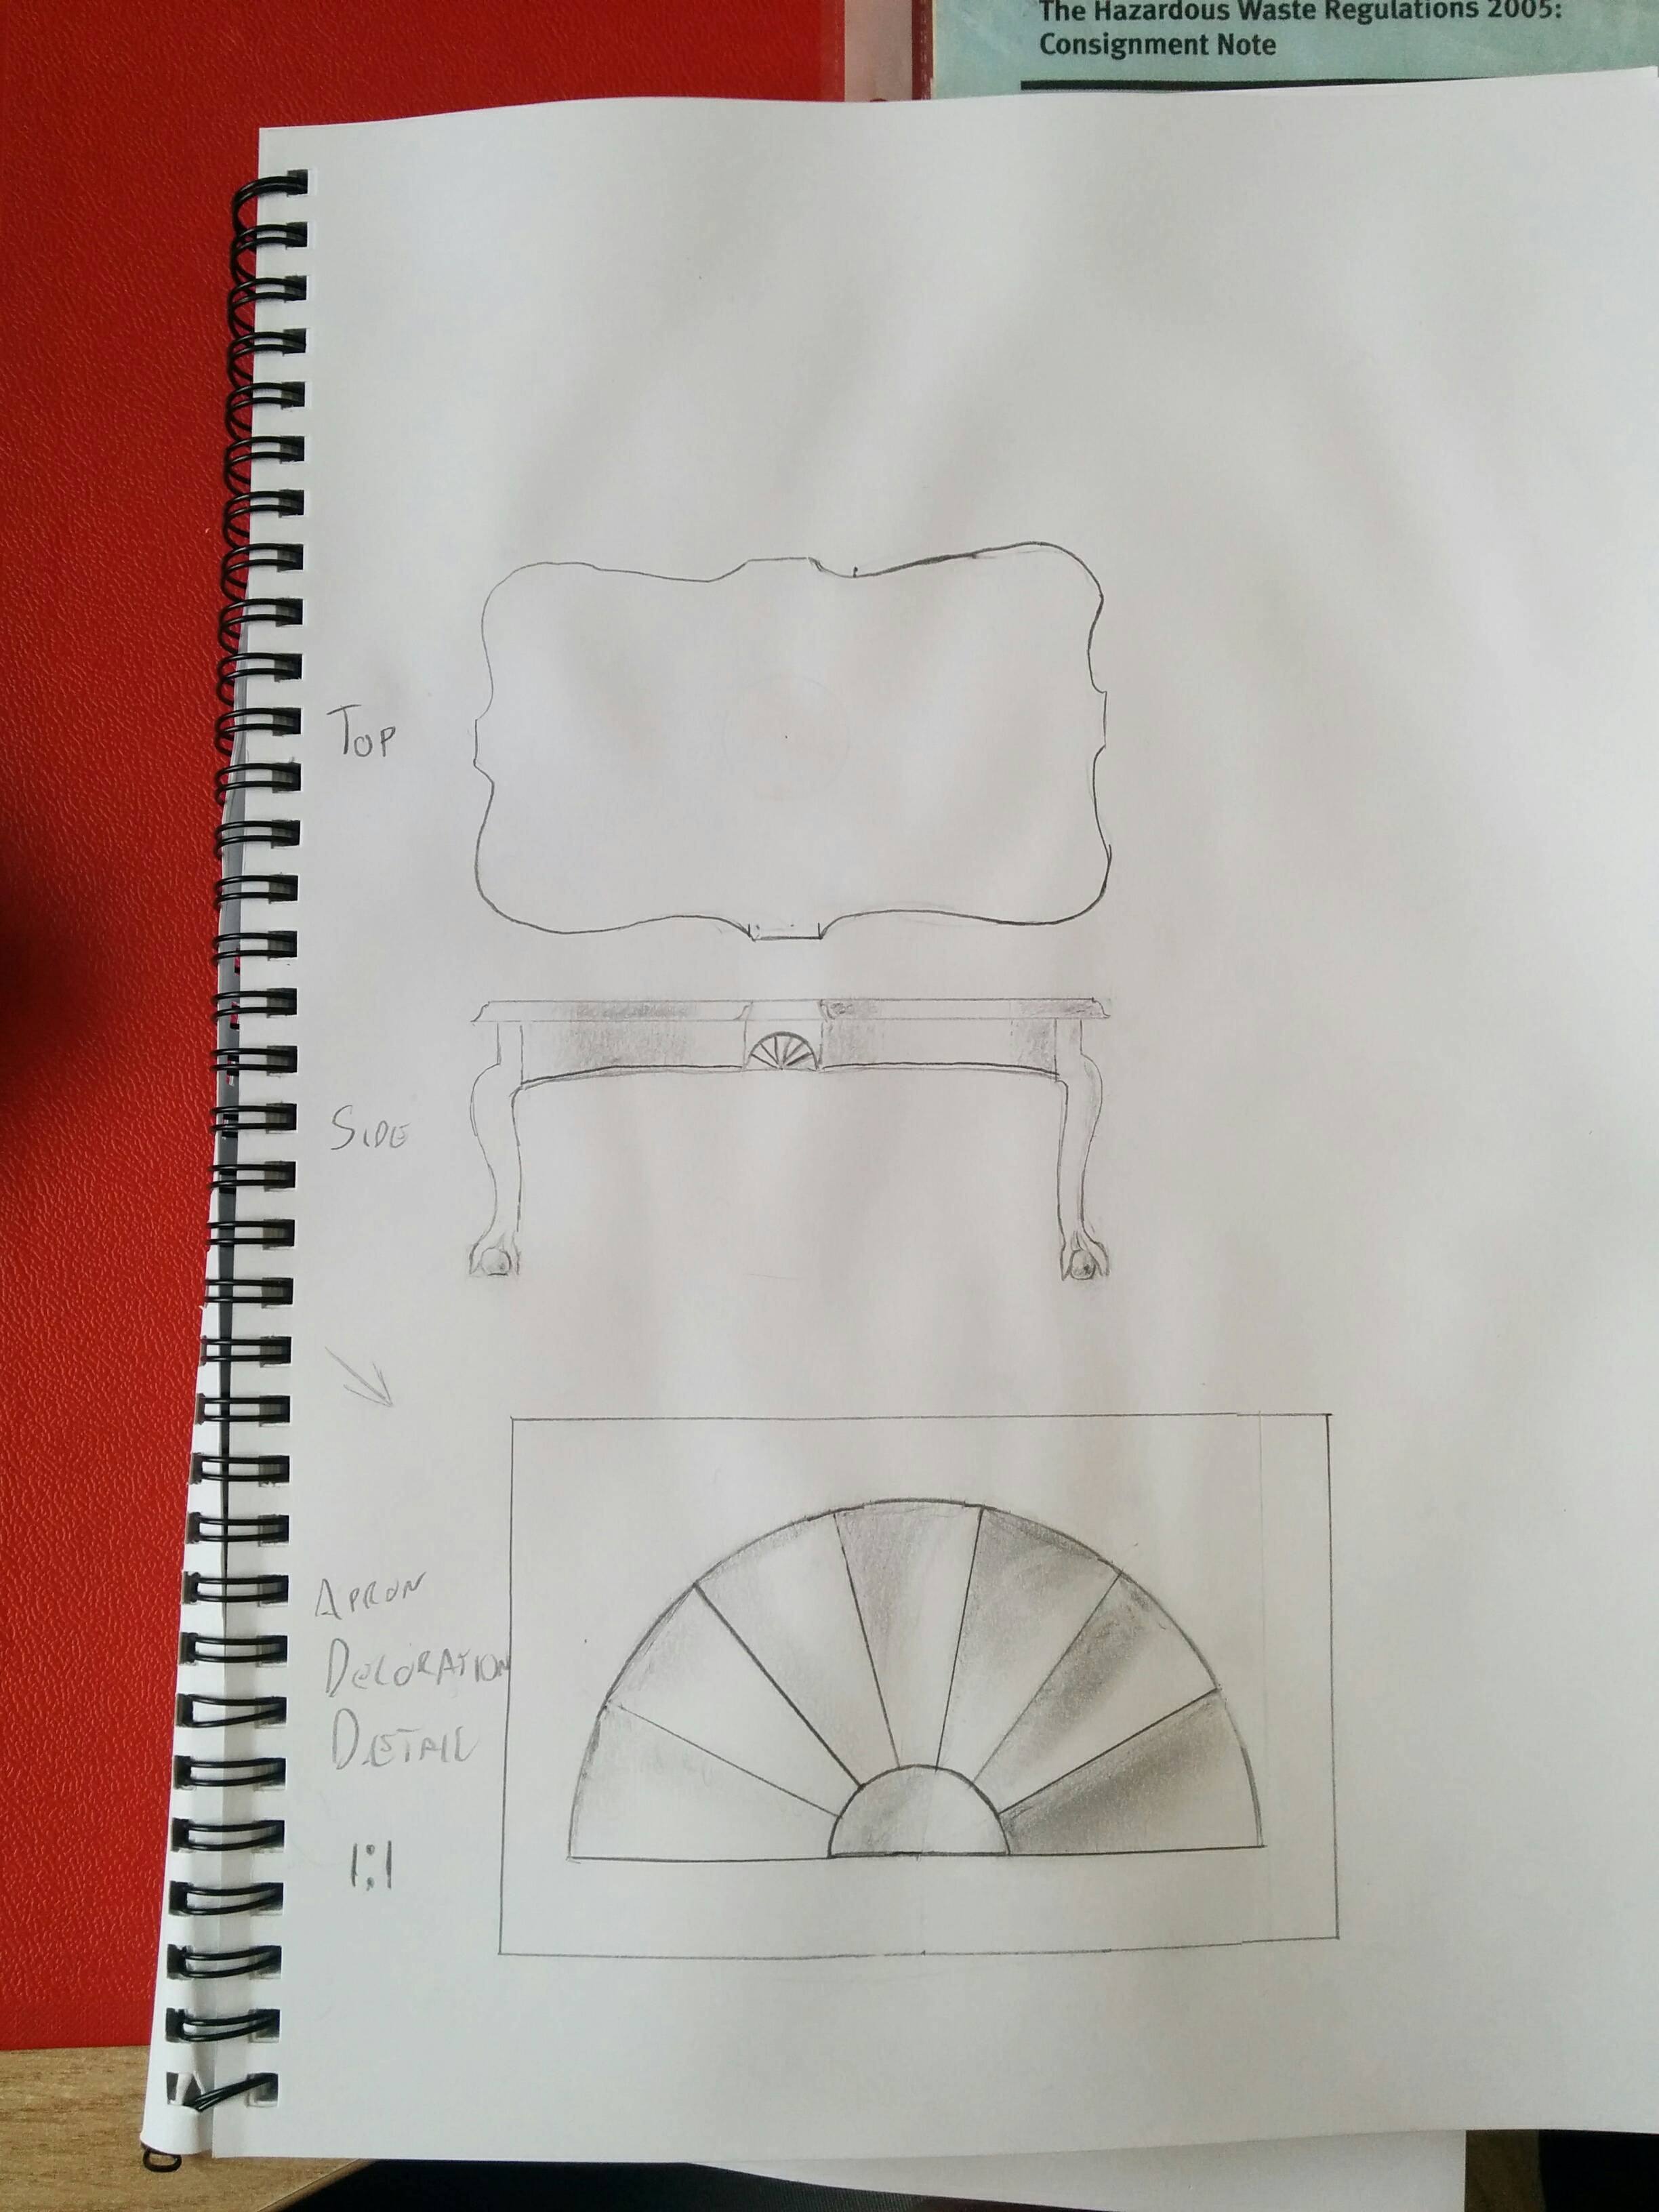
First things first, wooden template. I laid out the important points which needed to be correct, working off my scale drawing then drew freehand curves which joined the important points up; the same process on the bandsaw, establish the bits that need to be just so right up to the line on the bandsaw, then cut a tad outside the line on the curves and take it to the line with a spokeshave.
End result:

ypXGgOH.jpg


TBC.

Edit: Cont.

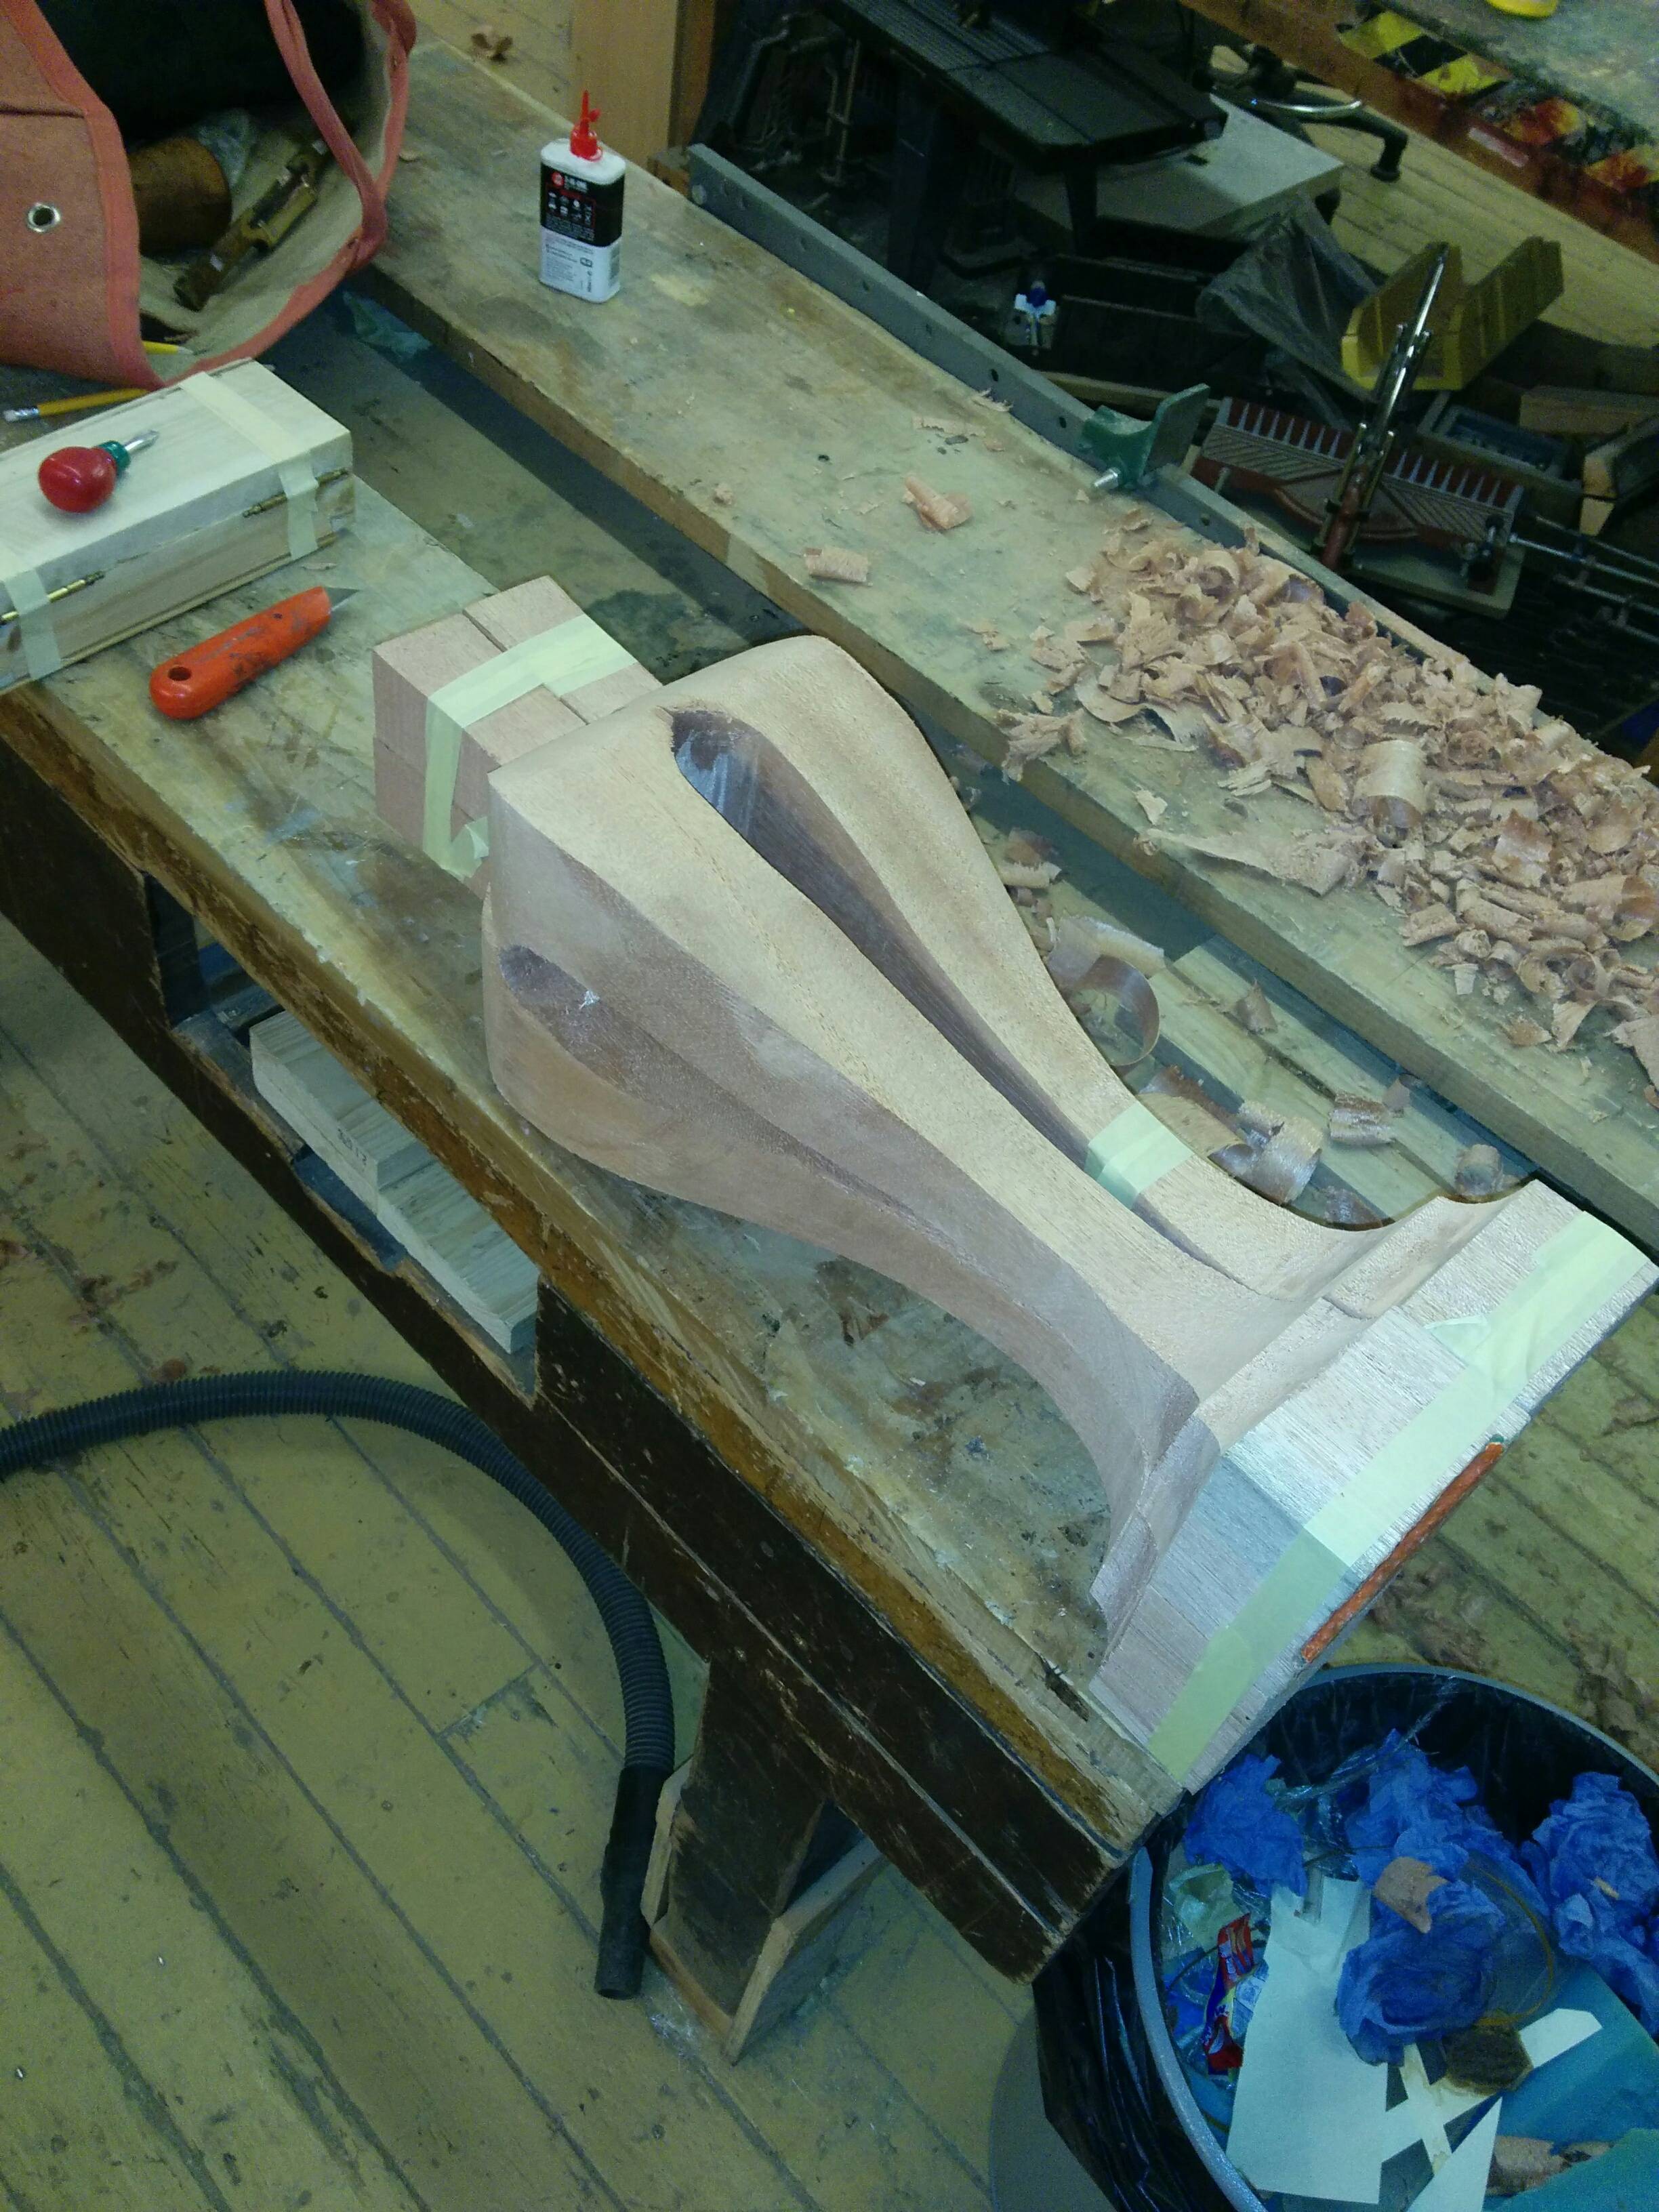
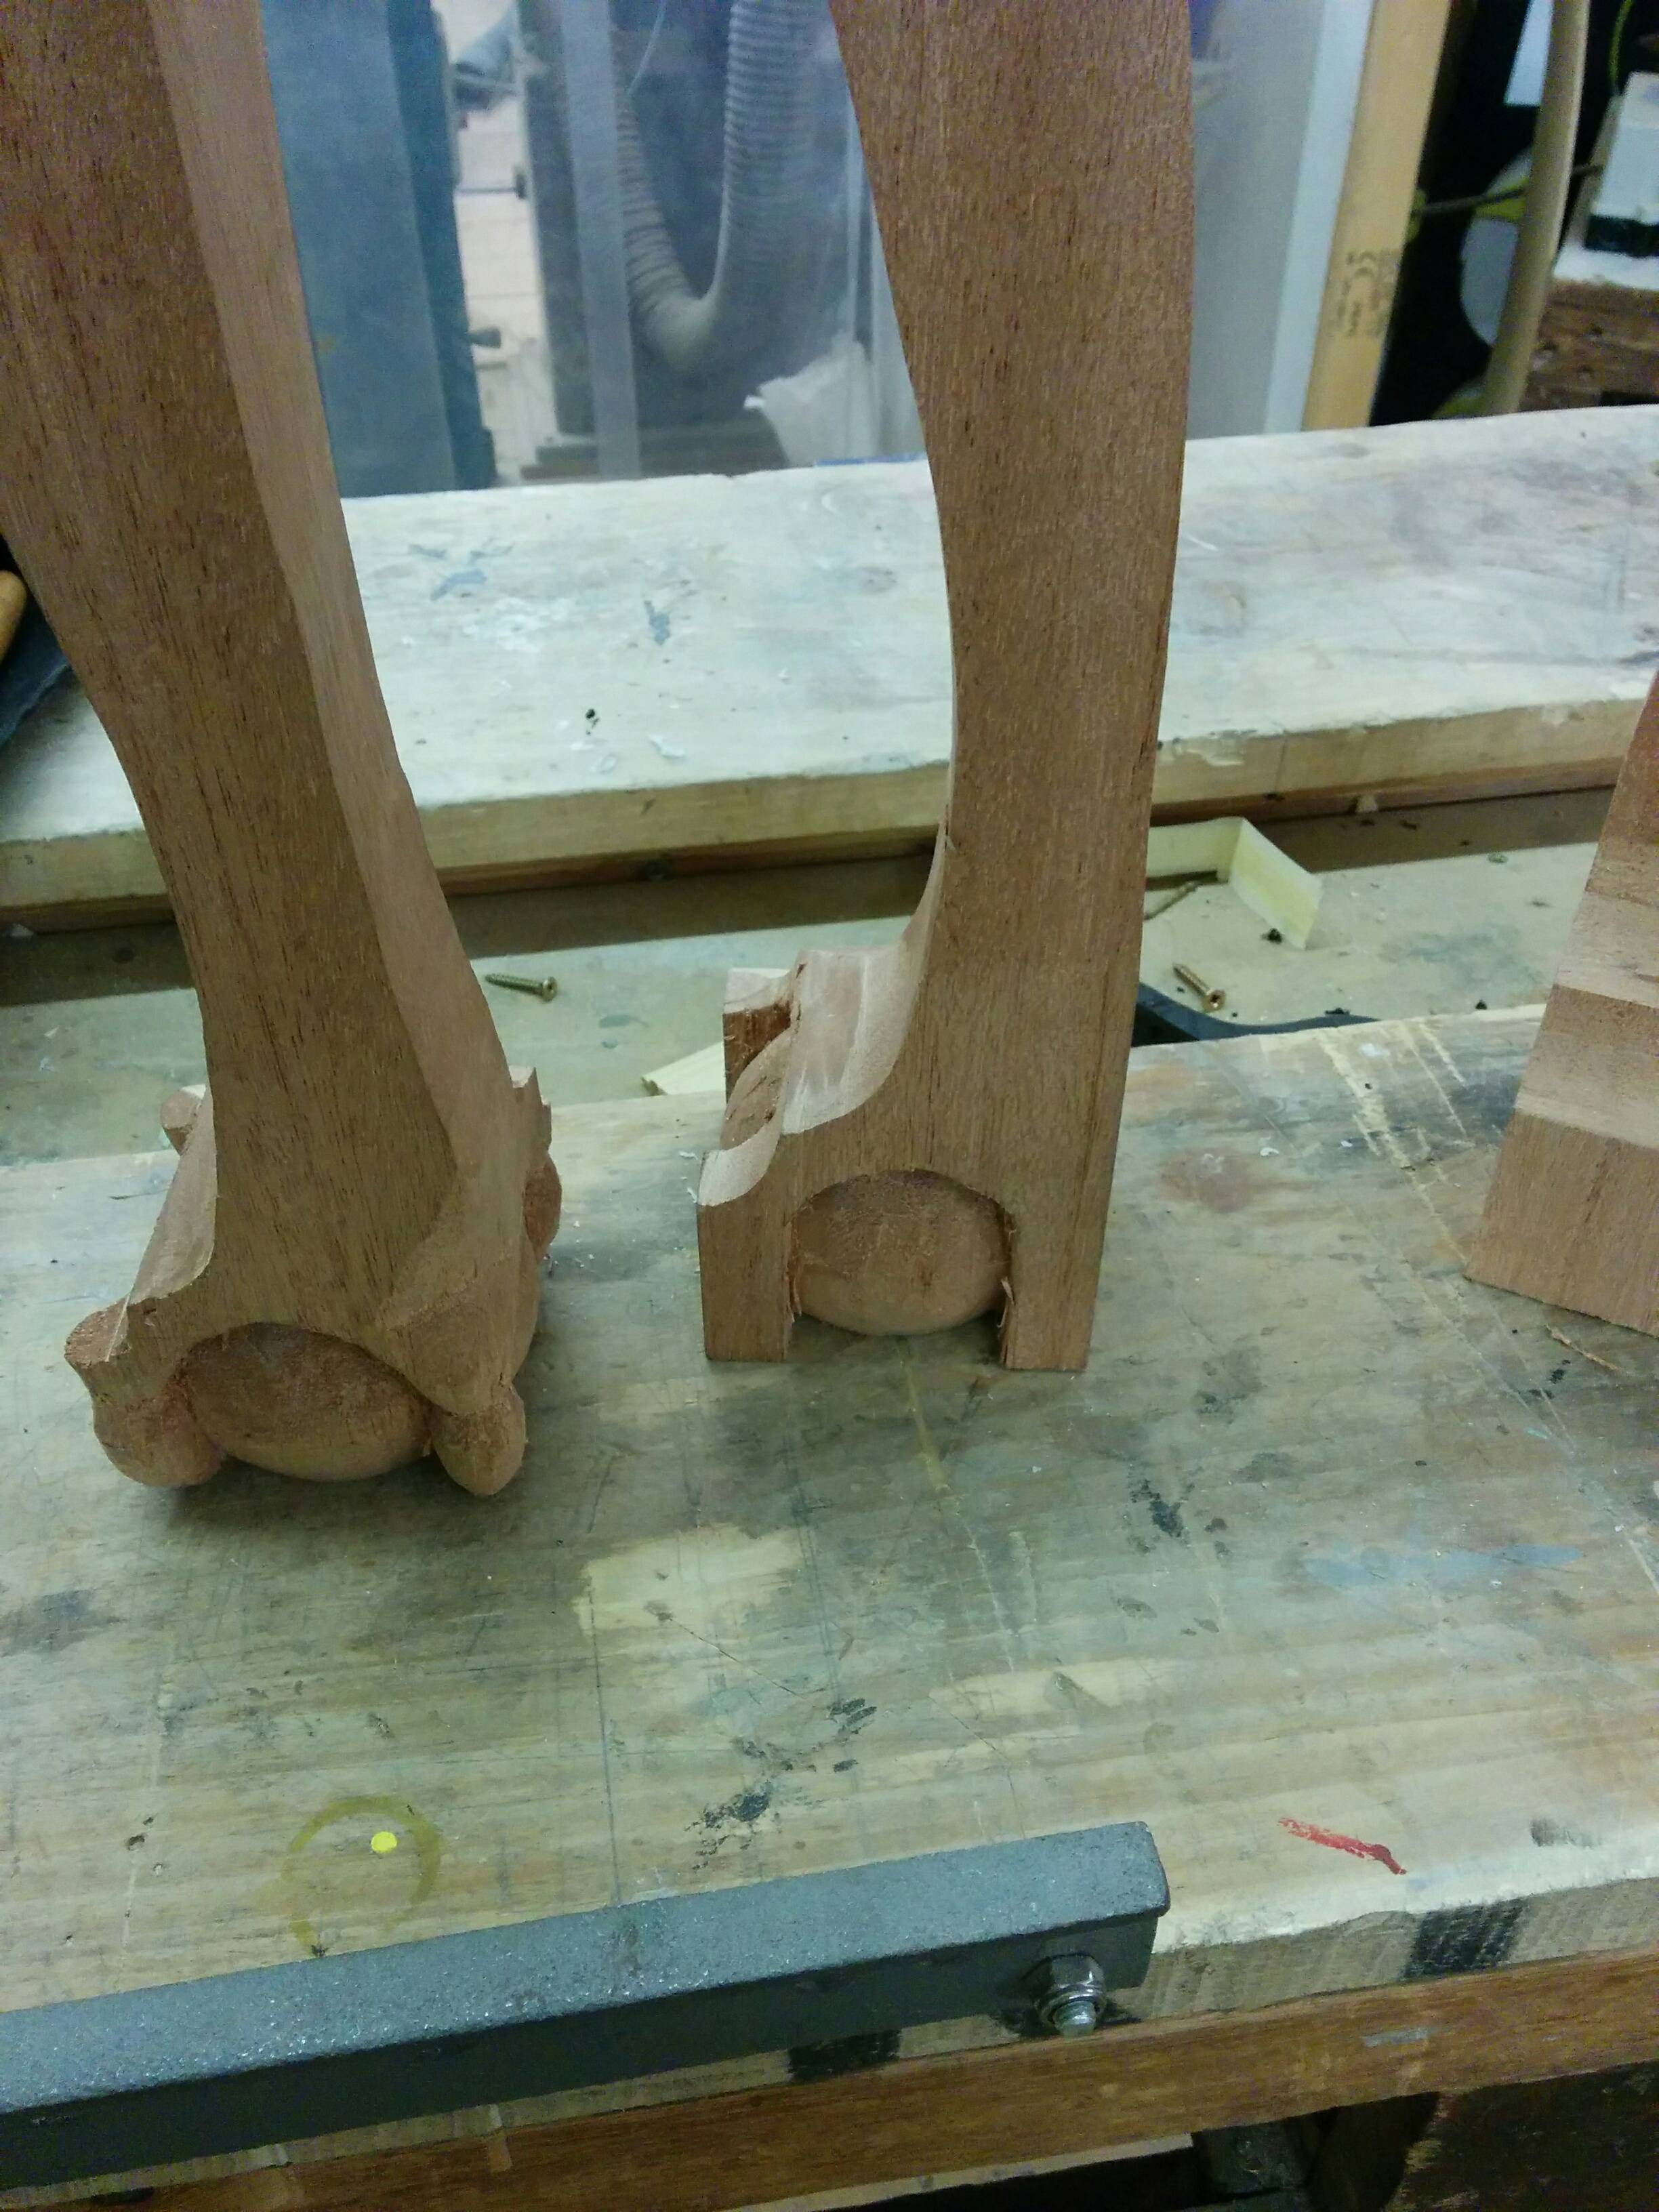
Shaping the legs did not go smoothly, if you look at the picture below, you'll see two things:
  1. The leftmost leg is not a nice continuous curve.
  2. The second left leg has thebandsaw exiting the knee at different points on each side.

lBXaowk.jpg


That leg in 2) was the first one cut, and I could feel the blade pulling away a bit to do its own thing, but with persistence got an OK result which could easily be standardised using a coarse rasp & a spokeshave. So I redoubled my efforts with the next (leftmost one), taking extra time and care but it just got worse...

This time the blade is really moving about, worrying me it would come out of the guides or snap... So I stopped, backed the stationary blade out and went to think, and then I saw it... Another workshop user trying to adjust the height of the top guide/guard, twiddling the tension knob, then the knurled locking screws on the guide, and finally getting the right knob to release the guard. So I waited for him to cut his ply shape out, and re-adjusted everything until it was just so... Which I should really have done at the start; finished my second one, and the third and fourth cut like a dream by comparison.

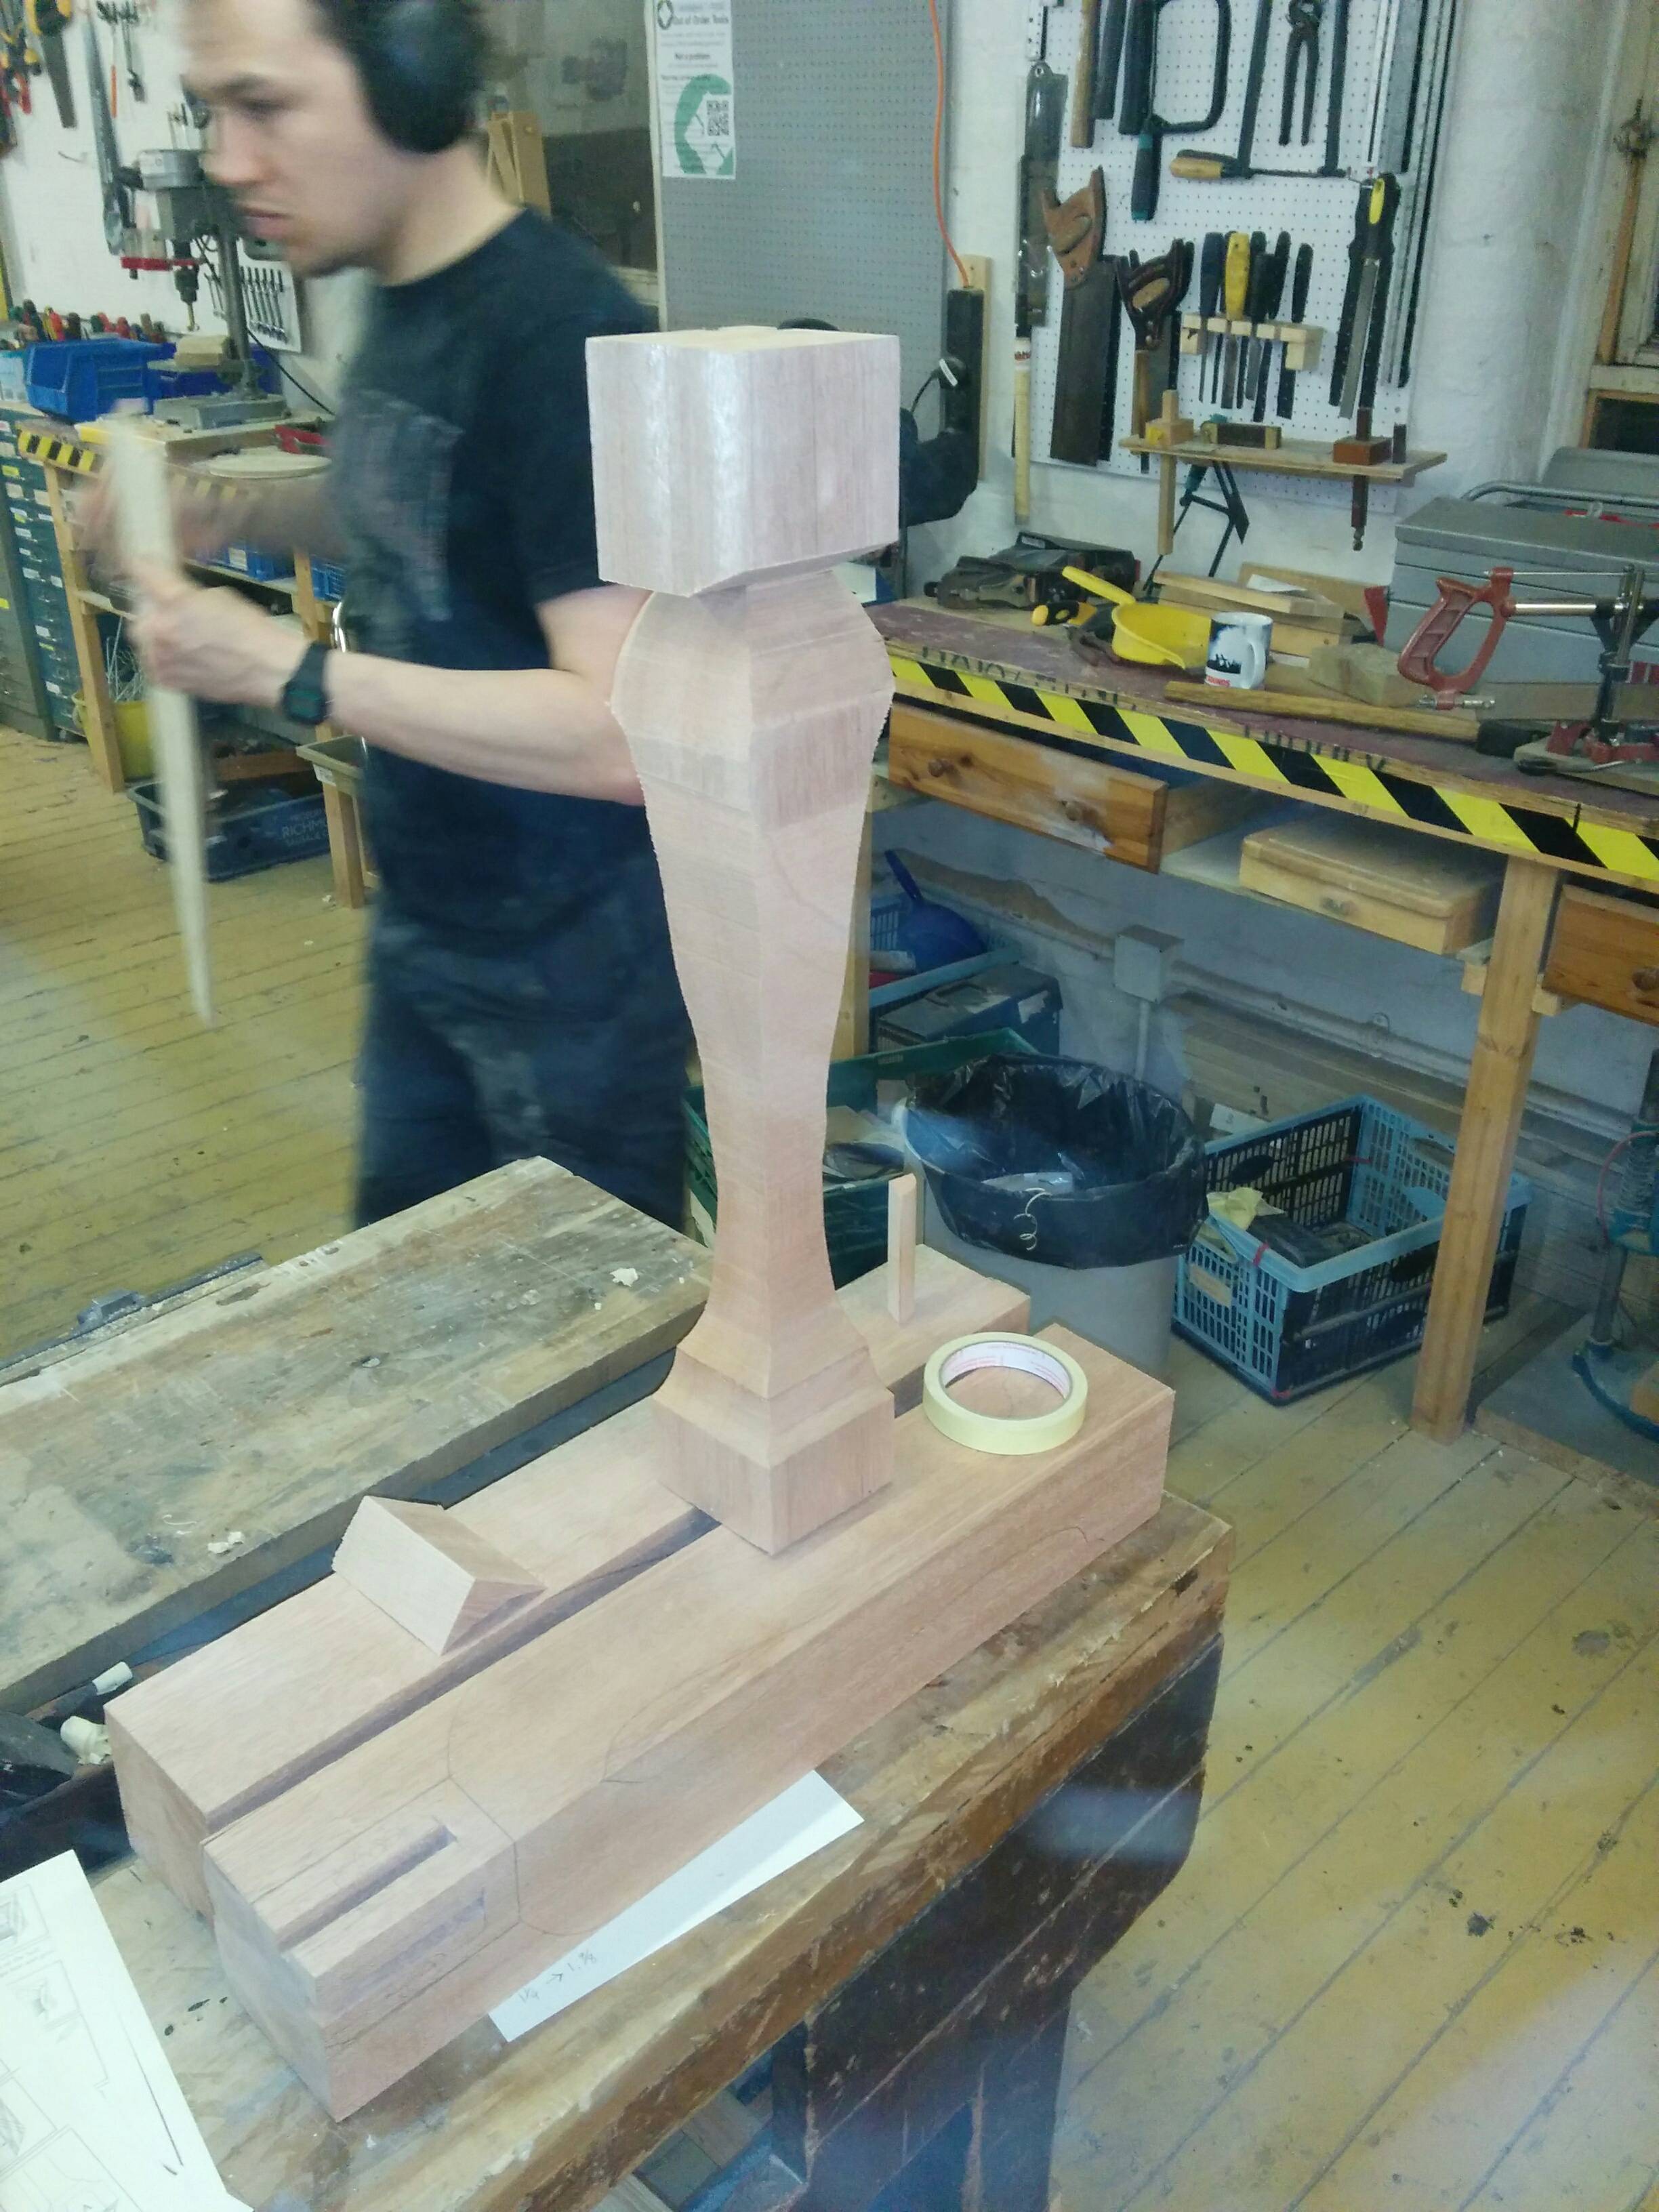
Back to shaping then:

SfPgkKp.jpg


That's the first side cutout, with all the bits arranged round it, not all of them need to be taped back on to do the next side, only enough to give a stable bearing surface at the bottom, and to show the marked shape on the top.

6HynWAE.jpg


And blurrily cutting the second side, to yield this:

EMrElzT.jpg


It's approximately the shape I'm after, which will do for me right now.


Which takes us back to tidying up the second one which went awry...

6MDDROX.jpg


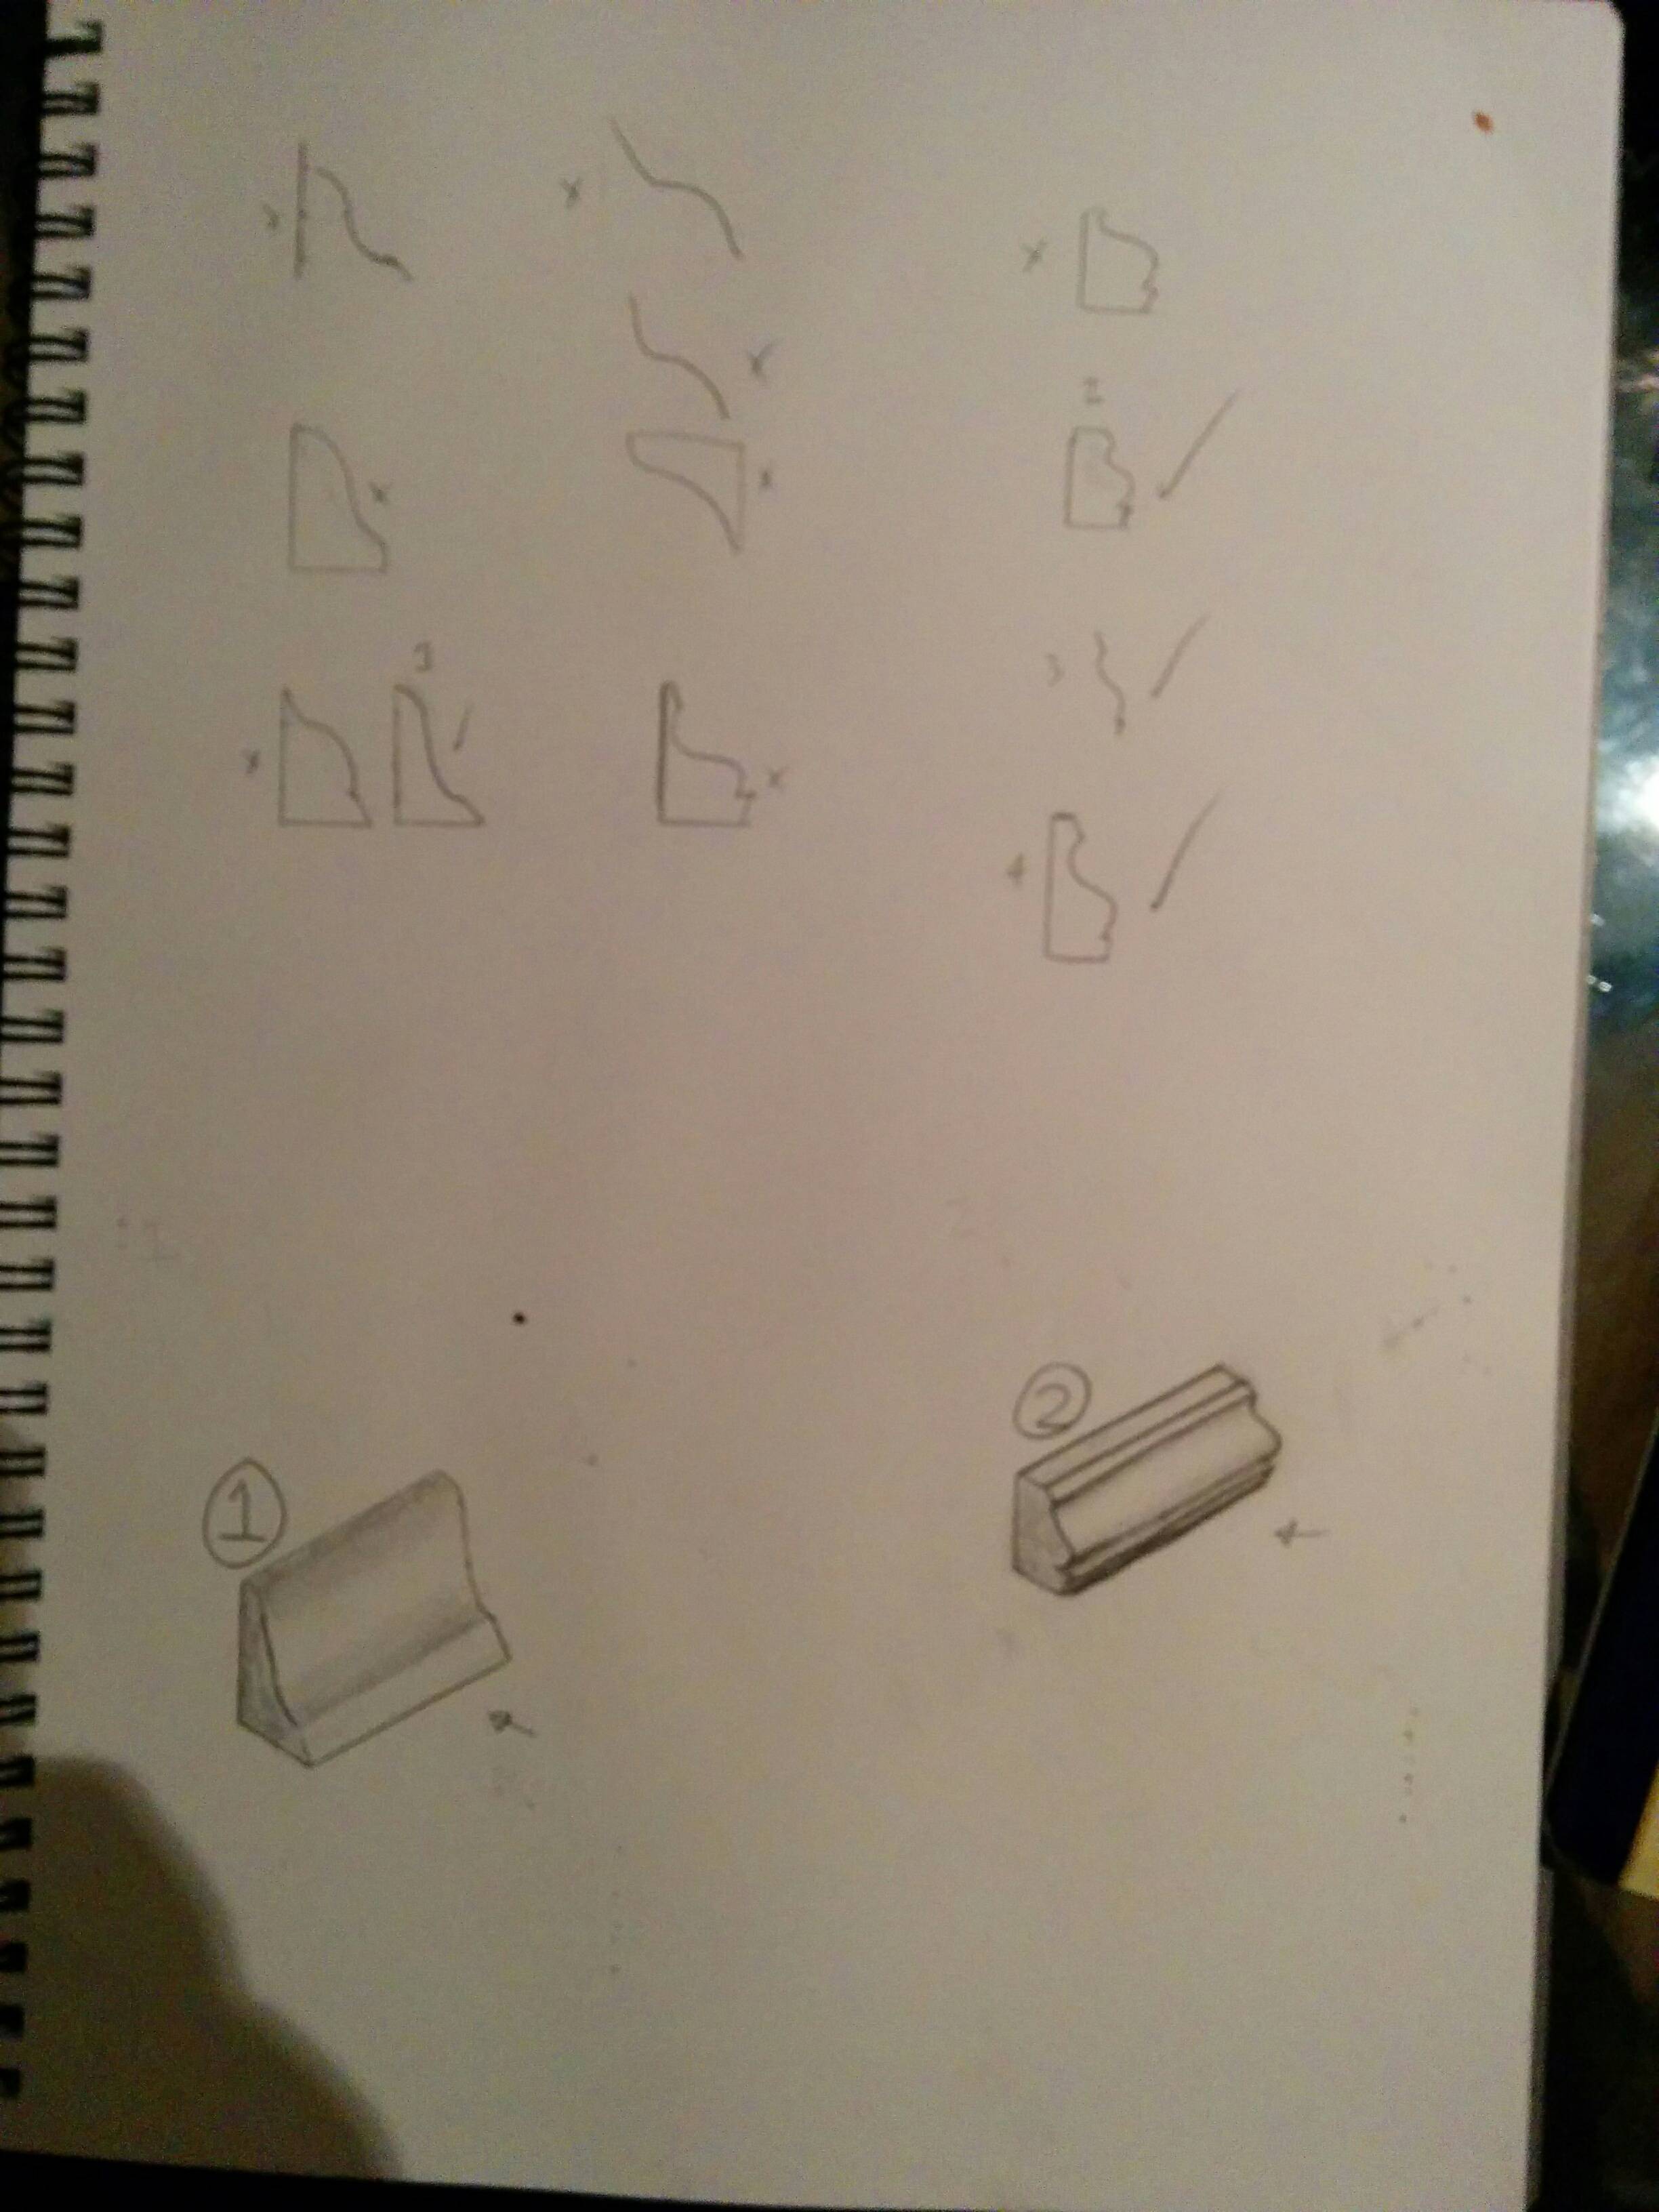
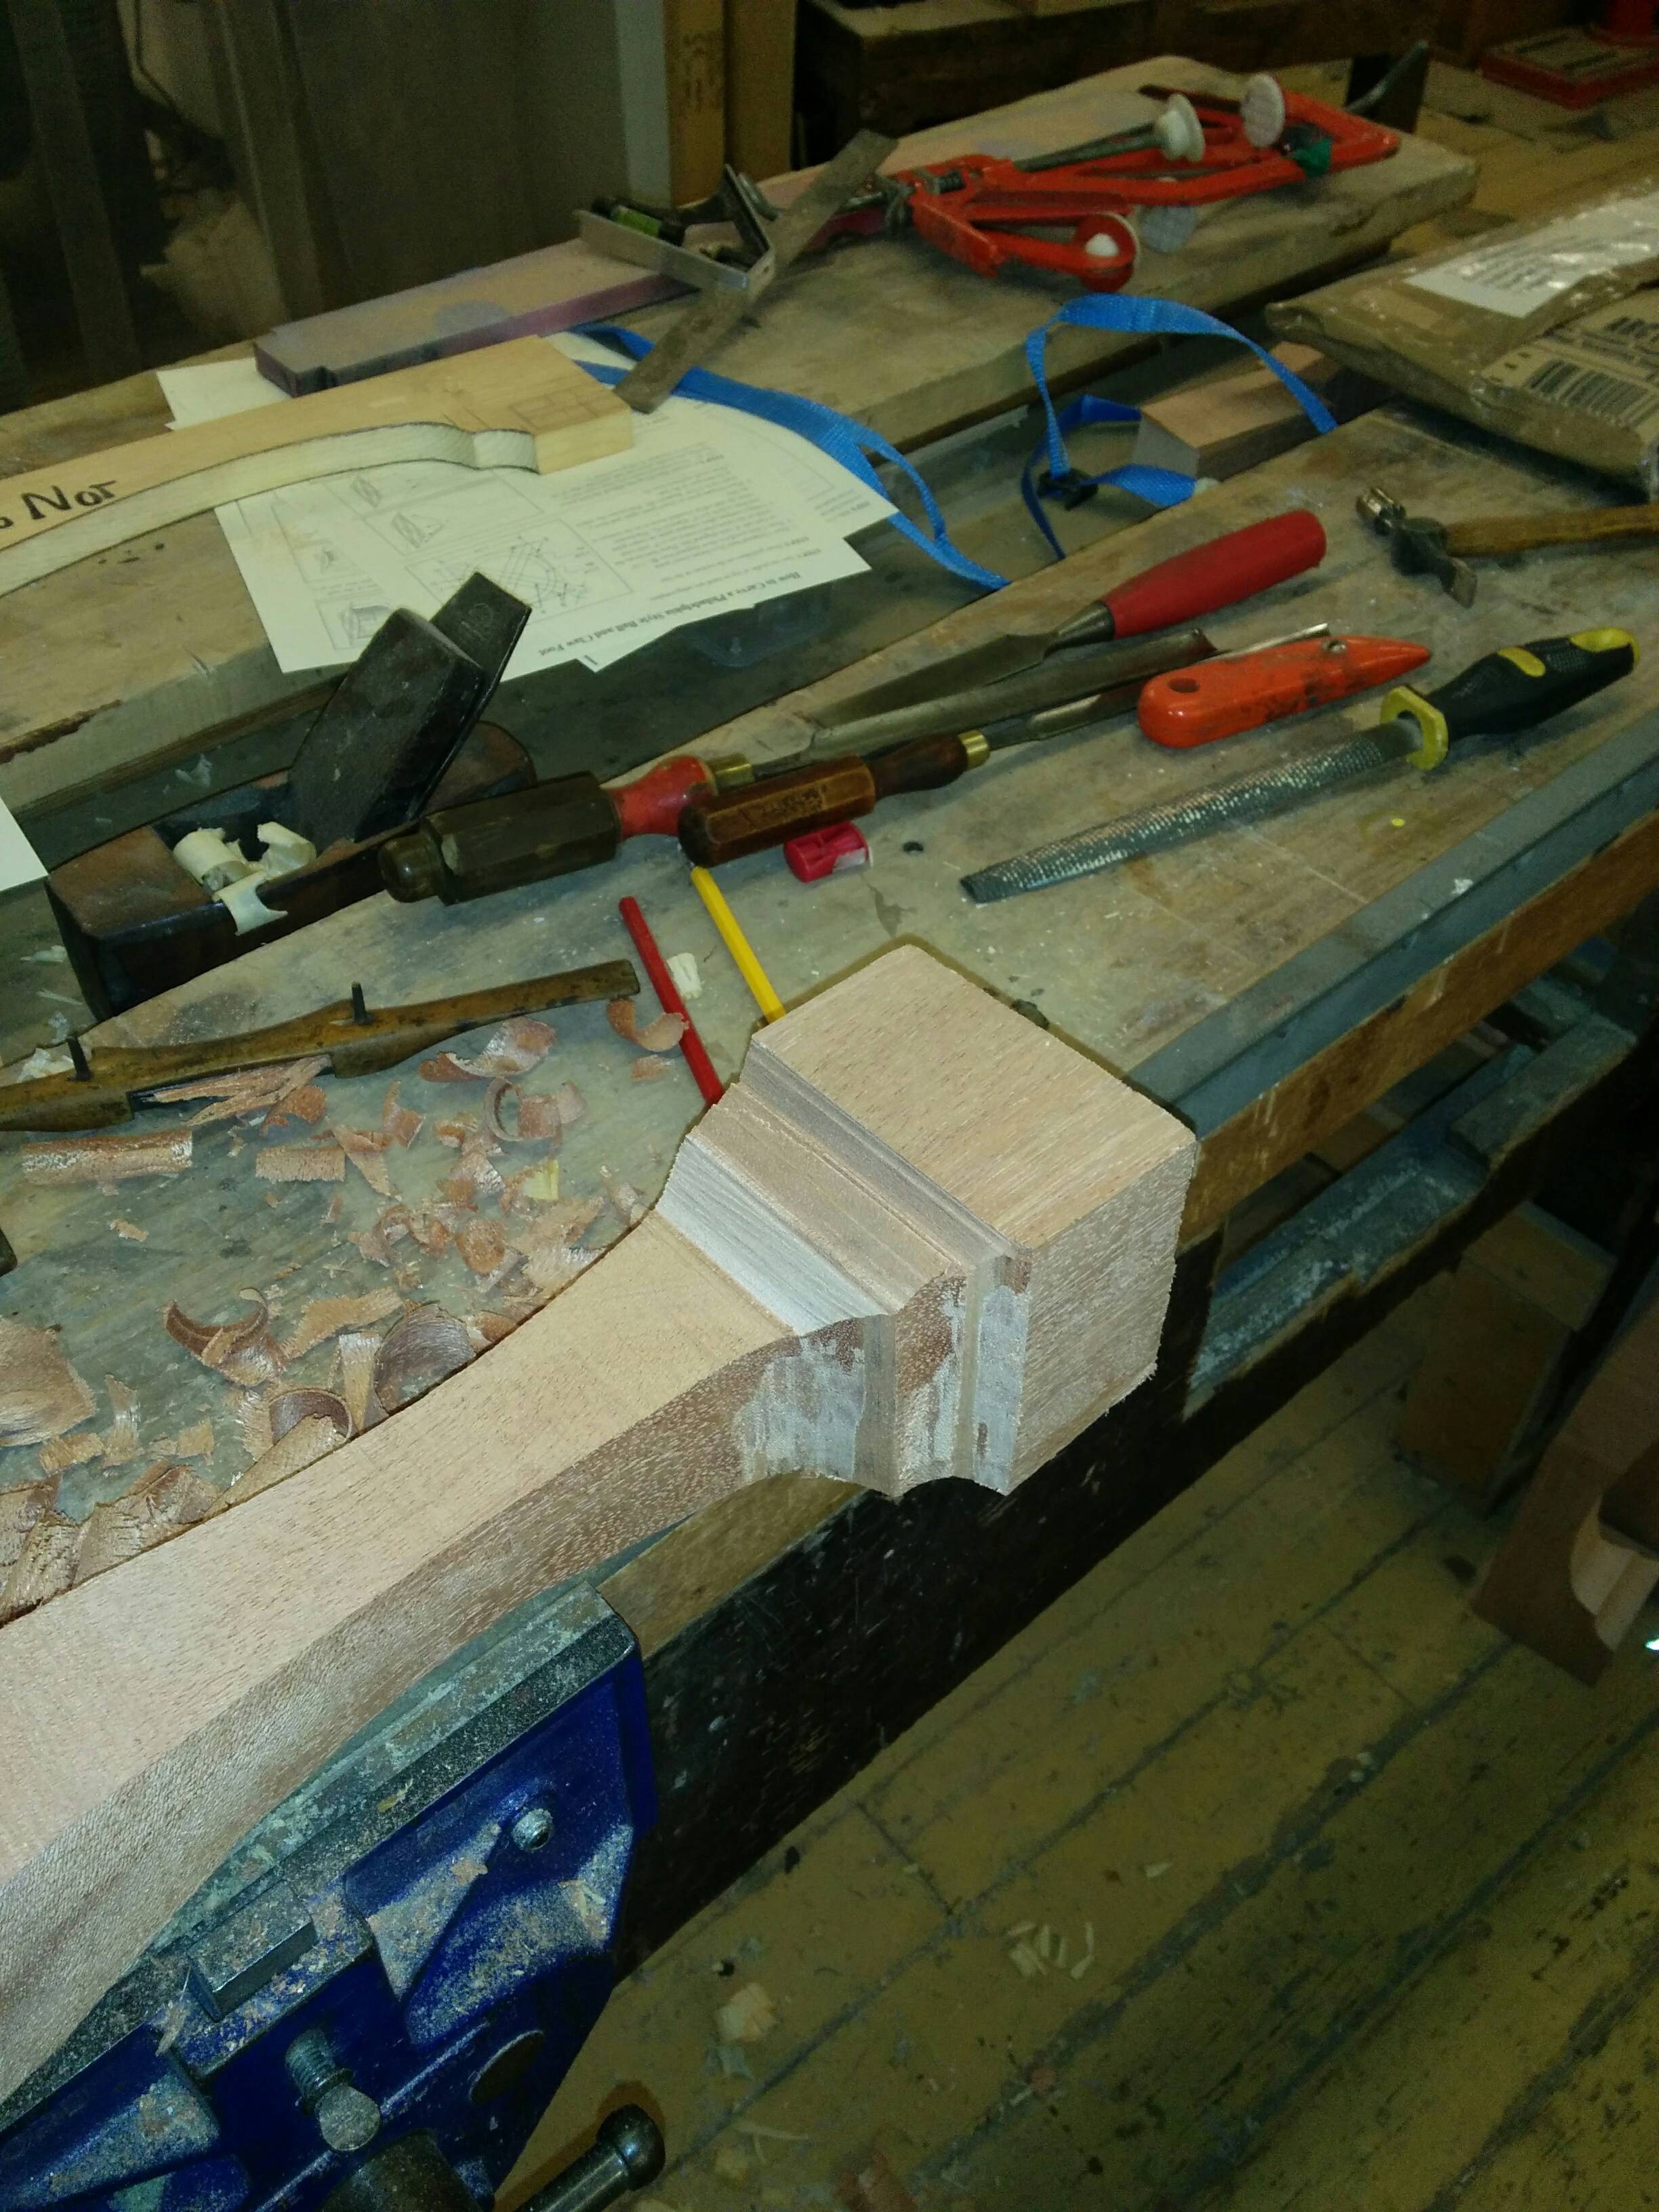
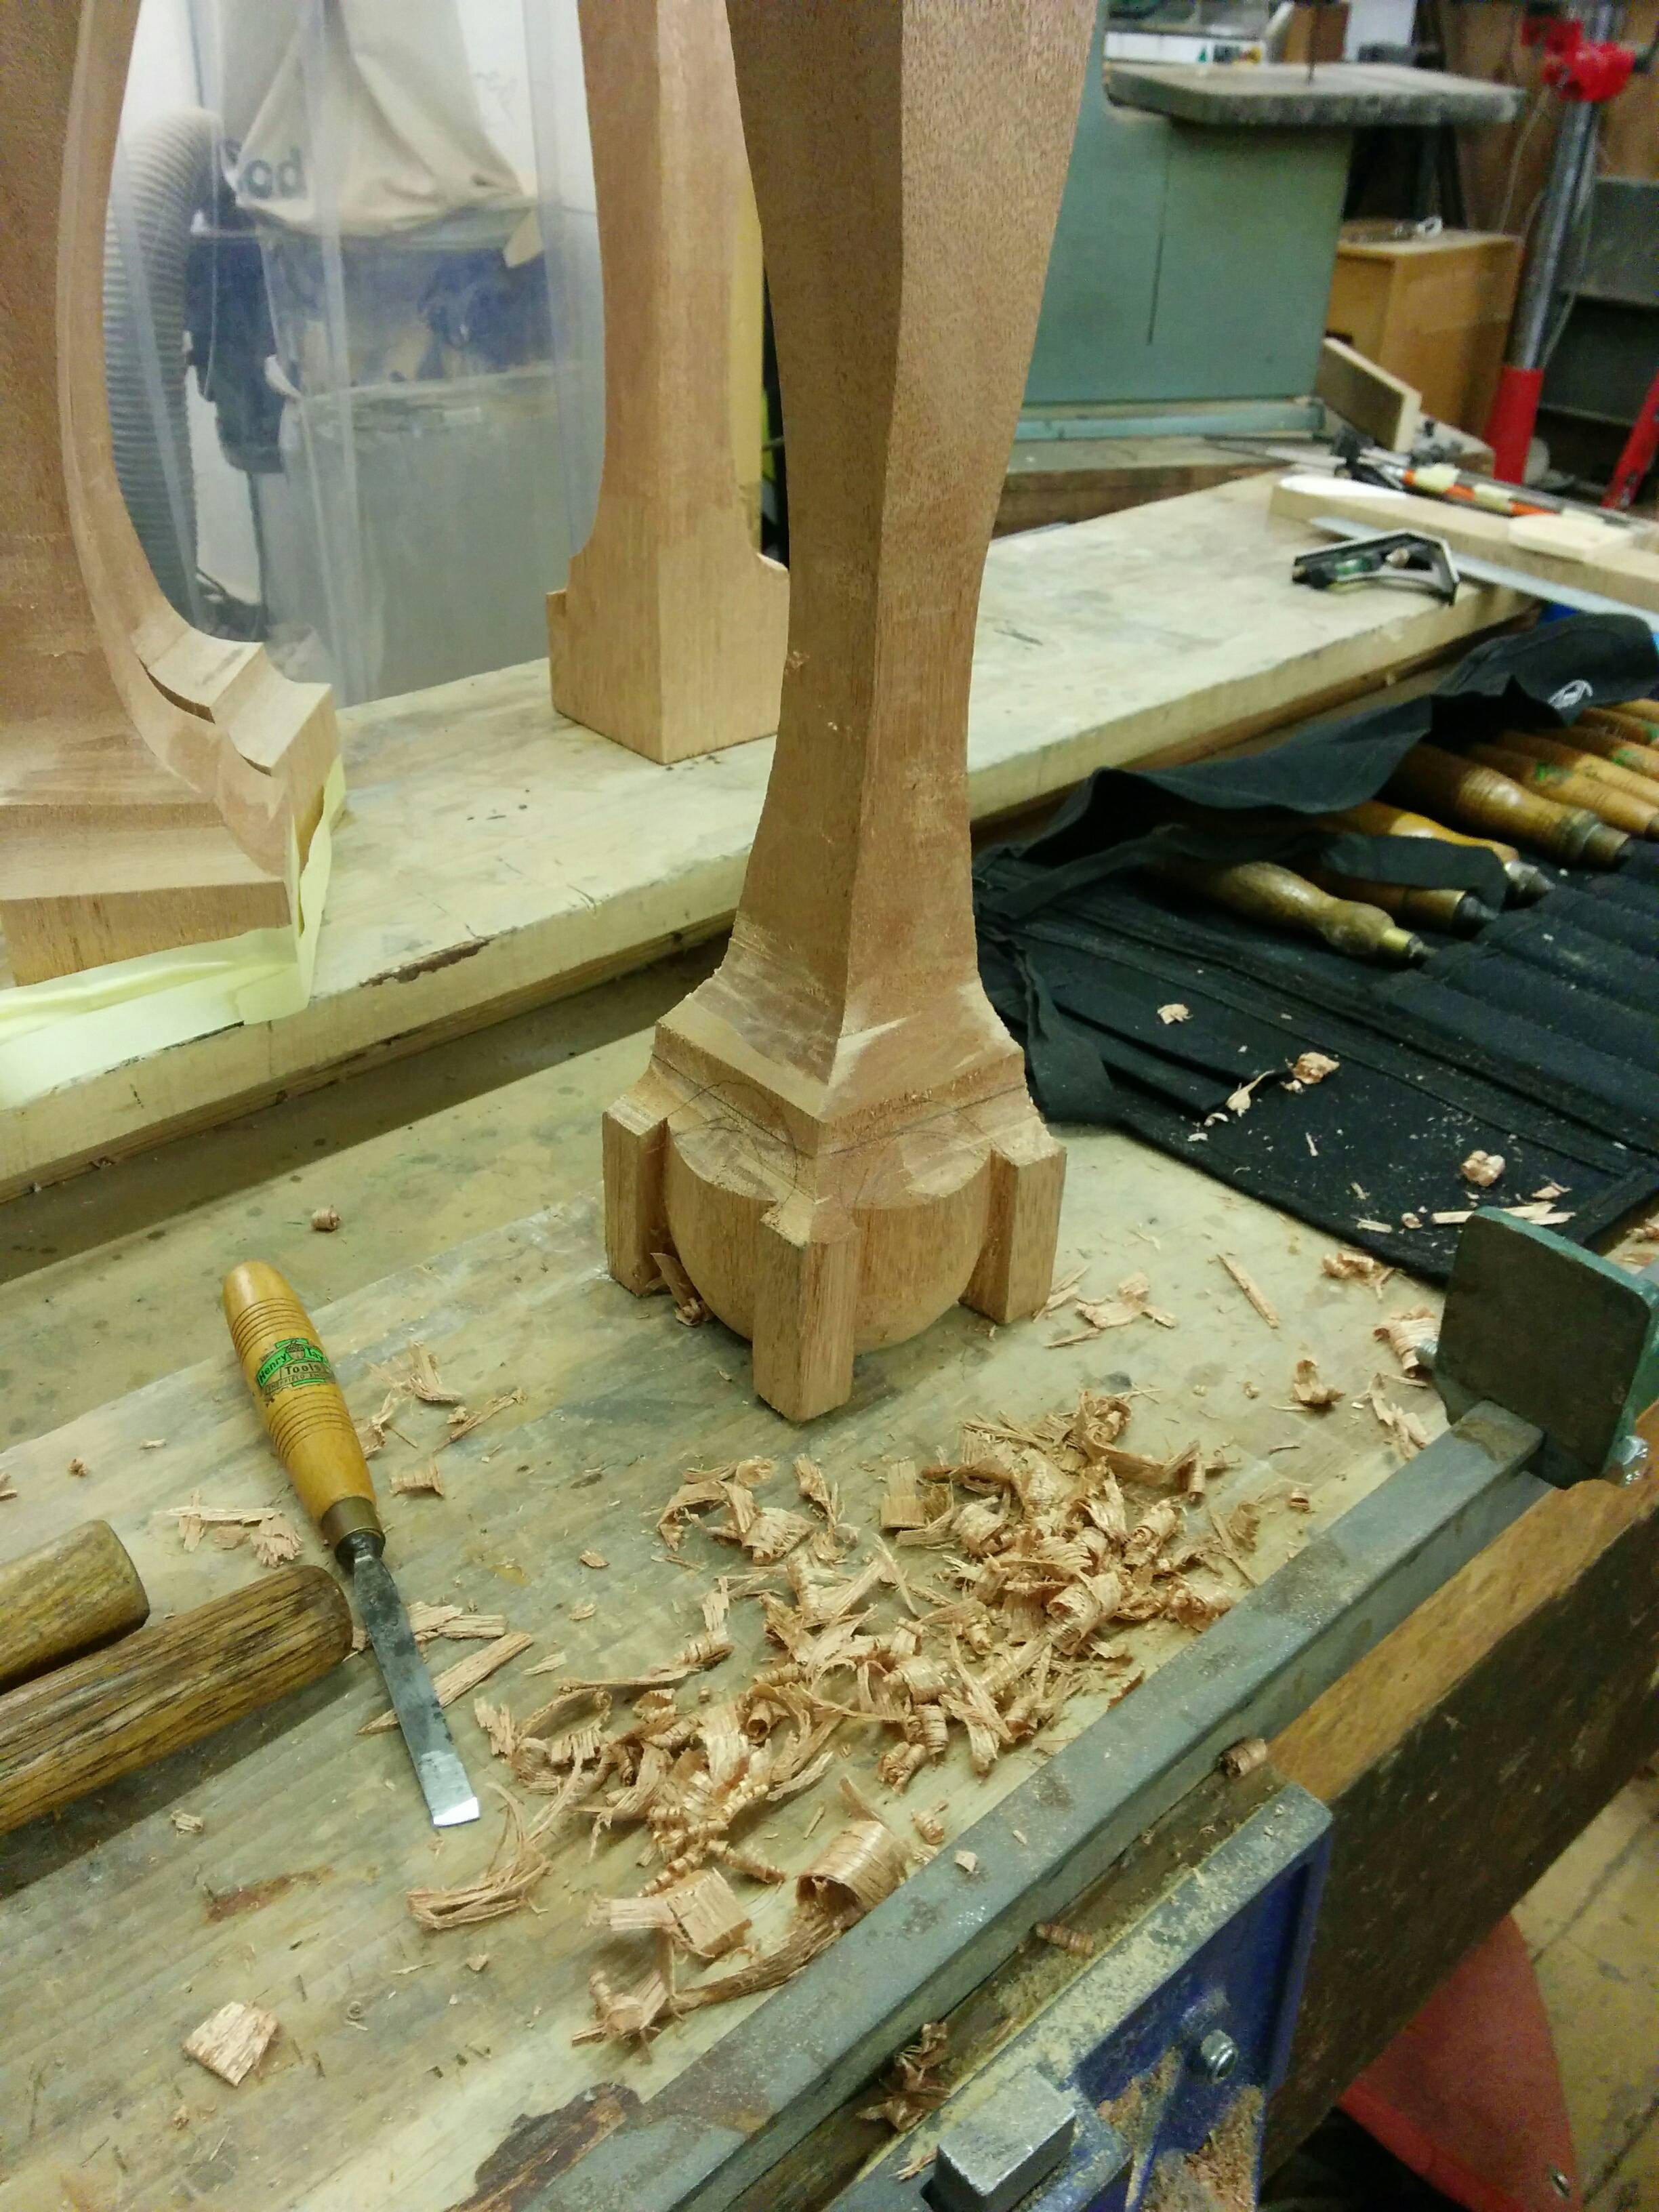
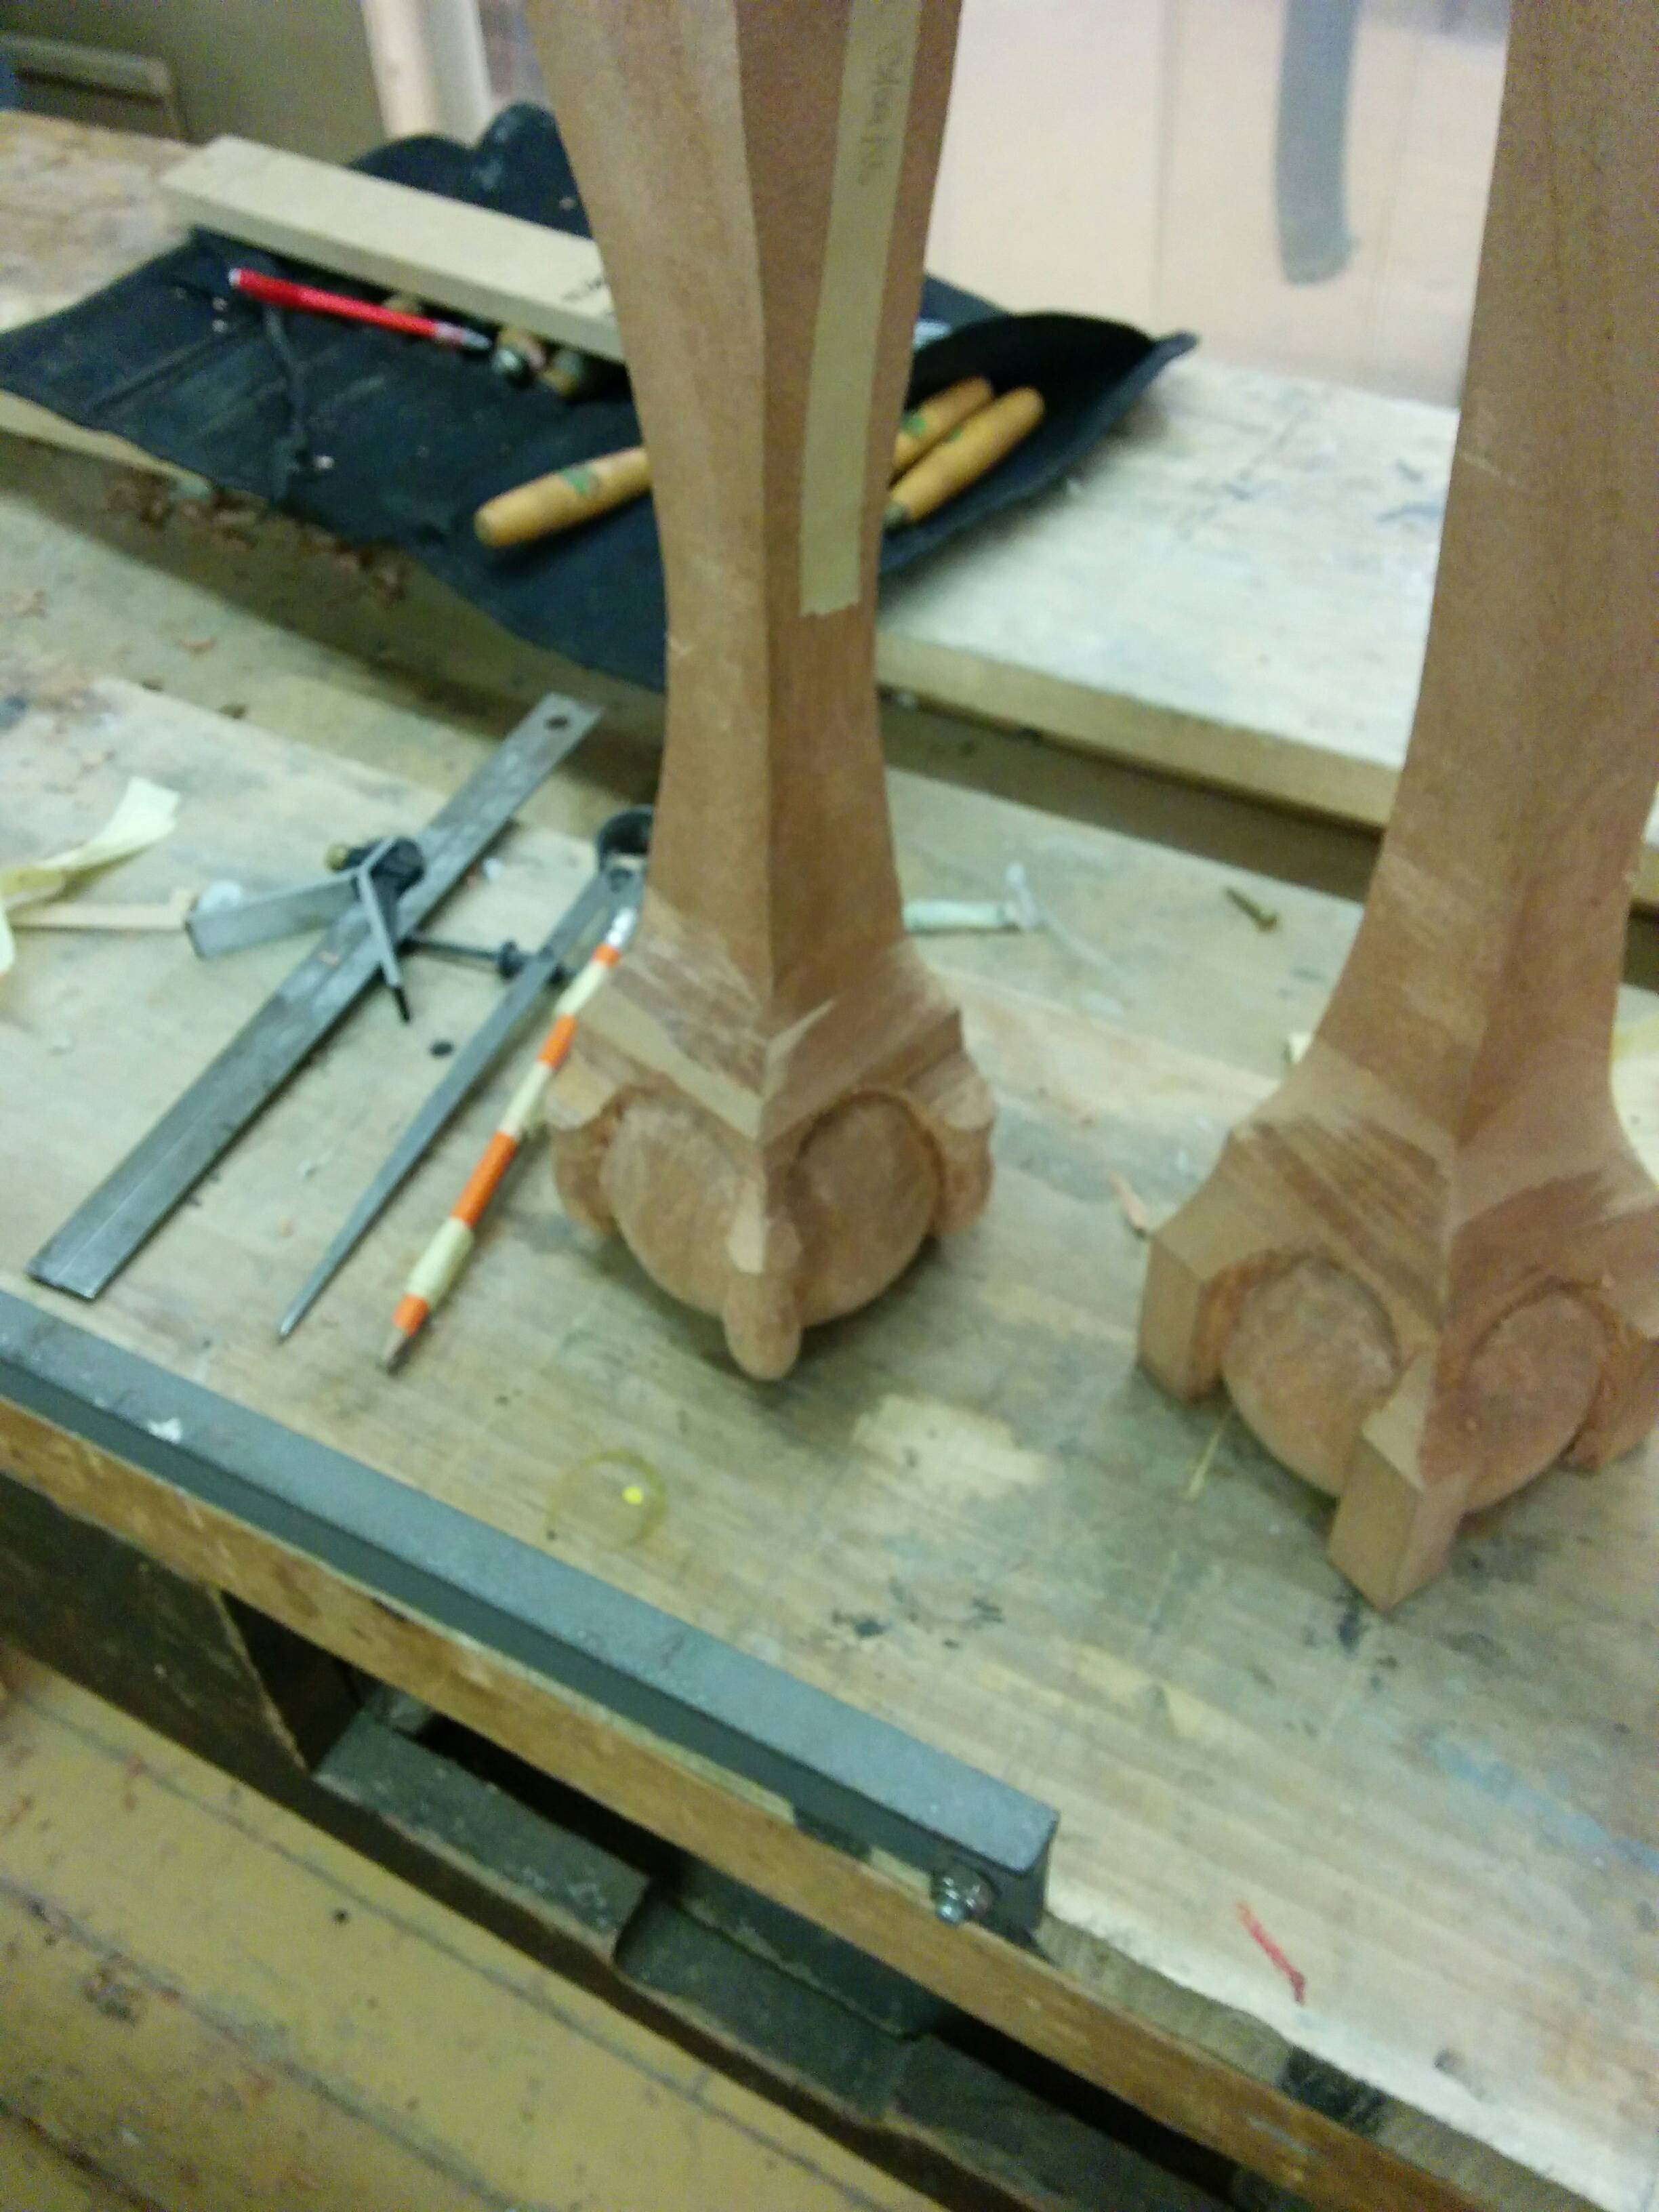
The big swept curves were pretty simple... Take off any big bumps with the big (4⅜" wide mouth) spokeshave, blend the curves together with a rasp paying attention to keep both sides equal, tidy up with the smaller, tight mouthed spokeshave for a reasonable finish.

The small curves which will define the top of the foot and the knuckles of the claws, were a mess though, and not one I was keen to rasp out... Fortunately The curve I'd picked matched the curve of one of my paring gouges exactly... So I paired out the waste, blended the paring to the big curve with a few quick strokes from the rasp, then rolled the small spokeshave down the surface of the curve, letting it take thin shavings near the bottom to remove the marks from the coarse rasp.

zIYOzNO.jpg


Much improved (but still not yet totally sorted in that pic).


More to follow at an unspecified date in the future!
 
Got a bit more done last night, all the legs are now exactly the same shape ready for trimming and carving.

One of the approaches that made it a lot easier than I expected when I embarked to get them all the same was using the first one as a model. It's suprisingly easy to spot minor differences by a visual comparison in 3D and drawing pencil lines to work from/to was particularly useful in getting the curve of the knee and the point where the 'ankle' goes from a curve to the flat.

I dug out the rasps I inherited from great-grandad, and found them to be a revelation, both made by camel laird they're appreciably better than the machine cut ones provided in the workshop I been used last time... I'm now convinced that I'll need to spend decent money on rasps and woodfiles going forward, more than any other tool I've used, the difference in ease and surface finish is striking and immediate.

KSVEamV.jpg


A keen eye will notice that I had a slight hiccup however, one of the knees chipped just on the corner where the knee blocks will attach, predictably it was the last side of the last one and in my tired state, I took too harsh a pass with the paring gouge when defining the curve and depth, and as soon as I took a stroke with the rasp, a wee chunk snapped off.

My plan is to make a small saw cut to one side of the chip, pare upto that flat, and glue in a little block of matching colour and grain direction, then gently shape/blend the repair with coarse sandpaper... Unless anyone has a better approach?
 
Jelly I like what your doing don't get despondent if you make a mistake its part of learning. Stop and look at the job and try to understand why you made the mistake, you don't have a master standing be hind you to tell you what the mistake was
so you will have to try and work it out your self. Dont file out of a corner, file into it it like using a block plane on end grain you don't shoot straight across you come at it from both sides. If I had lost a small piece out of the job the first thing I would do is stop and look for it then glue
It back in place and put a piece of masking tape on it. When working on your own there are three things you must recognize, tired when you get tired you must stop it becomes to dangerous
to continue,( shop fitting was all ways crazy for the hours that where worked I would notice it when I could not find my hand saw then when I found it I couldn't remember what I was going to do with it just stop).
Hunger is another one when you get hungry you cant concentrate and you start to shake , stop. Lonesome is another one when you get lonesome production goes down to nothing
you may as well pack the tools together and go home. These are all signs watch for them and know what they mean. Your doing well my friend and we are behind you. Billy.
 
Thanks Billy! I try not to get worried about mistakes, they happen sometimes; and in this case I'm still learning about the limits of this timber, so the mistakes teach me something important...

In this case the teachable moment saw me realising that with a very sharp blade and lowish angle it will cut like butter to a smooth finish, but and hint of imperfection to the edge, or with files and rasps it's prone to brittle fractures.

Tiredness is quite difficult for me as I can only normally fit in session in the workshop on weekday evenings, after a full day at work and an hour's drive in rush hour traffic. I find it energising to do something I really enjoy, so I usually don't realise I'm tired until I'm past it... I've stopped using the Milling Machine and Lathes during those sessions, and approach the woodworking machines with an additional degree of caution to normal, because I know that I'm not always able to fully focus on tasks. That gem of a realisation came whilst pulling a hunk of carbide out of a face-shield due to setting a drastically incorrect feed speed on an already deep cut into tool steel, luckily that only cost me a new milling flute and a visor!

As regards repairs, glue & tape to fit bits back on is my preferred option usually but with a 3D jigsaw of splinters, it wasn't going to happen this time.
 
Jelly, I'm really enjoying this thread. I'm sure I will learn more from watching you stretching your skills than I would from someone who had forgotten how hard it can be to do a good job at this level.

I'm sure your family will be thrilled with the finished article.
 
Thanks Andy, stretching is definately the way to describe it, as the thing I've found interesting, is that each new operation on the initial leg, is a challenge... By number four I begin to develop a set of working practices which allow me to do it for smoother and quicker than I might have initially anticipated.

I have quite a few more pics from tonight, but not the time to upload and narrate them, so I'll just add one showing where I've got to with the carving so far.

IojZaIp.jpg
 
I have made yet more progress, and a potentially massive miscalculation with the carving...

VbV0zUD.jpg


vLi0bbB.jpg


I will explain how I did that fully sometime tomorrow (today?) when I get a chance to sit at an actual computer to post a biggish update; long story short I mixed the approaches from three sources talking about two different styles of ball and claw...

I think, I have a vision in my head of how to make it work; but there's a good chance the upper claw will look out of proportion, very much a try it and see situation.
 
Back
Top