


Morning all,
After reading Petes post about draw-boring, i thought i post a few pics to try and make it a little clearer -also a jig for making the tapered fellas.
As an apprentice this took a bit of figuring out. :-k
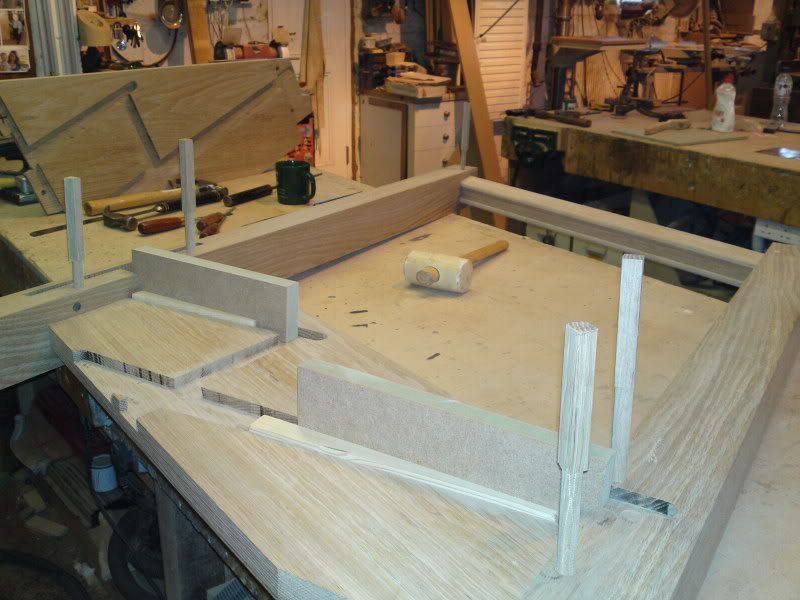
First thing you want to do is drill your hole for your draw-bore in the wood with the mortice first -
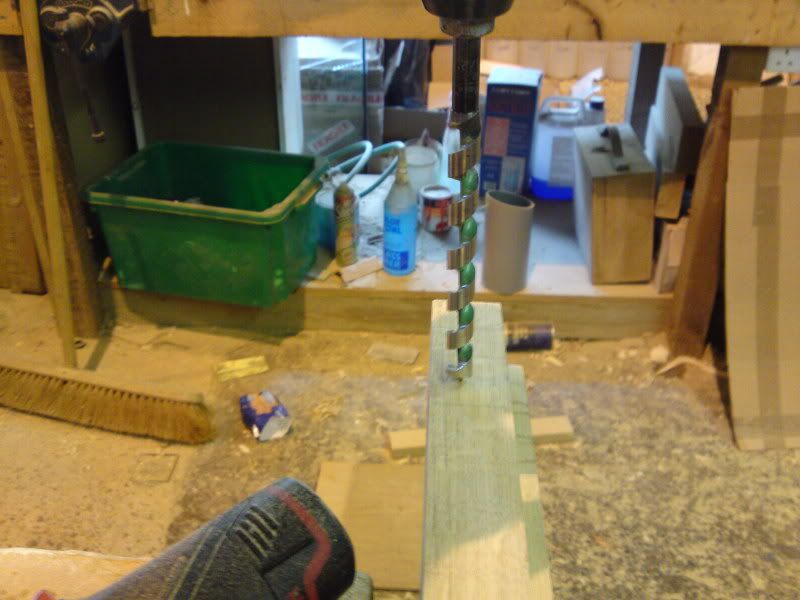
When im drilling newel posts i try to keep this as upright as possible so the draw-bore has the same margin in,from each side. When i was an apprentice i use to drill the tenon first which made it a real ball ache to get the newels all looking the same.
Once you have hole drilled in the bit with the mortice, insert your tenon. Put the drill in reverse, and with the auger bit allow to spin a few times.
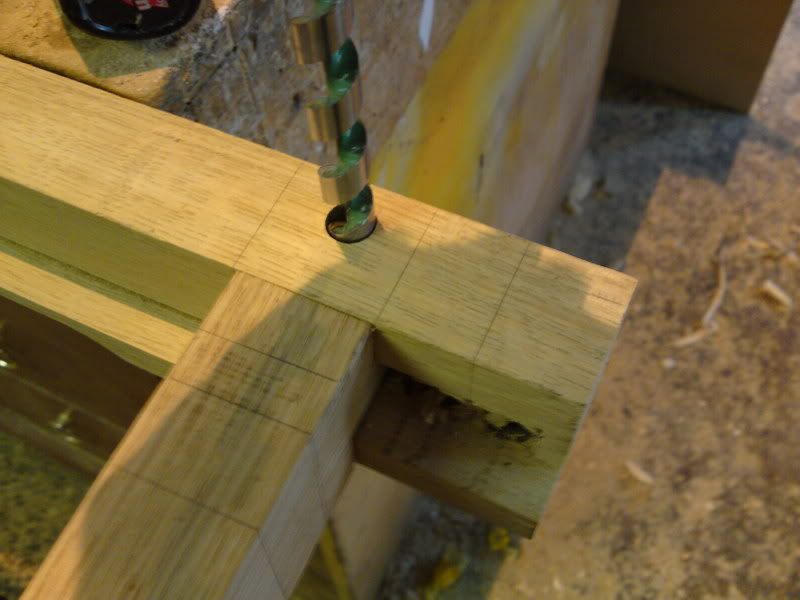
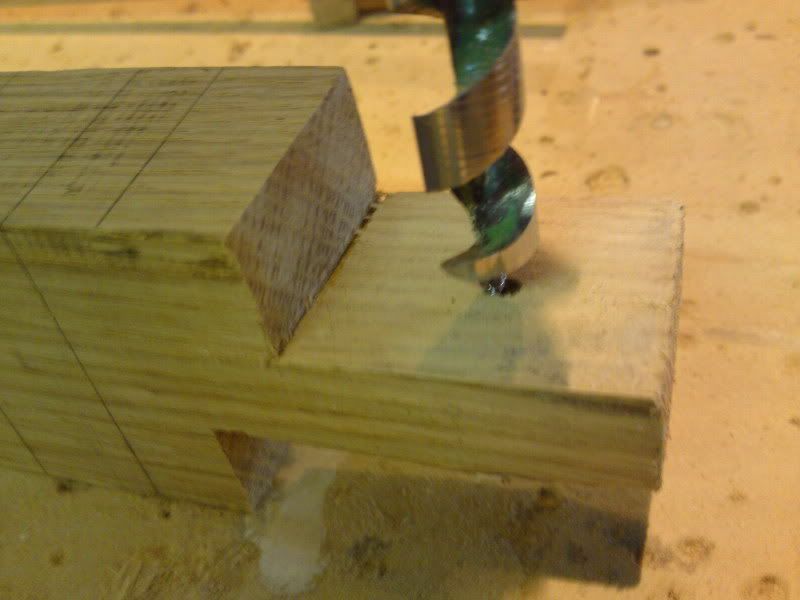
You should end up with a point being made in the tenon. Then simply move the point of the auger bit, a little closer to the shoulder
voila !
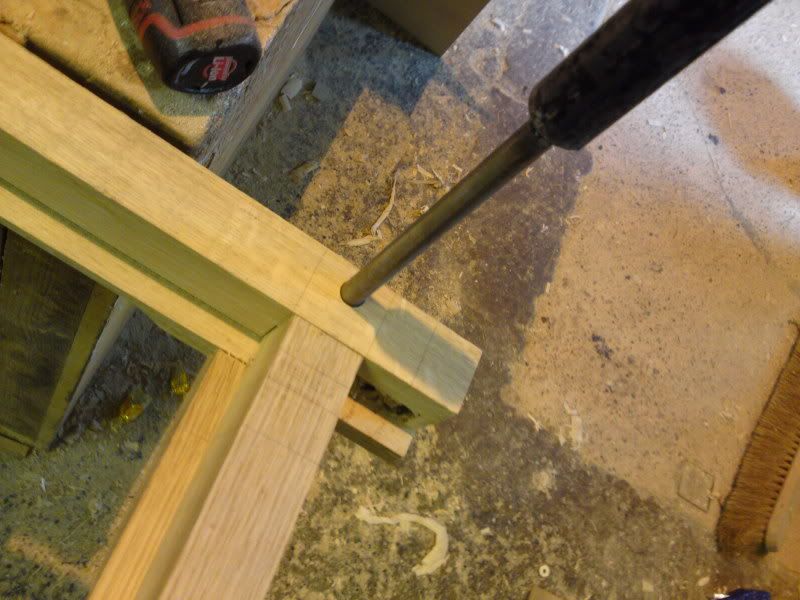
When you've driven the wooden draw-bore through, cut off the bit with the pointy end, a little proud. If it needs wedging a little to fill the hole it sometimes moves the pin back below the surface.
This is probably blindingly obvious to most people, but hopefully it might benefit someone :wink:
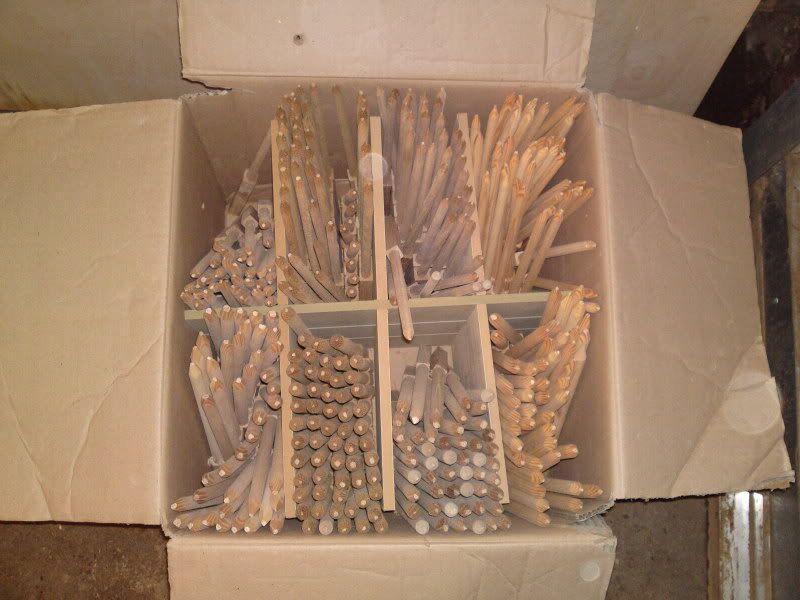
I've got these metal pins made up for dry fitting, prior to hammering home the wooden ones.
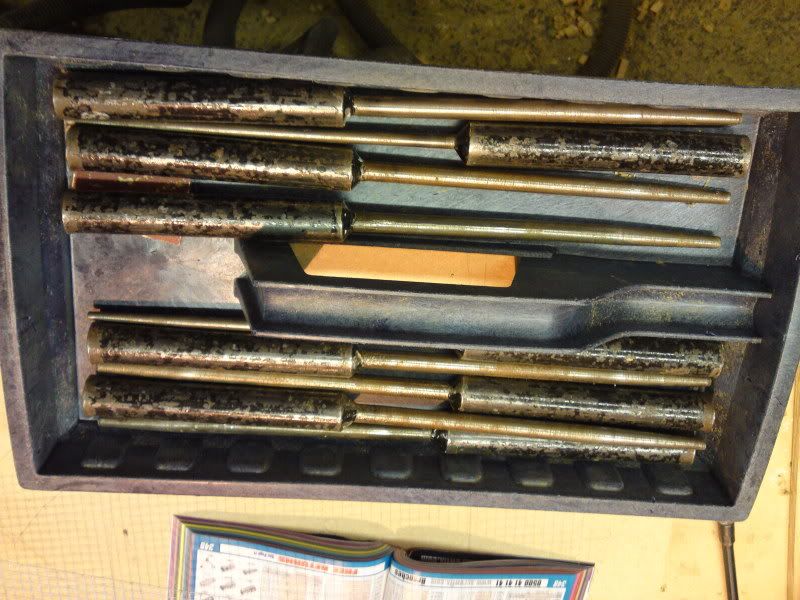
The joy of these, is you can gently smash the toffee out of them, without fear of breaking them.
After figuring out how to draw-bore, i was always given the lovely job of hand planing 3/8th and 1/2inch pins for stairs. Using a block plane made this job much more bearable, but i still on occasion ended up planing off pieces of skin/finger nails trying to hold the damn things. :evil:
For a drawbore to work well, they had to be tapered - so using a parallel dowel was out of the question.
The challenge was to conjure up something. After moaning several times to the foreman about always having to make the pins, he told me there was no other way- This made me even more determined (hammer)
This is the mk2 version. The first was hand powered and didn't have the bearing arrangement.
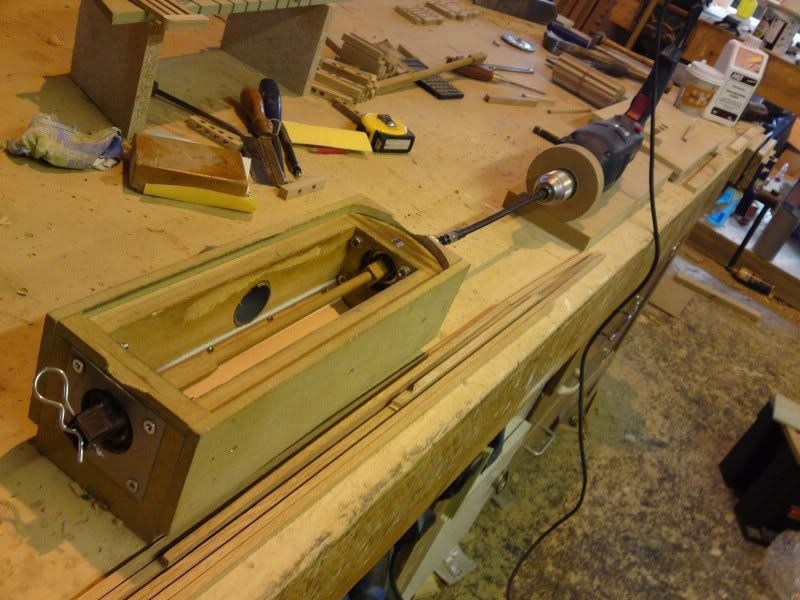
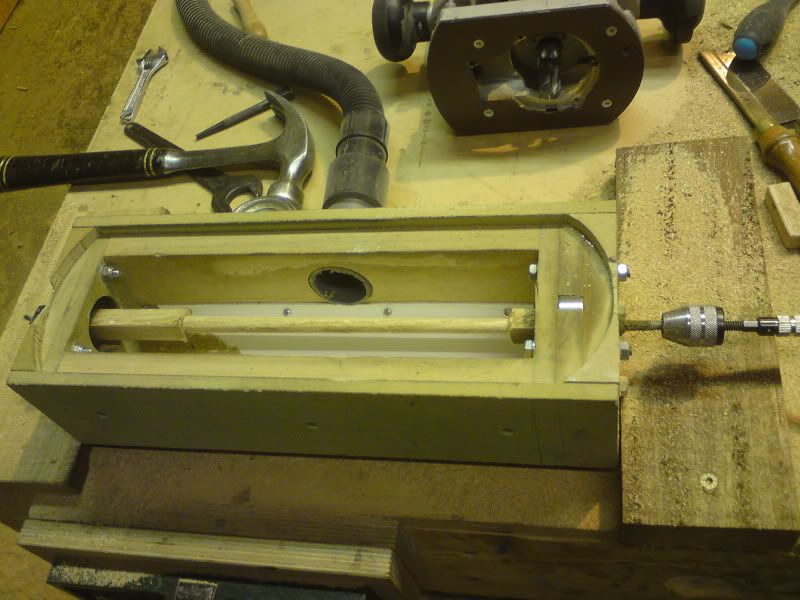
The bearing on the left is mounted slightly further down (1mm ish). This makes it a tapered jobby.
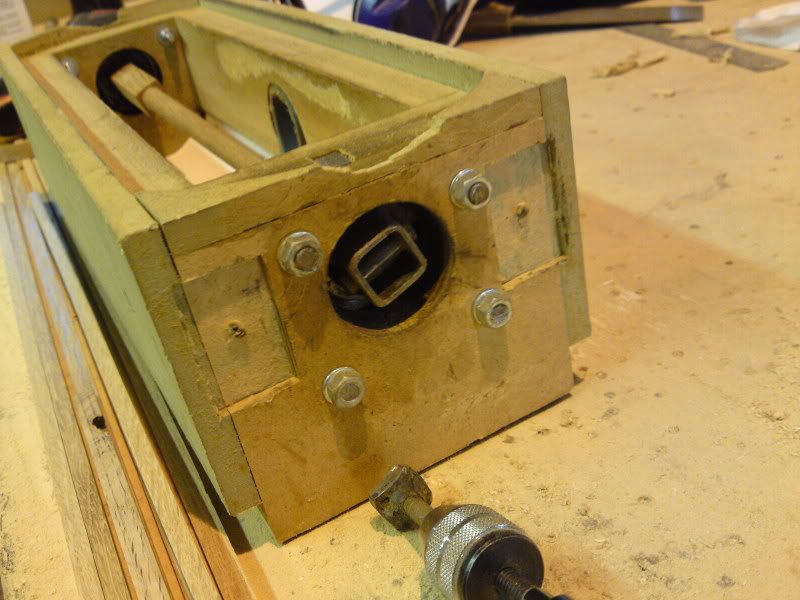
To make a braw-bore, you need a square section of wood- this needs to fit snug in the bearing.
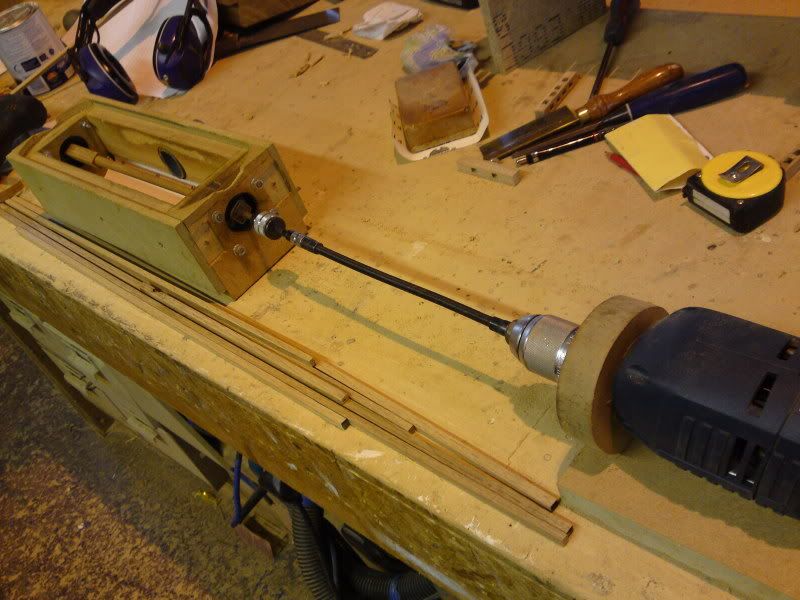
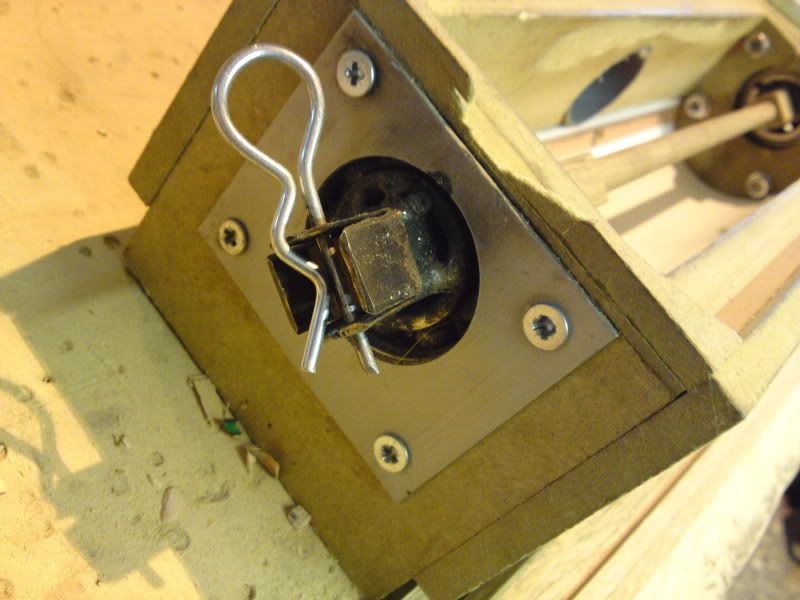
Insert split pin
Turn on drill- works best fairly slow
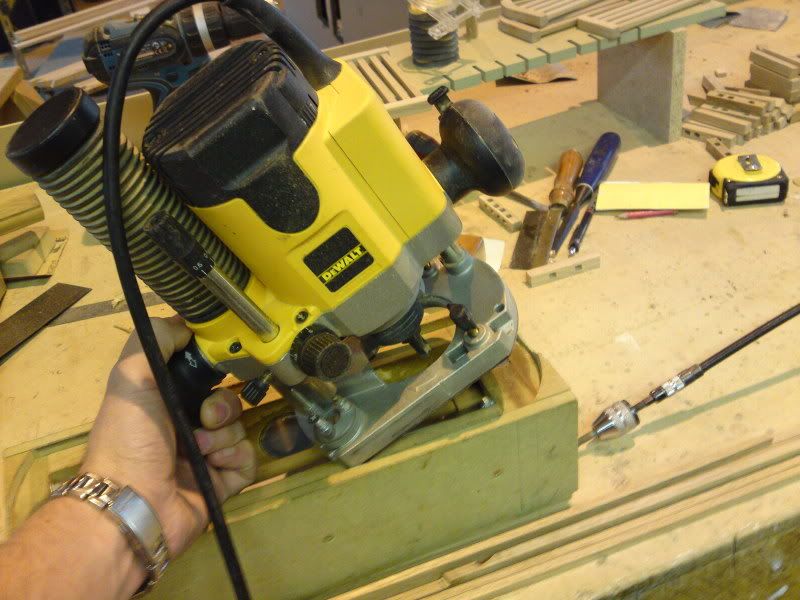
With the router permantly in the plunged position slowly lower it. (working from right to left gives the best finish. I also found using a bigger cutter worked alot better.- think i usually use a 18mm one
Move the router from right to left and you're done
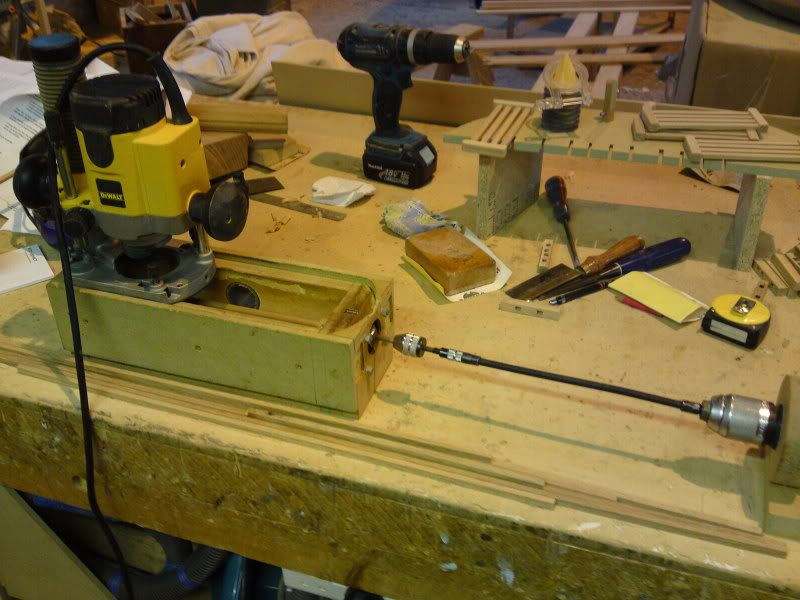
The hardest thing about this, is setting the depth of the router. Once you've got that sorted you can make both 3/8th and 1/2 easy peasy- Roughly one every 70-80 seconds i think.
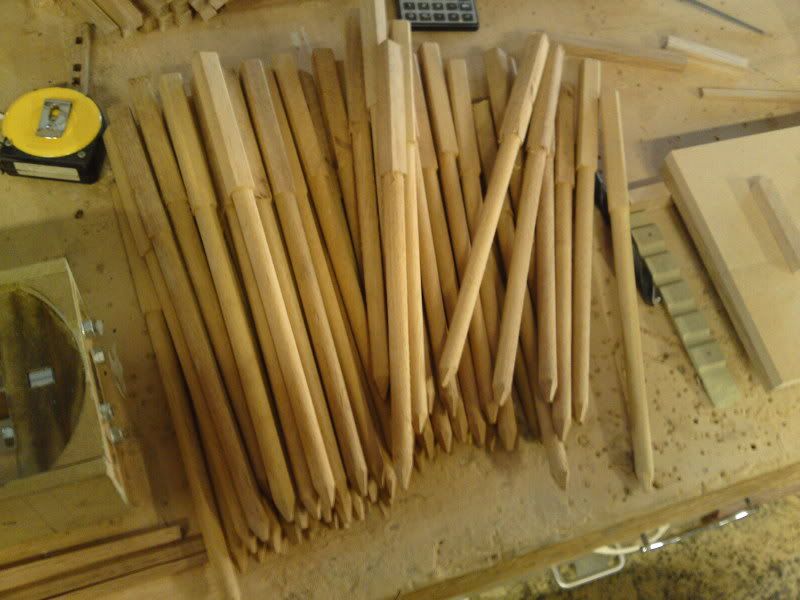
The big square ends are ideal for whacking with a hammer- especially the flimsy 3/8th ones
Its still a manic job making them, just much quicker and less painful.
HTH
Simon
After reading Petes post about draw-boring, i thought i post a few pics to try and make it a little clearer -also a jig for making the tapered fellas.
As an apprentice this took a bit of figuring out. :-k
First thing you want to do is drill your hole for your draw-bore in the wood with the mortice first -
When im drilling newel posts i try to keep this as upright as possible so the draw-bore has the same margin in,from each side. When i was an apprentice i use to drill the tenon first which made it a real ball ache to get the newels all looking the same.
Once you have hole drilled in the bit with the mortice, insert your tenon. Put the drill in reverse, and with the auger bit allow to spin a few times.
You should end up with a point being made in the tenon. Then simply move the point of the auger bit, a little closer to the shoulder
voila !
When you've driven the wooden draw-bore through, cut off the bit with the pointy end, a little proud. If it needs wedging a little to fill the hole it sometimes moves the pin back below the surface.
This is probably blindingly obvious to most people, but hopefully it might benefit someone :wink:
I've got these metal pins made up for dry fitting, prior to hammering home the wooden ones.
The joy of these, is you can gently smash the toffee out of them, without fear of breaking them.
After figuring out how to draw-bore, i was always given the lovely job of hand planing 3/8th and 1/2inch pins for stairs. Using a block plane made this job much more bearable, but i still on occasion ended up planing off pieces of skin/finger nails trying to hold the damn things. :evil:
For a drawbore to work well, they had to be tapered - so using a parallel dowel was out of the question.
The challenge was to conjure up something. After moaning several times to the foreman about always having to make the pins, he told me there was no other way- This made me even more determined (hammer)
This is the mk2 version. The first was hand powered and didn't have the bearing arrangement.
The bearing on the left is mounted slightly further down (1mm ish). This makes it a tapered jobby.
To make a braw-bore, you need a square section of wood- this needs to fit snug in the bearing.
Insert split pin
Turn on drill- works best fairly slow
With the router permantly in the plunged position slowly lower it. (working from right to left gives the best finish. I also found using a bigger cutter worked alot better.- think i usually use a 18mm one
Move the router from right to left and you're done
The hardest thing about this, is setting the depth of the router. Once you've got that sorted you can make both 3/8th and 1/2 easy peasy- Roughly one every 70-80 seconds i think.
The big square ends are ideal for whacking with a hammer- especially the flimsy 3/8th ones
Its still a manic job making them, just much quicker and less painful.
HTH
Simon
