Paul Chapman
Established Member
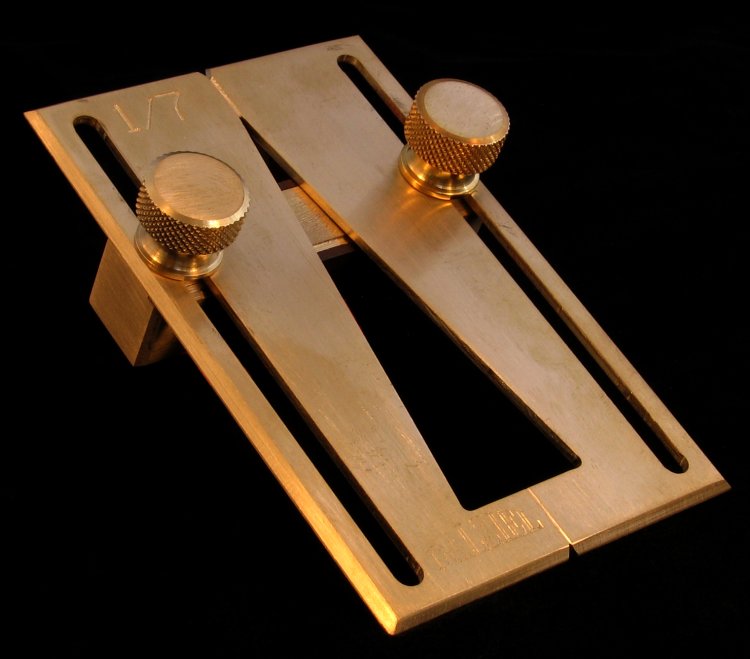
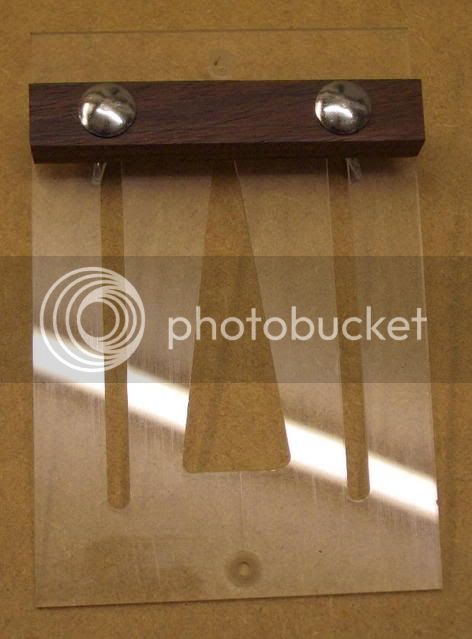
I needed to make a dovetail marking gauge, so I pinched a design from Rob Stoakley (from whom I also pinched the piece of perspex and the piece of Rosewood  ).
).
Planed one edge of the perspex dead straight, then marked a centre line using a marking gauge. Drilled and countersunk two holes and screwed the perspex to a large-ish piece of MDF. Did all the marking out on the MDF then routed the perspex using a 6mm bit and a slow speed. I've used a slope of 1 in 7.
The Rosewood fence is fitted with a couple of M6 coach bolts and wing nuts
I'm quite pleased with how it's turned out.
Cheers :wink:
Paul
).Planed one edge of the perspex dead straight, then marked a centre line using a marking gauge. Drilled and countersunk two holes and screwed the perspex to a large-ish piece of MDF. Did all the marking out on the MDF then routed the perspex using a 6mm bit and a slow speed. I've used a slope of 1 in 7.
The Rosewood fence is fitted with a couple of M6 coach bolts and wing nuts
I'm quite pleased with how it's turned out.
Cheers :wink:
Paul