Dandan's Side Gates

UKworkshop.co.uk

Help Support UKworkshop.co.uk:

This site may earn a commission from merchant affiliate links, including eBay, Amazon, and others.

Dandan

Established Member
Joined
9 Dec 2015
Messages
186
Reaction score
94
Location
Southampton
Hi all,
I've been a bit remiss in posting, well, anything much recently, but I want to try and document my latest build.
After I finished my front fence a few weeks ago:
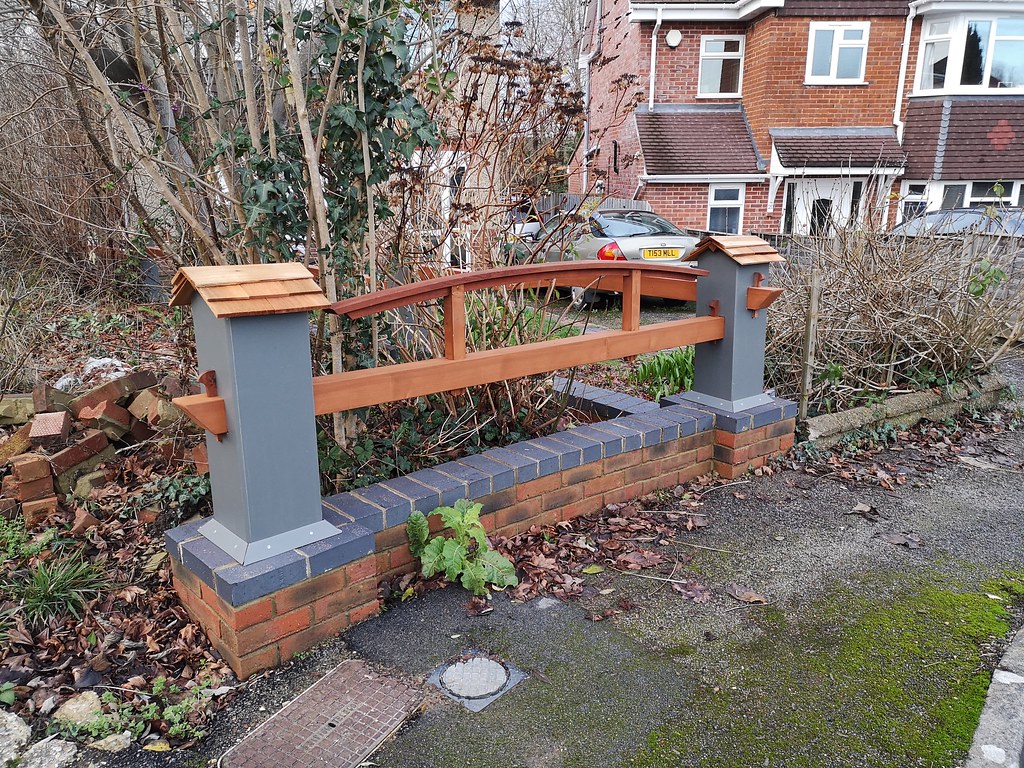
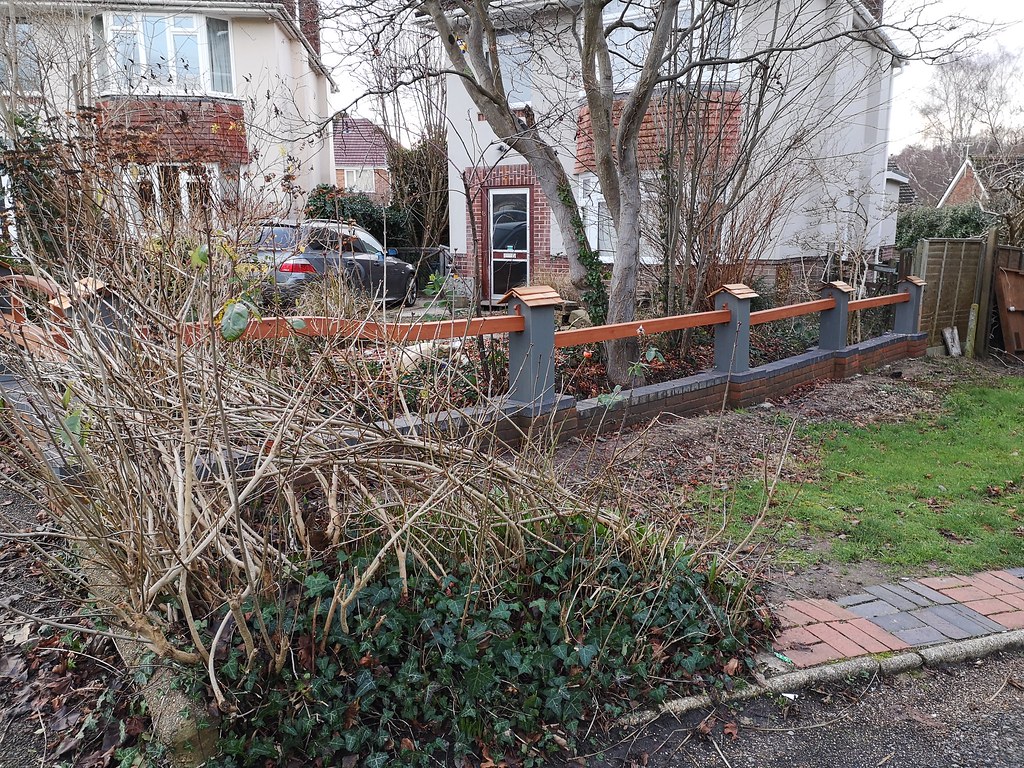


It was time to move on to the side gates. I want the front fence, side gates and (eventually) porch to match up, so the plan is to have the gate posts in grey, the frame of the gates stained as the front fence cross beams and an arch over the top matching the arch on the fence, made from sapele.
The gates will be filled out with larch cladding to match the workshop behind them. I hope i'm not going too crazy on all the different colours and woods, fingers crossed it looks OK in the end!

First off, the design, i'd sketched it a few times on paper but as there are curves involved i wanted to CAD it up properly to avoid too many dimensioning mistakes. I got hold of Fusion 360 for free for personal use (which is how software companies should all work!) and was able to use it straight away as it's nearly identical to the CAD system I use at work for 10 hours a day.
Here's the design:
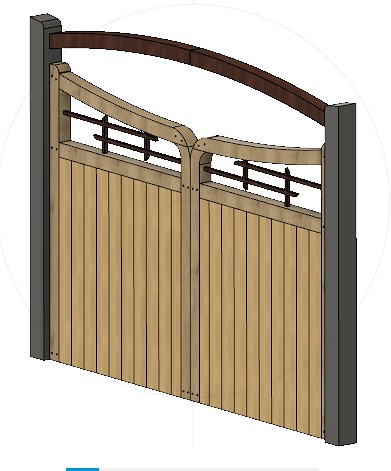
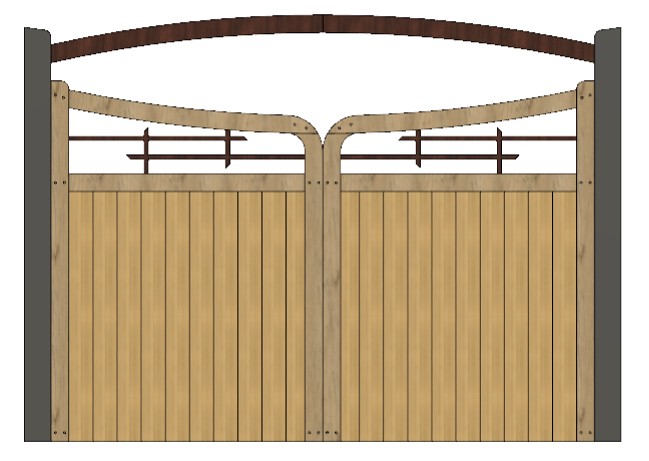
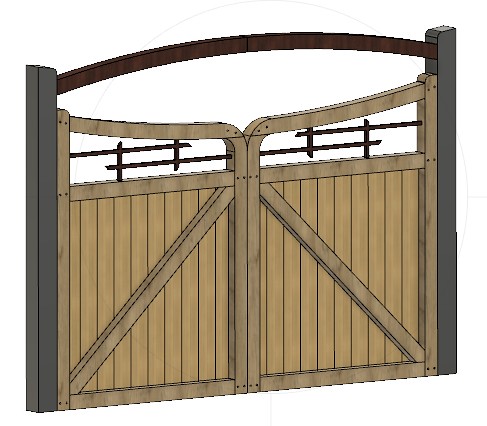


Each gate is 1500mm wide and just over 2000mm tall, the arch is around 2300mm at it s highest point. I decided to make it all from 100mm nominal thick timber, which will probably end up around 90mm when finished, so they will be pretty significant! It's all just treated softwood so not too heavy, the thinking was that we plan to move house in the next few years so it seems pointless spending out on hardwood if i'm going to leave them for someone else to enjoy, plus my mistakes will be cheaper this way!

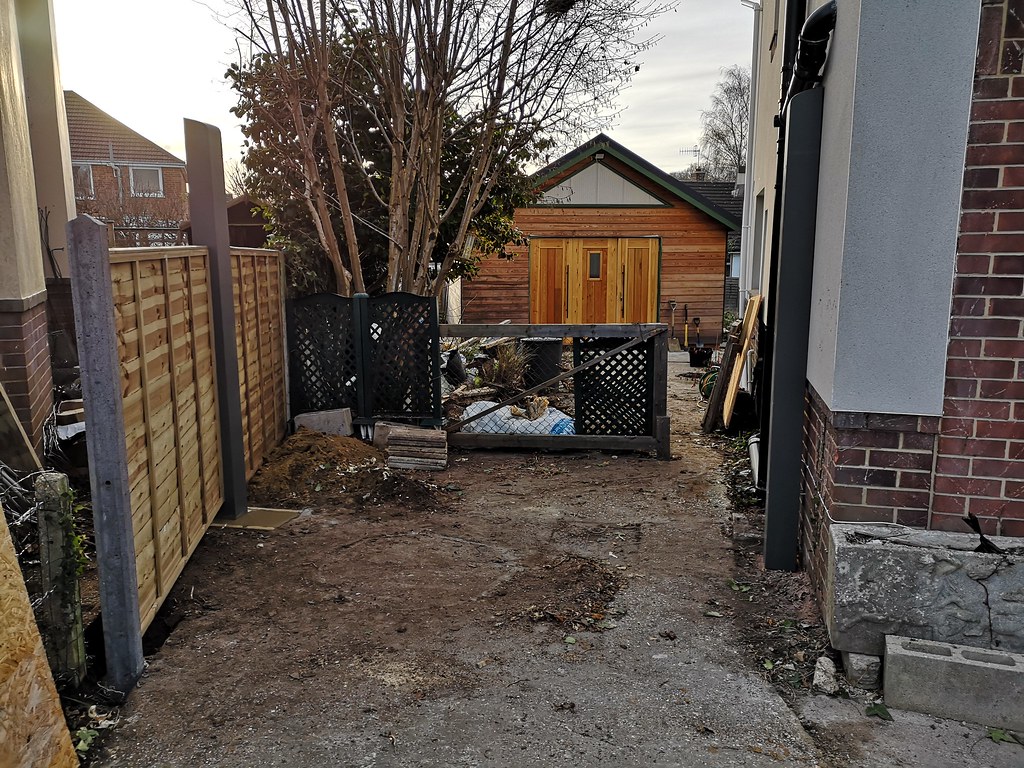
I got started by tearing down the old Ivy covered fence panels and post so i could put a new post in, 150x150 and buried 1000mm into the ground:
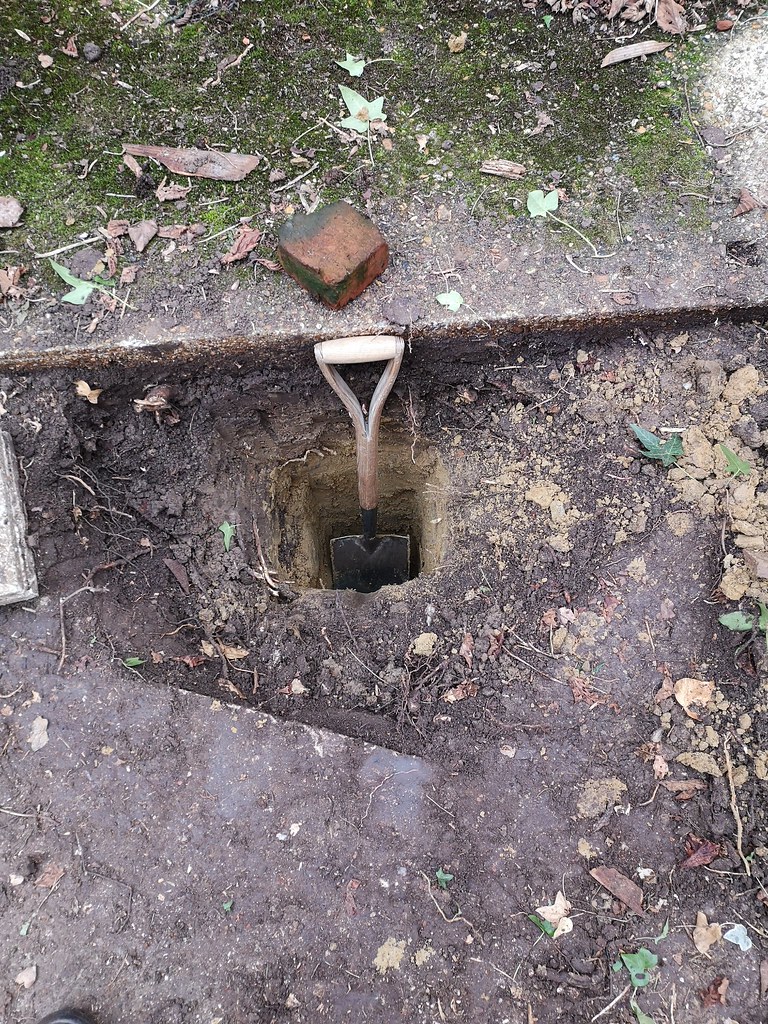

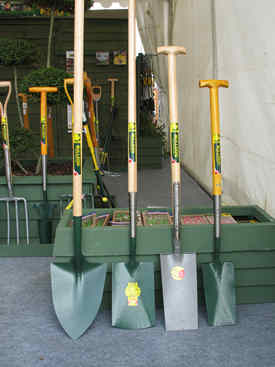
(that's a full sized spade)
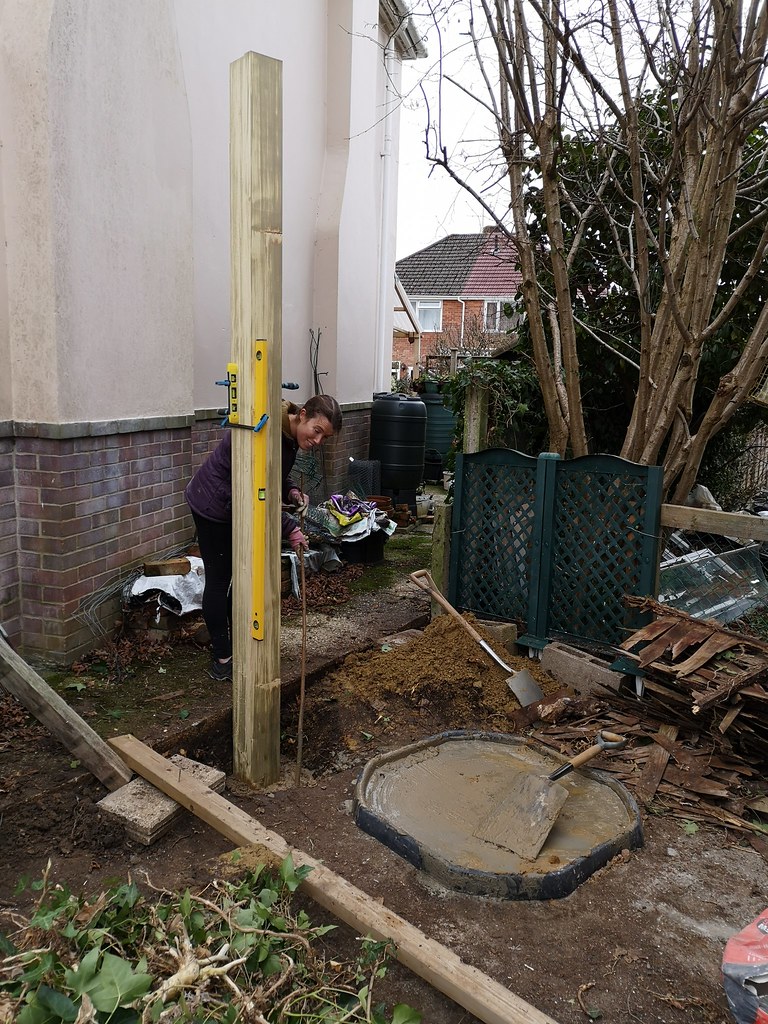


Observe the helper doing the all important 'poking the concrete with a stick'. Couldn't manage without her I swear.

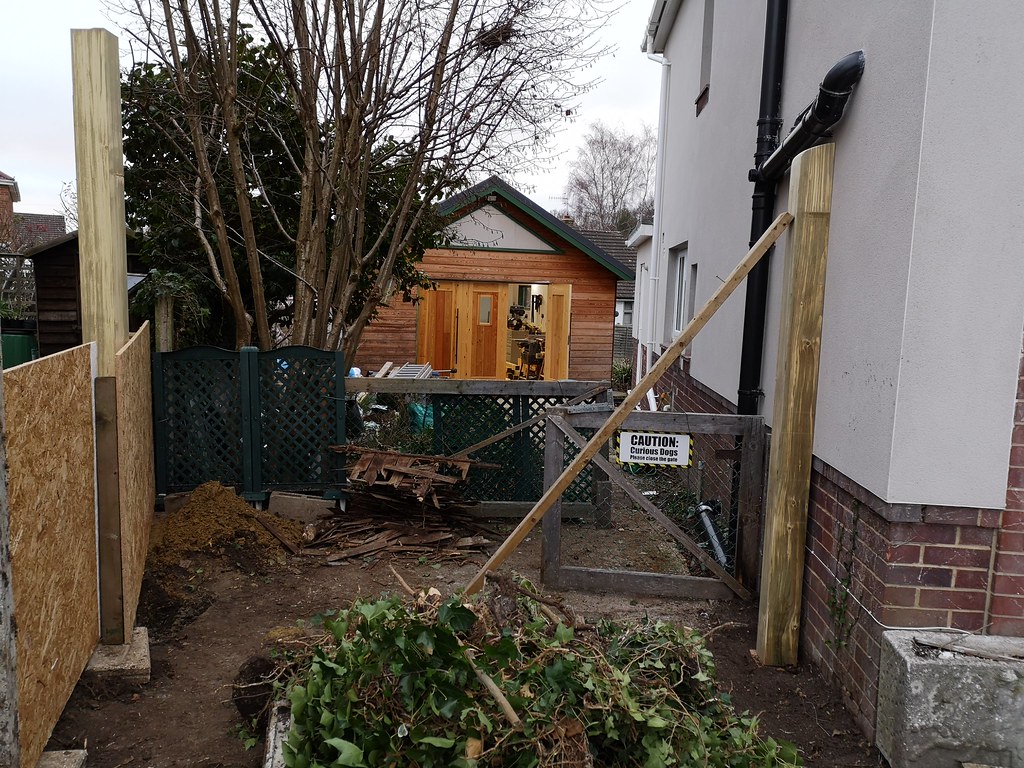
I cut the other post to size and shaped the top before mocking it up to work out where to cut the top off the first post. The second post will be bolted directly to the house so no digging required.
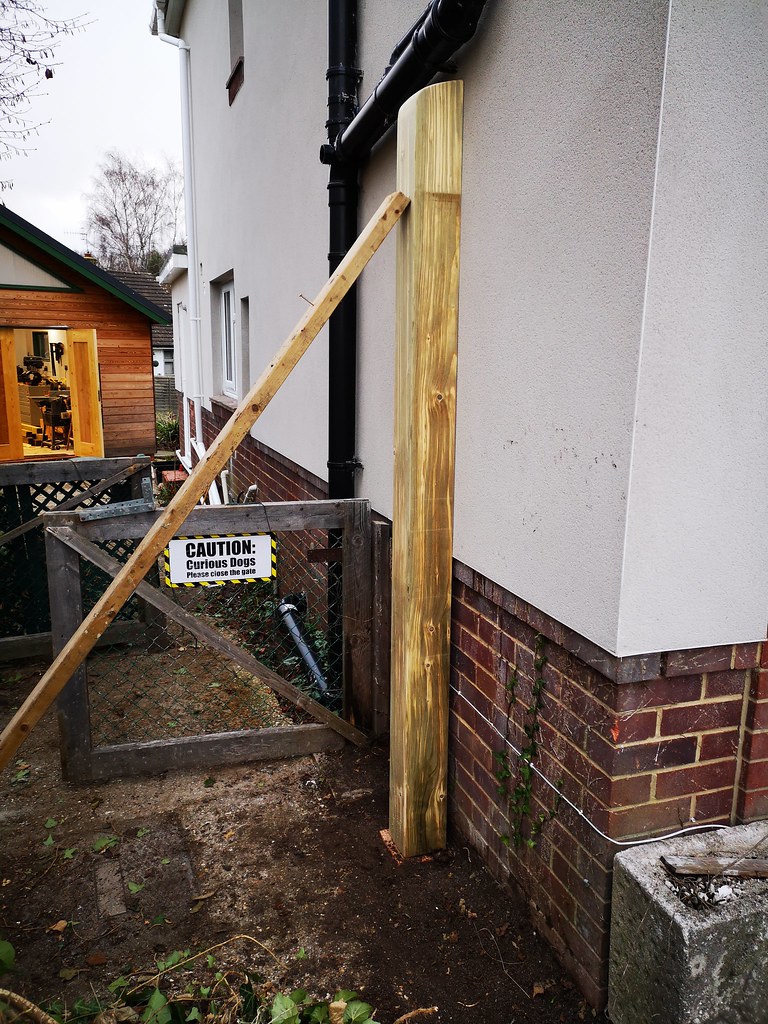


And that's pretty much when it got dark. Next is to cut and shape the top of the other post, paint them both and then get started on the gate frames.


A question for anyone who managed to read this far, when I make the sapele curved top bar, it will be much cheaper to make it in two pieces and join it in the middle (less waste from cutting the curve), how would you suggest I join it? I was thinking some box joint type fingers cut vertically but then the joints would be on the top face and more open to the weather, any better suggestions?
 
Looking good! I remember seeing your sketches of the fence. The execution looks good!

Sent from my Nexus 5X using Tapatalk
 
Dandan":ccjglajk said:
Hi all,
A question for anyone who managed to read this far, when I make the sapele curved top bar, it will be much cheaper to make it in two pieces and join it in the middle (less waste from cutting the curve), how would you suggest I join it? I was thinking some box joint type fingers cut vertically but then the joints would be on the top face and more open to the weather, any better suggestions?

I personally would use a wedged hammerhead joint from the underside half of the depth of the timber, ideally with one piece as the tenon and the other the mortice rather than a loose tenon. I would also possibly put some kind of decorative cap on top of the joint (Like a little roof) to keep the water from driving into the shoulders of the joint from above.
 
Dan. That's looking good. I remember the original plans and think this is splendid.
Although it's probably not really my thing in the altogether in the sense I wouldn't build it at my house, I like it nonetheless for its style, integrity and boldness. Fairplay. =D>
Really admire you for following this through. Well done.
You're opening boundaries! And closing them! At the same time!
Have you heard of postcrete? :wink:

:D

Cheers Chris

Ed: You might also be interested in this:
http://www.fredshed.co.uk/alternativediggingtools.htm

Scroll down to
'Old Fashioned Digging Tools
Irish Spades, Cornish Spades and West Country Shovels'


ZOqS0uc.jpg


The 2 middle tools are the pinnacle of Western Civilisation in general terms in my opinion. At least in terms of digging holes. Could never get on with a point shovel and the one on the right is starting to get a little specialist. Great for fence post mind so I'm maybe straying off the point a little lol but generally AFAIK a unsupported/ tamped post (no cement).
They will all do and the long handle is literally a life saver if you do this often
I've done this often. Just not recently... Working in Snowdonia the favoured spade for breaking out soil was a capped scaffold pipe with 2x 3" steel wings welded to it and filled with lead roll. That spade would shear through a newly married couples wedding vows and neither blink nor veer. It was a monster purposed for one reason.
Just saying.
At one time you'd get measured for the length of handle as it is was measured proportionate to your height.
These days, we just use a standard handle spade.
Enlightened times.

:|
 
Bm101":24p9ohad said:
Although it's probably not really my thing in the altogether in the sense I wouldn't build it at my house, I like it nonetheless for its style, integrity and boldness. Fairplay. =D>

I know exactly what you mean, I seem to be unable to create anything subtle, everything I make seems to be a bit brash and bold. Personally I would have liked a slightly more elegant result with the front fence but that said, I'm really pleased with the end result, it's very striking as you drive towards the house.

Bm101":24p9ohad said:
Have you heard of postcrete? :wink:

I had a bunch of odds and sods of aggregates and half bags of cement lying around so I used the big hole in the ground as an excuse to get rid of some of it!

I did once have a post hole digger but I've no clue where it ended up, I should probably check my dad's shed...

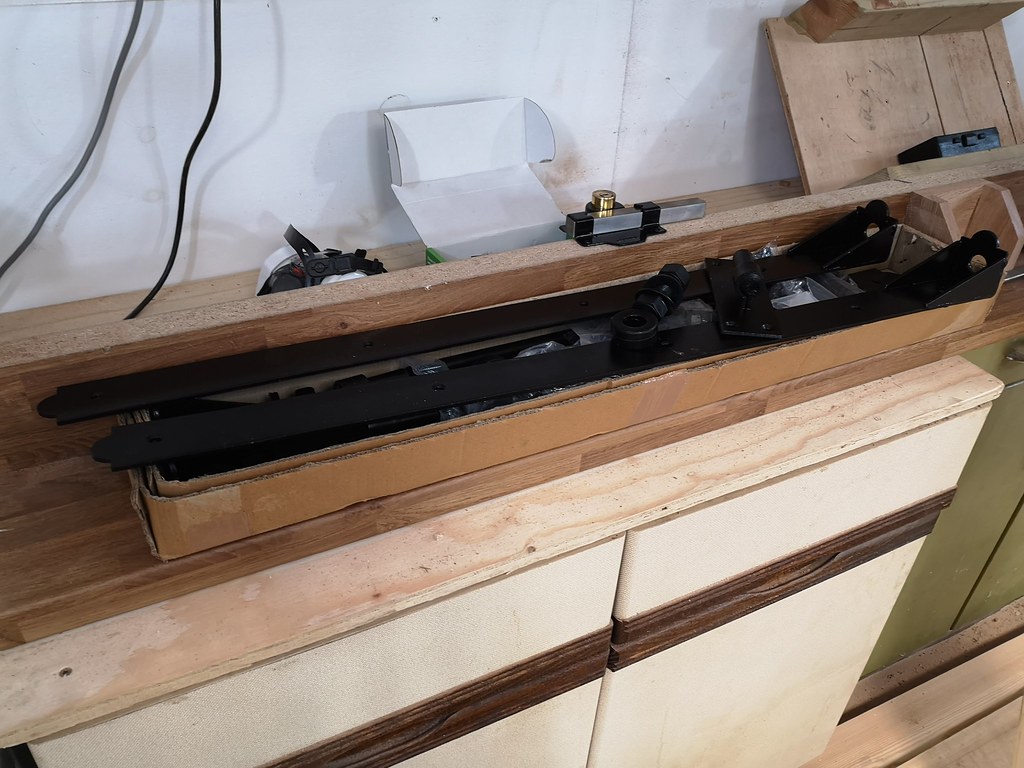
Anyhoo, I made a little progress this week, both gate posts are painted and the one on the house side is ready to be mounted. I bought the hardware for mounting that but haven't done so yet. Talking of hardware, my hinges turned up, and what hinges they are!


They are huge! The advice was to go for hinges half as long as the width of each gate, which would have meant 750mm long hinges, but my gates are particularly thick so I erred on the side of caution and went for 900mm hinges. They look pretty decent quality, especially if you judge quality by the kilo, time will tell how the black paint holds up though.

I got all the gate frame timbers planed and thicknessed, 4 bin bags of shavings later and the final dimensions are 93x90mm for most pieces.
I got started on the mortices, through-mortices are so much easier to cut than blind ones! I really rattled through them and got one and a half gates worth of joints cut, i'm now waiting on a template to cut the curved top bar before I cut any joints for that, plenty of scope for error there so i'm being as careful as I can.

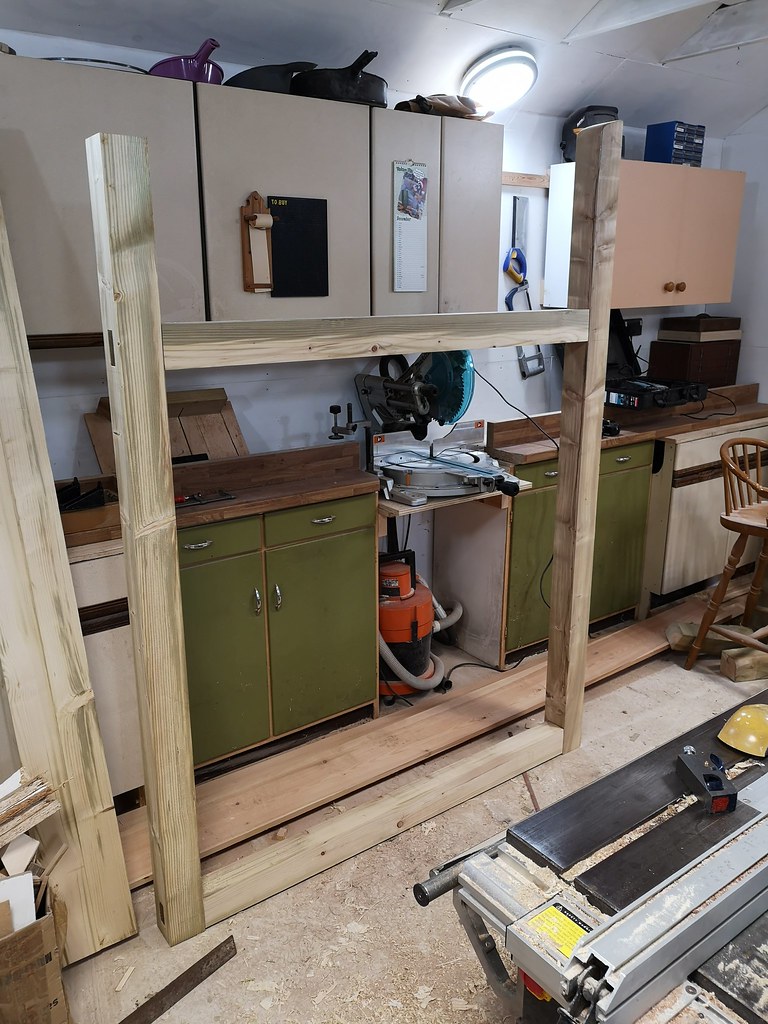
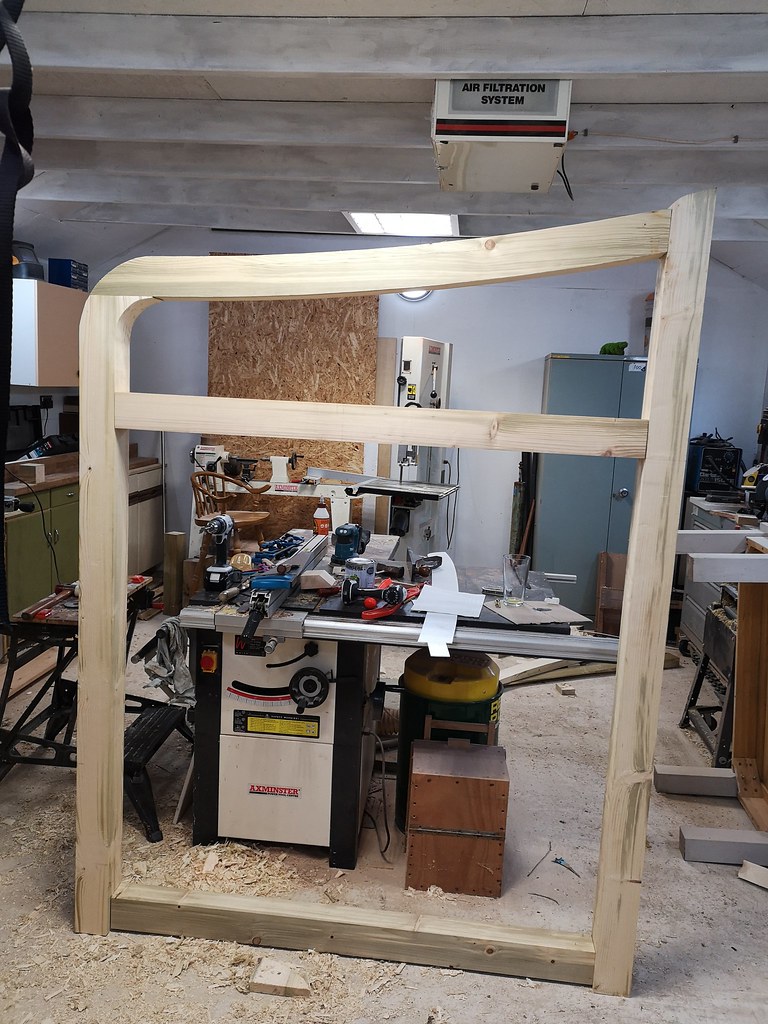
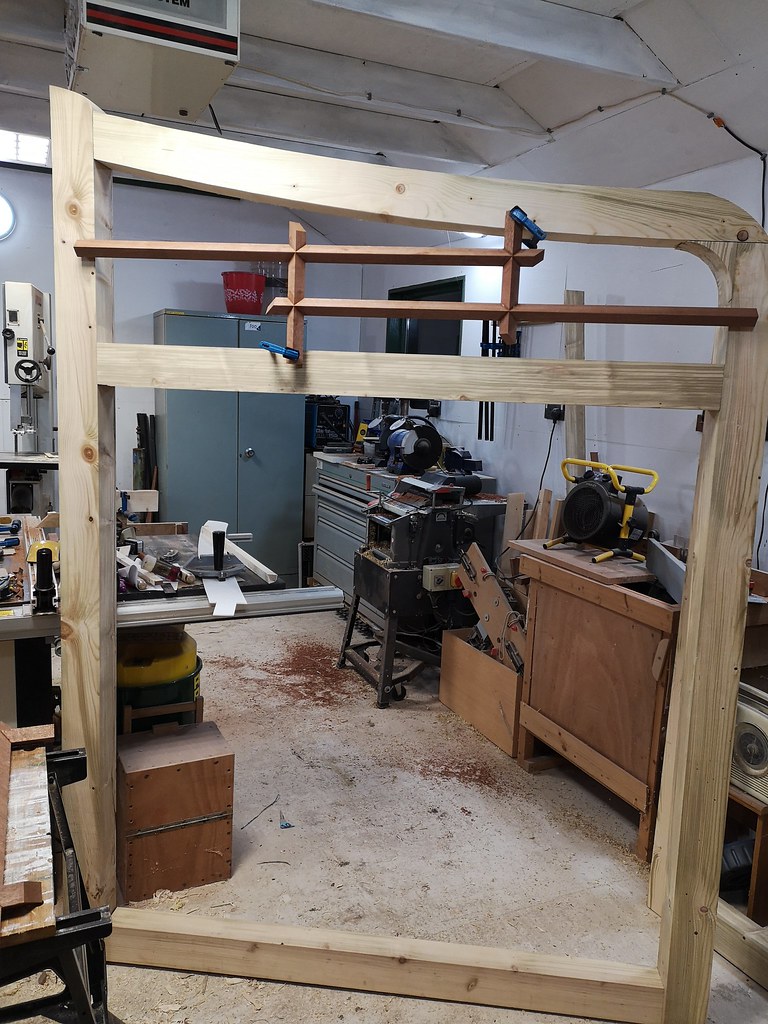
Here's one gate fitted up:


(The left hand upright will be trimmed to match the curved top cross bar)
It's really very large! I'm going to dowel the joints, does anyone think I should wedge them as well for a bit of extra tightness?
 
Trevanion":dhy8dp3w said:
I personally would use a wedged hammerhead joint from the underside half of the depth of the timber, ideally with one piece as the tenon and the other the mortice rather than a loose tenon. I would also possibly put some kind of decorative cap on top of the joint (Like a little roof) to keep the water from driving into the shoulders of the joint from above.

Thanks for this, I investigated that joint and it looks ideal, if slightly beyond my comfort zone! I'm not sure i can get away with a cap or roof without drastically changing the design, i'll think of something.
 
Dandan":37npuigp said:
A question for anyone who managed to read this far, when I make the sapele curved top bar, it will be much cheaper to make it in two pieces and join it in the middle (less waste from cutting the curve), how would you suggest I join it? I was thinking some box joint type fingers cut vertically but then the joints would be on the top face and more open to the weather, any better suggestions?

If you cut the curve off the bottom you can then take that and glue it on the top of the board with a good waterproof glue or epoxy. If you need a larger curve glue two boards together and then cut the inside curve and stack it on top.

Nice fences. Want to come and build more to go around my 9 acres? :wink:
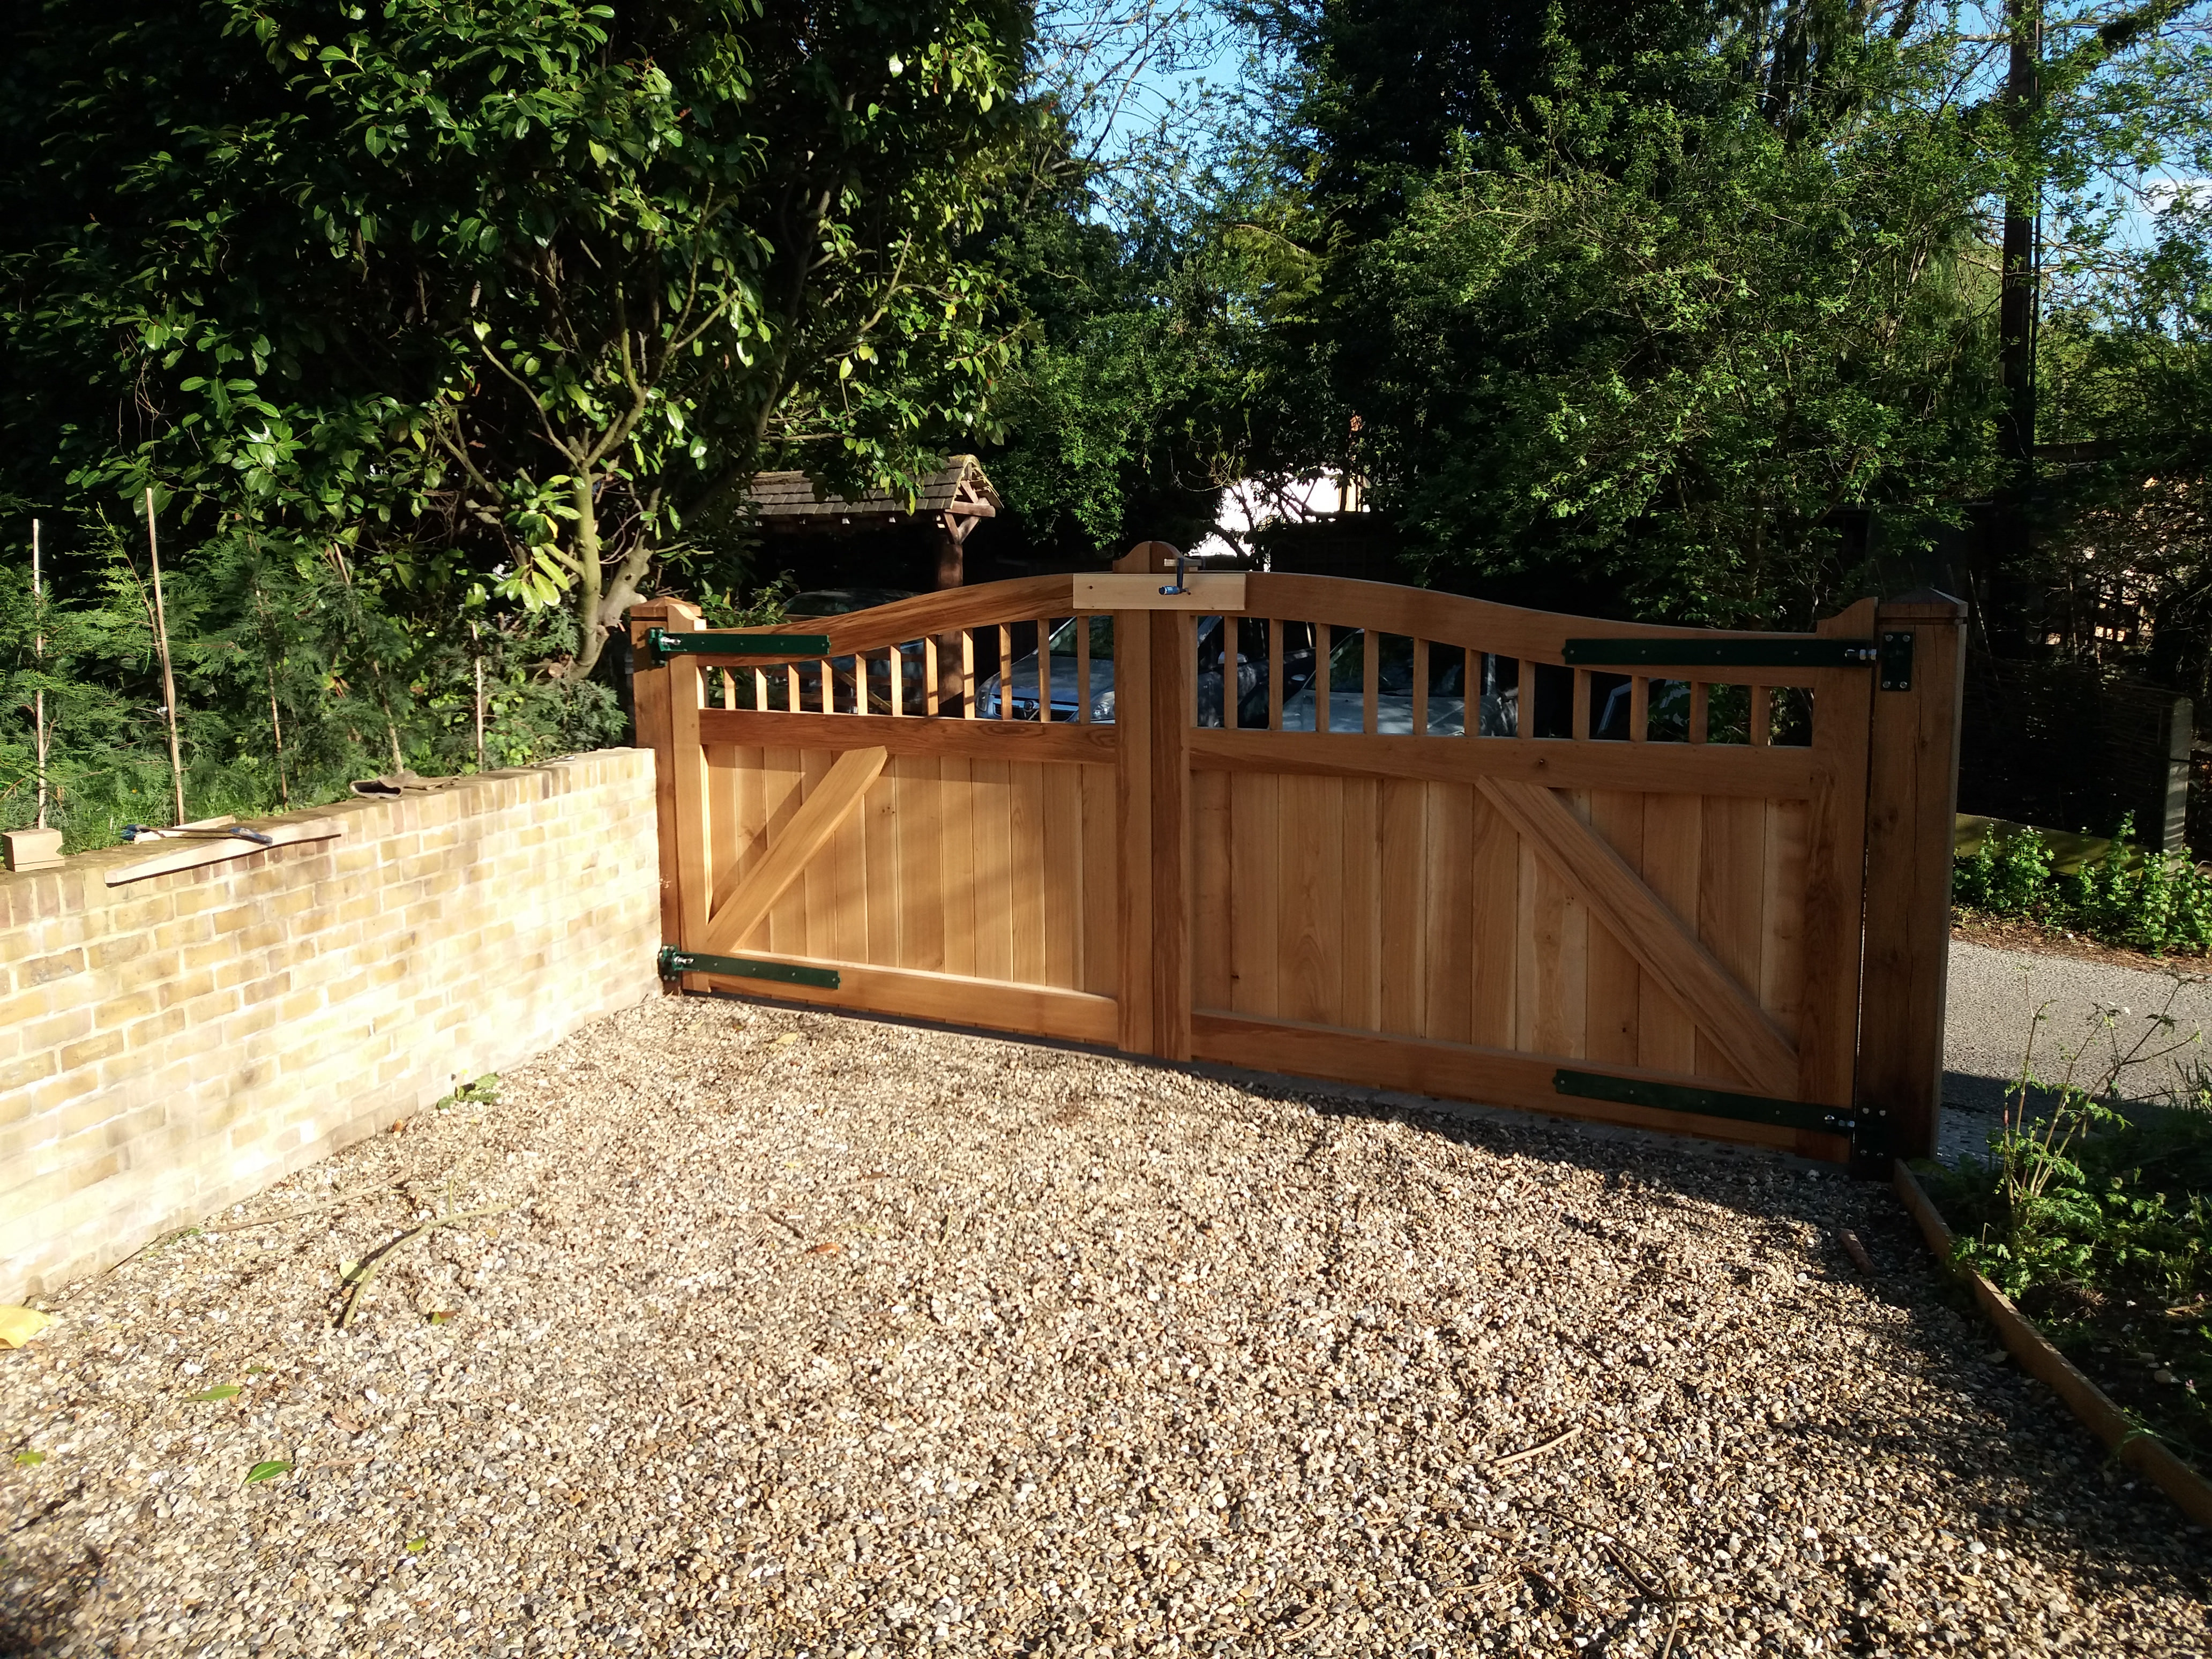
 
750mm hinges would have been more than adequate for your gates, are you going to swing them on the middle and bottom rail as they appear too long for the top rail

this is a picture of my gates on very similar hinges they are if i remember correctly 750mm, the gates are 2100 wide each and made from french oak 60mm thick and since being equipped with auto openers open/close approx 20 times a day

dDexKaN.jpg


Re your top arch, I would split it in the middle as you have said, however I would make it a feature with two pieces of timber strapping it from each side with stainless bolts thereby making it removable should you need the height to get anything through it (high vans etc)

if your interested this is my thread re the making of my gates, may be of help.

post1221614.html?hilit=gates#p1221614
 
Thanks Katellwood, I have already read your thread with great interest!
The idea of having the top bar removable is a good idea, I think I will look into that, it will help with another issue I have been keeping quiet about- once the posts are in place, how am I going to insert the top curved bar into them... If the top bar is split in two it solves that one!

While the advice is flowing, another question prompted by the image above, when I put the diagonal brace in, i'm going from corner to corner so do I need to cut the notch into the top cross bar as shown above or can I just run it tight into the corner? I guess it will then be trying to push the top centre joint apart, will it be best to cut a notch anyway?
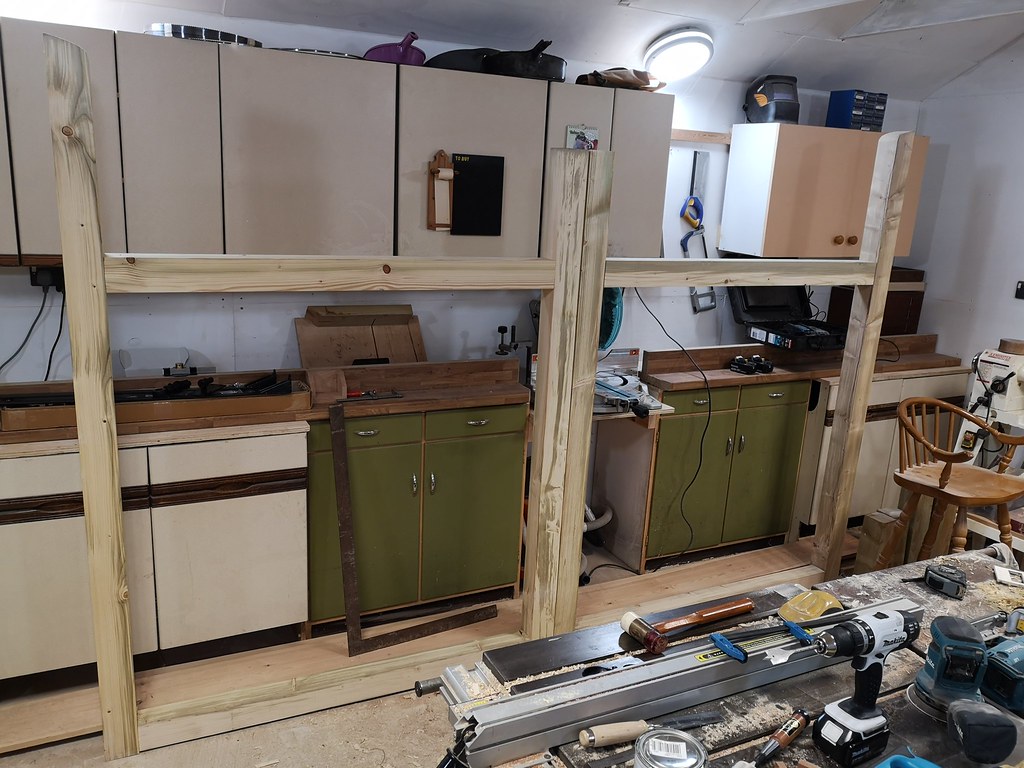
 
Re your bracing issue, if you are going corner to corner then the corner forms a natural notch (assuming the joint of rail and stile is adequate and with a mortice and tenon it will be).

Had I gone from corner to corner then the pitch of the brace would not have been sufficient. The notch stops the brace sliding along the middle rail under load
 
I've decided I will make the top arch in two pieces and join it with a large 'biscuit' joining piece inserted from underneath and held in place with dowels. This way no metal fixings will be visible from the front, to match the gates. If i'm clever with the shape of the biscuit then I can make sure there is nowhere inside for water to collect in case the joint does open up. The weight of the gates will be trying to compress the arch so it really shouldn't open up at all.

I finished another couple of mortices last night (8 down, 4 to go) and have sent Mrs Dandan to the timber yard with a sample of the cladding I want to order, then i'll be picking up my template for the curved top part of the gates on Friday. Once I have all the pieces of the puzzle the gates should come together quite quickly, hopefully a couple of weekend's work and they will be erected!
 
Hey Dan,

It's nice to see you here on the other, other channel. Assuming you're the same Dandan (same photo tho). You never post pictures of what you're doing in DIY Club (tho that is hard to do on UKC), but that's some top notch work you're doing there I have to say.

Cheers,

Matt
 
Are you Matt as in Mattrm? Yes i'm the same Dandan, some forum crossover was bound to happen some time! :)
 
More progress! I'm really rattling through this (for me), I even found a bit of time one evening to get a couple of mortices done.
All the easy square bits of both gates done:


This recent mild dry weather has been really useful for getting the posts and fences sorted, I temporarily put some OSB in place of panels so next doors garden wasn't open to the world and it hasn't seen a drop of moisture in a week, I was expecting to end up with two spongy lumps of mush, so that's a bonus.
On Friday I got the posts finished:


The right hand one is bolted to the wall with 6 recessed bolts, I will plug the holes once the gates are finished but will leave them open for now just in case I need to move it for any reason.

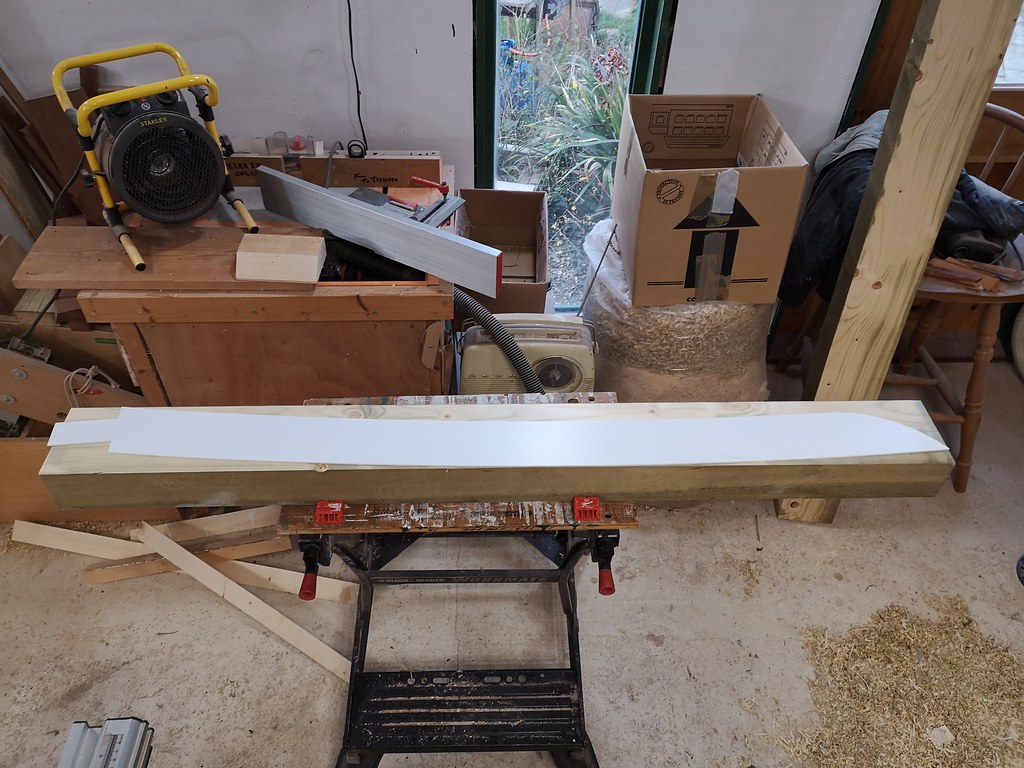
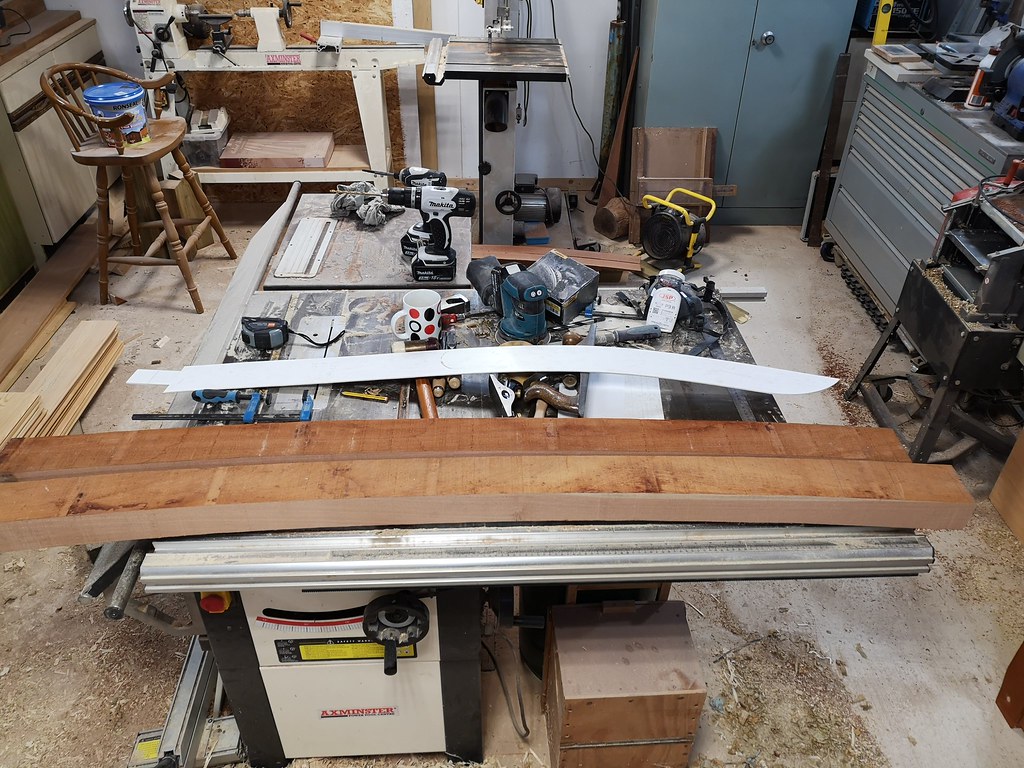
I picked up my template for the top bars, I had it cut from vinyl and transferred to a thin plastic sheet so it's reusable, here it is laid on the 4x6:


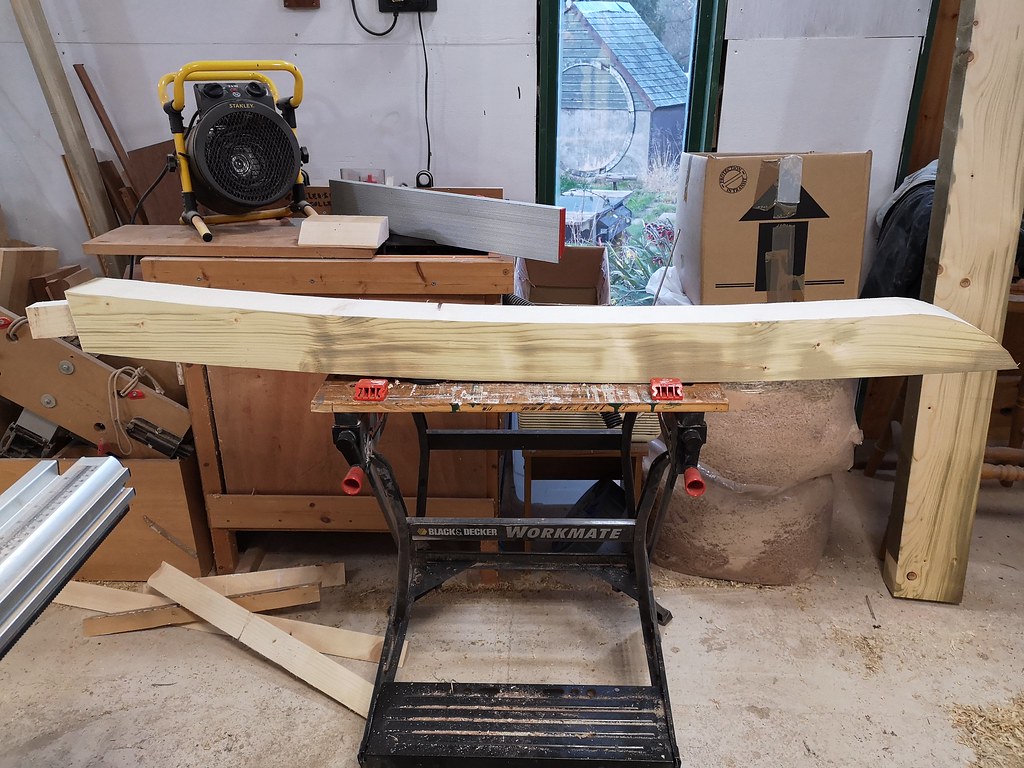
And here is the shape cut out, god I love having a bandsaw.


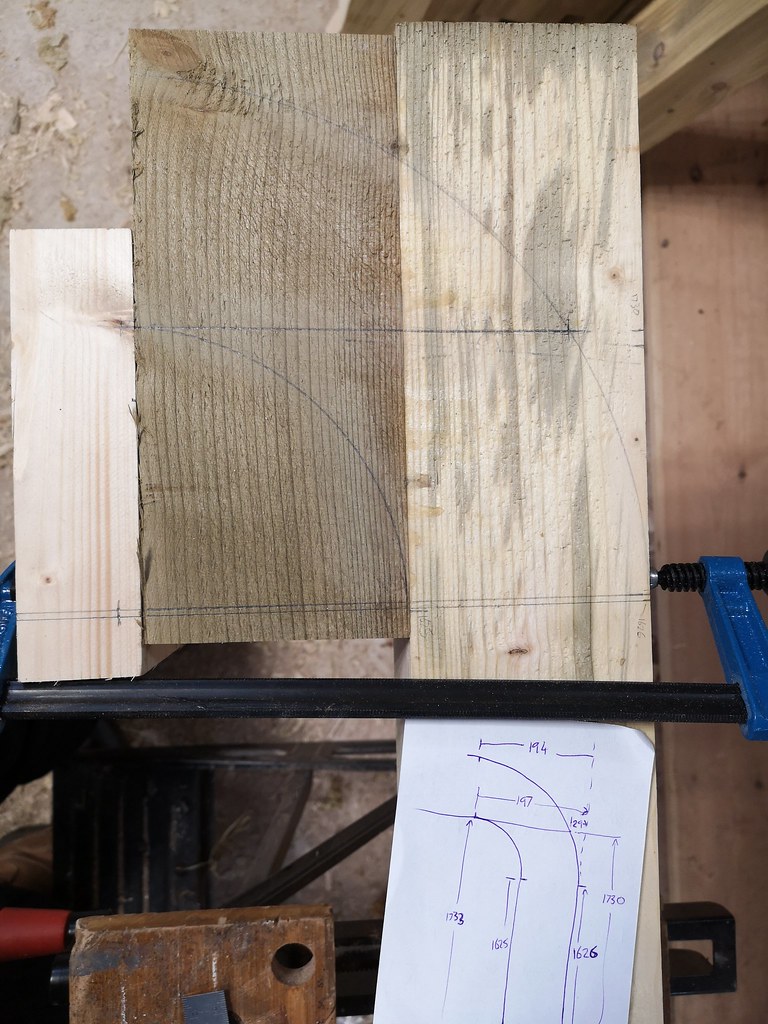
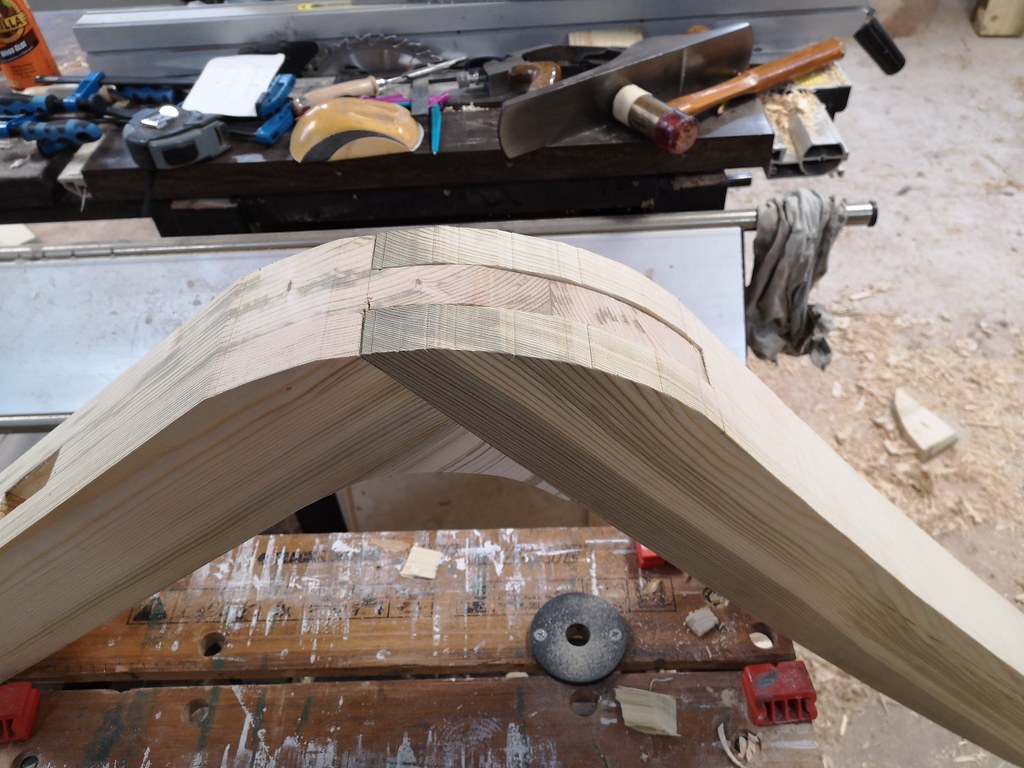
Now for the matching bit, i glued an extra lump of wood to the top of the inner uprights, then after a lot of checking and measuring, I got this curve marked out:


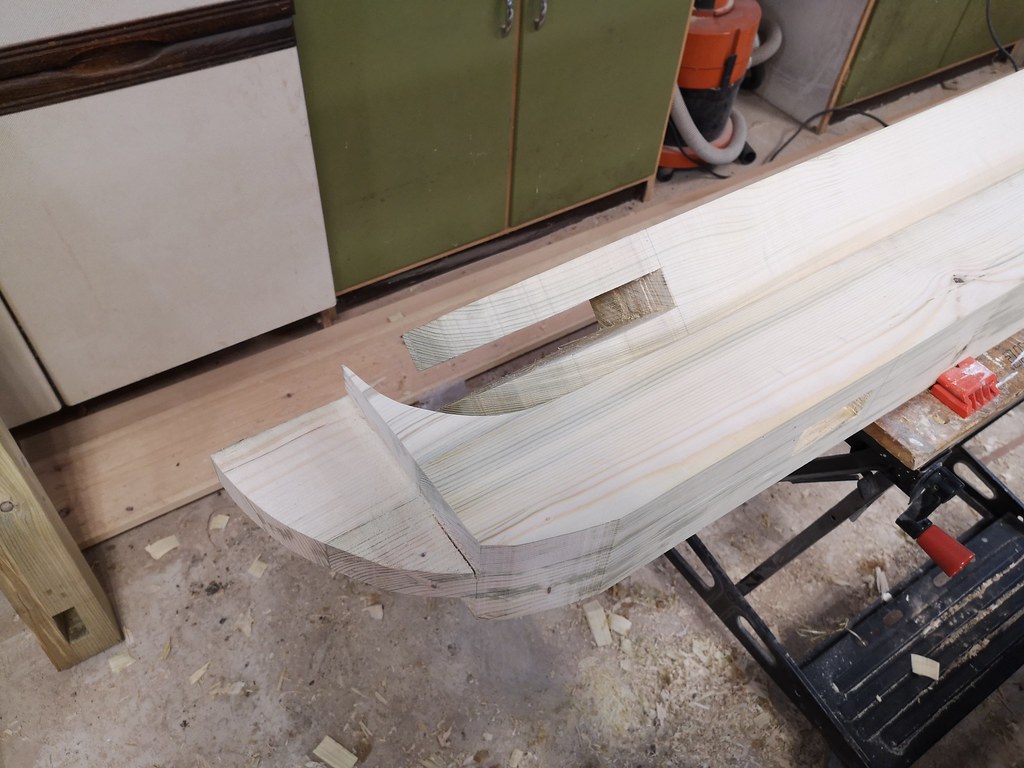
Cutting it was a pain in the bum because it had an 1800mm long tail hanging off the back, but I got there eventually and ended up with this:


Spot the definitely not deliberate mistake, making this joint in this way has left me with a tiny thin sharp point on the underside of the joint. It will be fine when all glued up but it's not ideal while trying to cut and shaped the upright, i'm not sure how the joint could have been improved to eliminate this thin spot?

Anyway, it looked ok once put together:


(I won't finish the shape of the outside curve until they have been glued up)

High time for another test fit!


Very pleased with that. Then it was a case of rinse and repeat to end up with 2 gates which are miraculously similar in all dimensions:


I've ordered the sapele for the big top bar between the posts which should be here next week, and i'm waiting on the larch cladding before I can cut a groove all round the lower part to accept it, just in case the new cladding isn't exactly the same dimensions as the stuff I had before.
The next job will be the decorative criss-cross for the top gap in the gates, I think i'm going to turn all the pieces 45 degrees so it's visually more interesting, it will make the joints a little more tricky but should be worth it.
 
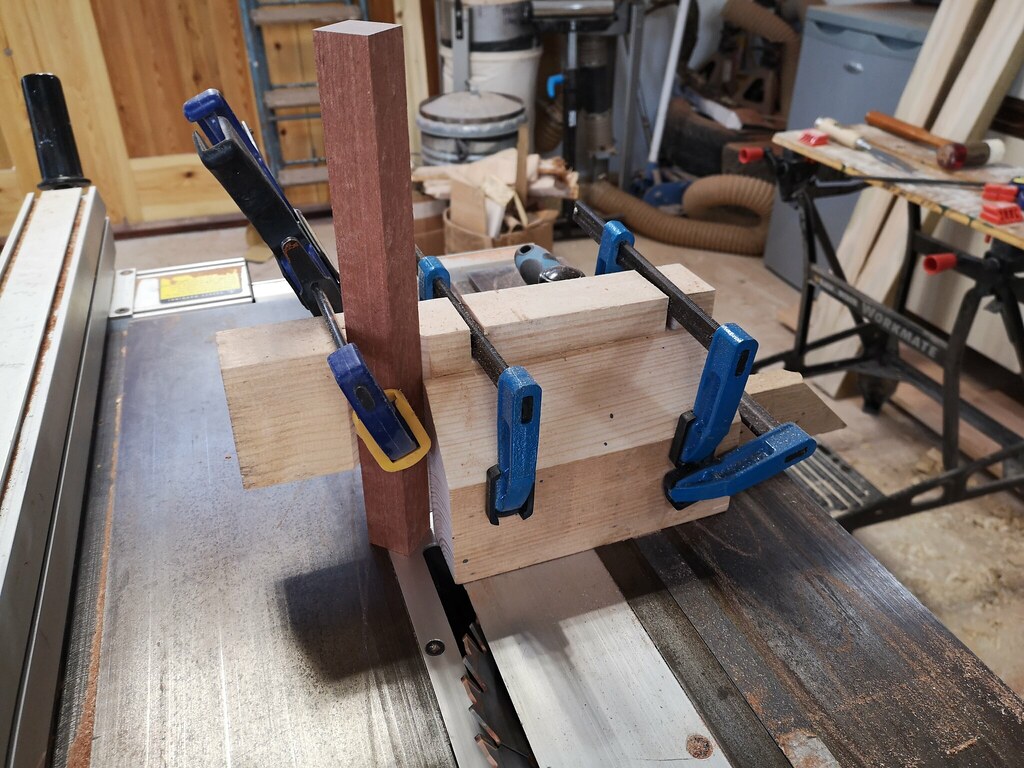
Moving swiftly along, the next job was the decorative lattice part at the top of the gates. I decided to bite the bullet and go for rotating all the pieces 45 degrees to and some visual interest, after a bit of experimentation I put together this highly technical and accurate jig:


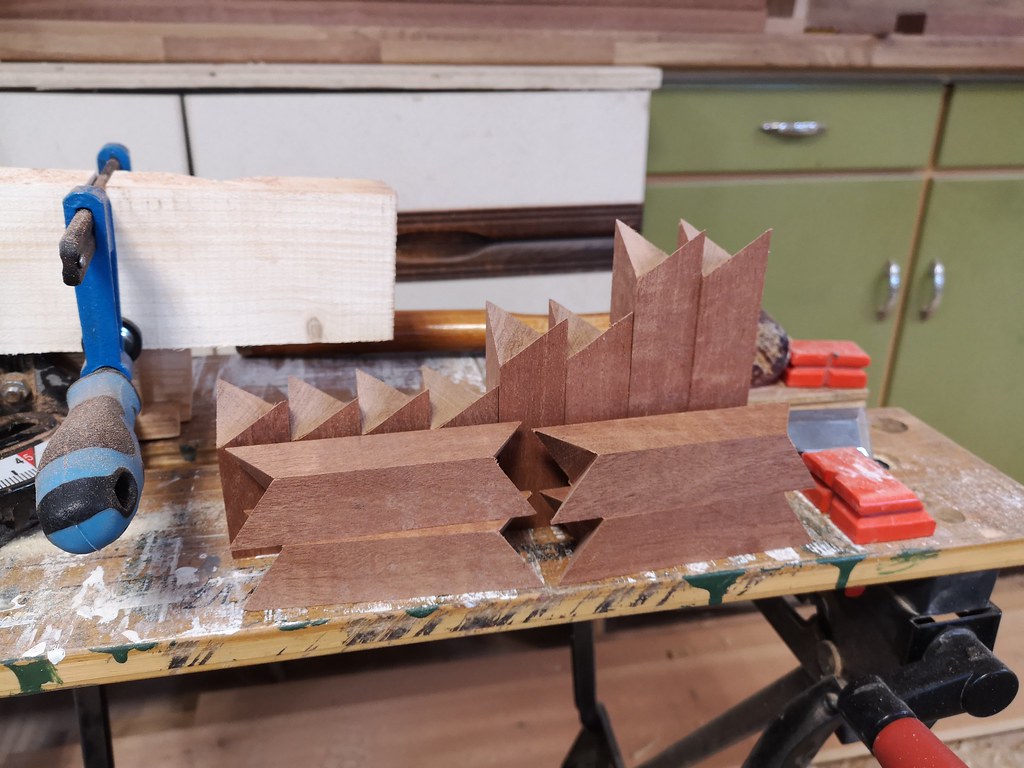
Which actually worked pretty well, it cuts a birds mouth in the end of the wood at 45 degrees to the faces.
I had always planned to do these in softwood but I managed to scrape together enough scrap sapele to cover it, meaning the angled cuts were much cleaner (compared to my softwood trial pieces) and the finished item should have a bit more visual contrast.
Here are the fruits of my jig cutting labours:


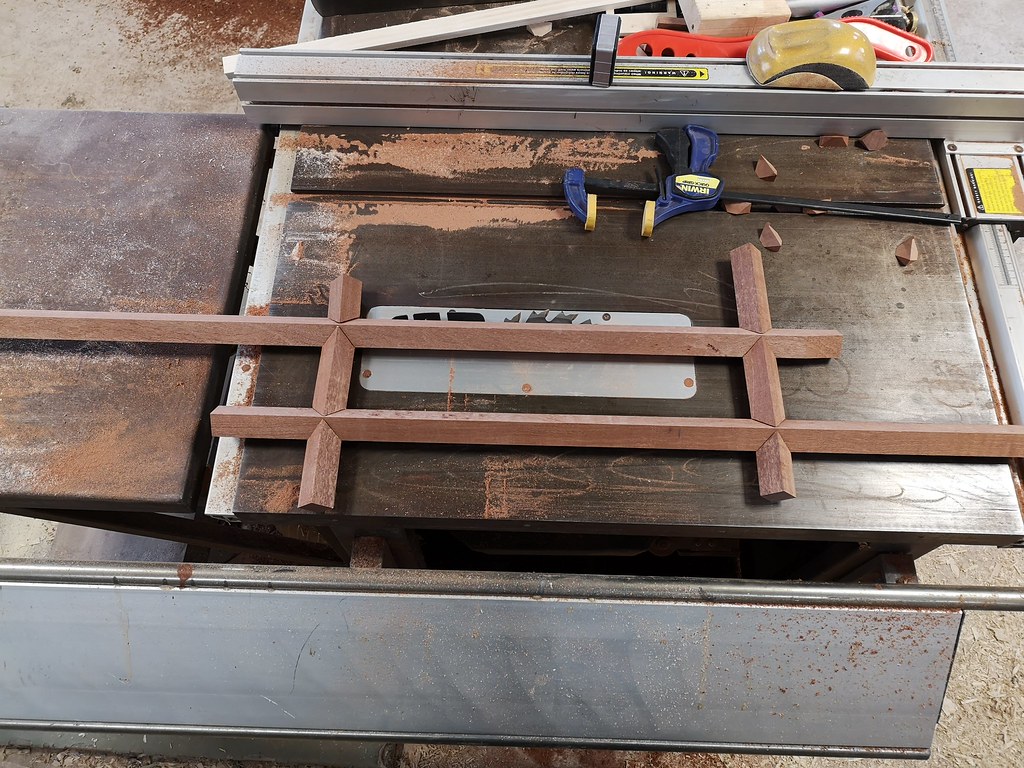
Which go together something like this:


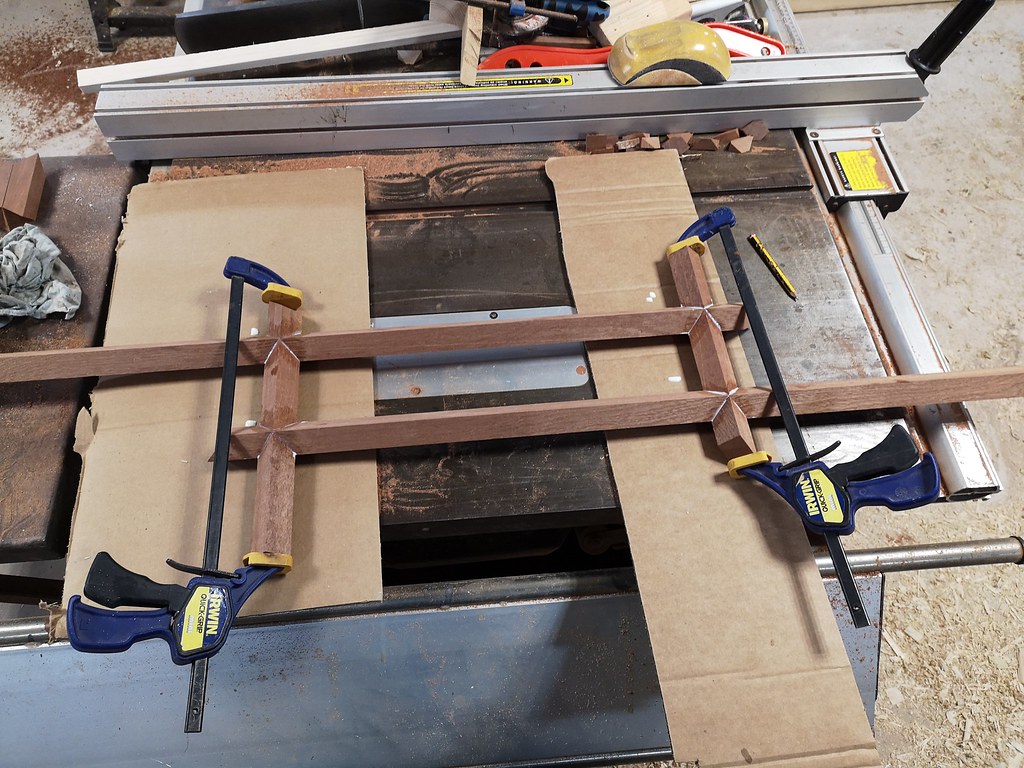
I then cut another 45 degree chamfer on the 4 free ends, I didn't get a picture of this specifically and you can't really see it on this glue up photo but it adds a little more interest than just square ends.


Once it dried i couldn't help but mock it up, I love how stark the shadows are on the different faces of the lattice, that will be lessened when it's outside and not under harsh interior lights but i'm still very pleased.


Just some small mortices to make to fit the lattices, cut a groove for the cladding (when it turns up) and we are most of the way there!
 
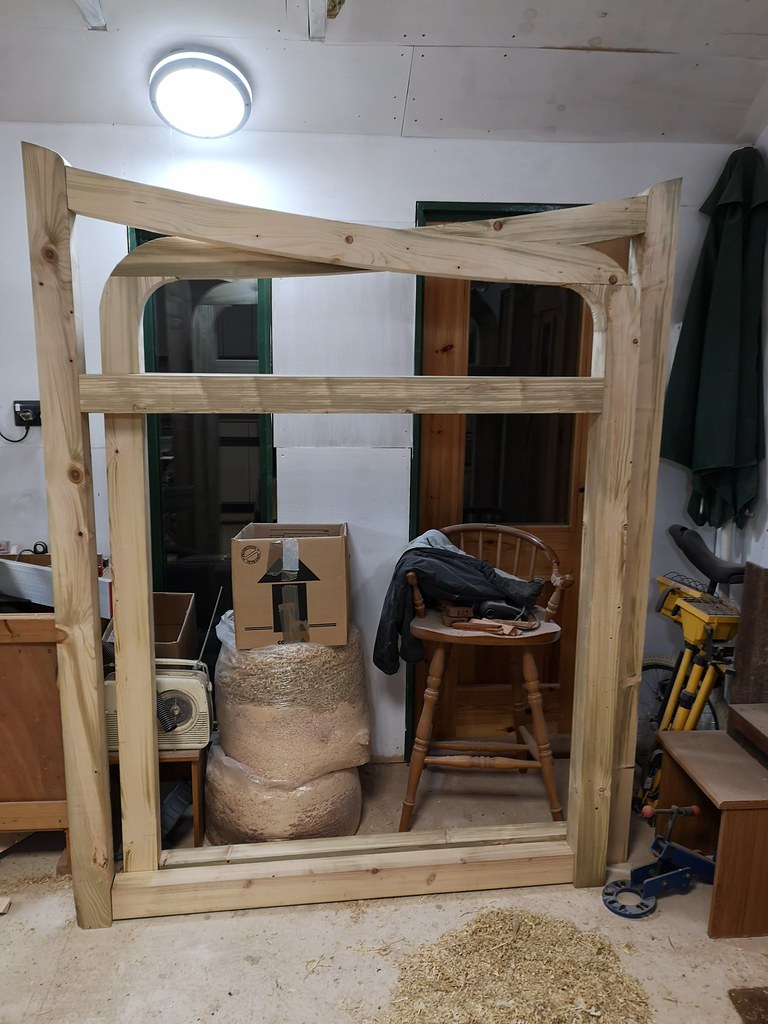
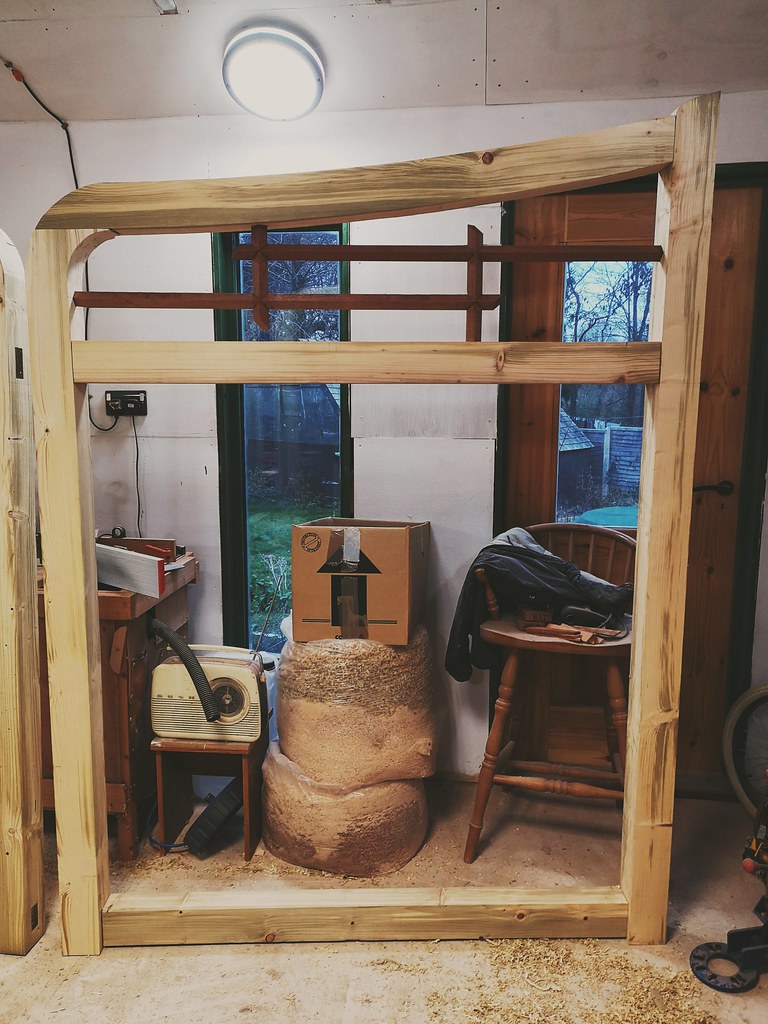
Had a bit of time after work today to cut the mortices for the lattice, couldn't resist another dry fit, i think it looks great:


The added bonus was that I can assemble it without risk of snapping anything! Having the open joint on the top inner corner means you can bring things together gradually to avoid any unpleasant forcing. I feel I should point out this was purely luck and not by design. :)
 
it looks amazing, if I saw a gate like this I'd salivate, stop and stare, the double mitre joint (not sure what this joint is called sorry) on the sapele looks really nice, it's going to really make a statement.
 
I had it in my mind that I was going to get the gates hung this weekend, i'll save you too much suspense and say now that didn't quite happen but it was very close, I made some good progress and to be honest I'm glad I didn't start rushing things just to get them hung.
I got the top curve made and fitted and got one gate hung, but nobody wants to see a picture of half a set of gates so you'll just have to wait. :)

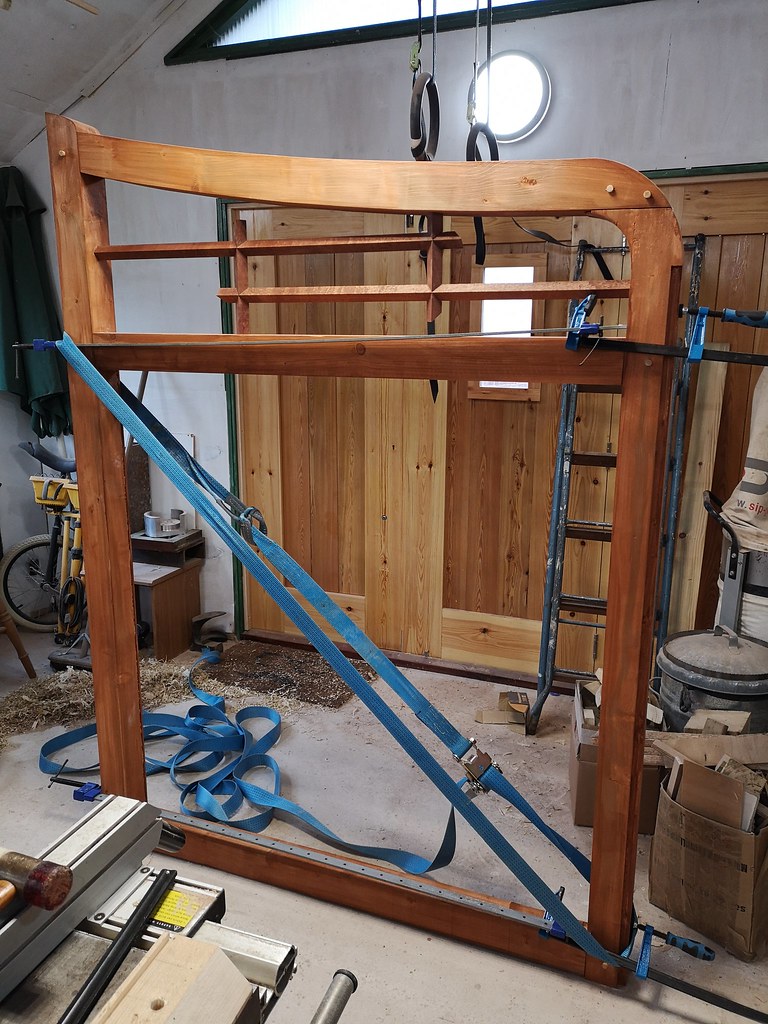
I put a first coat of stain on all parts before gluing up to make sure I got in all the nooks and crannies, then put a second coat on once they were assembled.


(The strap is to hold things square)

One thing I planned to do after the glue up was to shape the top inside corner curve where two parts join, it seemed much easier to get them to match after fitting, but in all honesty I forgot all about it so that needs doing and then re-staining really. I'm not a fan of the stain colour, it's a bit too bold for my liking, I should have gone for something paler but I'd already committed with the front fence so it might have looked odd to change it now. Hopefully it will calm down a bit with time.
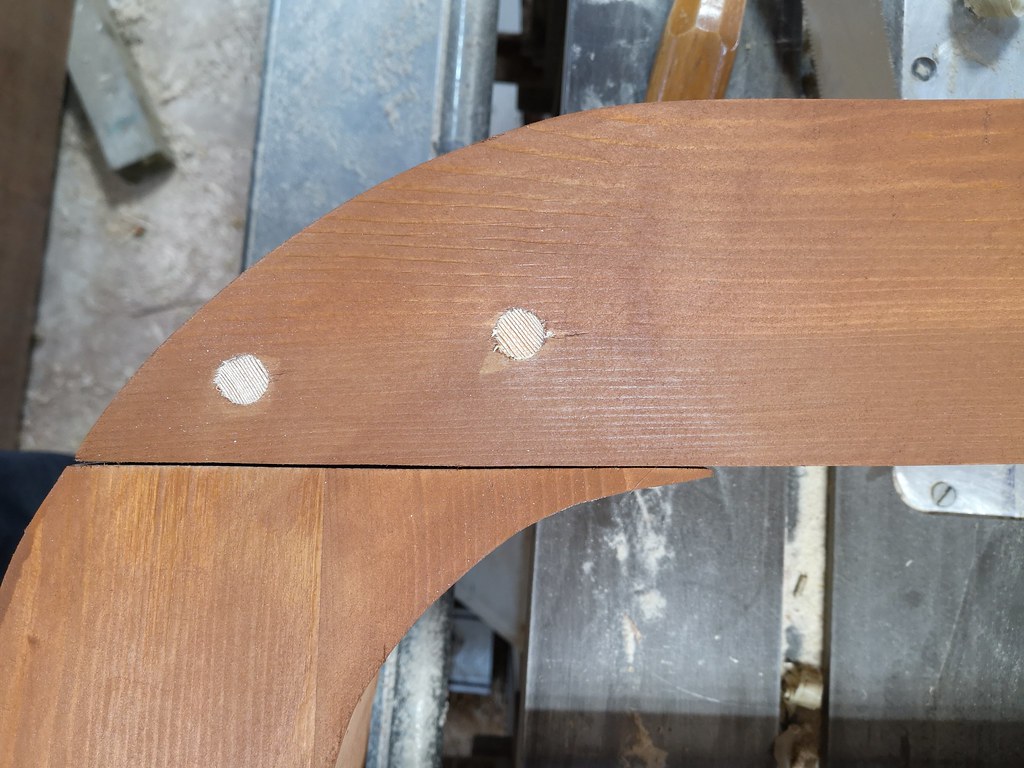
I used my snazzy Veritas dowel making die to make a bunch of larch dowels (for the colour contrast). Despite offsetting the holes slightly to pull the joints in, some of the joints weren't super tight, here is one of the worst offenders:


I guess I needed to offset more than I did, it seems quite an inexact science.

On Thursday I got a call to say my sapele and larch were ready, I was very pleased with the quality of the wood, the sapele is completely clear for the whole 4.5m length, and the larch is very dense and mostly clear. I did notice later than some of the larch has some sapwood on it though, I'm not sure if this is an issue, it certainly gives some visual interest.

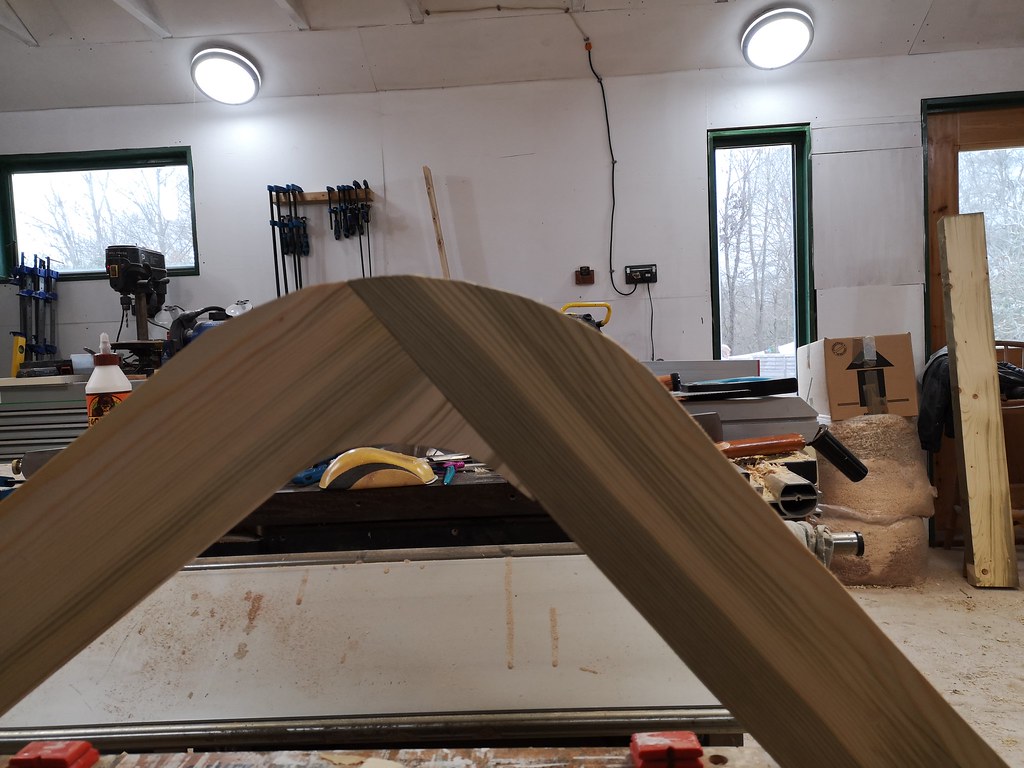
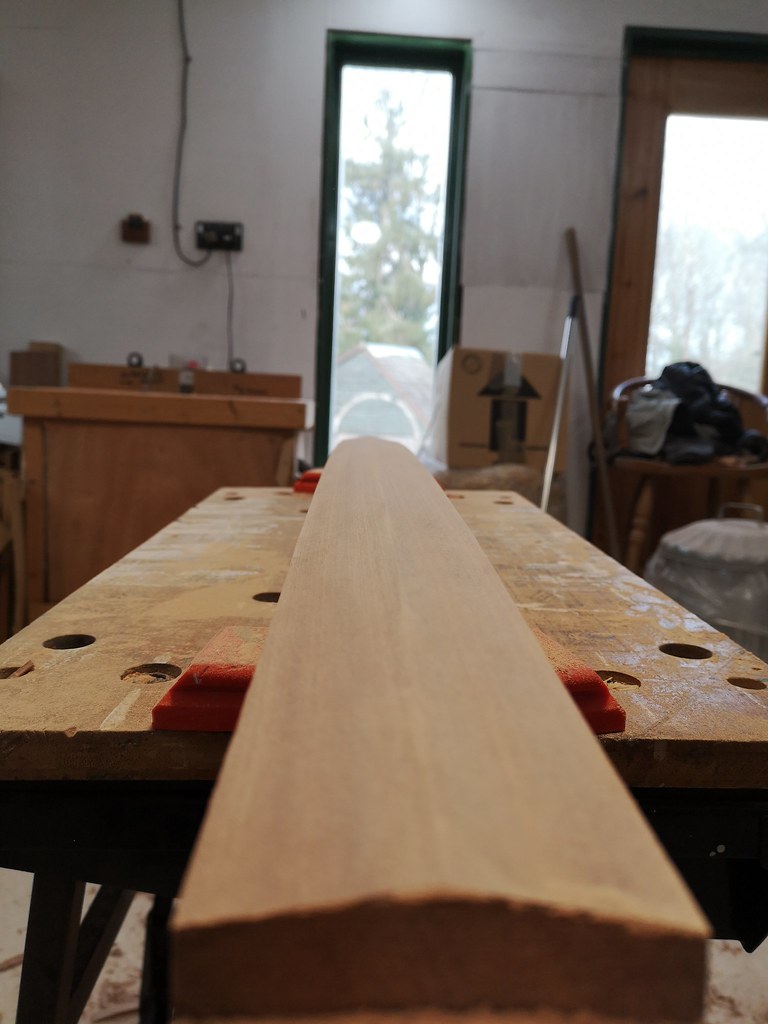
I used my plastic template from the tops of the gates to mark out 2 pieces for the top arch and whizzed them through the bandsaw (fast becoming my favourite machine)


Then through the planer/thicknesser to end up with pieces 60mm thick and 93mm between the curved faces (to match the gate timber width)
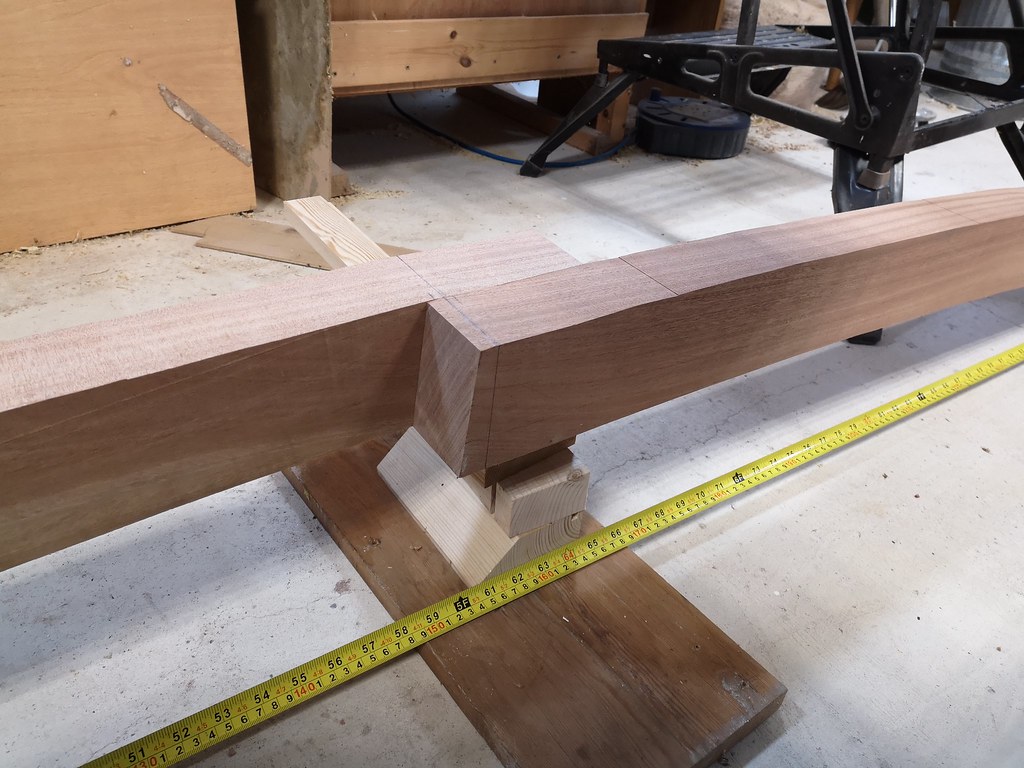
I set them down on the floor to measure and mark up the joint in the centre:


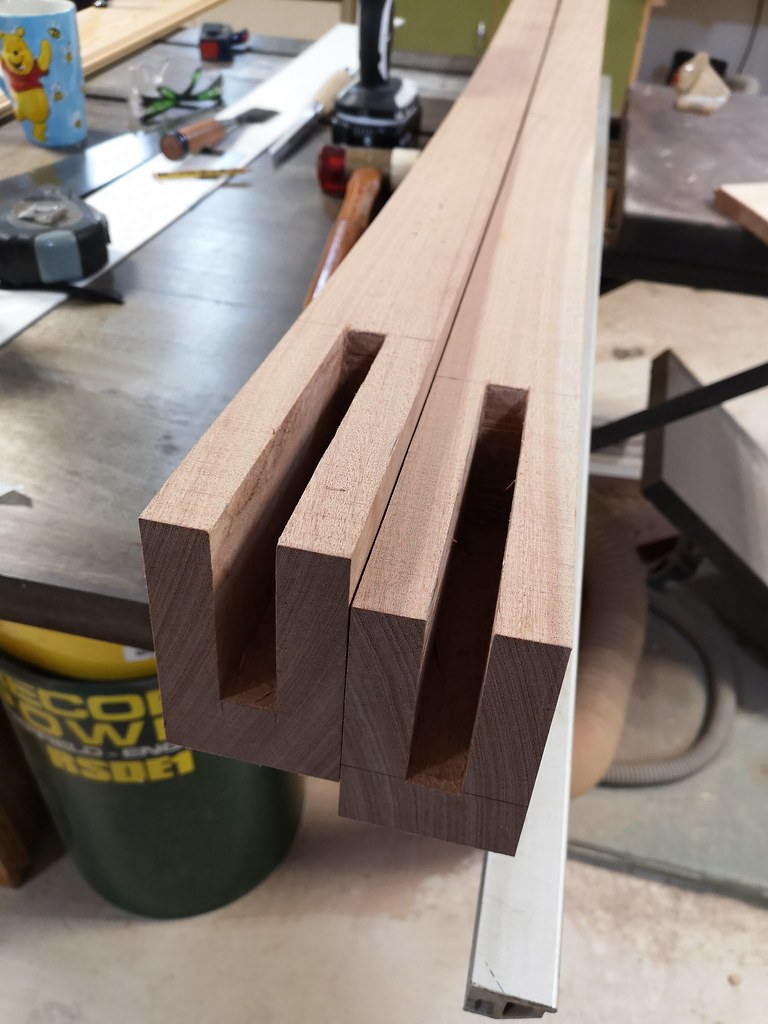
Then I cut two large mortices to take a big larch 'biscuit' to join the two pieces. Being a beginner, i've not used a lot of hardwood, and I can't wait to use more, it's such a pleasure to work with! It cuts so much cleaner with a chisel, these two mortices are probably 2 of the best that I have ever done, and they were so easy:


(the pieces are upside down here, the open part of the joint will be on the bottom)

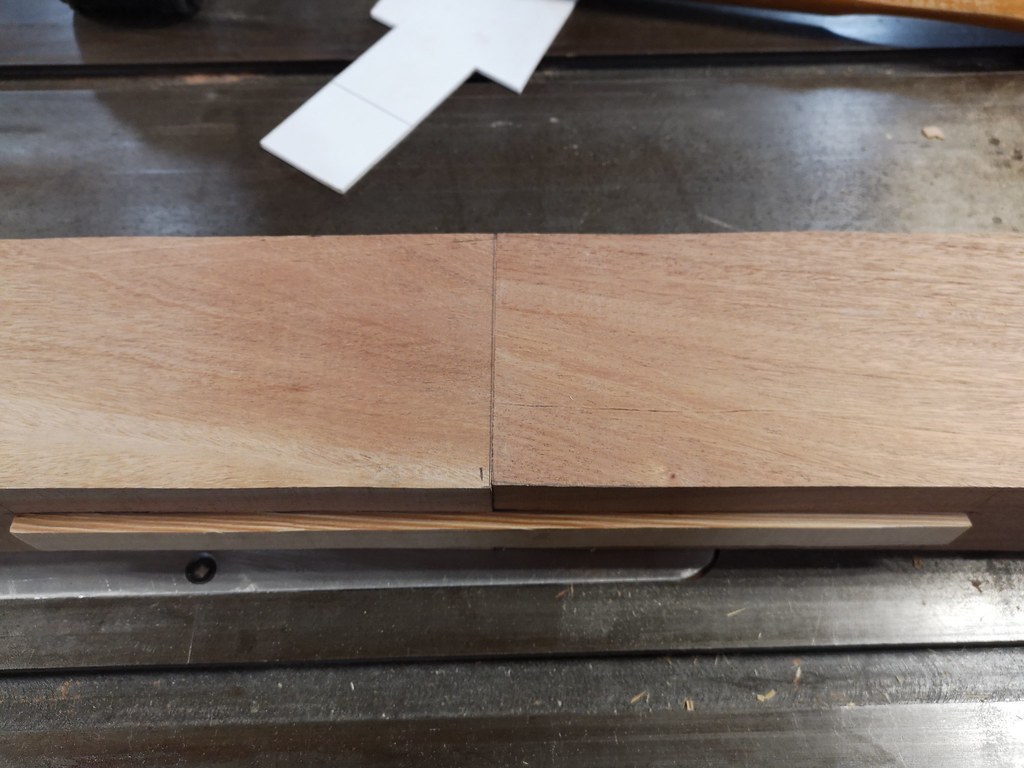
I made a larch biscuit and cut it such that if any water does get in the joint from above, every face is sloping downward so hopefully the water won't sit around inside. The two parts joined:


Tight!
I drilled 4 holes for dowels and then put a 10 degree chamfer along the top edge of the whole curve to discourage any water from hanging around up there too, this was roughed out on my new best friend the bandsaw and then hand sanded, I couldn't come up with any way to do this with a jig or a fence due to the curve. (Also it's 8ft up in the air so nobody knows it's there but me)


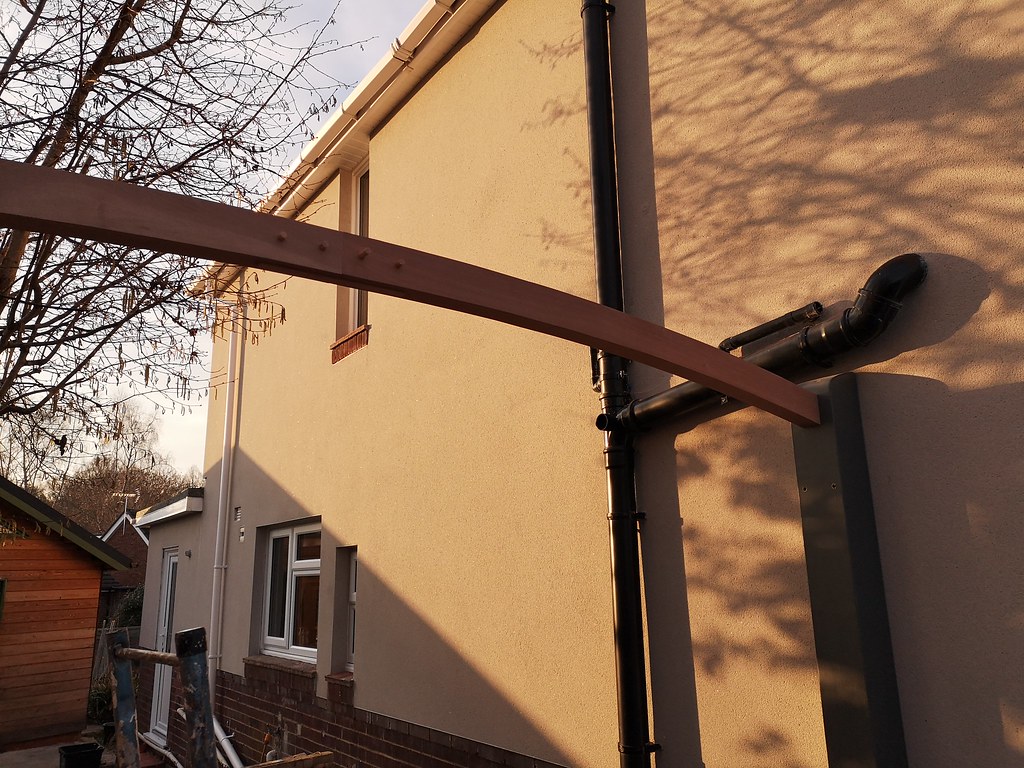
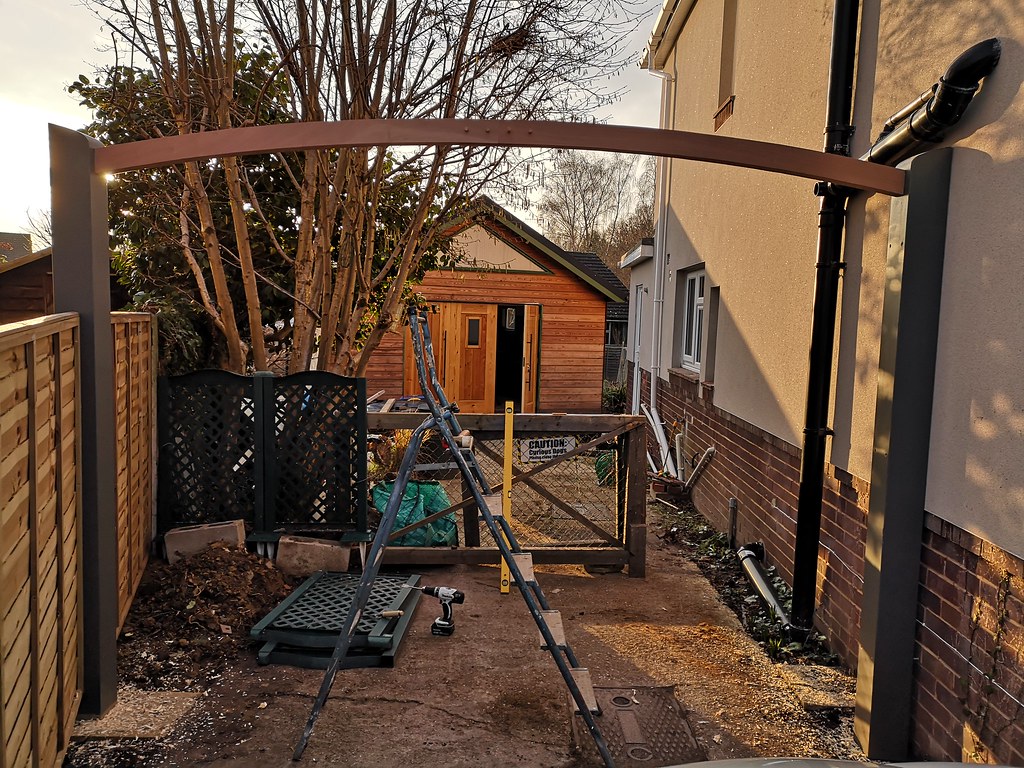
I went outside and cut a mortice into the top of each gate post, the plan was to put one half of the curve into place, then I had rounded the bottom of the tenon on the other half of the curve so I could pop it into the mortice at a high angle and drop it down to meet the other half. It sounds complicated, it really wasn't, I should have taken pictures. Amazingly it dropped into place perfectly, first time!


Not a screw or drop of glue in sight. The arch is now easily removable by knocking out the dowels and just lifting it apart, weather and expansion depending I guess...

Thats it for now, like I said I did get one gate hung but i'll wait until I have both up before the big reveal.
 
Dandan, it is such a welcome sight to see your work and progress and the feeling to me seeing some of my woodwork equipment getting and giving satisfaction, although I am missing my own days in the workshop, I have projects piling up my end which I just have to dream on these days.
 
Back
Top