Curvy Oak Kitchen

UKworkshop.co.uk

Help Support UKworkshop.co.uk:

This site may earn a commission from merchant affiliate links, including eBay, Amazon, and others.
Hi jake the top bullnose piece is made on the spindle. The curved parts are made using mdf jigs with a profile block guided by a bearing. You just have to make sure you have some lead in on the template.

The parts are then put together and joined with dominos and pocket screws as the curves are too hard to clamp.

Jon
 
Nice Kitchen Jon, Ilike the way the grain is on all the curved rails, they must have been cut from the same block of wood, I don't suppose you have any WIP pics to show how you acheived all this mavelous work.

If I have any criticisms, I don't like the wardrobe type cupboard, thats just personal taste.
 
CWatters":3hqdsajw said:
Very nice work. Particularly like the bead (wrong term?) around the door openings.

Have to agree -I think the beading really sets it off nicely -lovely work
 
nice work Jon,

you must have worked all 7 days of each week to turn that out!

got my timber quote yet?

John-Henry
 
Really, really nice - love the cabinets.

Tiles and floor not my taste, but I love the standard of the cabinets.

Thanks for sharing.
 
amazing, simply stunning. how did you make the curved oak frame sections? are they cut on a band saw from thick sections or are they steam bent?
 
JimJam":3dnxr4d8 said:
Tiles and floor not my taste, but I love the standard of the cabinets.

I think the mundane tiling really detracts from the kitchens appeal. We can see what great work has gone into the kitchen, but I wonder how many potential purchasers wouldn't look twice at it because of the tiling?

Cheers

Karl
 
Lovely work! The frame beading gives it the extra touch!

What sort of finish have you put on it?
 
Karl":1f7otzb5 said:
JimJam":1f7otzb5 said:
Tiles and floor not my taste, but I love the standard of the cabinets.

I think the mundane tiling really detracts from the kitchens appeal. We can see what great work has gone into the kitchen, but I wonder how many potential purchasers wouldn't look twice at it because of the tiling?

Cheers

Karl

indeed and what were they thinking when they chose that sink ???? none of which detracts from jonnys execlent cabinets - i presume the tiles, sink etc were a client decision
 
The tiles and sink were the clients decision. They are not to my taste but in real life it looks better than the photos.

A few answers for you

John - should have the quote early next week

Geno - the finish is an Acid Catylsed Laquer with a 10% sheen level

Martin - Sorry I havent got any WIP pics of this project

Out in Shed - The curved sections are cut from solid timber. The framing from 52mm stock and the door rails from 80mm stock (expensive stuff). The wood is planed to near final thickness and then the parts are bandsawn out. The pieces are machined on the spindle moulder using a big bearing and straight cutting block.

Bearing and block a bit like a large bearing guided router cutter when assembled

jig-01.jpg


You need jigs for each different radius and for both inside and outside curves. The inside curve is machined first followed by the outside.

One of the jigs

jig-02.jpg


The jig is doublesided so that you can machine the wood from both sides so by flipping the jig over you can always be machining with the grain and you get an excellent finish with no tearout. I have made up an MDF guard for the spindle so there is no chance of losing any fingers.

Jon
 
Excellent work.
I'd be interested to hear why you make the curved rails out of solid stock?
I laminate them from 2.6mm 'constructional veneers', using a male/female former setup (soon to be replaced with a male only vacuum bagged setup.)
Very impressed with the quality of the joints, particularly the curved doors. Also, I'm VERY impressed that you've got concave doors in a beaded frame. Did a job recently with the same setup and it turned out to be a fookin nightmare to get that one door looking good.
Nice attention to detail, and you got the grain matches spot on, from what I can see. How long have you been at this kind of work?
You must be very proud. And all in 8 weeks!

Adam.
 
RILEY":z3ue74pm said:
I'd be interested to hear why you make the curved rails out of solid stock?

I too would normally laminate them. My concerns about making them from a lump of solid wood have always been threefold;

1. Cost of the timber.

2. Weak spots where the grain runs across the rail.

3. Unnatural looking figure due to the curved cut not matching the adjacent flat doors.

You seem to have overcome these concerns and I will have to reappraise my thinking.

I have never attempted curved beaded frames. I'm still trying to work out how you do it!

One of the best projects we've seen here, Jonny.

:lol:

Brad
 
Hi Brad / Riley I had the same concens about using solid stock rather than laminating. I experimented with laminating the frame components and found that the springback was hard to calculate and the components were moving all the time. I used titebond, Cascamite and epoxy and they all moved to some extent although the epoxy wasnt as bad as the other glues. I was getting Pi***d of with it so I decided to try solid timber and found it a lot more stable and havent had any problems with it and one of the kitchens I have done had 11 curved doors in it.

Riley I would be intersted if you have had any of these problems with laminating. i was using 1.5mm beech in my trials.

In answers to your question I have been wooodworking for about 15 years. I graduated from a furniture design degree in 97 worked for a few people and started on my own in 2001. I agree the internal curved doors are a bit of a pig to get right.

Brad the curved beaded frames arent that complicated. I mould the stock on the spindle using separate jigs for internal and external curves. The curved component is sized on the table saw with a jig to hold it at the right angle. The 45 degree ends are cut with chamfer cutter in a handheld router and then the bead is put on with a bearing guided router cutter in the router table. The frame is then domino jointed and then assembled with screws to pull the joints tight. Simple :D

Jon
 
I'm so impressed I'm almost in tears!

Well done that man (and helper), and a virtual drink for the effort!
Seriously, if my wife found this site, and this thread, I'd be divorced...

Hmmm, maybe I should show her your work? :p
 
Johnny, in my experience, the frame rails do spring back a little, but once they're jointed and the frame is glued to the carcase, they're going nowhere!
Brad, this is my process for a curved beaded frame....
Laminate the stock for the frames.
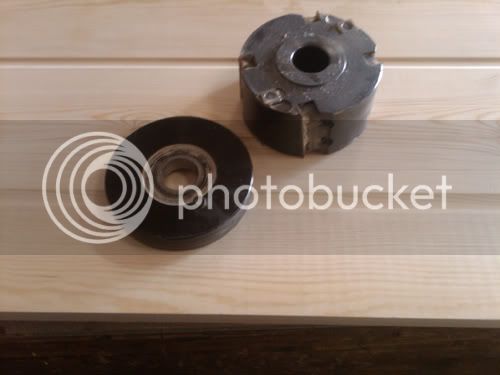
Cut the frame components to length, starting with the verticals. Mark out and cut the joints as usual (using mortar groove cutter and jig - I believe you do the same, unless you've changed to router table mode).
Clamp (I use a Kreg face frame clamp) the rails to the carcase and mark off (using a spacer the same depth as the 'mortise' in your joint - in my case 7.5mm) from the internal carcase side. This will give you your angle for the first cut.
Make this cut however you feel comfortable.
Cut the 45 degree joint (I use a modified donkeys ear shooting board and block plane)
Fit the joint and mark the other side.
Repeat for the other rail.
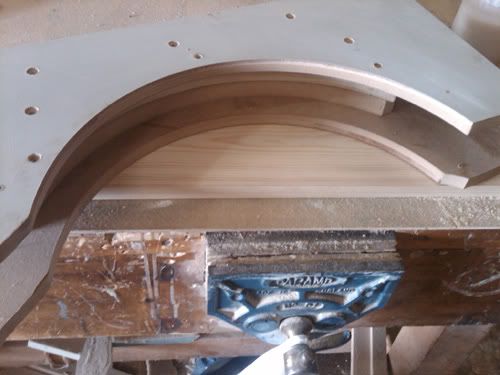
Up until this point, all the frame members are un-moulded.
Dry fit them to the carcase and blend the frame in (you'll probably have to take the edge off the verticals.
Now disassemble the frame, bead on the router table, reassamble and glue to the carcase.
I can probably joint and fit one frame in the time it took to explain this.
I hope that makes sense.
It probably doesn't though....... :wink:

EDITED FOR SPELLING
 
You do not say if this is your kitchen or for a client? This is seriously professional work,
well done.

Regards
 
Hi the kitchen is for a client. I have been planning my own kitchen for about 5 years but havent got round to it yet.

I would like to thank everbody for there interest in this its much appreciated.

Jon
 

Latest posts

Back
Top