DBT85
Established Member
The ender 3 Pro is here. I already want an adapter to go from my mitre saw to my vac. Why do these sprouts insist on making up random sizes!


 20200514_190302
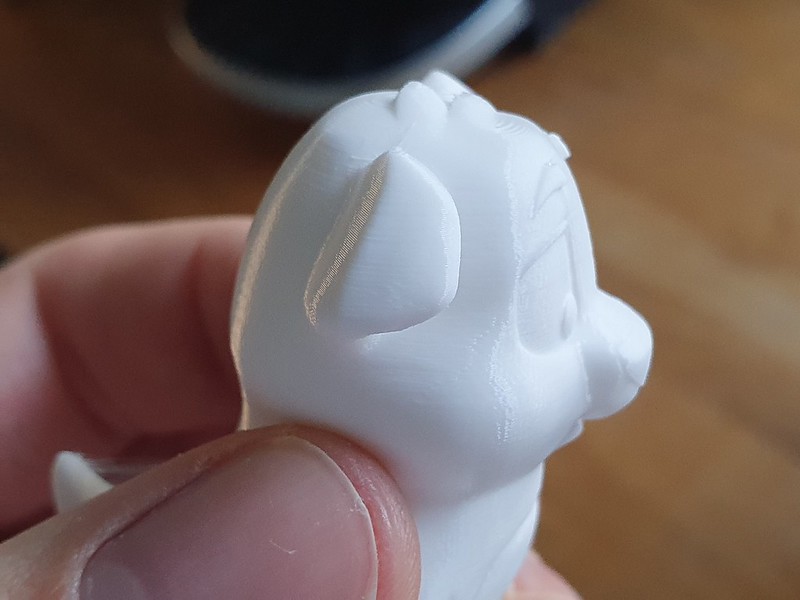 20200514_190258
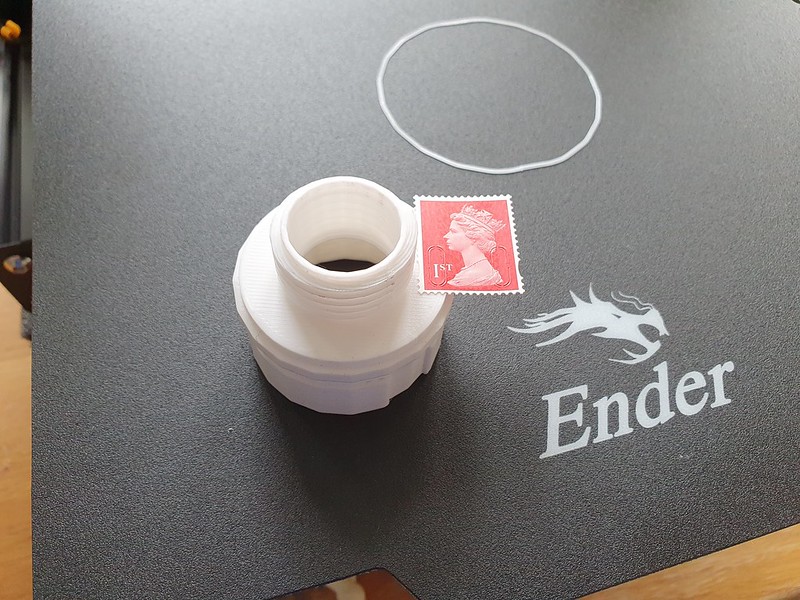
It was 2 hours to print and yeah, you just leave it to it. If it had an issue you might come back to a spaghetti mess, but if you keep the occasional eye on it you can cancel it if its looking bad.marcros":135x2d8p said:Is that 2 hours to print or is there design time on top of that?
When it is printing, can you just leave it to it?
 IMG_9718 by jamie skinner, on Flickr
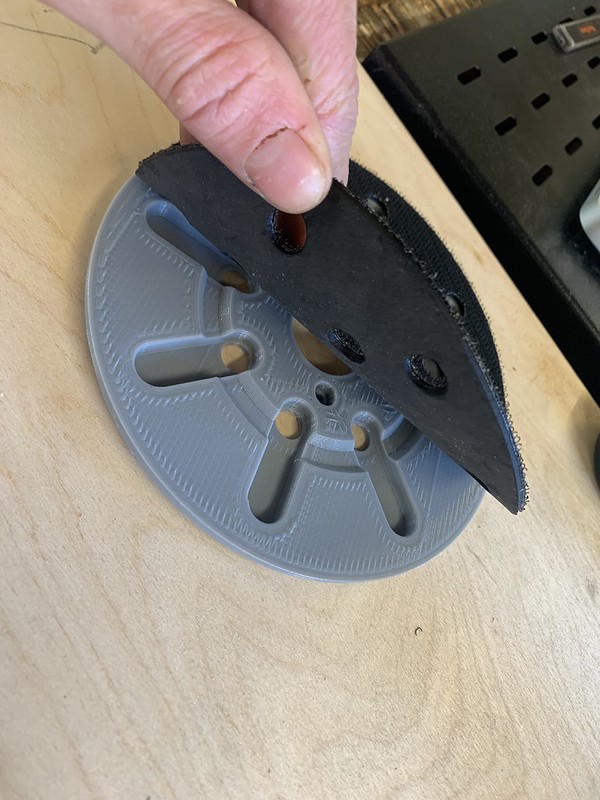 IMG_4546 by jamie skinner, on Flickr
 IMG_8394 by jamie skinner, on Flickr
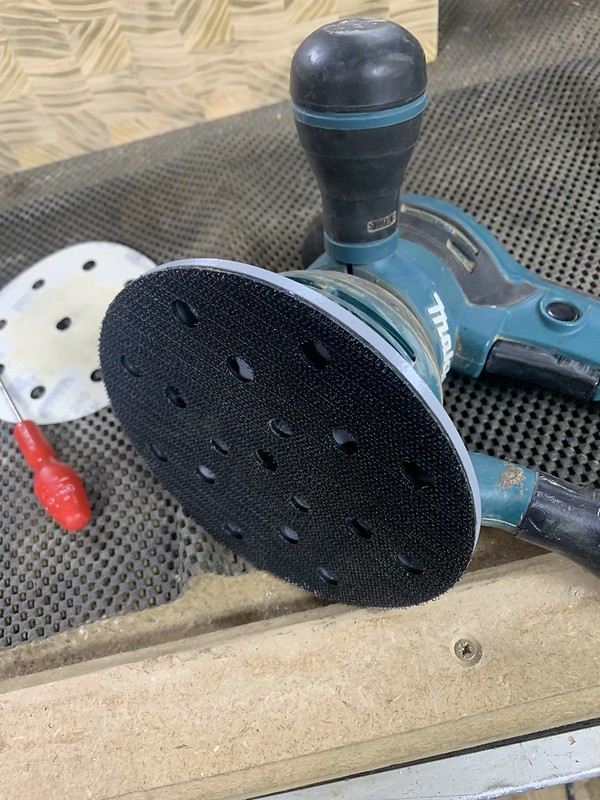 IMG_8395 by jamie skinner, on Flickr
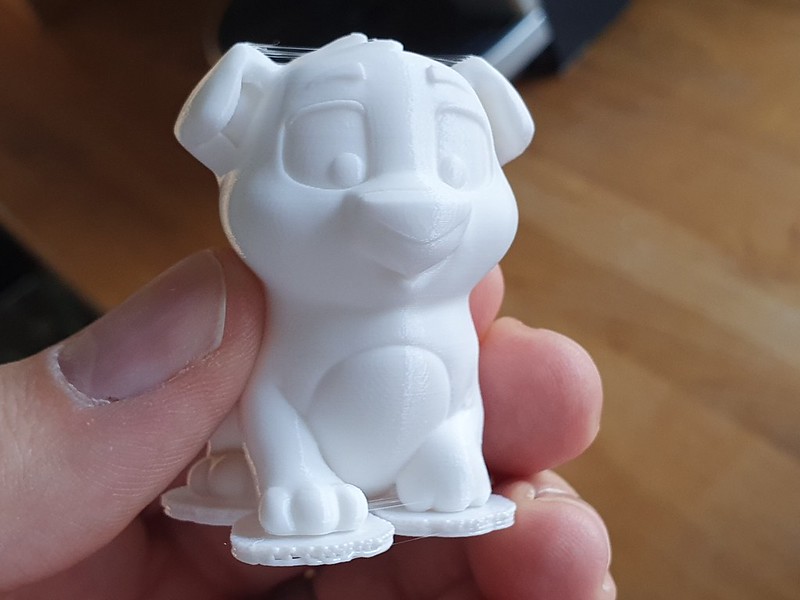
I'm sorely tempted by the banggood product. Have you hit any issues?DBT85":3bz8mrxy said:First print right off the bed. It was one of the models included in the printer so nothing fancy, no settings changed or anything. Not bad for a £196 printer.
This will easily do the bits I want it to do.
SkinnyB":1uz6qzto said:Here is my latest design 3D printed. 2 hours to print. I run a 1mm nozzle over the standard 0.4mm nozzle, so essentially I lay down plastic over twice as fast as a standard nozzle. This works great for the print I do as they tend to be big parts so really speeds up the time.
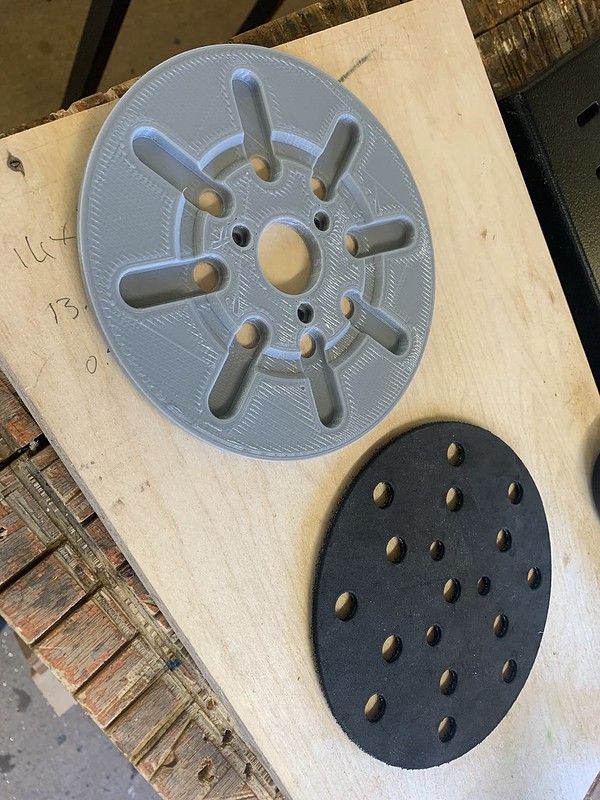
I wanted to put 150mm sanding discs (Mirka silver Ace only available in 150mm) on my Makita 125mm sander. So designed and 3d printed a larger plate for it. Added some foam and velcro and all under £5. The slotted design allows for suction holes outside of the 'body'
of the sander so it still pulls in dust from the very outer holes.
I also designed one to take 9 hole and 8 hole discs as I accidentally bought 9 hole instead of 8 hole once.
None at all, bu bear in mind its only been a couple of days. It has been printing things for about 24 hours so far in total, today just parts for itself like cable clips and stuff.Deadeye":1uz6qzto said:I'm sorely tempted by the banggood product. Have you hit any issues?
DBT85":14de55ix said:First print right off the bed. It was one of the models included in the printer so nothing fancy, no settings changed or anything. Not bad for a £196 printer.
This will easily do the bits I want it to do.
I can make a steps per mm adjustment, but if a 20mm cube is nigh perfect I don't quite know what I'd need to adjust. I'll ask on reddit maybe.CHJ":3qbuin65 said:A calibration adjustment for the stepper motors in the firmware by any chance?
 IMG_8688 by jamie skinner, on Flickr
Yeah unless you have the desire to design your own stuff it is largely a bit of a toy.marcros":1d14bm41 said:This thread alone has been enough to confirm that I don't want a 3d printer. It is very interesting stuff, fascinating in fact, but I hadn't realised there was quite so much to it.
 IMG_8694 by jamie skinner, on Flickr
Can I ask why you changed it to 0.3 in the first place? I assume just for print speed. My nozzle is only 0.4 so I guess 0.2 is basically where I'll stay unless I get a larger tor smaller nozzle.SkinnyB":1x3gd04d said:And just by reducing the layer height back to 0.2mm we have a much better part.
marcros":e980q06f said:This thread alone has been enough to confirm that I don't want a 3d printer. It is very interesting stuff, fascinating in fact, but I hadn't realised there was quite so much to it.
Enter your email address to join: