burr oak veneer laptop box

UKworkshop.co.uk

Help Support UKworkshop.co.uk:

This site may earn a commission from merchant affiliate links, including eBay, Amazon, and others.

ColeyS1

Established Member
Joined
2 Nov 2009
Messages
4,245
Reaction score
35
Evening all,
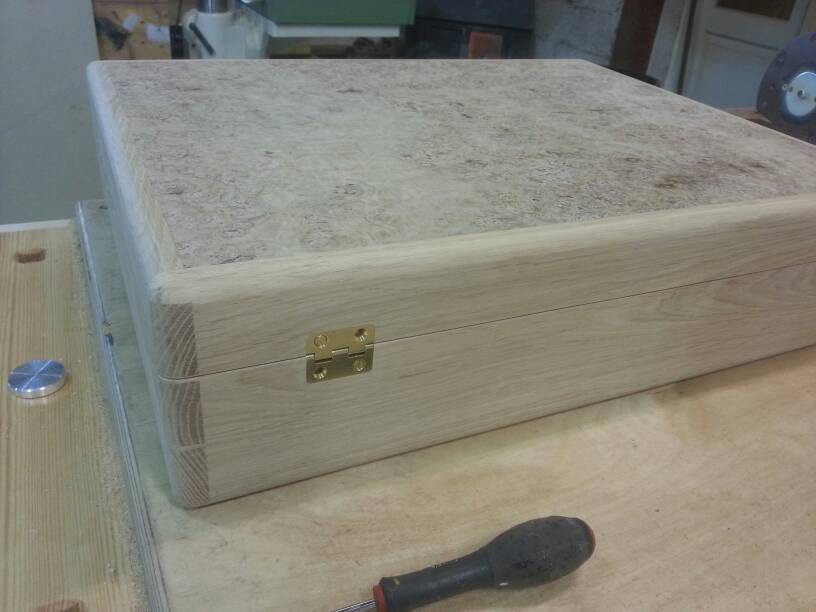
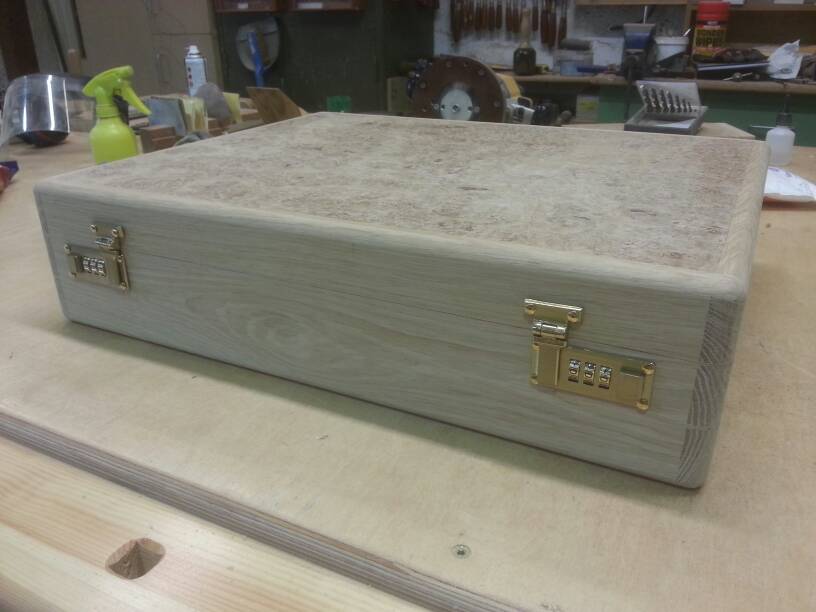
Over Christmas i decided id try making a laptop box with hand cut dovetails. It wasnt going to be anything special but i thought it would be a nice change from making windows every day.

20130316_141956_zpsda00cd03.jpg


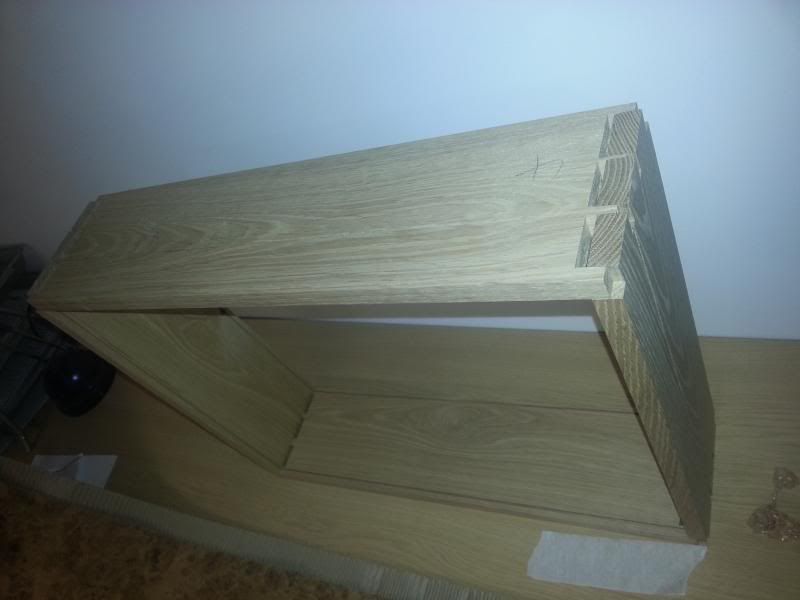
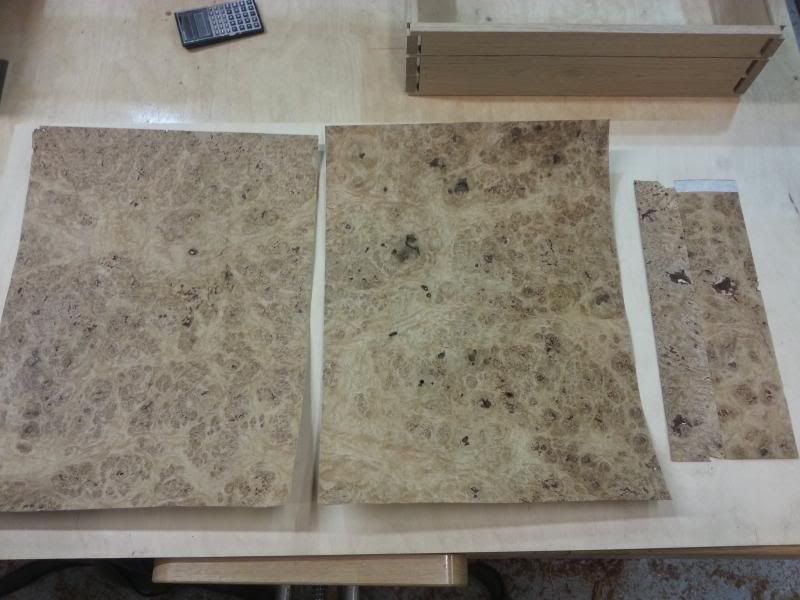
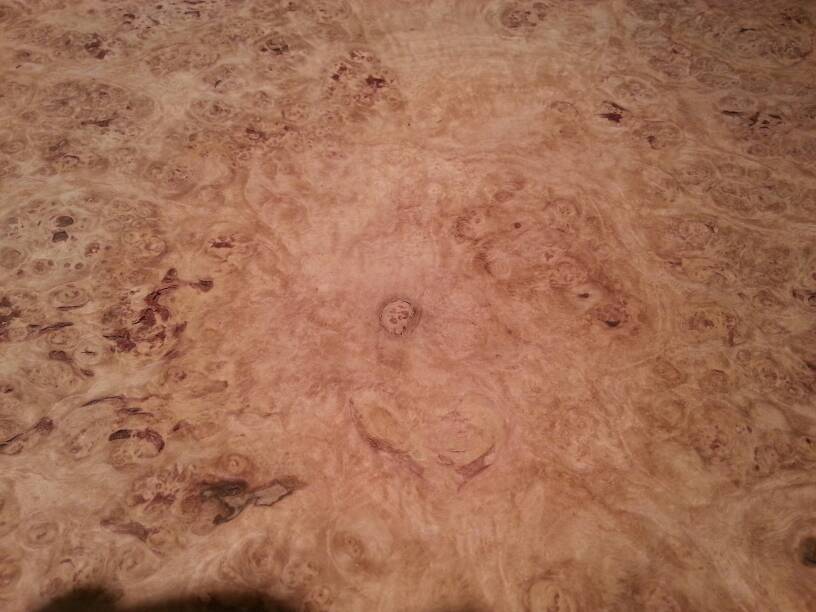
The dovetails turned out o.k. I'd put aside a piece of oak mdf to use for the top and bottom but when it came to fitting, turned out the wood was too small anyway #-o :lol: It was then i had the silly idea to splash out a bit and buy some burr oak veneer.

20130316_142055_zpsa6e4deb2.jpg

20130316_142017_zps5871ea3e.jpg

20130316_142032_zps70a0c4f8.jpg


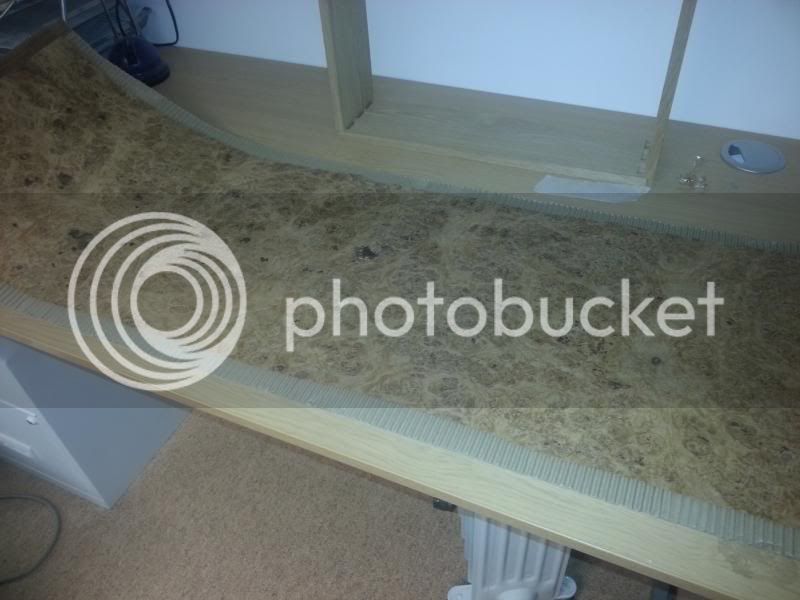
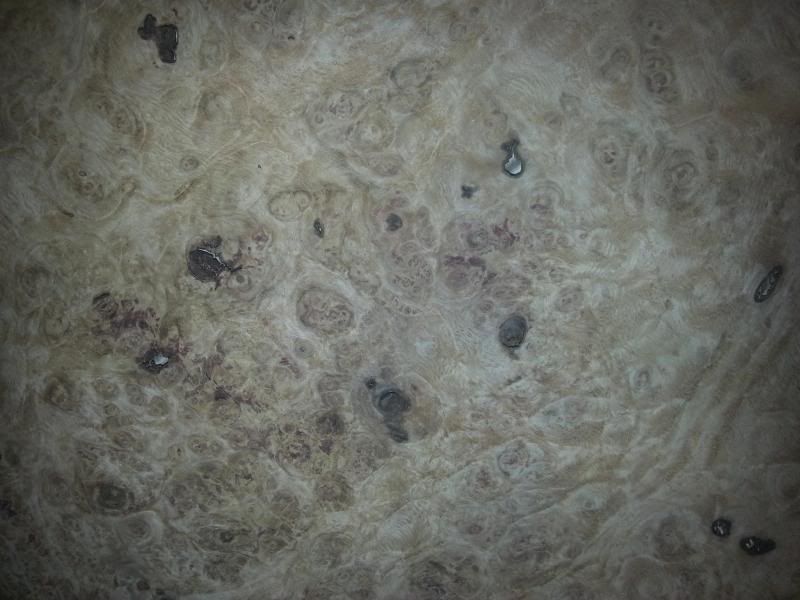
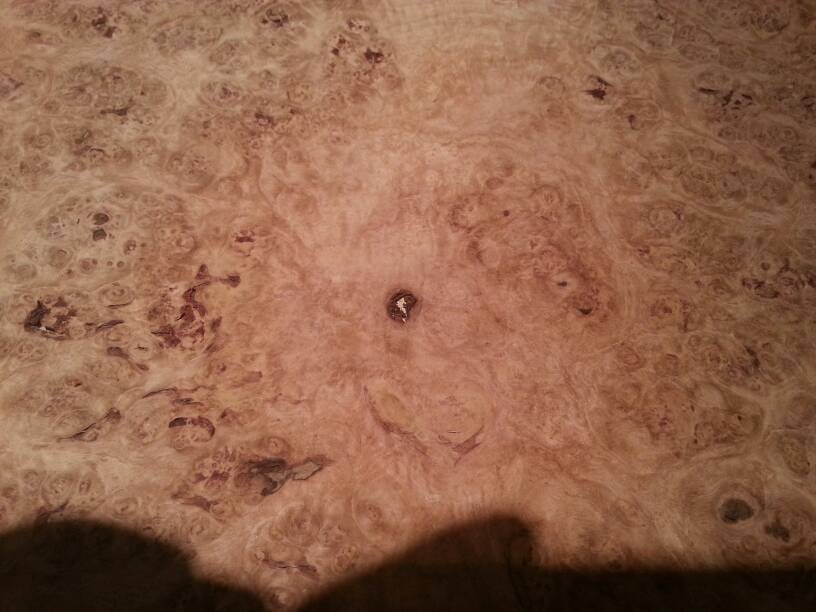
I thought it would be a simple case of sticking it onto a piece of ply then job done (hammer) The thing im stuck on is what i should do with all the holes. I had a look on the net and quickly became lost reading about gelatine flattening solutions and all kinds of other mumbo jumbo- so i havent done anything to it since :roll:
Im raring to go and get it stuck down and finished but could do with a little nudge in the right direction to get me started. Here's what ive kind of assumed so far-

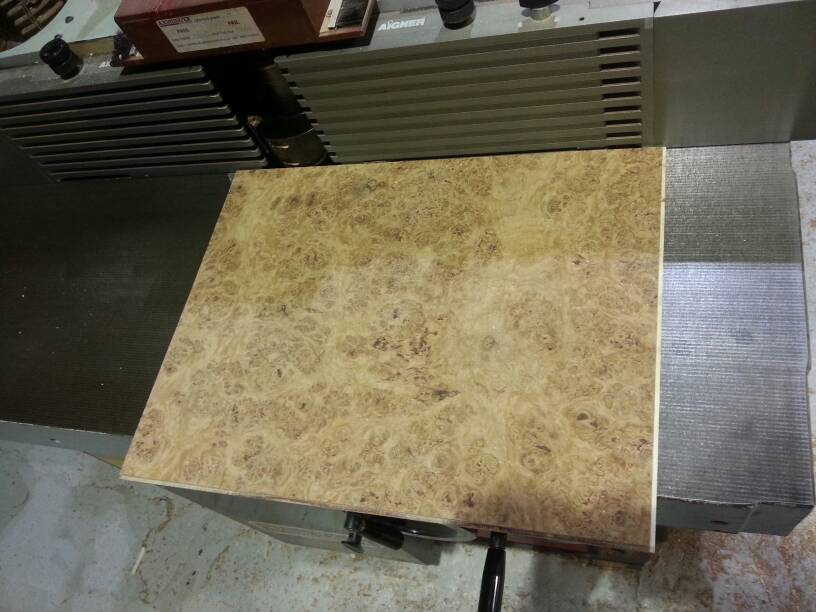
its pretty flat so doesn't need any special kind of flattening
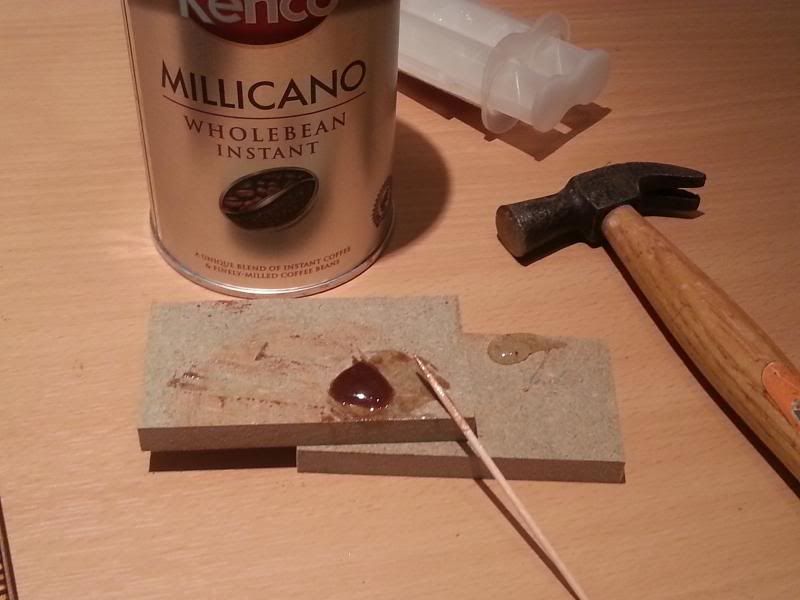
I could either stick it down as it is, then chisel out and patch it afterwards, or patch it before
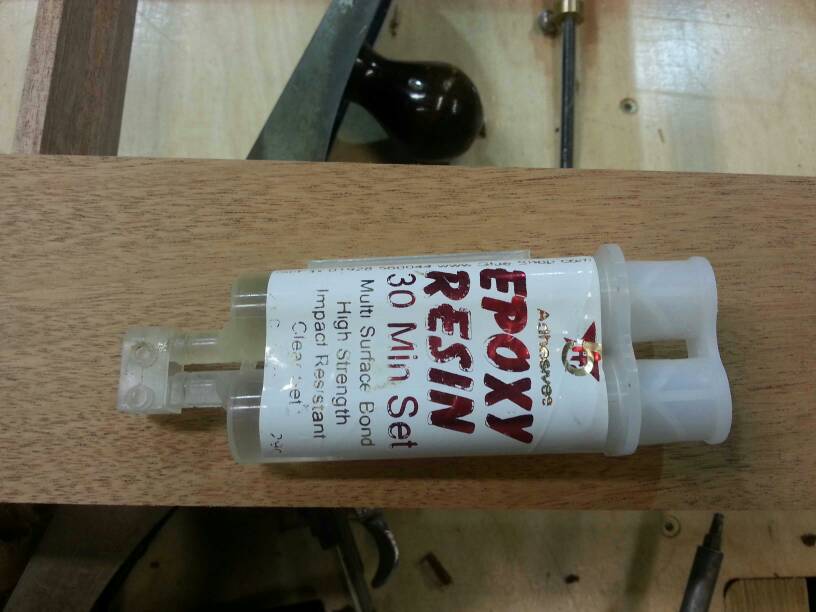
perhaps some brummers :oops: or a mixture of sawdust and superglue
give up, and just ruddy well buy one :shock: :D

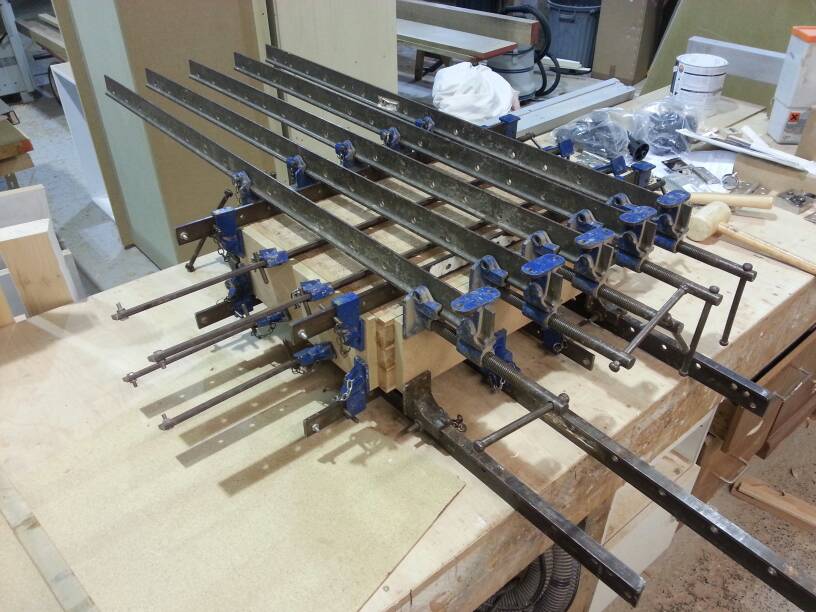
Any pointers would be greatly appreciated. Ive got some titebond cold press glue ready and a vaccy bag, just need some hand holding (homer)

Coley
 
Id fix it then fill it with resin. Id have a play with the colours and air on the darker side wouldn`t think about cutting out and patching as the holes seem to be on the small side and all dark
HTH
all the best
rob
 
I would glue it on first with the best method you have a your disposal making sure to get it as flat down as possible, worry about the holes afterwards.

A burr coloured filler is what you'd get in there if you bought it preglued from a supplier, PVA mixed with sanding dust works well, epoxy or extramite mixed with pigment is also acceptable. Unless you're painting in the burr afterwards I'd rather see a coloured fill in place of missing pieces rather than a cut out square replacement.

Alex
 
Hi Coley,

What happens with this sort of open veneer is that a lot of holes fill with glue as it's being pressed and it looks awful. I've started using West System epoxy for this type of thing. Expensive but has many advantages. I mix in some coloildal silica thickener to the consistency of cascamite then add a little burnt umber (or whatever colour you fancy) pigment. This fills many of the holes nicely with no further ado. A similar mix, minus the thickener, is used to fill any remaining voids. it sands off nicely. I guess you could add a little pigment to any glue of choice but probably test for any strength implications first.

John
 
Hi, Coley

I filled the pips in my pippy oak settee with wilcos epoxy stained with instant coffee.

Pete
 
Thanks for the replies ;) ive got some runny araldite epoxy that sounds up to the job. This pigment thing then..... is there a particular thing I should be looking for. The coffee thing - do I just grind it up untill fine powder, or liquify it then stir it in. Sorry about the gormless questions :lol:
Im relieved I can finally glue the delicate veneer flat. I might put some masking tape over the holes to prevent any glue that bleeds through from going further.

Thanks
Coley
 
Hi, Coley

That's what I did, grind to a fine powder and add coffee until you get the right colour, Araldite went off very quickly (as I was stirring the coffee in!) so do a test first.
Wilcos epoxy worked and was half the price.

Pete
 
mix with the resin, then add the hardener to that. If you mix resin and hardner then the coffee you will run out of time.
 
Cheers chaps ;-)
ane2a3a8.jpg

Guess this is one of those times having separate tubes might be easier. I'll keep it separate untill the colours right.
Thanks again, wish I'd asked months ago now :oops: im gonna mix up a test sample dinner time and see if I can find some decent ply to stick the veneer to. He he he, how exciting :p
 
Depending on what sort of finish you require the way to achieve a quality finish is to fill the larger holes with off-cuts of burr.

You will notice that your holes mostly follow the grain in burrs, if you have a sharp scalpel, cut round the damage and try to follow the pattern of the burr, lightly sketch round it with a pencil first, go slowly and careful as burr is brittle, small chopping type cuts working away from yourself is the best way.
With some masking tape, adhere a small piece of spare burr (rotate or move around or change to find a good match) underneath and covering the hole.
With your scalpel cut round the hole using your edge as a guide, angle the top of the scalpel inwards slightly so you are just undercutting, just a little. Small chopping type cuts gradually working away from you again (practice first on some scrap)
When cut, turn your veneer over, remove tape carefully if stuck to your piece, pull it flat not upwards, inset cut piece from this side, turn over use a little masking tape to hold it in place. There is a veneer tape available for this purpose which is dampened to stick it in place and again to remove it when your veneer is stuck down but if you are not going to do a lot then it may not be cost effective, if you use masking tape then you must undo your clamps after ten minutes or so, remove the masking tape and redo your clamps, the tape will stick if left clamped.

Andy
 
Well... with the added confidence from you lot i mixed up some coffee dust and epoxy

20130320_131255_zpse0178f44.jpg

I used the little hammer to smash it to dust and was fairly impressed with the cured finished mixture. Only problem was it was slightly to light. I bought a sample pack of other assorted veneers so would be handy to know how to match a colour. Im guessing i need some little pots of different coloured........ powdery stuff 8-[

20130320_171839_zpsb291774d.jpg


I've also finally cutting it roughly to size :lol: Luckily alot of the larger defects were removed but there's still a few fairly big bits to deal with. The one on the left i'll keep for the top, and put the rougher one on the bottom. Im tempted to go back and stick it on now, but the temperatures decreasing rapidly so might do it tomorrow.
Andy, i bought some of that veneer tape with the order cause thought i might need it. I've researched that i only put glue to the piece im gluing through so hopefully shouldn't have much bleed through. If i were to attempt cutting out some of the bigger holes, do you think i should cut in a piece 'burr colour' or try and find some knotty coloured stuff. Is there a difference in veneer quality or does this kind thing have to be done on every piece- i forgot just how tiring trying to learn something new can be :lol:

Coley
 
Not sure if this would work? But i have some van dyke crystals which produce a very dark brown liquid once mixed with water. If the guys think they will mix ok in the epoxy i can pop some in the post to you?
 
Hi, Coley

I found I could adjust the colour by adding more or less coffee to the epoxy.

Pete
 
Hi I am not by any means an expert but it feels like I am always filling holes in my veneer.
For small holes I chop up small pieces of scrap veneer as fine as I can and mix them with glue and apply to the hole a bit like the sawdust method.
For larger holes I use a hole punch set for making gaskets odd shaped patterns work best cloverleaf etc rather than a circle.
Then trace it onto a spare piece of veneer and fix with masking tape as described.
I hope this helps.
Michael
 
Thanks for all the suggestions- gave me plenty to think about
ejubara6.jpg


I doctored the lid first. I thought id try the patching with veneer first seeing as I'd see the lid the most
ude3uty6.jpg


It wasn't perfect by any means but now its glued on it seems a bit less noticible
a2yne4am.jpg


I spindled a little tongue on the edge of the ply and was expecting bits to fly off. Luckily it didn't so was more than relieved when that part was finished. My only regret is not selecting the colour veneer to patch a bit better. The bottom required some quite big bits to be removed- its the colour more than anything that gives it away :roll:
u3e6upa4.jpg

Can never have too many clamps :lol:

There's still some little holes that I'll fill with epoxy and coffee but at last the gripping part is done ;-)

After taking it out the vac bag I was a bit surprised at how lumpy it felt. There's no bubbles and it all appears to be stuck down. Im tempted to 120 grit it, but somethings telling me i should be scraping it flat instead. Atleast now ive only got a glued up box to keep moving around instead of loads of bits :cool: :lol:
 
2e6yba6a.jpg

I managed to get the scraper cutting o.kish. Usually I try forming the bur whilst holding the scraper in my hand and never seem to be able to get it to cut. I the cabinet scrape in the vice this time with much better results.
ejyqaseh.jpg

Most of the lid was already cut right through so only needed a bit cutting through by hand.
I made a jig to let the hinges in flush (whilst lid and base clamped together) then noticed id done something very terribly wrong :???:
8avyhuhe.jpg

Balls bother what a pleb :lol: Not sure why but for some reason I didnt let the hinge in so the pin was central. It rubs.........like so much its trying to snap the hinge screws :roll:
 
Coley, if you are going to do any more veneering, Titebond do a cold press veneer glue which dries quite dark (don't put on too thick or it bleeds through, especially in light coloured veneers) the beauty of this glue in darker veneers is that it will fill very small holes when it is pressed especially where you have cut a piece in and the dark colour is almost unnoticeable against a dark veneer.
Although you say the patches you have put in are slightly visible, I don't think it would be as noticeable as a one colour filler which would not take a finish the same as wood.
Ref. the hinges, could you not take them off and chamfer the back edge of the lid or even route a very shallow concave section along the back edge of the base, that would allow the rear of the lid to swing down, failing that, enlarge the hinge rebates, let in a black / very dark piece of wood and re do the hinges, they would then have a contrasting frame and make it look as though it was deliberate, maybe do the same with the catches on the front.

Andy
 
Thanks Andy. Think I'll have to just round the back joints over a bit. Shame really but not to keen on sticking in a contrasting bit, think it would annoy me more seeing it every time :twisted: That's the glue I used ;) seemed pretty good after only putting it on one piece - I did a sample putting it on both pieces and it was a complete messy disaster :lol:
2usuvyqe.jpg


I need to decide what to do with the handle. All the cases ive seen on the web have got plain handles. half tempted to try chequering the hand grip but not to sure if it'll work. I've only had a quick go on an offcut of gun stock so might be pushing my luck :? I'll probably just spray it up and put it to one side for now. I can add the innards and handle at a later date which shouldn't interfer with just finishing the box.
Any ideas on the handle ? Id like it to be a bit different.....but dont wanna be ripping all my hair out :smile:
 
The only place I have seen with case handles is Rutlands, they have 10% off and free postage at the mo.
If I may, where did you get the catches and hinges?

Andy
 
Back
Top