Bootfair Basketcases?

UKworkshop.co.uk

Help Support UKworkshop.co.uk:

This site may earn a commission from merchant affiliate links, including eBay, Amazon, and others.
I certainly wouldn't want to put people off doing the sort of shiny transformation job that Jimi has embarked on, but in case anyone's thinking they don't want to spend quite as much effort, can I offer a bit of another take on this?

Here's my 4½, rescued from a relative, as found:

IMG_0038.jpg


and this is it after a little bit of time with some emery paper, a brass wire brush and some turps:

IMG_0070.jpg


- perfectly usable, back in the state that a more careful owner might have kept it in!

I think I dated it to the 1920s - plenty of life in it yet - so if you find one like this, yes it is worth keeping.
 
bugbear":29uuo5nm said:
jimi43":29uuo5nm said:
a No2 make unknown (please tell me!),

whit2_lab.jpg


"Whitmore No. 2 Metal Block Plane"

Alf converted one of these into a semi-scrub ("scrub from scrap" on her blog)

BugBear

I recently picked up one of those No 2s very cheap at a boot sale - which I also am planning on making into a scrub plane!

Mine wasn't particularly rusty, but the tote, front knob and black screw adjuster knob are all plastic (ugh!). The sole isn't very flat, but then that's less important for a scrub plane.

tekno.mage
 
GraemeD":1p4c5fzg said:
Nice job, Jimi.....I can feel the enthusiasm coming right out of the page!

I have an old No 5 1/2 and a No 6 as WIP, and the finish on the handles is shot. Your results looks fantastic....any chance of a hint as to what you do stain-wise? My minimal playing with stains yielded very disappointing results on mine, so I kind of held off doing anything!

Cheers
Graeme

Hi Graeme....certainly. There is nothing particularly secret about it... but it was shown to me by my mate in the village who has now given up restoration but in his day could match most finishes...a true artist indeed.

Using base colours and tinting these from stock powder you can get virtually any combination of colour alteration and matching.

Start with the pure powders...you can make absolutely gallons of stain with these as they are super concentrated....

I get mine from J.Hewit & Sons Ltd.

It costs £3.68 for a 50mL pot of powder and you will need

DARK BROWN, LIGHT BROWN, LIGHT RED and YELLOW.

The rosewood colour on beech is mostly dark brown with a touch of light brown, a tiny bit of red and yellow...mixed with meths.

Just test it on a piece of beech until it is right...you will get the feel for it...I like mine to the red end of the spectrum. If it dries out in the pot...simply mix in more meths! No waste whatever! You can mix with water, nitrocellulose, polyurethane...or any other carrier medium that takes your fancy...each has its own characteristics. I use meths because it penetrates and you can halt the depth somewhat with more meths wiped on to slightly erase the depth before it dries out.

The knob is just the pure meths stain. I will post a picture once it is set with CHWO. Be careful applying this as a wipe on finish as you can drag the colour out if you are not careful. If in doubt...seal it with a brush layer first then rub on more layers once this is fixed.

Hope this helps.

Yes Andy...you can just bring these things back to the original as long as they are not too far gone...and your tote and knob are basically fine...they were just dirty. The same can apply to the sole BUT...I like my sole relatively flat and sides square so I end up having to lap that.

I also like my tools to look the best I can as I get satisfaction from using tools that glow. I am not interested in "original" finish on these as they are so ubiquitous...of course the rare examples...well they are a different cup of tea and should be maintained as original as possible if you want to resell them. I don't want to so I am not interested in collectable values.

The little block plane may or may not get new handles but it already has a Veritas type blade so I think it might be quite a nice operator right off the bat. We shall see.

I am off for a week now so the restorations will flow better! No blinkin' interruptions from work!

Jim
 
Thanks Jim....I've never played with mixing my own stains; in fact I've not used stains at all much previously, so this could be an interesting experiment. You make it sound easy!

My plane handles currently have the original finish on them, which has cracked with age, so the handles are rough to the touch. There seems to be original brown stain underneath. Were yours like this to begin with?

If so, presumably you sanded off the old finish before starting your process? Did you also sand off the old stain? Having tried this previously, I found it leaved a very patchy result....some brown stain, and some bare beech peeking through.....or maybe you sanded more? Or maybe your stain simply covers this patchiness up to leave the smart result you showed?!

Cheers
Graeme
 
GraemeD":1a0iz36g said:
Thanks Jim....I've never played with mixing my own stains; in fact I've not used stains at all much previously, so this could be an interesting experiment. You make it sound easy!

My plane handles currently have the original finish on them, which has cracked with age, so the handles are rough to the touch. There seems to be original brown stain underneath. Were yours like this to begin with?

If so, presumably you sanded off the old finish before starting your process? Did you also sand off the old stain? Having tried this previously, I found it leaved a very patchy result....some brown stain, and some bare beech peeking through.....or maybe you sanded more? Or maybe your stain simply covers this patchiness up to leave the smart result you showed?!

Cheers
Graeme

A finish would need to be completely opaque to give uniform results on a non-uniform base - and stain isn't very opaque at all.

So the problem sounds like the sanding.

My Record #05 (tote + knob) was simply done with good ol' Rustin's die.

rec_front34.jpg


BugBear
 
Mmmm, so that's why my patchy handles didn't stain so well in the past! As I said, I really don't have much experience with stains, and kind of thought they may cover up a multitude of sins. So it sounds like sanding to a good starting point is vital, and then use the stain to add colour and not effect a cover up.

Graeme
 
Hi Graeme

It is just a case of how far you want to go with the finishing/fettling.

The majority school of thought is that originality is the key and I wholeheartedly support this. As I said...if you get a good but dirty example...leaving it original but functional is the preferred way.

What I enjoy is restoration and as long as the example is fundamentally sound but it is beyond "collectable"...then I like to have something restored in full.

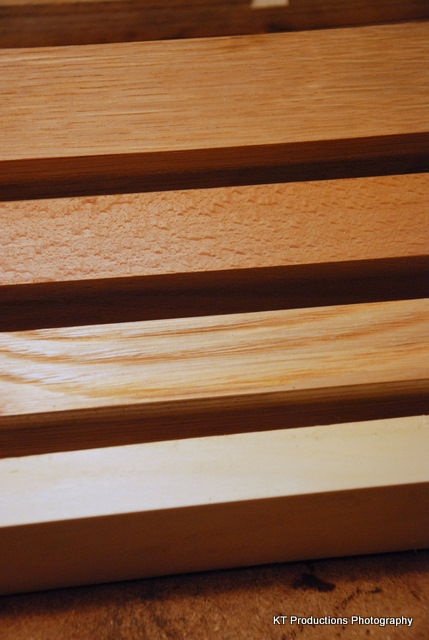
On the subject of stain to beech handles...you will have to remove all of the original shellac. This is what allows stain from acting on some areas and prevents it in others.

I start with 40 grit and go down the grits...which removes all the dead shellac and allows uniform staining:

DSC_0100.JPG


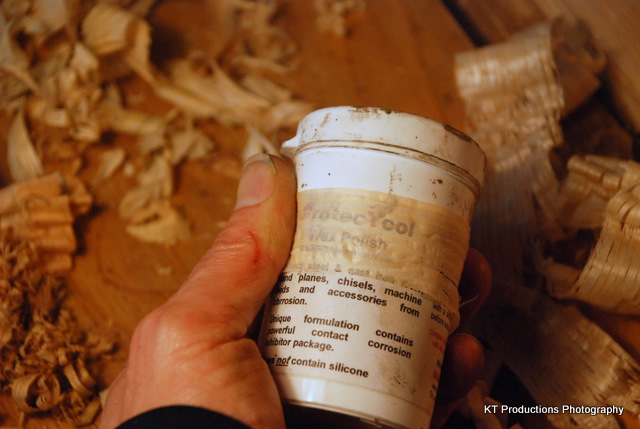
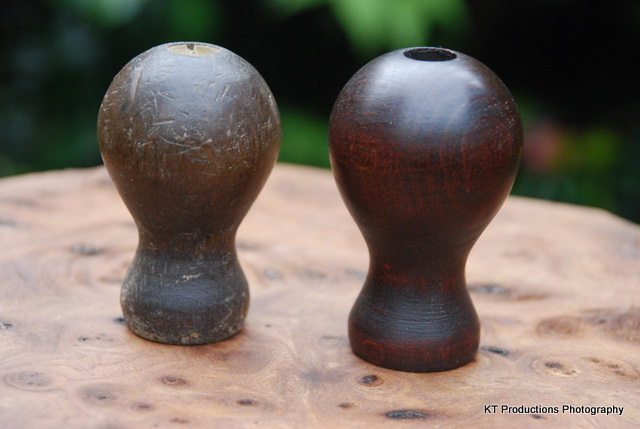
The old example on the left is a very good one. The shellac is almost all intact. For this one I would just use burnishing cream on a lathe followed by beeswax. I will do this in a minute to compare.

The one from the No. 4 1/2 is on the right. This is after three coats of CHWO. The first was brushed on with a very large but soft brush with hardly any drag. This sealed the stain. I then used two wipe coats on a rag rotating as I went to try to be consistent. Later, when this has hardened, I will burnish and wax to a gloss.

The reason I like meths stain is that each coat darkens the wood progressively to almost dark brown whilst leaving the grain exposed. Using opaque finish is bland IMHO...like the Chinese do with the QS.

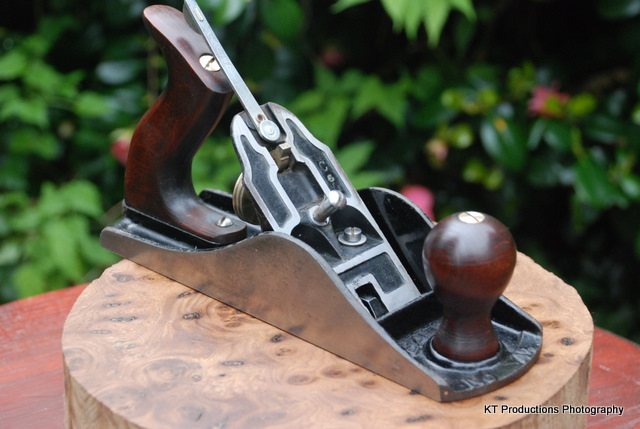
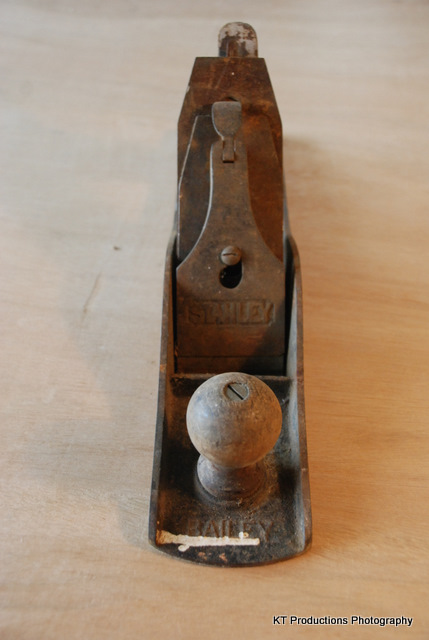
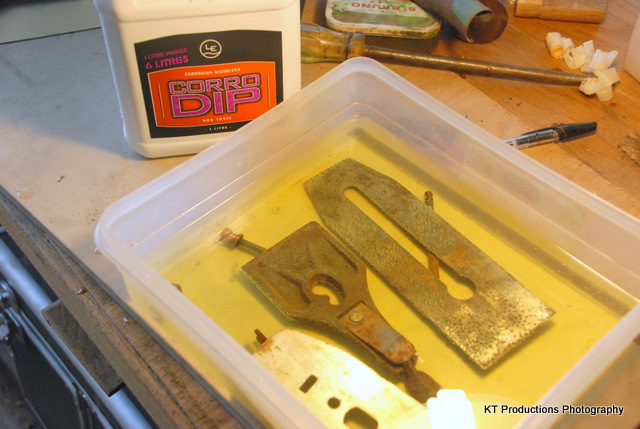
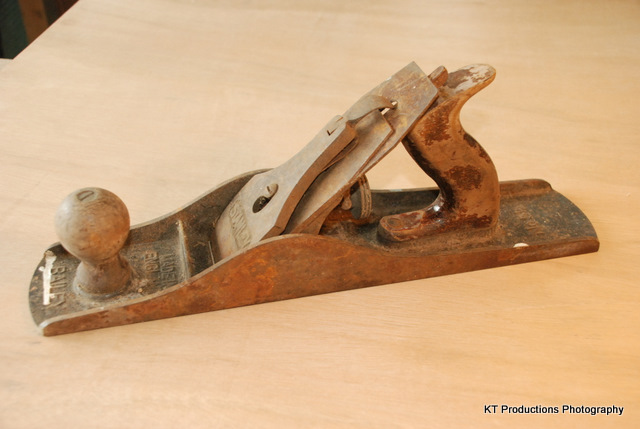
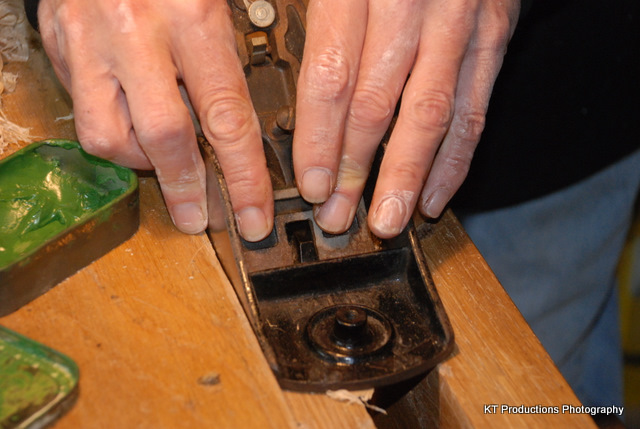
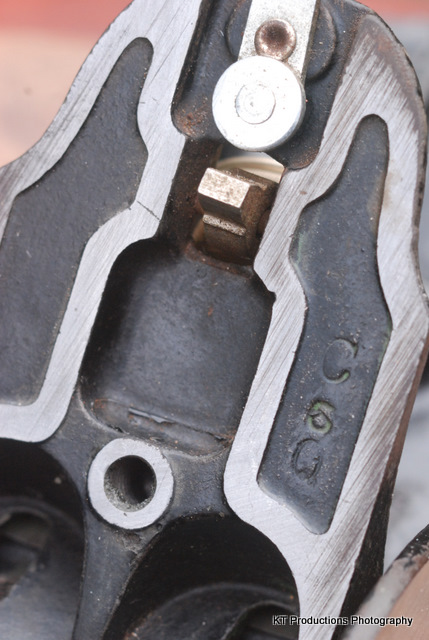
Moving along to sole/frog fettling....

In order to show that I am not just a wire wool and Brasso nut...I want to explain that it doesn't matter how shiny I want the end product, I still want it to work at its best.

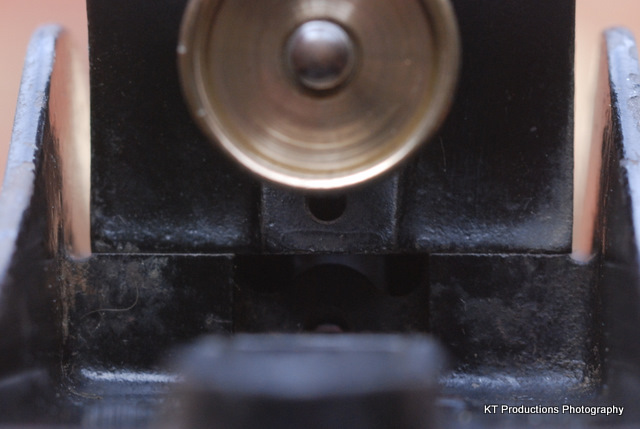
Straight out of the factory and through the rigours of time and rust...the two key points that need attention are where the iron rests on the frog, and where the frog rests on the sole.

Each stage of the tuning adds a small but vital benefit to the proper seating of the iron. I am assuming stock iron at this stage as obviously that could be improved greatly by using a thicker iron and modifying the mouth.

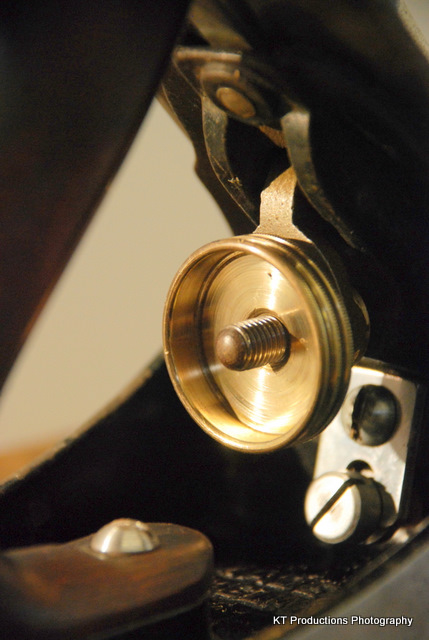
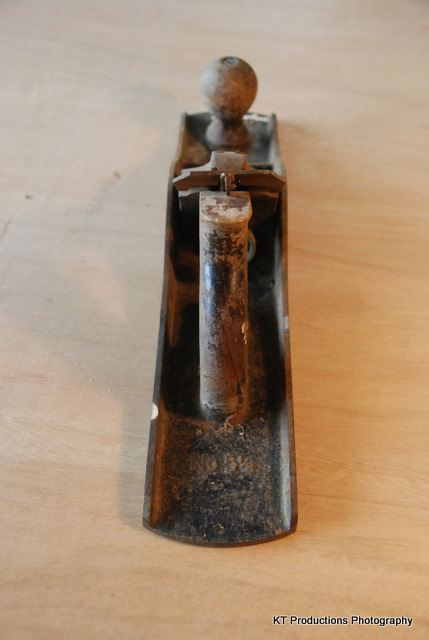
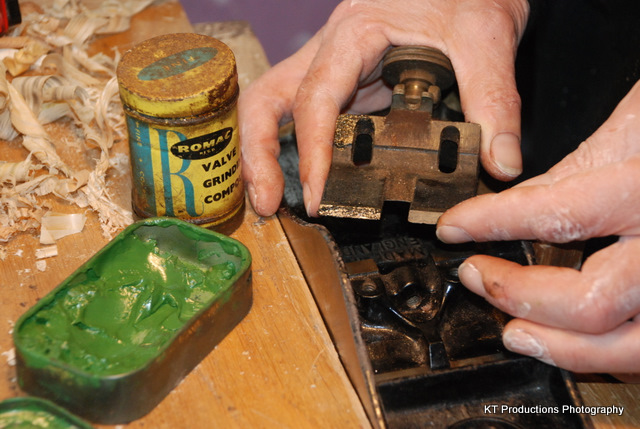
So...first we need to lap the seats where the frog meets the sole:

DSC_0097.JPG


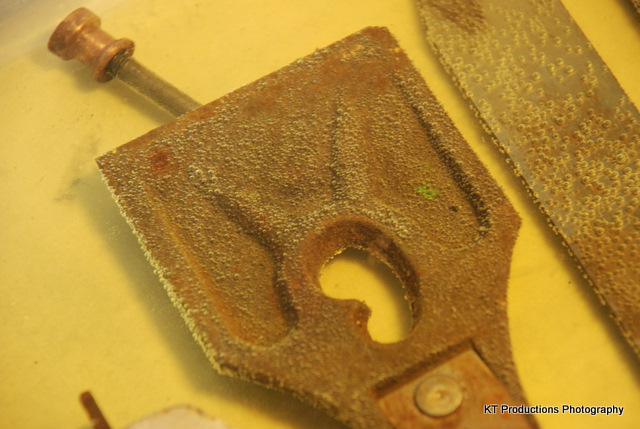
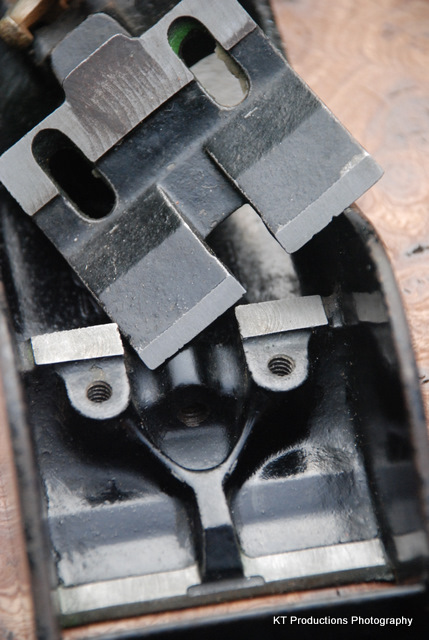
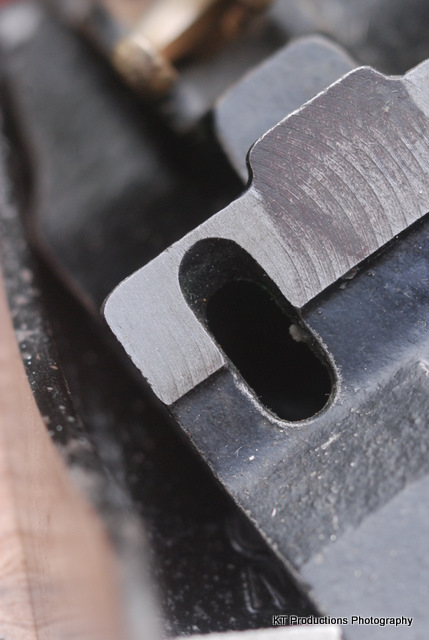
The four seat points on the frog are as shown here. First I use valve lapping compound from that lovely old double sided tin. Here I am applying COURSE grit to the first corner seat and I will apply this to each seat in turn then lap:

DSC_0098.JPG


A gentle but firm and even back and forth movement will lap both the frog and the sole seats so that they mate perfectly. The closer they mate, the firmer the bed. This one was only mating at four high points...that was out of the factory, so this will be quite an improvement!

I then move down the grades of compound finishing with engineer's blue to see if the lapping has been complete.

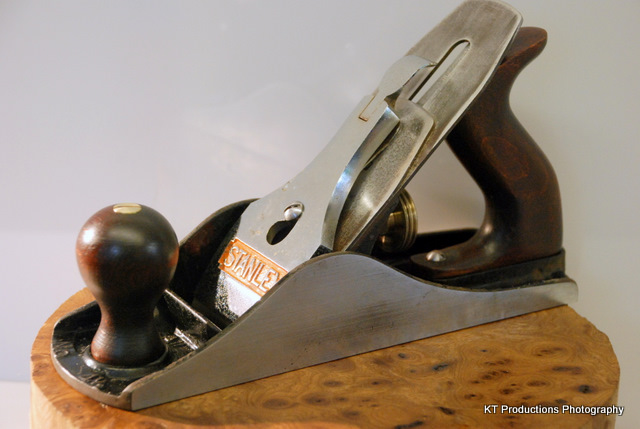
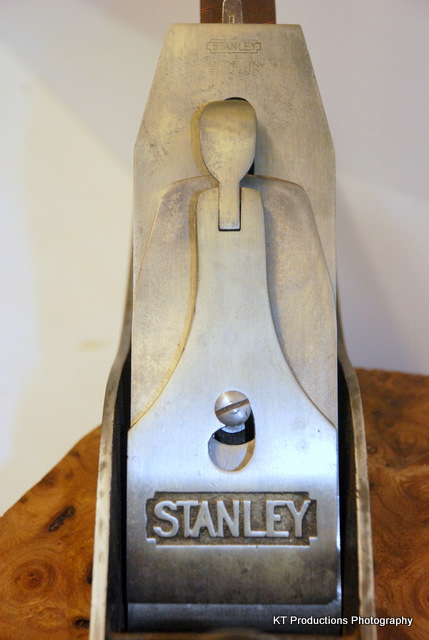
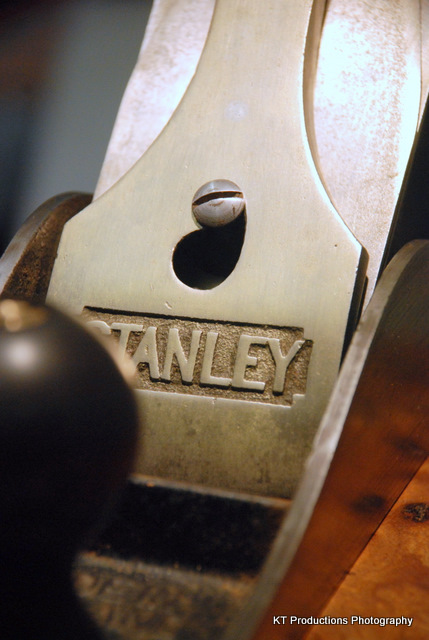
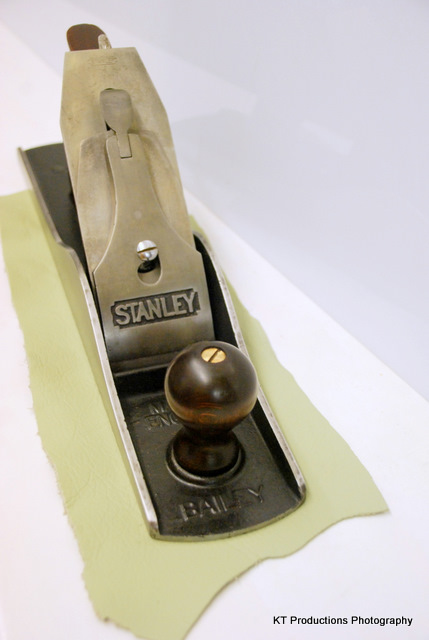
I am keeping the sole inside original. The Japanning is all but there and just needed a clean...more on that later.

Jim
 
Thanks for the info on this Jim....I'll go back to my handles and have another go. As well as making them look much nicer, the feel will be improved tenfold over their current roughness.

I'm completely with you on the originality thing; it's nice to have something which is untouched, especially if it is something a little special. However, if you pick up something which has been neglected, or is just run of the mill, then I find it really fulfilling to make it better than new, so that it performs as well as it possibly could. That is the case with my two planes right now; nothing special, but can be made nice to use with a bit of fettling.

The frog fitting is an interesting idea.....I've not seen it done with grinding paste before. I have a similar double ended tin of paste (mine's red/blue from memory) which I'l have to dig out. I had just cleaned up the four frog bearing points, but whether they actually fit together well is another matter! A bit of engineers blue will soon tell me that.

Keep those pics coming!

Graeme
 
Hi Graeme

Well if I have encouraged you to try some more finishing, I am pleased.

The course grinding paste is very aggressive.....and it doesn't take much to get the faces down flat.

DSC_0103.JPG


Time for my trusty old 105mm micro here...to show how the machining is cut back and flattened:

DSC_0104.JPG


You can actually FEEL that it fits...that metal to metal binding that occurs when two flat surfaces interface...

DSC_0111.JPG


You can get carried away...so I am going to stop here. I am happy that should I fit a kiln fired iron later...there will be adequate support for the thicker slab.

The iron/frog interface will need some more work....

DSC_0112.JPG


One of the things that I am a bit anal about is the hardware...the bolts and clips and wheels and such...

The lathe makes quick work of these and I use either fine wire wool (yes the stockade is free! :oops: ) where the item is irregular or 3M MicroMesh for rotational polishing...

DSC_0115.JPG


DSC_0120.JPG


So there ya go...finished...

DSC_0121.JPG


NOW...off to hit the No. 5 1/2 and maybe a scrub is in the making!

See ya later guys and gals...

Jim
 
Very nice explanation Jim! Thank you :)

By the way how do you go about dressing the bed for the iron? Isn't it awkward having the lateral adjustment lever in place?

As an aside. Do I see a St. Bruno tin there? I cannot see one without thinking of my old Dad who smoked St. Bruno for most of the time I knew him, forty odd years. Very useful those tins.

xy
 
xy mosian":1jcd802n said:
Very nice explanation Jim! Thank you :)

By the way how do you go about dressing the bed for the iron? Isn't it awkward having the lateral adjustment lever in place?

As an aside. Do I see a St. Bruno tin there? I cannot see one without thinking of my old Dad who smoked St. Bruno for most of the time I knew him, forty odd years. Very useful those tins.

xy

Thanks xy.

Yes...it is awkward but I figured that if I dressed it side to side up to that point it would cover most of the bed on which the iron rests.. I then swung it around and did a tad of a cleanup with very fine mesh to rid the top bit of rust.

It is indeed a St.Bruno tin...another find at a bootfair with fine compound in it!

I did some test shavings to see if there was any improvement from the bedding in and the results speak for themselves. I can get a thou or two off the shavings now...more transparency:

DSC_0145.JPG


but what I noticed the most was the ease of adjustment and the resultant consistency of the shavings...they are perfect ribbons now.

DSC_0144.JPG


DSC_0146.JPG


I think this picture speaks for itself:

DSC_0147.JPG


Jim
 
Do you remember back at the beginning...the "basketcase" No.5 1/2?

Let me remind you...

DSC_0005.JPG


Well the bootfair this week released its greatest find...

For a mere 50 pence of the coin of the realm...I thought I would try a gimmick or a gem....some stuff called CORRO DIP:

DSC_0280.JPG


Now I'm very apprehensive about these "TV CHANNEL" type miracle cures...and this I thought was one...until I Googled it and found that Liquid Engineering...the makers....sell this litre bottle for over £20 and it makes 6L of reuseable non-toxic, harmless liquid.

It professes to totally remove rust and gunk and they are talking about using it on caterpillar tracks not just little rusty tools:

DSC_0281.JPG


Now it says...dilute the green goo...1:5 with clean water (preferrably hot) and dump the rusty stuff in it and leave it for up to six hours...

DSC_0283.JPG


Well as you can see...after a few minutes it started fizzing and continued to fizz...so I left it and forgot it!

For a whole two days! DOH!

BUT...I was astounded...it totally stripped ALL the rust off..even the little tin rust in all the crevices (as it promised) and left a beautifully patinated nickel plated look...no scrubbing...no rubbing with abrasives...nothing...

Just washed in water and wiped with a cloth:

DSC_0295.JPG


DSC_0293.JPG


This is worth every penny of 50p...no...every penny of the retail price of £20!

Amazing stuff...simply amazing! :shock:

Jim
 
I'm so glad to see other people love restoring the old planes like myself!

I was given an old 1910-1918 (theres a site BRILLIANT for dating stanley planes, but in this exhausted state of mine, i forget it :p) by my brother for christmas last year, I'm still working out what blade to get for it, and after meeting and speaking to mr lie nielsen, i think hes my favorite contender...
back to my point!
Even without a new super steel blade made by wizards unknown on the moon, when having a little competition at college, it out performed a 2 yr old veritas! just goes to show, old stanleys are build to last!

i have just aquired an old wadkin 6", single phase planer in need of LOTS of tlc! but i guess i've just got the bug... :D:D:D


Sam
 
Hi Sam

I am afraid it is a vice of mine...

But now I have this corrosion stuff...I think I will get some more rusty items and see how it performs.

Website Here

The reviews are tremendous..and I can quite see it will work on most things...

This is product of the year as far as I am concerned!

Jim
 
jimi43":171zmohs said:
I am afraid it is a vice of mine...

sorry to rain on your parade jim but thats not a vice, its clearly a plane - you need to work on the id skills :lol: ;)
 
HA! Nice one BSM...I did check the spelling twice though!

So...the No 5 1/2 is now fully finished...all the bits are degreased...corrosion removed and the Japanning cleaned...

I am more than happy with this one too....

DSC_0005.JPG
DSC_0323.JPG


That Corro Dip is a definite stayer in my arsenal of restoration kit...

DSC_0002.JPG

DSC_0313.JPG


DSC_0006.JPG

DSC_0308.JPG


This weekend is going to be glorious apparently....early start at the bootfair if I don't end up working!

Jim
 
wizer":3dbxc698 said:
Jim I might join you, which one you going to?

I'm not sure mate...I have to check my rota at work first. I hear tell the ones at Pedham Place Swanley are now back running...so I might do that one...

The local ones yield few items at the moment until the weather breaks...

Have to be early though...6am! :wink:

Jim
 

Latest posts

Back
Top