bending the veneer around a bullnose step

UKworkshop.co.uk

Help Support UKworkshop.co.uk:

This site may earn a commission from merchant affiliate links, including eBay, Amazon, and others.

Jacob

New Luddism. Wake up and resist.
Joined
7 Jul 2010
Messages
28,992
Reaction score
5,545
Location
Derbyshire
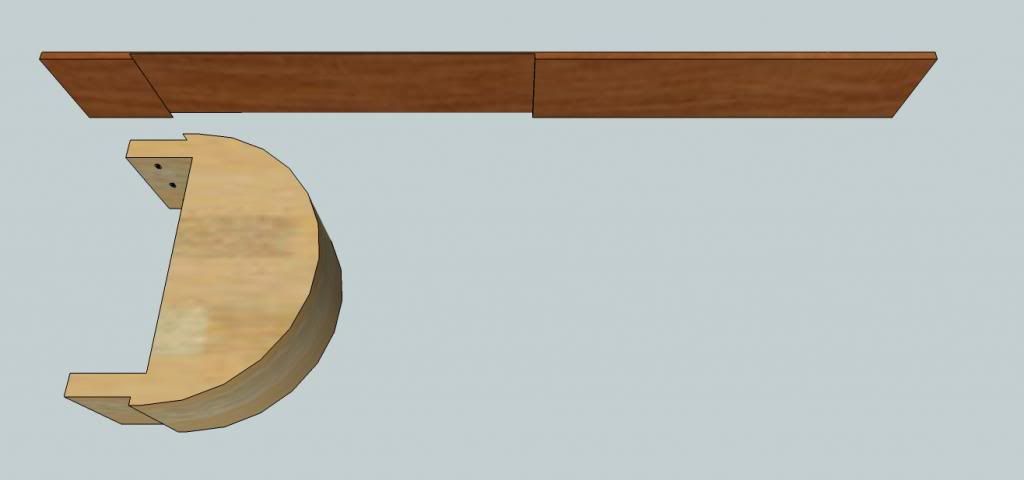
Any particular hints on bending the veneer around a bullnose step? This sort of thing.
I did it once many years ago as a training exercise but never since.

NB it's half round at each end so more than a bullnose.
 
If you have a moulding underneath the nose, plane a piece down to the right thickness then put a radius on, mould etc and glue it. Groove it with a router to accept the riser (I usually do 'em 15mm) .

Kerf the riser about an inch before and after the spring line, I usually take it down to 2mm depending on how tight the curve is. If you have a table saw with a sliding carriage you can make a jig by fixing a backing piece against the fence with a nail or screw that is the same width as the saw blade kerf. Everytime you cut a kerf, slip it over the nail which will give you equal distances and a nice smooth curve. Quarter sawn stuff works best.

Be careful with the curved blocks in regards to newel posts as its a bit of a mare having to chop bits out if they are in the way.
 
Thanks for that it sounds sensible.
Kerfing doesn't feature so much in the old books and I guess this is because it is difficult by hand - either to maintain a precise depth or to get a wide enough cut.
 
From what I have seen of very old bottom treads like that they seem to just take the riser down in its thickness until it is bendy enough for whatever radius they are using, they may have formed it around a hot stove pipe as well to help avoid it breaking where the riser reduces in thickness; or so I've been told.
 
Yes. Effectively the same as kerfing except they remove all the bits between the saw cuts and call it a veneer. 1/8th inch thickness. That's what we did on my course 30 years ago but I don't recall heat or steam or anything. Maybe it was careful progressive clamping or something.
 
I think I'll try the kerfing first. It looks as though it'd be more controllable (though slightly less traditional). I've only got 2 not very good pieces of redwood to experiment with.
 
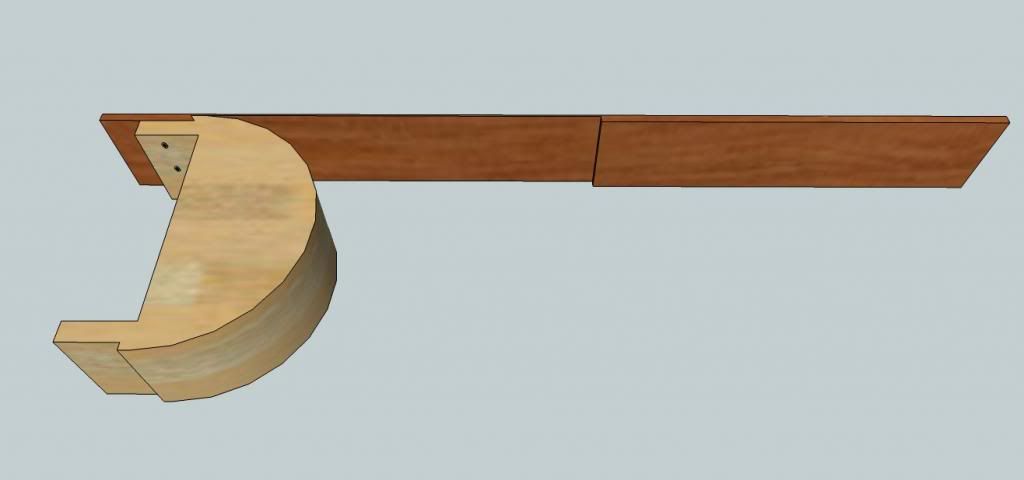
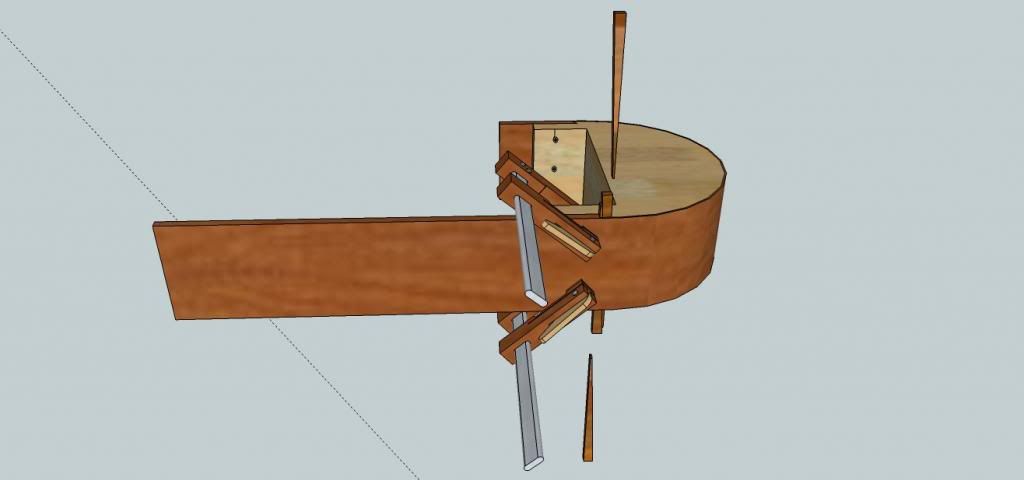
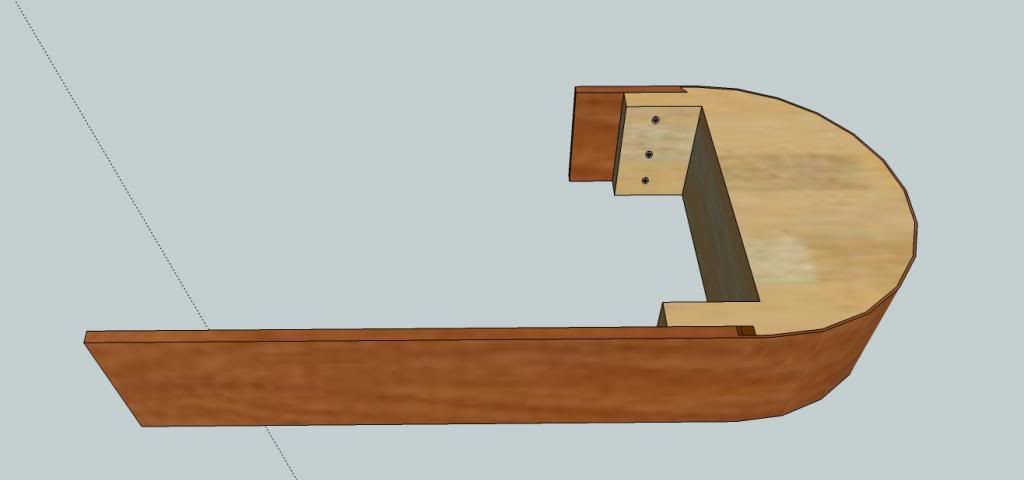
My method as I was taught and carried out numerous times

I tend to cut the form from 3/4 ply and glue together, the riser is thinned down on the radial arm with the bevel cut by hand


The riser is then glued and screwed at the bevelled end


The veneer is then glued and bent round the form then lightly clamped to hold it in place. I then insert and hammer home a pair of folding wedges which tightens the veneer to the form. It is then screwed through the back of the form. I tend to leave clamps in situ to hold the riser parallel in the case of a half round or at 90 degrees in the case of a quarter round


All being well you end up with this which can be cut to suit the newel after the adhesive has cured


An example of a quarter round done with this method


hope this helps
 
I usually thin down the veneer bit using a large router cutter. In the past I use to remove it with the table saw but found it use to sag a little the more you removed. Also the saw cut wouldnt be exactly flat due to the shape of the teeth. Not sure if its been said but allow the veener bit slack for length on the former. Hook it on the dovetailed end then with a bit of some thing bendy (flexi mdf ) gradually coax the veneer with packer around the former. Then just tap in some folding wedges. I usually plaster the former with pva which help trying to get everything to slide in place

Sent from my GT-I9300 using Tapatalk 4 Beta
 
Thanks for that. Katellwoods drawing is the classic way but I decided on kerfing - partly because it's not a very good piece of wood and I thought it'd keep in one piece better if the non kerf bits are left on.

Tried it out on a bit of cls spruce stud. Very bendy stuff - worth bearing in mind if you have bendy projects in mind

step1.jpg


Redwood much more brittle

step2.jpg


the system - the last cut is lined up against a felt tip mark on the block to space the next cut

step3.jpg


step4.jpg


sags under own weight

step5.jpg


step6.jpg


getting there

step11.jpg


cramp and damp it while doing other bits

step7.jpg


block on the rod

step8.jpg


frantic clamping and gluing

step9.jpg


step10.jpg
 
Jacob

I used a method similar to yours to form the bullnose on my stairs from kerfed solid oak.

On the first attempt, the oak split.

On the second attempt, I added some steel sheet to the outside, clamped in slight tension and then attempted the bend.

Much to my relief this time it worked.

Lynn
 

Attachments

  • P1010168.JPG
    P1010168.JPG
    190.3 KB · Views: 94
Looks good!

Took the clamps off mine, seems OK. Could have used ratchet straps! Would have been easier.

Can see very faint facets matching the kerfs but nothing that a bit of sandpaper won't remove. I guess the veneer option would be better - but only if you have a nice piece if timber, ideally quarter sawn and straight grained.
 
Jacob. That is looking good. I did skirtings some time ago and found the redwood always broke across the hand sawn kerfs. Perhaps I wasn't accurate enough or the kerfs were too far apart. After more than 3 attempts I ended up chamfering vetical soldiers and glueing up round a former which was a bit of a fiddle but was OK painted up. Done now. Best wsihes.
 

Latest posts

Back
Top