


My daughter recently dropped a not so subtle hint that she was looking for a bedroom mirror about 4ft x 2ft to match her blanket box and that she was shocked to see that they were around the £300 - £400 mark, and that would be without any decorative carving which stuffed the price up even more.
As we were going to stay with her in London only 2 weeks later there was no time to lose. I started off with carving some oak leaves. These were identical to those on my bookcase as I knew I could do them - no time for failures if attempting something new.
As before, I traced the design on to some 20mm oak and routed out around the design to a depth of 14mm, leaving the edges until last to give extra support to the router base plate.
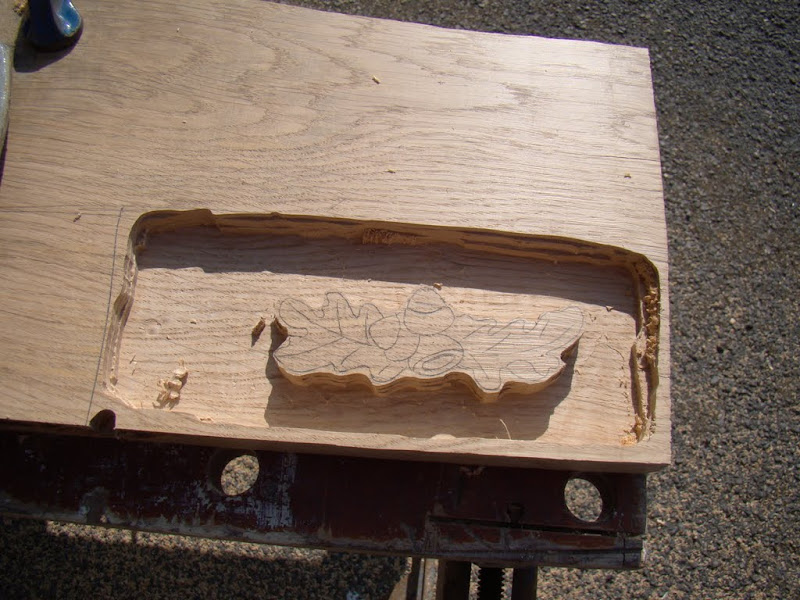
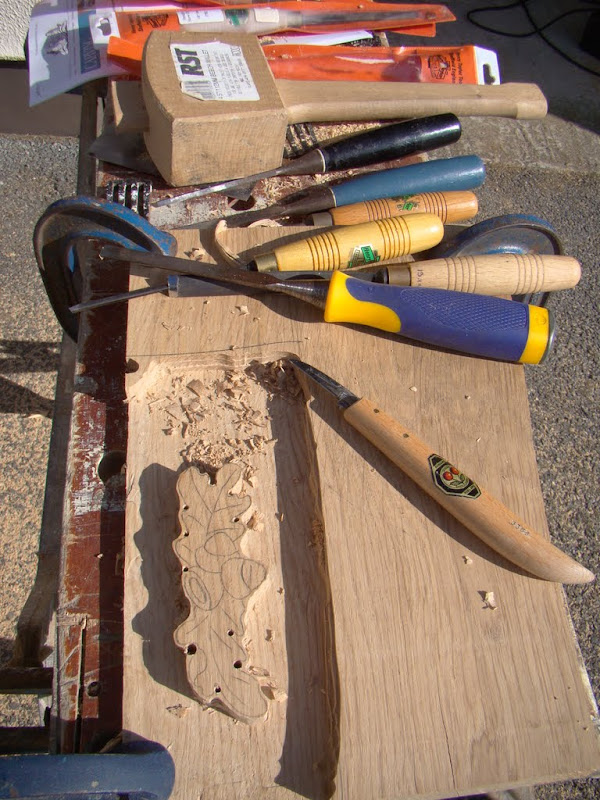
Then drill out the gaps between the leaves to the same depth and cut away the supporting edge.
After this the process was exactly the same as used for the bookcase so I'll not repeat it here.
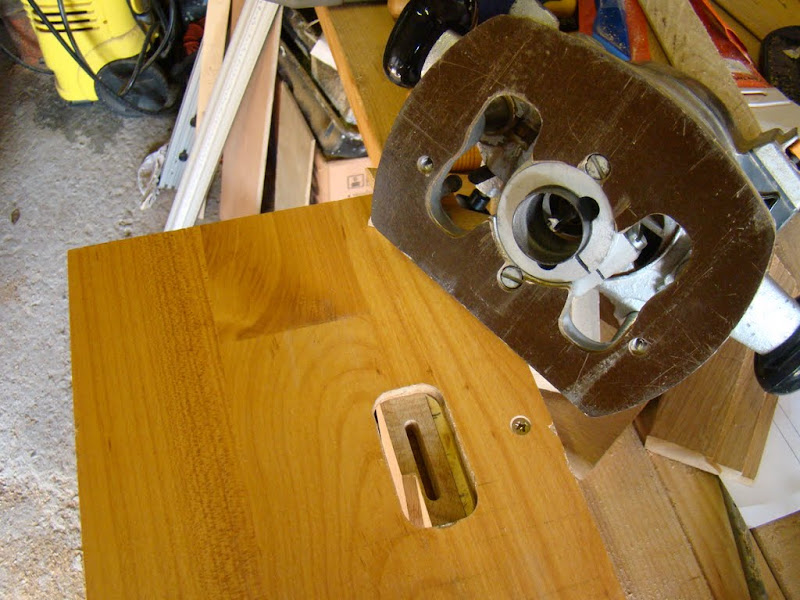
Moving on to the frame, this was made from English Oak, with a 20mm x 70mm section. A recess was cut in two stages, firstly for the mirror, and secondly a shallower but wider one for the 6mm ply backing, on the router table. The ends were mitred by hand using a Nobex picture frame saw as I felt that on small sections this is gives a less aggressive and more controllable cut than using a SCMS. Then cut mortises for loose tenons using my trusty router mortice jig - which is my "poor mans Domino"!
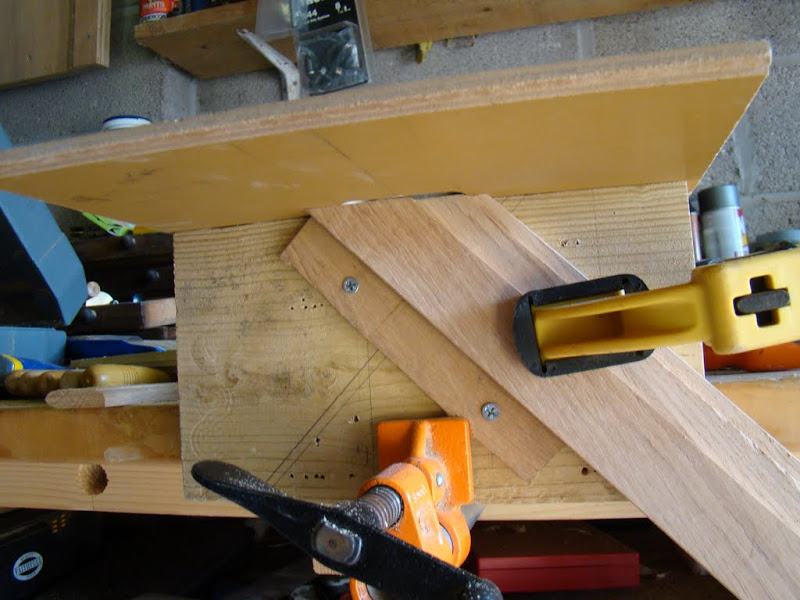
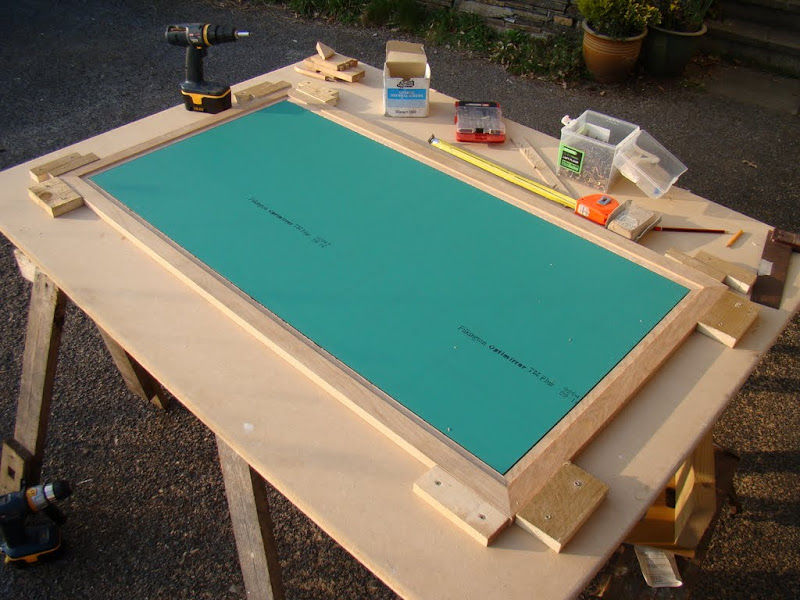
The frame was assembled on a sheet of MDF, with the mirror resting loosely in place to ensure a square glue up. Two sides were defined using fixed blocks, and the remaining two sides were held in place by fixed blocks and wedges.
It had been the intention to set the oak leaves in to the top by routing a recess from behind the frame, but there wasn't room to do it that way and still leave sufficient material to retain the structural integrity of the frame, so eventually decided to cut the leaves off their backing using the band saw, leaving just 1mm of "veneer" that could be removed by hand carving afterwards, and also leaving a small oblong tenon which was let in to the middle of the frame.
Finish was 2 coats of Osmo PolyX oil, denibbed with a single pass of worn 120 grit, followed by 3 coats of Liberon Furniture Wax.
Here's the finished article hanging. As this is a rented flat we wanted to minimise drilling of the walls which is why I've used a cord rather than mounting plates on each side. It wasn't possible to get the cord tight enough to stop it stretching to become visible above the top of the frame, so will replace the cord with wire next time we stay. Or if I can find some, get some picture rail hooks and hang it from those.

Total cost was £56 for the mirror and £26 for materials, which was somewhat better than madam had been quoted elsewhere, so she is well pleased. I enjoyed what turned out to be an enjoyable build and I got a bottle of Bombay Sapphire for my trouble - so we're all happy.
As we were going to stay with her in London only 2 weeks later there was no time to lose. I started off with carving some oak leaves. These were identical to those on my bookcase as I knew I could do them - no time for failures if attempting something new.
As before, I traced the design on to some 20mm oak and routed out around the design to a depth of 14mm, leaving the edges until last to give extra support to the router base plate.
Then drill out the gaps between the leaves to the same depth and cut away the supporting edge.
After this the process was exactly the same as used for the bookcase so I'll not repeat it here.
Moving on to the frame, this was made from English Oak, with a 20mm x 70mm section. A recess was cut in two stages, firstly for the mirror, and secondly a shallower but wider one for the 6mm ply backing, on the router table. The ends were mitred by hand using a Nobex picture frame saw as I felt that on small sections this is gives a less aggressive and more controllable cut than using a SCMS. Then cut mortises for loose tenons using my trusty router mortice jig - which is my "poor mans Domino"!
The frame was assembled on a sheet of MDF, with the mirror resting loosely in place to ensure a square glue up. Two sides were defined using fixed blocks, and the remaining two sides were held in place by fixed blocks and wedges.
It had been the intention to set the oak leaves in to the top by routing a recess from behind the frame, but there wasn't room to do it that way and still leave sufficient material to retain the structural integrity of the frame, so eventually decided to cut the leaves off their backing using the band saw, leaving just 1mm of "veneer" that could be removed by hand carving afterwards, and also leaving a small oblong tenon which was let in to the middle of the frame.
Finish was 2 coats of Osmo PolyX oil, denibbed with a single pass of worn 120 grit, followed by 3 coats of Liberon Furniture Wax.
Here's the finished article hanging. As this is a rented flat we wanted to minimise drilling of the walls which is why I've used a cord rather than mounting plates on each side. It wasn't possible to get the cord tight enough to stop it stretching to become visible above the top of the frame, so will replace the cord with wire next time we stay. Or if I can find some, get some picture rail hooks and hang it from those.
Total cost was £56 for the mirror and £26 for materials, which was somewhat better than madam had been quoted elsewhere, so she is well pleased. I enjoyed what turned out to be an enjoyable build and I got a bottle of Bombay Sapphire for my trouble - so we're all happy.
