


Philipp
Established Member
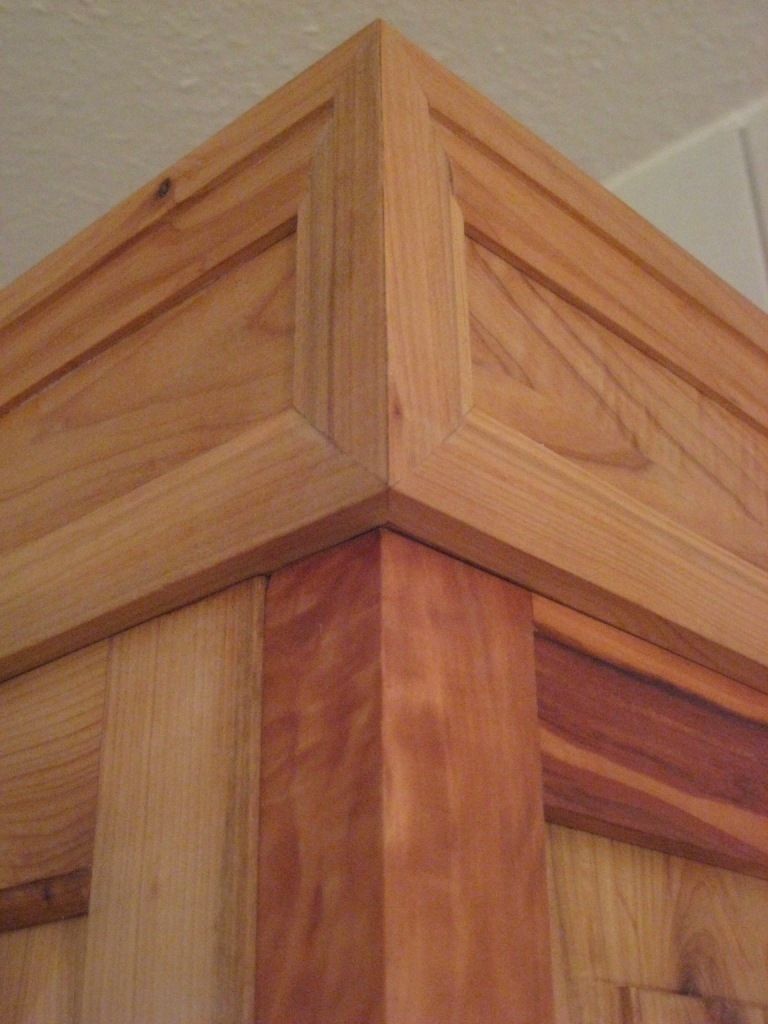
I would like to briefly introduce my recently finished bathroom cabinet (too tall for showing in one picture). The cabinet is about 230 cm high, 38 cm wide and 36 cm deep.
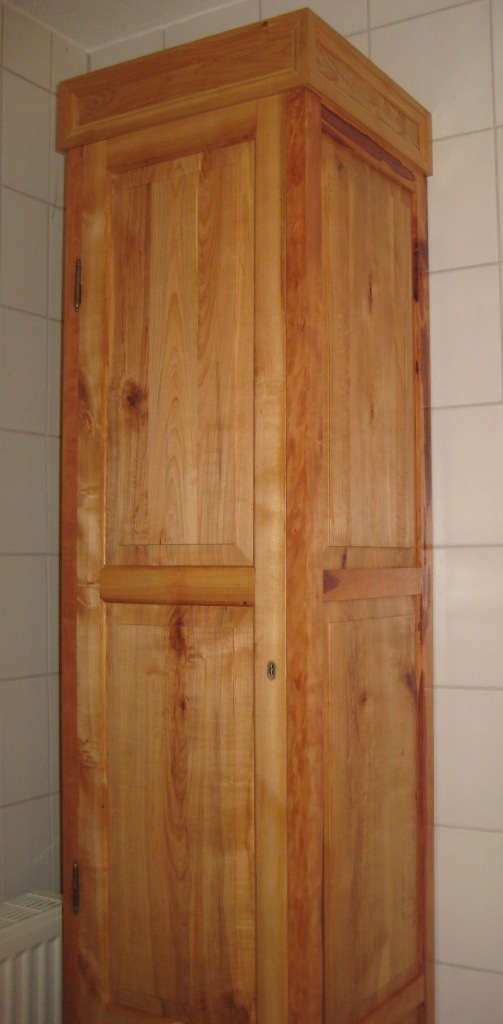
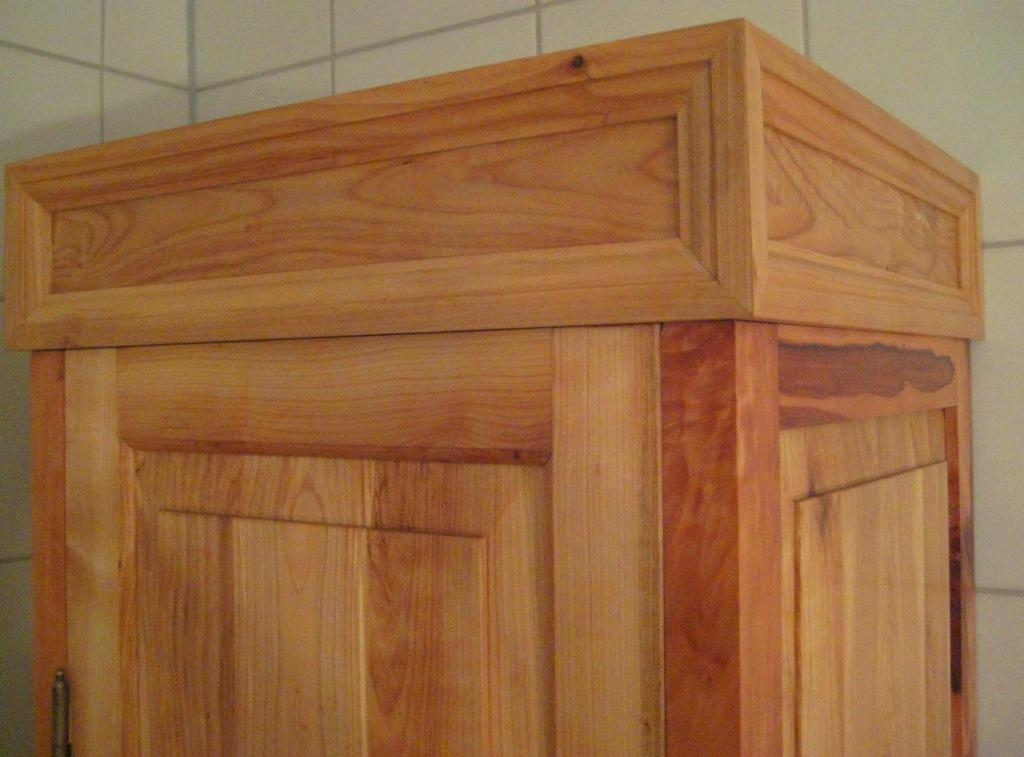
The two carcasses are made from rowan and were dovetailed by hand. Originally, I had planned only horizontal mouldings revealing dovetails in between. However, I made a mistake in the dovetail sizing resulting in poor aesthetics, so I decided to cover all dovetails with mouldings. The look of this picture-frame-like construction is, well, worth to be discussed… :? Building the moulding-frames was quite tricky and time-consuming but I learned a lot.
The panels are also made from rowan, the styles and rails are made from pear, since I didn’t have rowan in this length.
Stupidly, the pear had some inhabitants cropping up during construction :twisted: . So off the styles and rails went into my brother’s sauna from which they came – hopefully – without life inside them, but also twisted and distorted. Again, I had to reach for my planes…
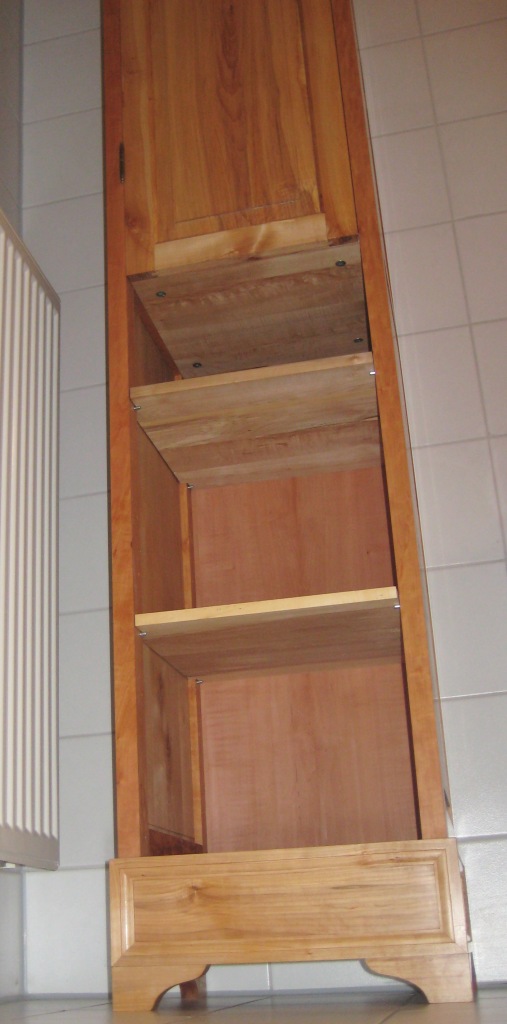
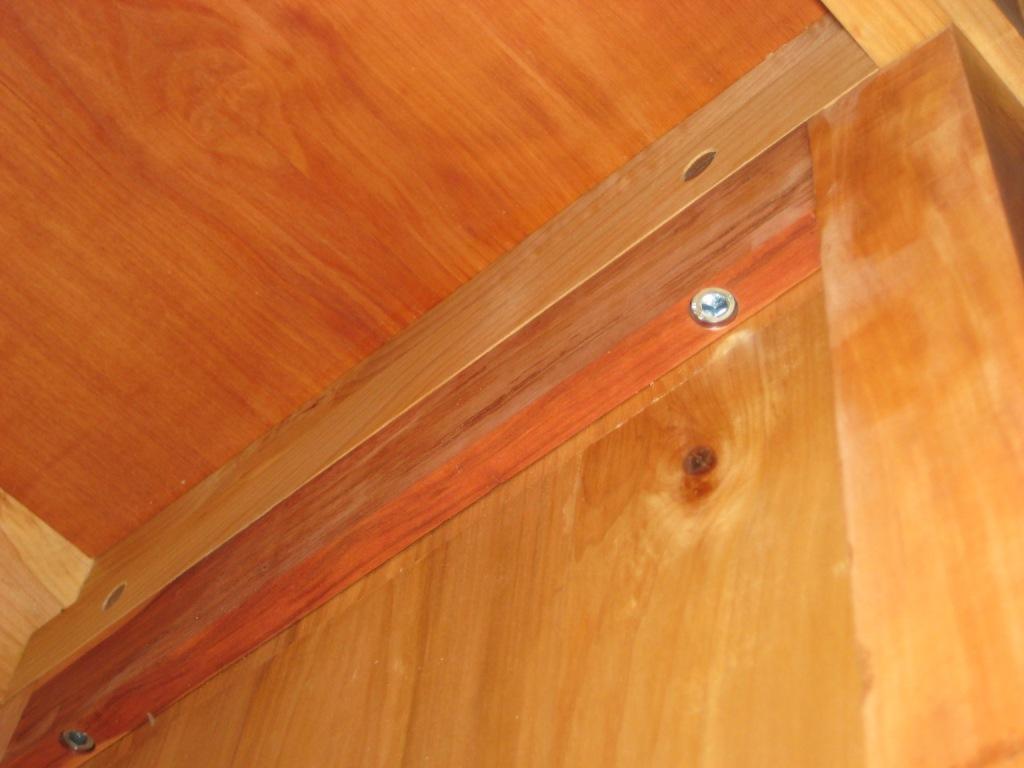
The carcasses and sides are connected to each other with dowels and screws. When drilling the holes I used a template for exact results.
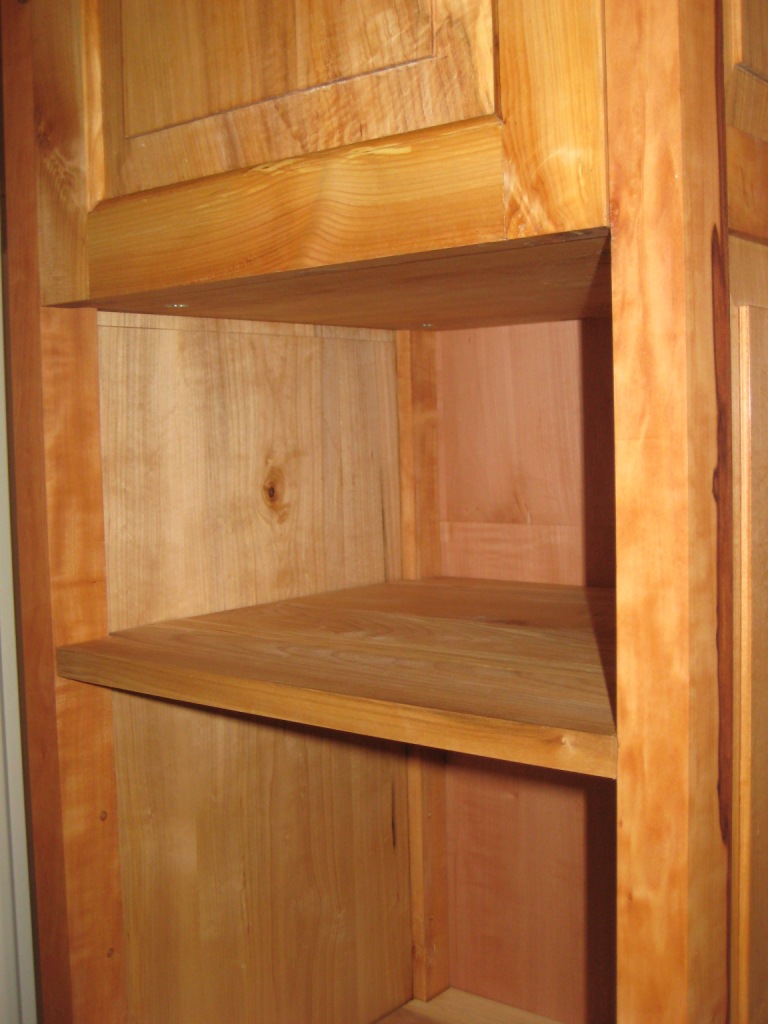
The shelves are made from rowan of lower quality. Here I even accepted small cracks, knots and some tear-out in order to save my better wood for later projects.
The back-wall is 7 mm plywood (poplar), veneered with steamed pear or service tree (don’t know exactly).
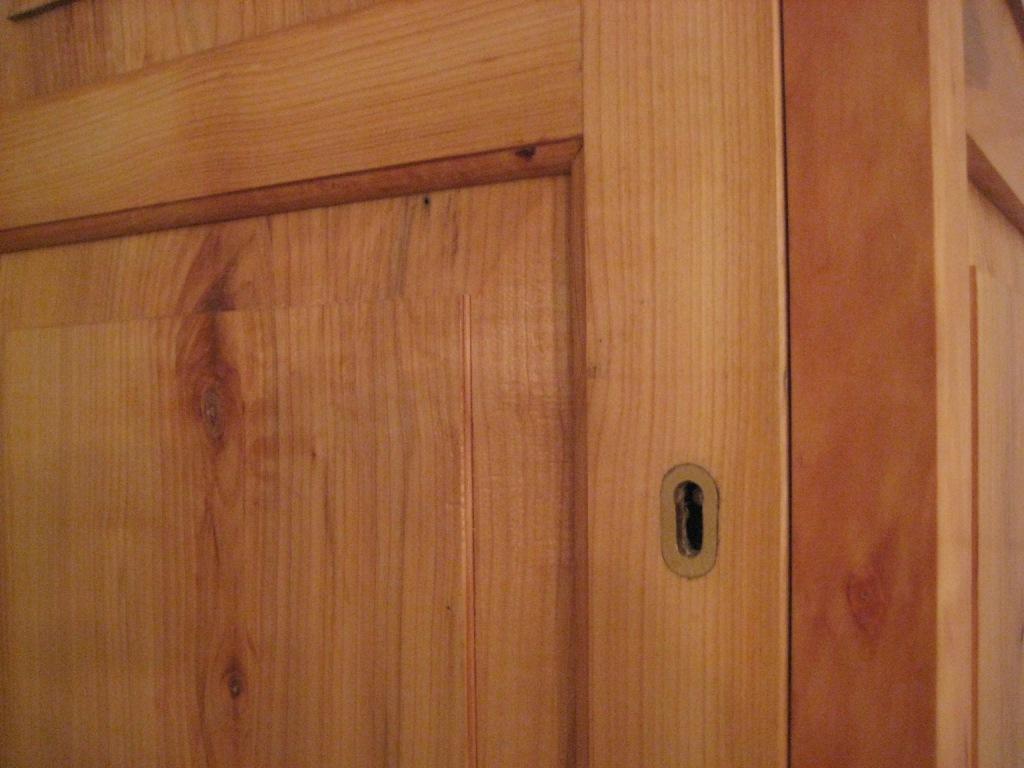
The door is also made from rowan, for the moulding I had to reach for the router as I didn’t have an adequate moulding plane.
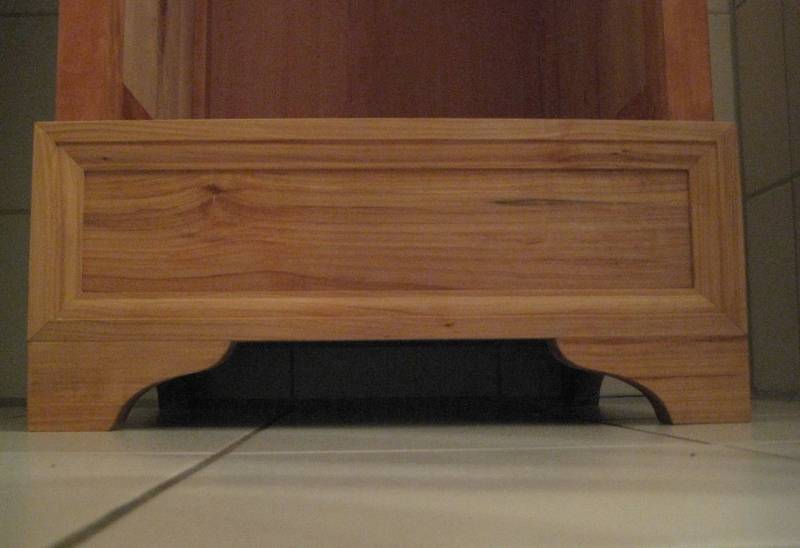
Surface treatment: one coat of walnut-oil with siccative and two coats of wax (self-made mixture of carnauba wax and bees wax solved in turpentine). This surface treatment changed the rather grey color of the rowan into a nice and warm tone.
Shelves, back and insides of panels got two coats of shellac.
Machines were used for:
- milling the pear and the rowan logs (log band saw).
- rough dimensioning of the boards for gluing-up the panels (circular saw and table saw).
- drilling the holes fort the connectors.
- routing of the door-moulding.
Handtools were used for:
- smoothing all boards.
- trueing the edges for glueing-up.
- dovetailing of the carcasses.
- raising the panels with a panel-raiser (which had to be refurbished before)
- wood joints (mortise-and tenons)
- cutting the grooves for the panels with a grooving plane.
- making the mouldings with a moulding plane.
The building-phase was unintentionally interrupted when one of the side-walls made its way down from the balcony when drying there in the sun after the walnut-oil was applied ](*,) (somehow it lost its balance and, according to Murphy’s law, slipped through the slot between the balcony floor and the balustrade. It was completely disassembled by the impact on the concrete one level below. Interestingly, the damage was not so big. The panels were almost unaffected, most of the joints could be repaired and only smaller parts of the rails and styles had to be replaced. Using wood of similar grain the damage done could be made almost invisible. So, this is my first piece of furniture that required restoration work before it was completed .
.
I liked building the cabinet very much and learned a lot. It was my first project of this size, my first (raised) panels from solid wood, my first mouldings and my first complete door. So, I am quite satisfied.
Rowan is a wonderful wood that I can highly recommend. Difficult to come by in acceptable dimensions, but nice to work with and with a very specific grain and colour. If you can get some don’t hesitate!
Thanks for looking!
The two carcasses are made from rowan and were dovetailed by hand. Originally, I had planned only horizontal mouldings revealing dovetails in between. However, I made a mistake in the dovetail sizing resulting in poor aesthetics, so I decided to cover all dovetails with mouldings. The look of this picture-frame-like construction is, well, worth to be discussed… :? Building the moulding-frames was quite tricky and time-consuming but I learned a lot.
The panels are also made from rowan, the styles and rails are made from pear, since I didn’t have rowan in this length.
Stupidly, the pear had some inhabitants cropping up during construction :twisted: . So off the styles and rails went into my brother’s sauna from which they came – hopefully – without life inside them, but also twisted and distorted. Again, I had to reach for my planes…
The carcasses and sides are connected to each other with dowels and screws. When drilling the holes I used a template for exact results.
The shelves are made from rowan of lower quality. Here I even accepted small cracks, knots and some tear-out in order to save my better wood for later projects.
The back-wall is 7 mm plywood (poplar), veneered with steamed pear or service tree (don’t know exactly).
The door is also made from rowan, for the moulding I had to reach for the router as I didn’t have an adequate moulding plane.
Surface treatment: one coat of walnut-oil with siccative and two coats of wax (self-made mixture of carnauba wax and bees wax solved in turpentine). This surface treatment changed the rather grey color of the rowan into a nice and warm tone.
Shelves, back and insides of panels got two coats of shellac.
Machines were used for:
- milling the pear and the rowan logs (log band saw).
- rough dimensioning of the boards for gluing-up the panels (circular saw and table saw).
- drilling the holes fort the connectors.
- routing of the door-moulding.
Handtools were used for:
- smoothing all boards.
- trueing the edges for glueing-up.
- dovetailing of the carcasses.
- raising the panels with a panel-raiser (which had to be refurbished before)
- wood joints (mortise-and tenons)
- cutting the grooves for the panels with a grooving plane.
- making the mouldings with a moulding plane.
The building-phase was unintentionally interrupted when one of the side-walls made its way down from the balcony when drying there in the sun after the walnut-oil was applied ](*,) (somehow it lost its balance and, according to Murphy’s law, slipped through the slot between the balcony floor and the balustrade. It was completely disassembled by the impact on the concrete one level below. Interestingly, the damage was not so big. The panels were almost unaffected, most of the joints could be repaired and only smaller parts of the rails and styles had to be replaced. Using wood of similar grain the damage done could be made almost invisible. So, this is my first piece of furniture that required restoration work before it was completed
.I liked building the cabinet very much and learned a lot. It was my first project of this size, my first (raised) panels from solid wood, my first mouldings and my first complete door. So, I am quite satisfied.
Rowan is a wonderful wood that I can highly recommend. Difficult to come by in acceptable dimensions, but nice to work with and with a very specific grain and colour. If you can get some don’t hesitate!
Thanks for looking!