Anyone built a Paulk workbench?

UKworkshop.co.uk

Help Support UKworkshop.co.uk:

This site may earn a commission from merchant affiliate links, including eBay, Amazon, and others.

Pord

Established Member
Joined
1 Feb 2018
Messages
47
Reaction score
0
Location
Scotland
Looking for any construction tips and wisdom from anyone who has built and uses a Paulk workbench.

I've bought the plans and am ready to buy the materials. Ron P recommends 12mm a/c plywood sheets (5 required). Do we think Malaysian ply would be ok? Need it to be affordable.

Thanks.
 
The top of my workbench is similar to a Paulk in design but mine is permanent not portable so it is just in one piece. The actual top of mine is 3 Festool MFT style tops joined together, they are just screwed on so I can flip and replace when needed. For the cut out ribs I used 18 mm birch ply and for the bottom I used a sheet of 18 mm shuttering ply. Mine then sits on a frame with a shelf lower down.

It is used as my assembly and power tool table really, loads of clamping options, works well. Also use it with my track saw and dogs for cutting up panels, again works well. I love how you can keep the top clear by storing tools inside it, only downside is because of the holes in the top a lot of dust falls through.

If you are building the proper portable version it's different to mine but still basically a torsion box top.

Doug
 
My 'workshop' is the garden, as a consequence I had to build something portable. I looked at the Paulk design and thought - yep I can do that. Given that I'd never really built anything before then. Mine is fairly small though, the top is 1200 x 500. Having built it without plans ( literally just looked at a couple of pictures), and being very much new to woodwork I would say the task isn't even remotely complex. I used 4 tools for the whole thing, a cheap Makita mitre saw, a cheap jigsaw, a screwdriver and a Katsu palm router to round over the cut outs. Rounding them over was a mistake btw, my quick clamps don't get great purchase on those round edges.

These things always remind me of caravan/camper/barge furniture...

I have no dog holes (didn't know about them at the time) or router table cutout etc, just a basic version to act as a workbench that I can carry back in the house and store upstairs.

I used 18mm B&Q ply for the body parts and 10mm ply for the top. You can see (top left corner) why now, if I'm cutting on it, I use a 1200x500 bit of 25mm MDF which slides on top.

I might actually build another with some of the bits I missed out.

bmw.png


bmw-legs.png
 
Thanks for the replies gents, very useful. I can see the likelihood of dust gathering on the shelf beneath the work surface, so I may create a couple of slots to aid brushing out.

Looking forward to the build.
 
Just thinking, another way to avoid would be to make the top out of two sheets laminated, with only the top sheet drilled?
 
I don't think that would work Rick. The holes are there to put wee f-clamps through and clamp work to the surface.
 
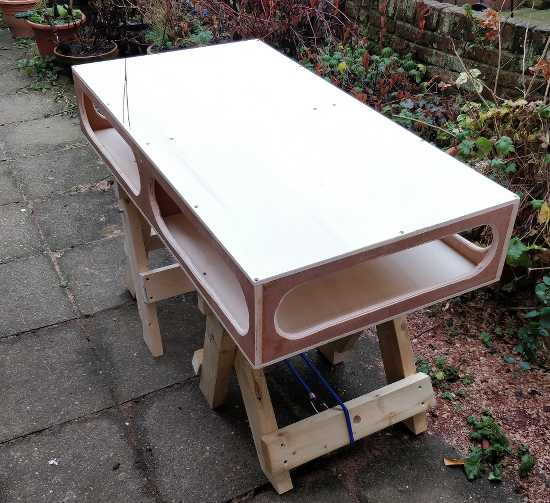
Thought I'd give a quick update and thoughts on my Paulk workbench build, which is now complete.

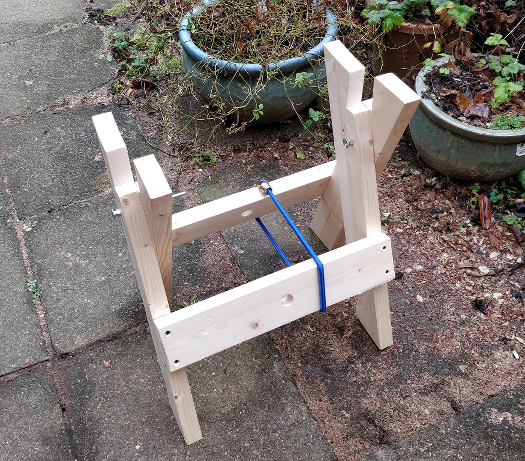
Really enjoyed the process, and the almost architectural aesthetic gives it great presence and is very pleasing. It's hugely useable, easy to set up, and the leg assembly is very forgiving on slightly uneven floor surfaces such as my suspended wooden board floor.

I don't have a router or the 2 large holesaws the plans call for, so I decided to do all the big cuts freehand with a jigsaw. Consequently they're not as uniform, but this is just a cosmetic issue and really only noticeable up very close.

The dog holes on top are well worth the effort. I did mine freehand with a combination of auger and forstner bits. Took a while and quite a few battery charges.

12mm ply is perfectly adequate.

I didn't add the router table, and will retro fit the table saw fixture (without the additional mitre tracks). However, rather than use just the bare poles suggested by Ron, I will be building a more universal plywood box 'cradle' that will sit on the poles. My table saw will then sit inside the cradle, making it easy to accommodate any future change to my table saw.

In summary, it's a very intelligent design and well worth the effort. $10 for the plans is a bargain, and Ron has even produced a series of videos of an actual build that make the whole process very do-able.
 

Attachments

  • IMG_20180617_194137-min.jpg
    IMG_20180617_194137-min.jpg
    237.8 KB · Views: 1,210
  • IMG_20180616_130731-min.jpg
    IMG_20180616_130731-min.jpg
    186.5 KB · Views: 1,211
Back
Top