Adirondack Kitchen cupboard doors

UKworkshop.co.uk

Help Support UKworkshop.co.uk:

This site may earn a commission from merchant affiliate links, including eBay, Amazon, and others.

RobertMP

Established Member
Joined
29 Mar 2006
Messages
863
Reaction score
1
Location
Woodford Green
Well they were Oak kitchen cupboard doors but now they are two Adirondack garden chairs :)

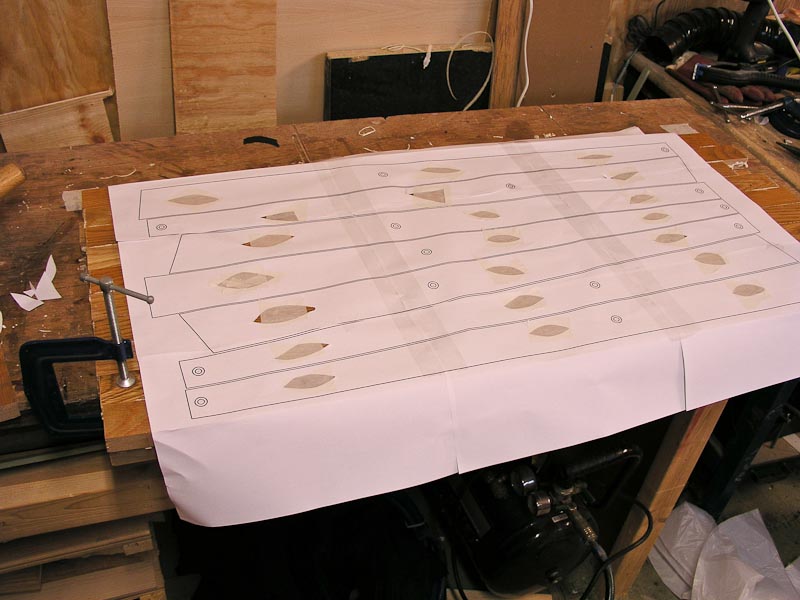
The panels inside the door were not big enough for most parts so I cut the rails into square ended and sided pieces and glued them into panels. The PU glue I used claimed it is suitable for immersion in sea water but I guess only time will tell. I taped a printout from sketchup onto the face ready to bandsaw two panel at once.
P1010072.jpg


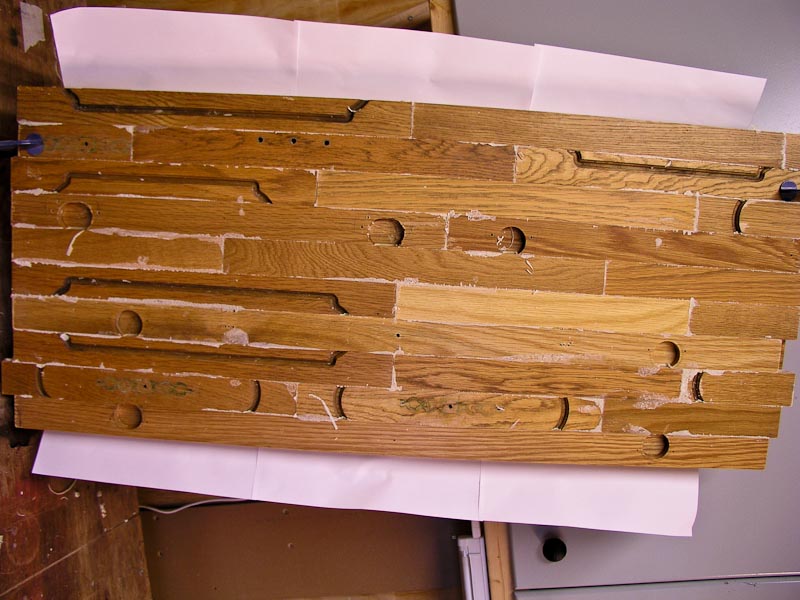
Kept all the holes on one side
P1010073.jpg


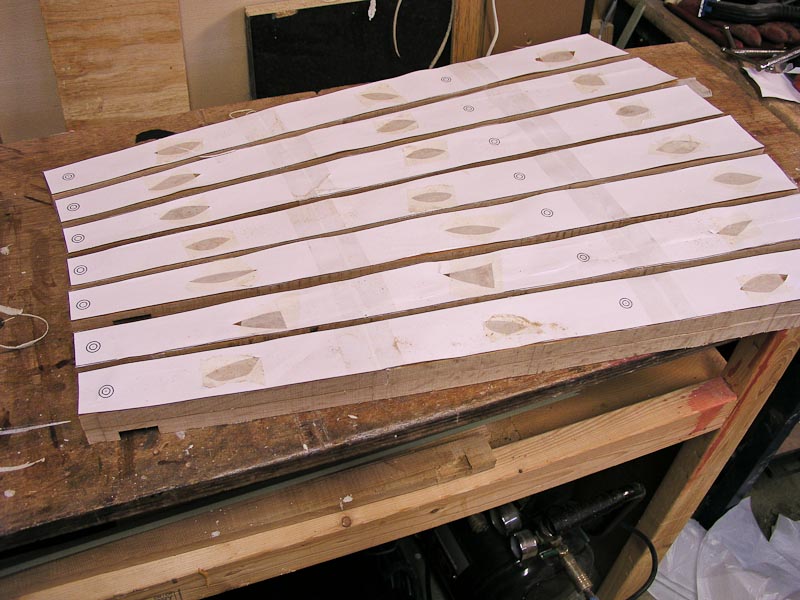
After a bit of band sawing
P1010074.jpg


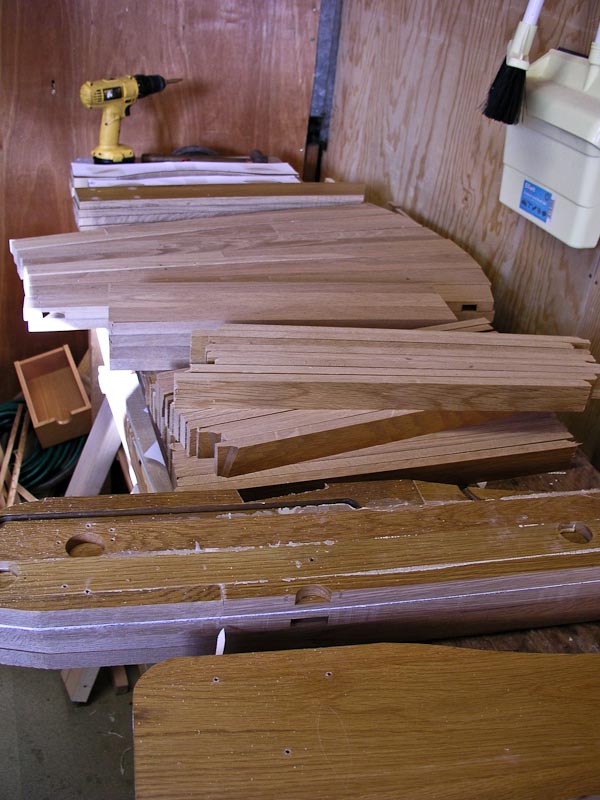
Repeat as required and end up with a set of parts
P1010075.jpg


Then after a bit of work on the planer thicknesser, router with 1/4" radius cutter, drill, belt sander and some filling where the cutouts break the edges followed by spraying with some reasonably priced yacht varnish from toolstation.....
P1010076.jpg


P1010077.jpg


P1010078.jpg


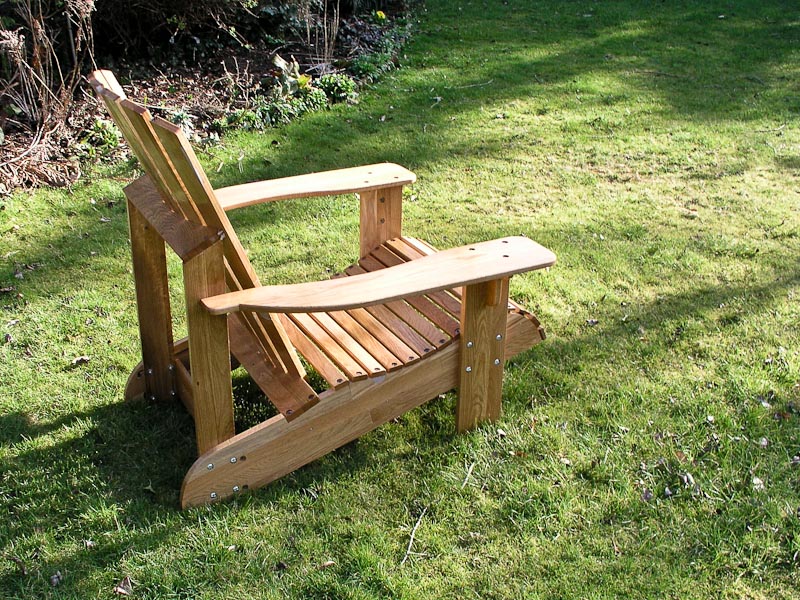
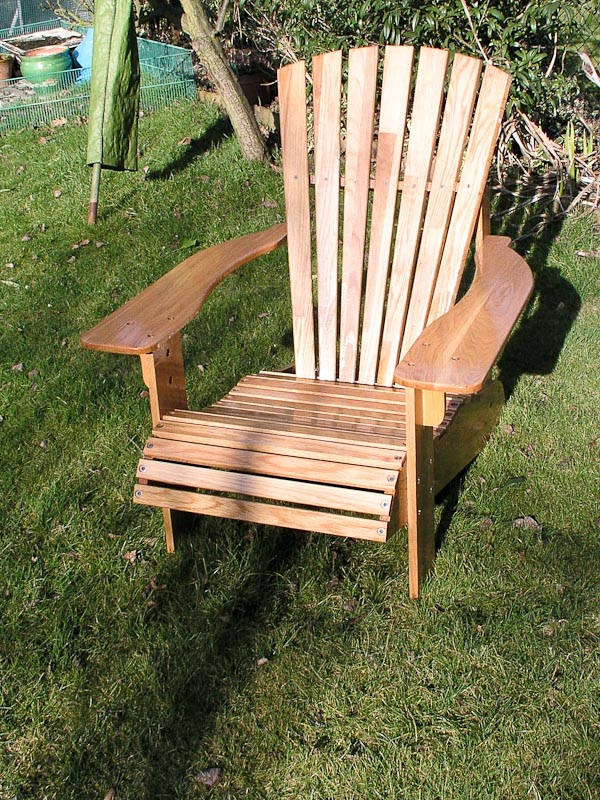
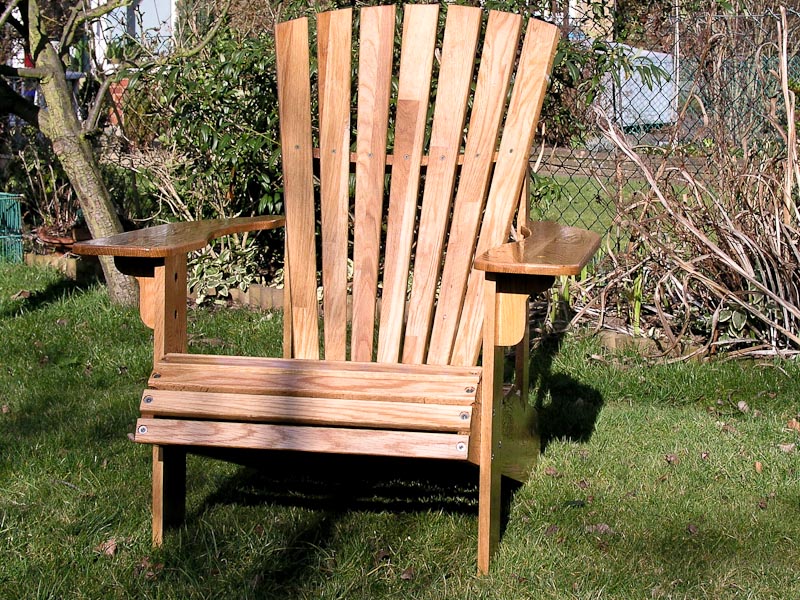
I quite like that you can see its origins on the internal or back faces of the main side pieces and the back slats. The arms are arguably a bit on the thin side at 15mm thick but I have tried the ultimate test of sitting just on the arm and it felt solid enough.
 
Robert,
They are surperb. I've always liked 'adirondack' design.
They would certainly brighten up my garden.

John. B
 
Very nicely done! I'm all in favour of recycling wood, and those are great.
 
That's a good way to make use of some un-wanted cupboard doors. Nicely done. :)

Do you not intend to plug and 'hide' the screw heads? It looks like they're only countersunk in; perhaps the only thing I don't like about this sort of design.
 
They are counter bored and have a decking screw and stainless washer. I think they look kind of functional :)

I was thinking I might fill them with black silicone or something then just cut it flush with a blade.... or I might just leave it looking functional.

The only screws that are just countersunk are the ones holding the back slats. They were sprayed individually and screwed on as a final assembly thing.

The roof bolts holding the main pieces together are in counterbores too.
 
Brilliant use of some "waste" wood. It just goes to show that something attractive can be made from something that some people would just skip. Its unlikely that MDF kitchens would get to have a second run like that
Owen
 
Brilliant use of some "waste" wood. It just goes to show that something attractive can be made from something that some people would just skip. Its unlikely that MDF kitchens would get to have a second run like that


Exactly!
 
I like it. These chairs are surprisingly comfortable don't you think?

Good use of reclaimed timber and the oak should last well outdoors.

I think the functional look is fine, the only thing I would suggest is sinking the screws that hold the back slats in place. If they are on the surface they can get hot in the summer - what summer I hear you say :)

regards

Brian
 
I'm thinking I may have made the seat portion about 2" too long for my lower back to be in the right place. My wife and daughter both say they are fine as they are. As it all bolts together a future modification is not out of the question if I'm proved right after a long spell in them.

But otherwise yes I agree. We sat in this style chair on our holiday to Canada. don't think the back garden views are going to match up to looking at theAtherbasca river at Jasper

I'll test the screw temperatures when the weather permits :)
 
I would be interested to see if you modify the length of the seat.

I made one a few years back (can't find a photo just now & it's dark outside right now) and while I find it comfortable enough to fall asleep in my SWMBO finds the seat too long. I'm tempted to make a smaller one at some time just for the LOML :)

BTW - I can fall asleep anywhere :lol:
 

Latest posts

Back
Top