Now for the upholstery. This is something I’ve never done before so this
WILL NOT be a definitive guide on how to upholster. It’s just a woodworkers approach, having read around the subject a bit, and having trawled YouTube for anything relevant. Copy my methods at your peril, and if there are any experienced upholsterers reading, please be gentle.
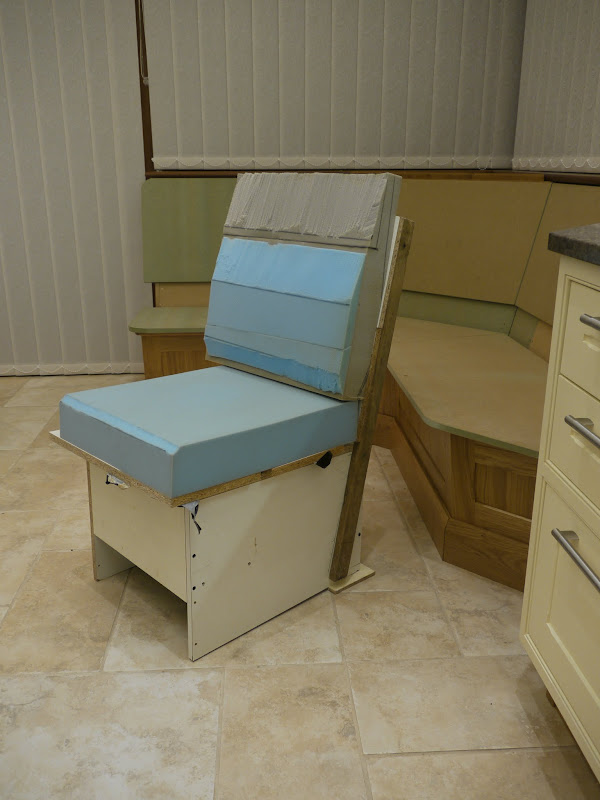
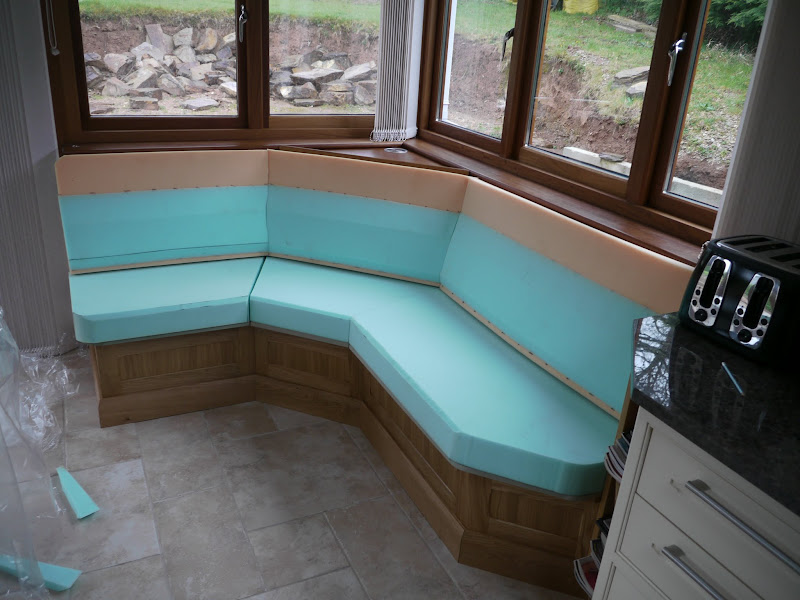
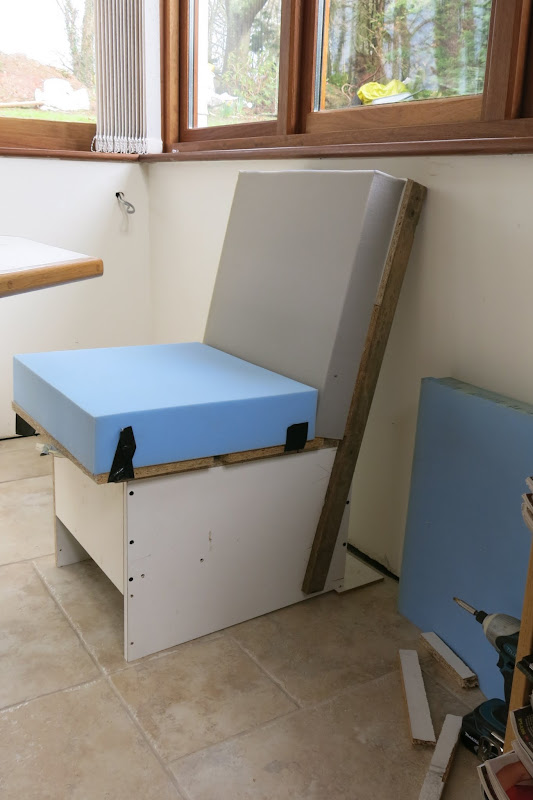
As I made clear earlier in the thread, I started with a rough mock-up to get the geometry of the seat the way we wanted it, and played around with various densities and thicknesses of foam. We finally settled on a 100mm thick medium density foam for the seat. I had bought some 50mm and 25mm foam so that we could try backrest thicknesses of 25mm, 50mm and 75mm but found that the medium density foam for the backs was too firm. We settled on a soft 75mm foam for the backs. This will feel firmer after it has been covered with polyester batting and covered with fabric, so I thought it best to err on the side of being a little too soft rather than too firm.
This happened right at the outset as it would determine how the seat was built, so it left us with several weeks to play around with it. I had some medium 25mm foam over and played around with some strips of this to provide some lumber support and it improved the comfort of the seat significantly, so this was added to the design.
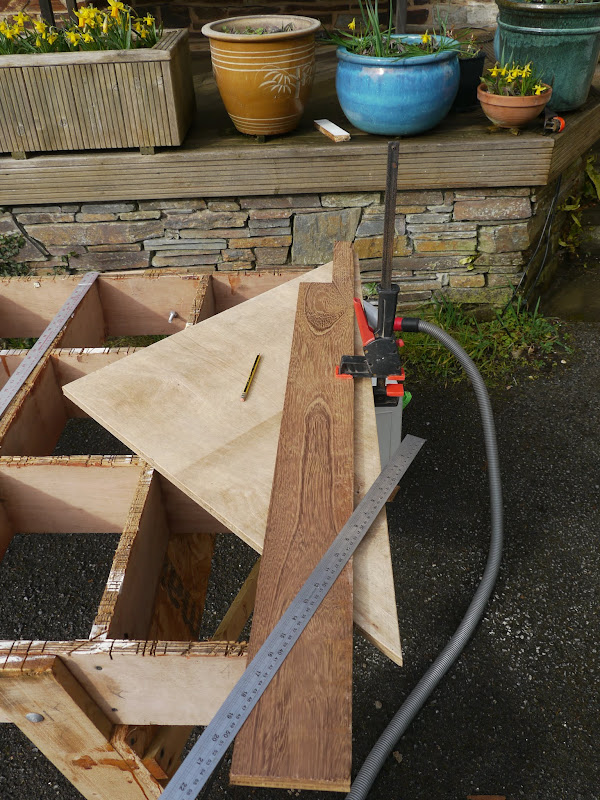
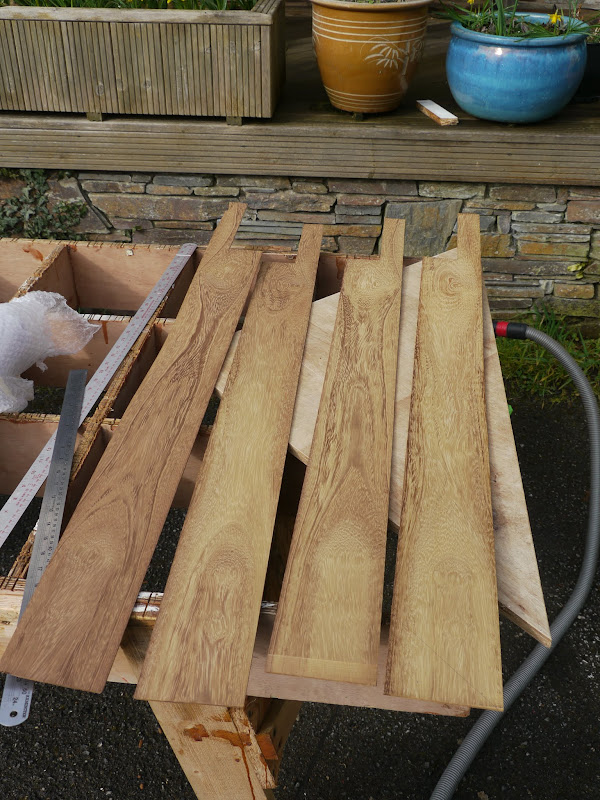
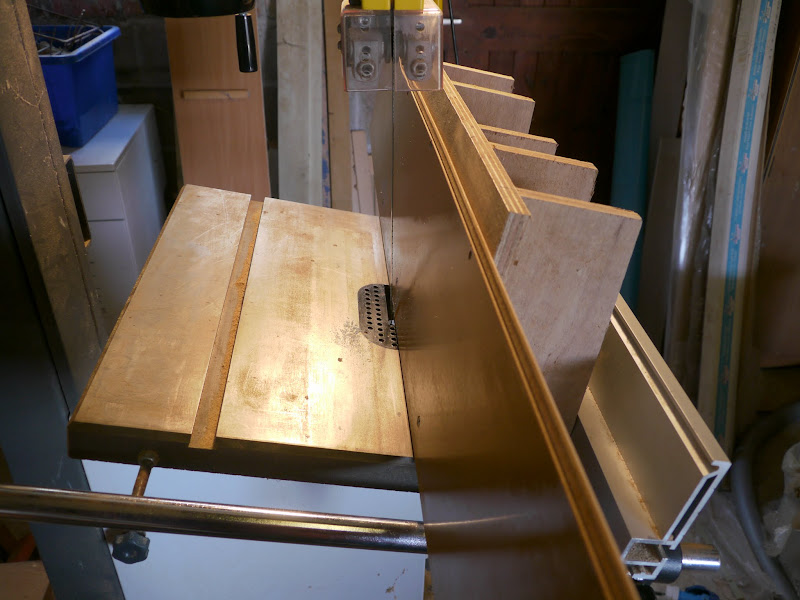
Several Youtube videos advocate cutting foam using a domestic electric carving knife. This produces a moderately satisfactory result where any irregularities will be invisible once covered with polyester batting and fabric, but I found that a far superior finish of cut came off the bandsaw!
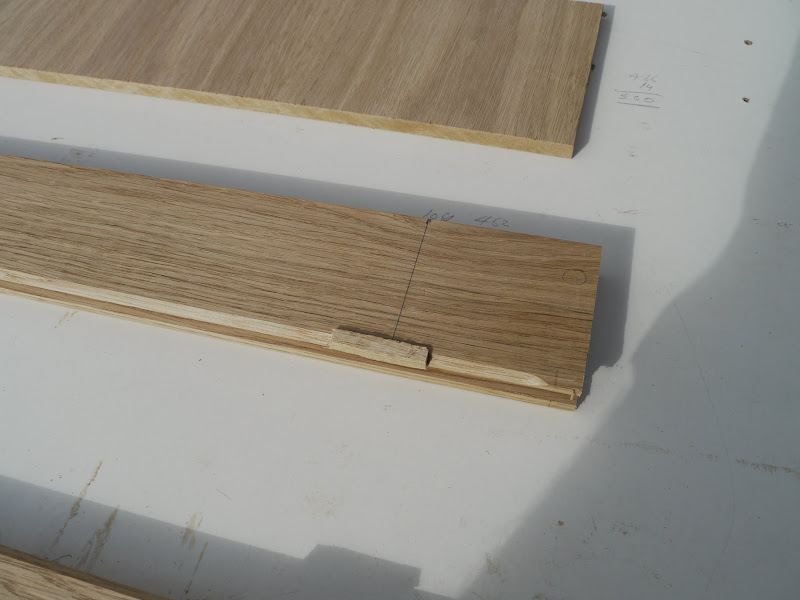
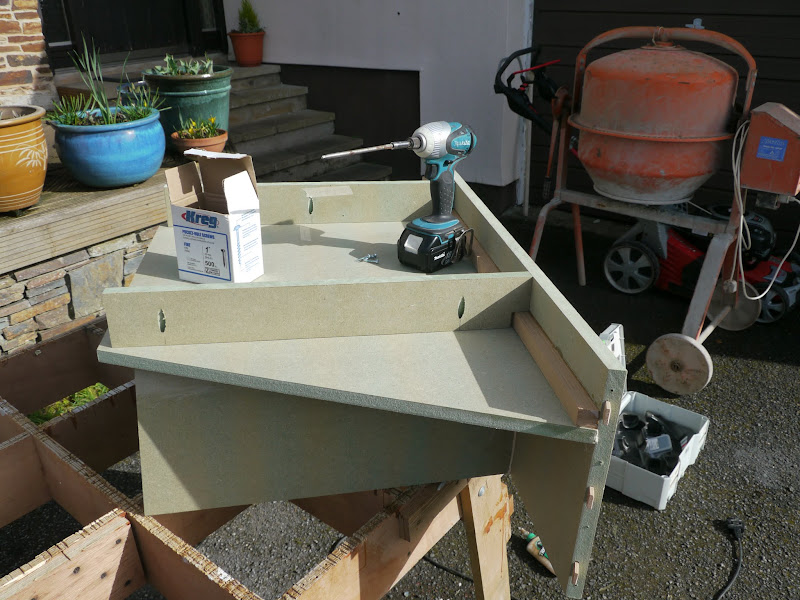
I used my home made auxiliary fence which I use for cutting veneers, and screwed a length of engineered floor board to it to provide support along a greater length. I lubricated the surface with some PTF spray so that the foam would slide smoothly along it.
Finally, when making the cut, I rested an old piece of skirting against the offcut to keep the foam in firm contact with the fence along its entire length. I have already cut one bevelled edge on the foam in the photo, and as you can see the finished cut is nice. However, if you don’t have access to a bandsaw, the electric carving knife will do just fine.
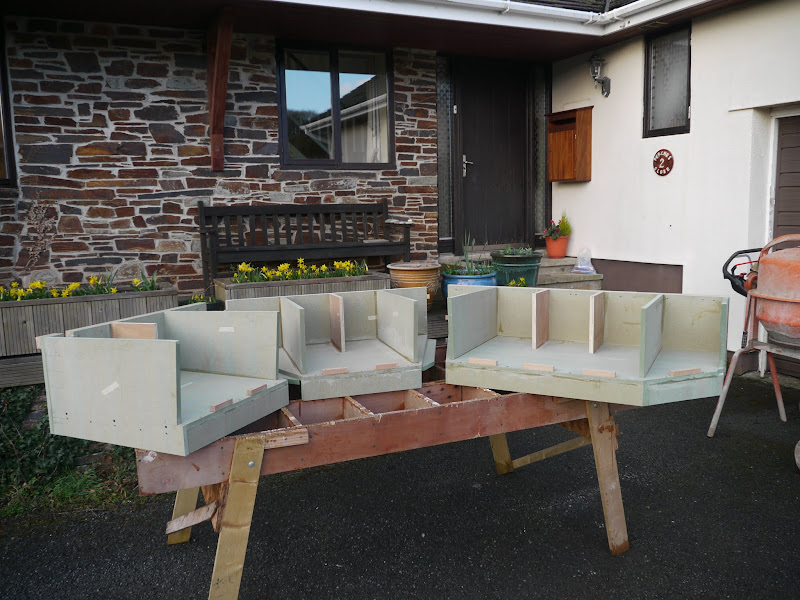
I had received some very helpful advice from a local husband and wife team who had supplied the materials for the mock-up, but sadly, due to a bereavement they were unable to help until after Easter, and possibly not even then, so I had to find a replacement, which accounts for the different colour foam from the mock-up.
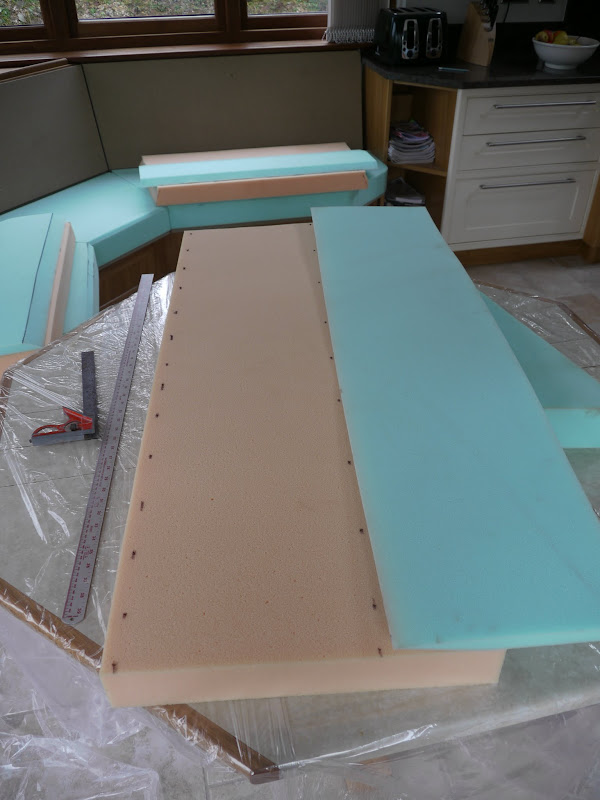
The lumber supports need to be glued to the back rest foam using a spray on adhesive. The glued areas are wide so strength is not an issue, so I used “No nonsense spray adhesive” which is as cheap as chips from screwfix.
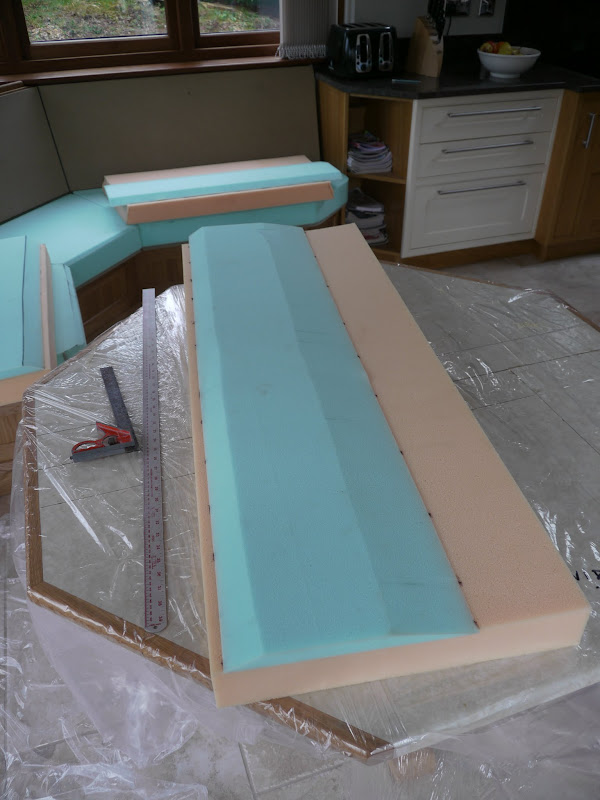
Mark the position of the lumber support on the back rest, lay the lumber support face down alongside and spray the area to be glued.
Then the lumber support can just be rolled through 180 deg into position.
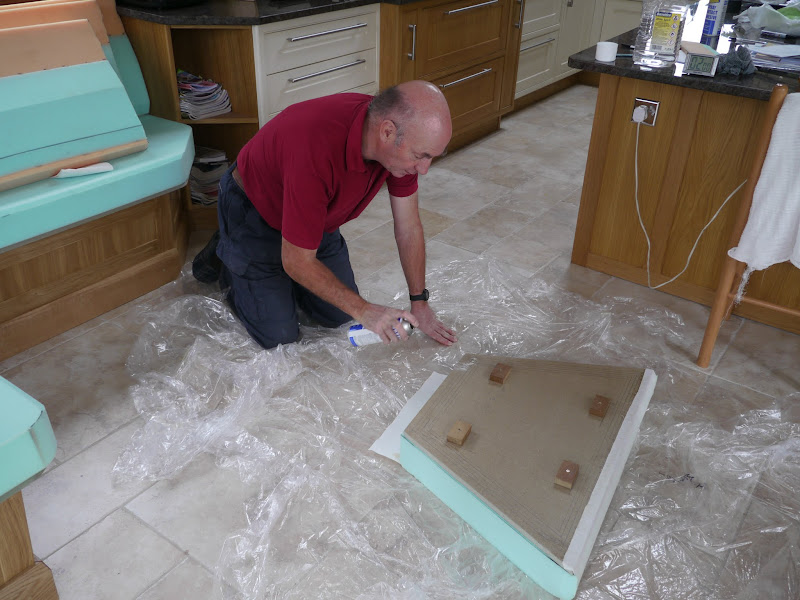
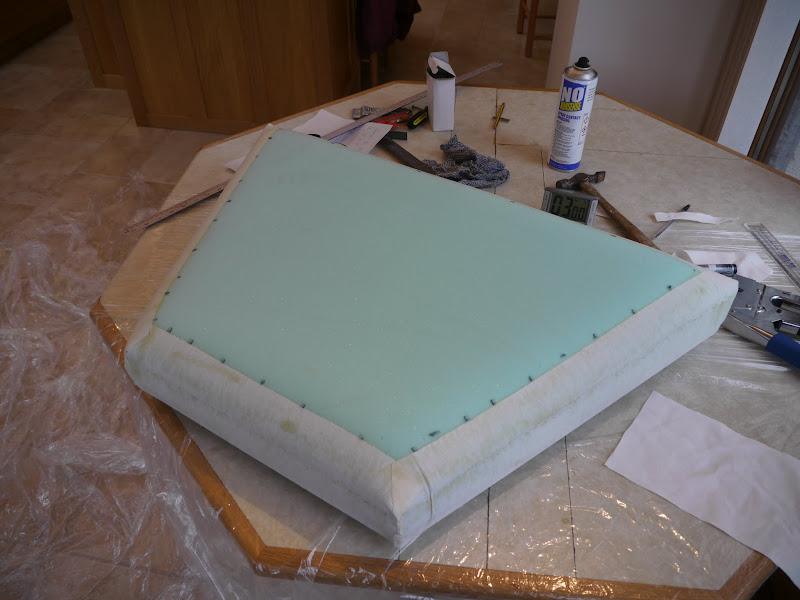
Then glue the backrests and seating foam onto the mdf bases using the same adhesive. The foam should be cut 10mm oversize so that it over hangs the edge of the MDF bases by 5mm all the way round. This will help ensure that if the foam shrinks back over time, there is no hard edge showing through the fabric.
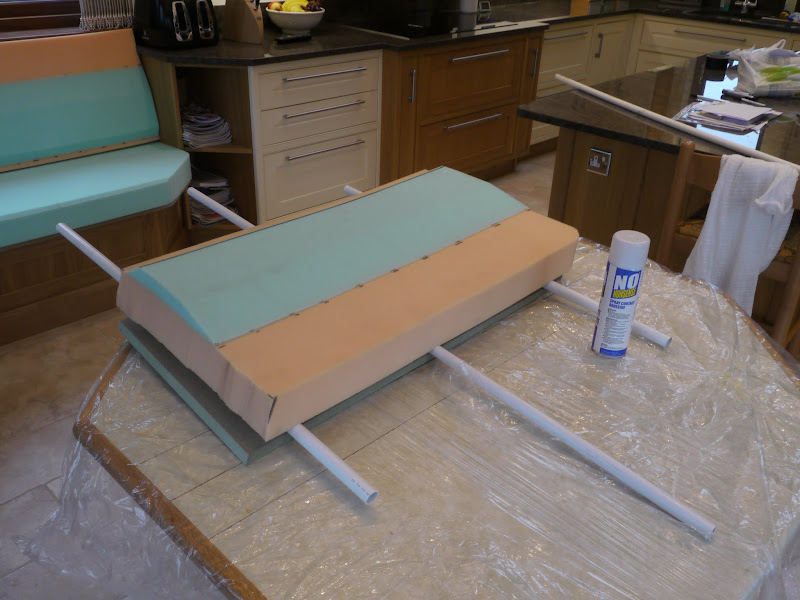
I found the easiest way to manoeuvre the foam into position was to rest it on some lengths of plastic overflow pipe so that the foam could be rolled to precisely the right place.
Then press one end of the foam into place, roll the pipe along the mdf, pressing the foam down as you go. The plastic pipe will get covered in glue, but being plastic it can easily be wiped clean with a rag and white spirit before you tackle the next one.
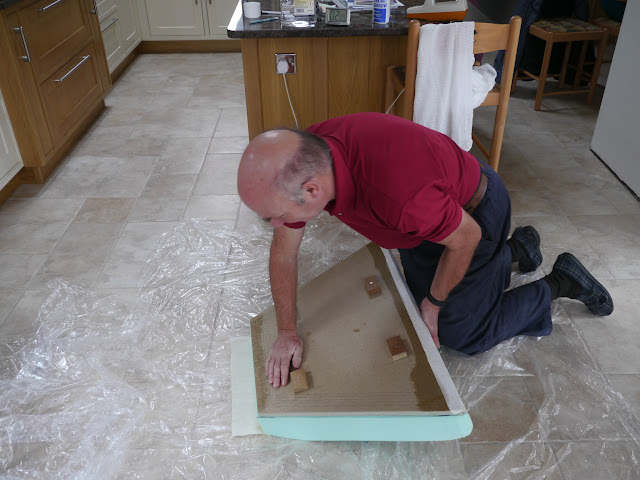
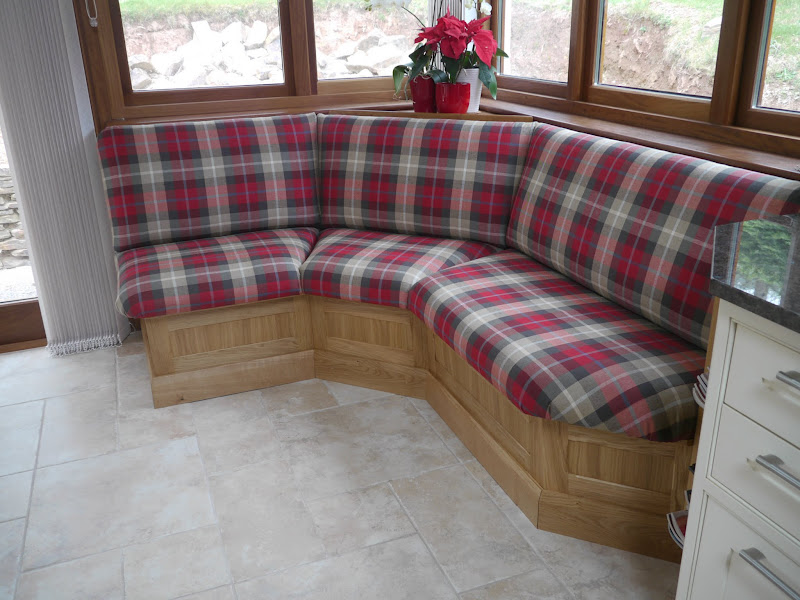
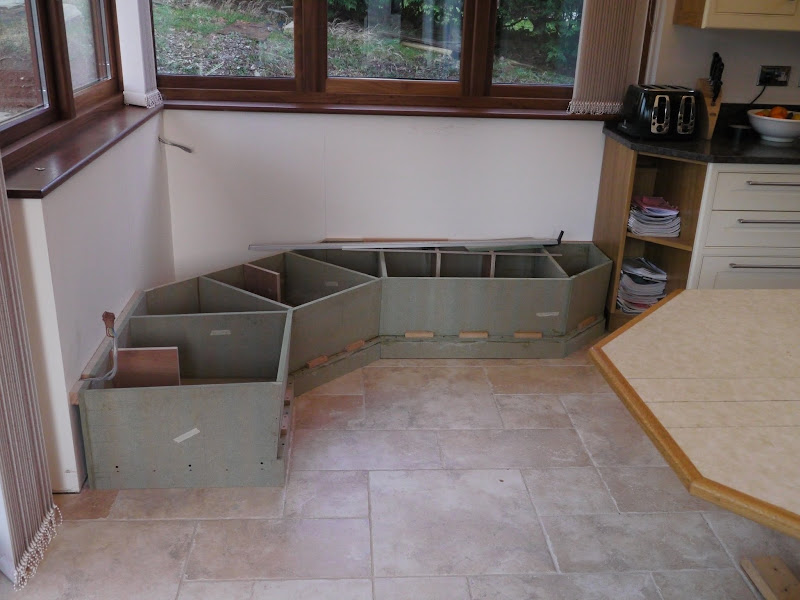
Here is the seat, with all foam attached, ready for the next part of the process.
At this stage, many people would launch straight into covering the foam with the top fabric, but I remain convinced that this would merely leave us with something that looked and felt like what it was - a lump of foam covered in fabric!
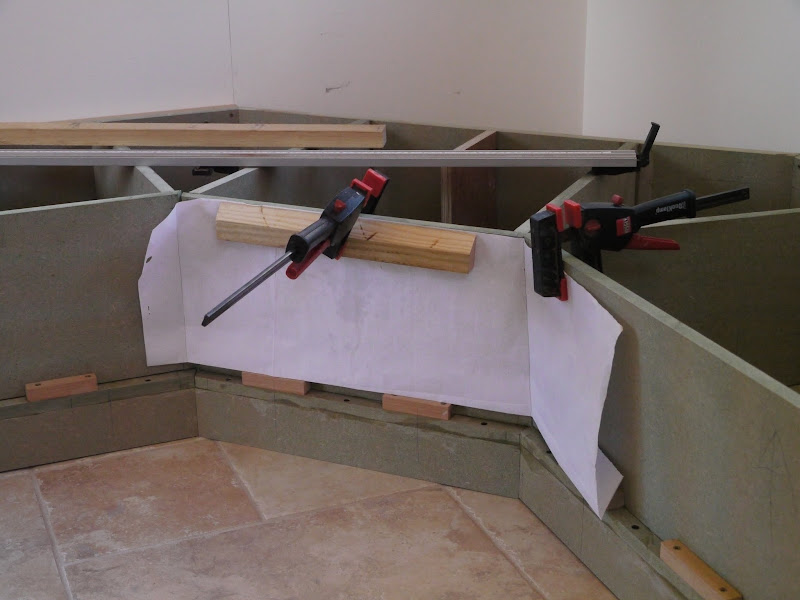
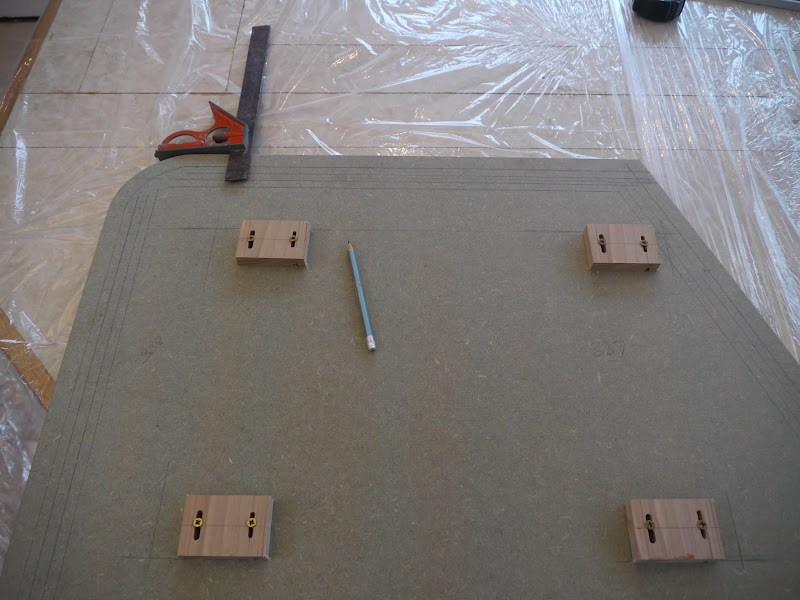
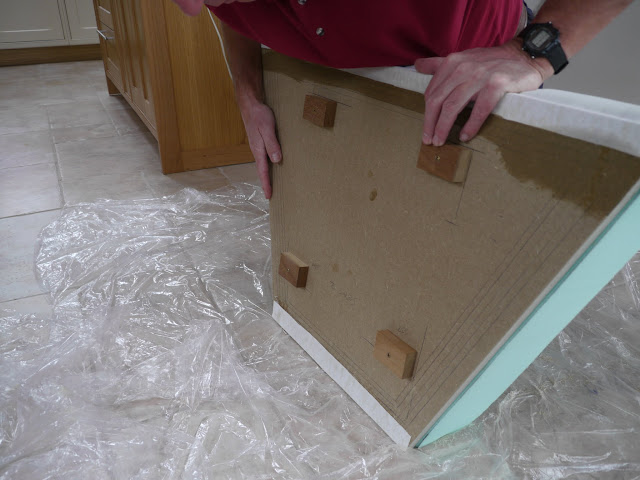
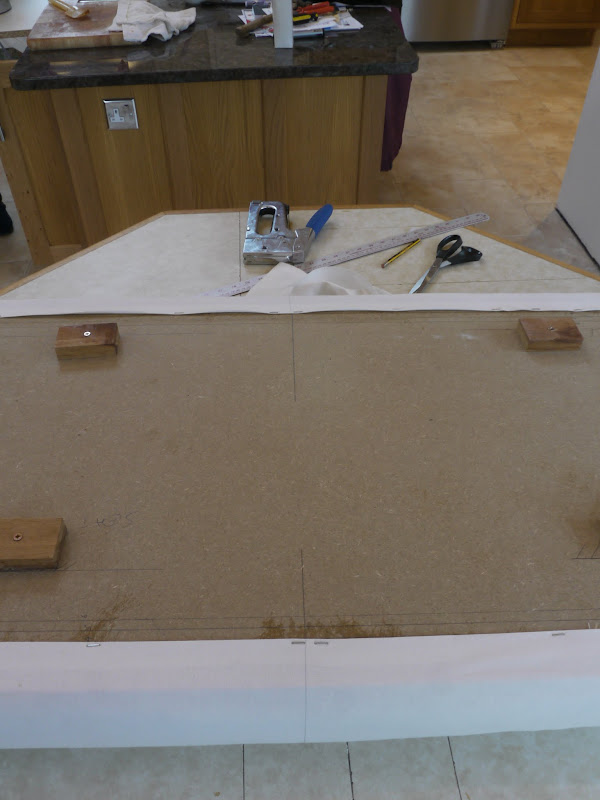
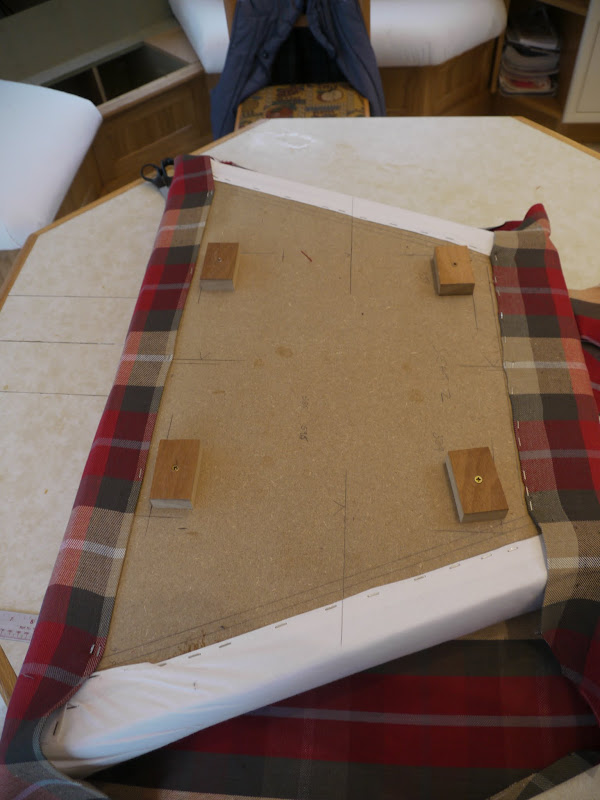
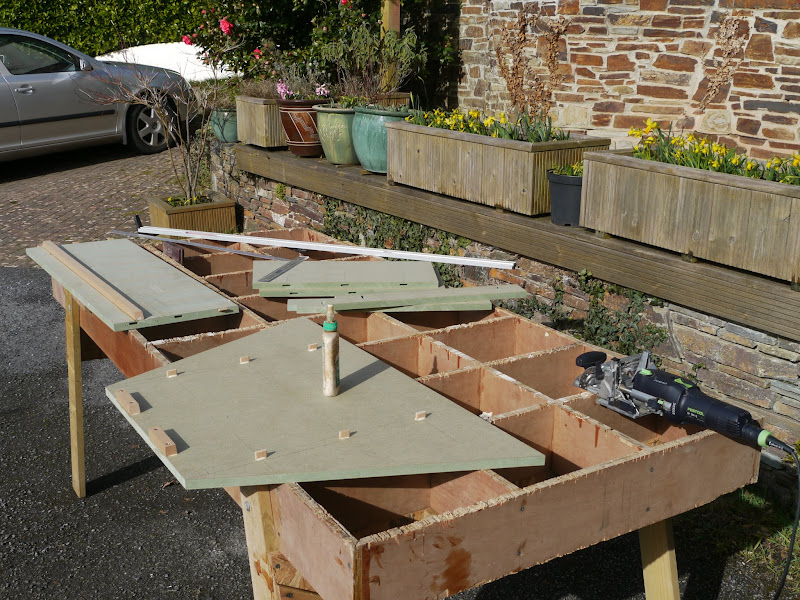
To help with positioning the fabric I drew lines parallel with the edges of the seat all the way around at 10mm intervals out to 60mm. This proved to be invaluable later when pattern matching the fabric between cushions, and for getting an even tension in the fabric. The blocks are to locate the seat onto the base.
I had been thinking about how to get an even curve along the front of the cushion when I struck pure gold on youtube. The relevant video can be seen
here.
Huge thanks to Joan Milton of
J.A. Milton Upholstery Supplies for posting this one.
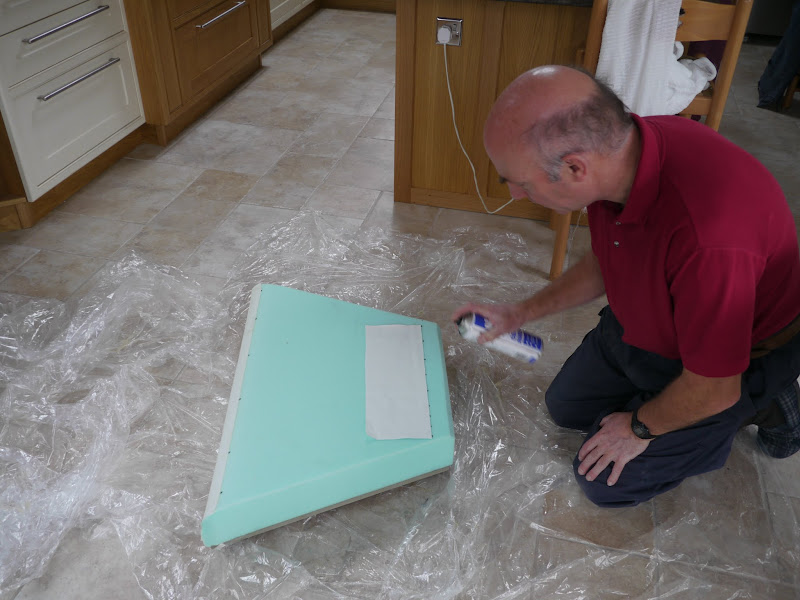
I cut some polyester/cotton fabric into strips 150mm wide and glued them to the top of the cushion 50mm back from the edge. It is worth doing this with a degree of accuracy.
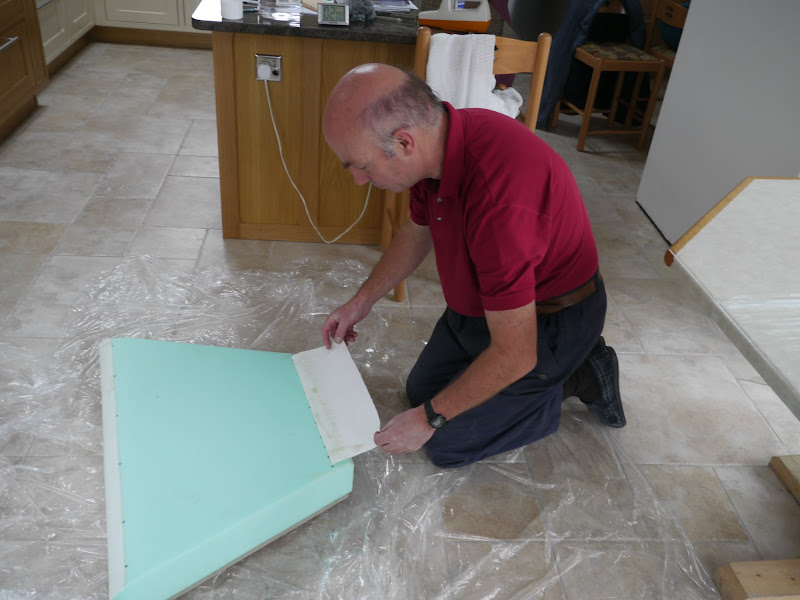
Rotate the fabric 180 deg into position.
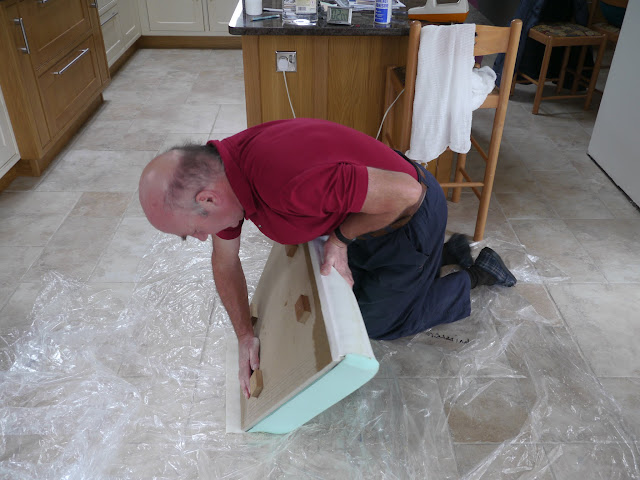
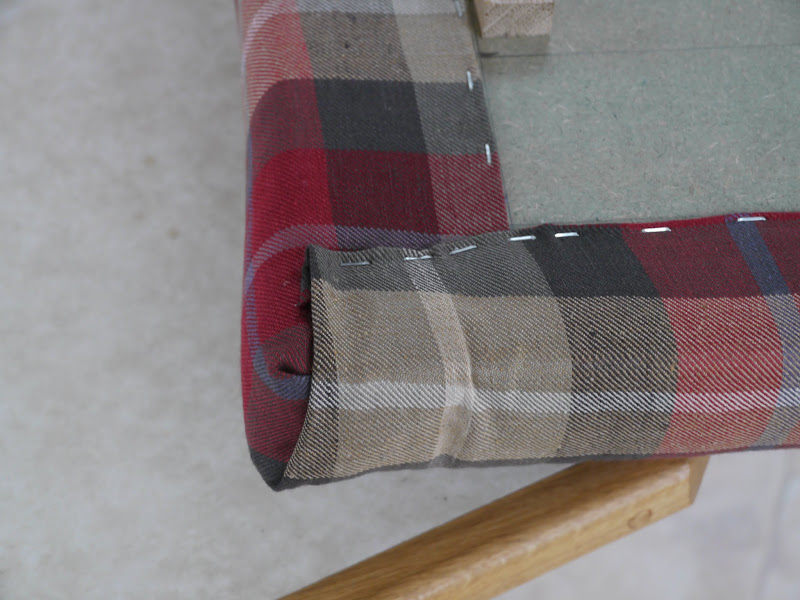
Turn the seat over and spray adhesive in the back of the fabric, the sides of the foam core, and the first 20mm of the underside, using the lines you drew earlier as a guide.
Apply even, downwards, pressure on the edge of the seat whilst rotating the seat up to near vertical with your other hand, compressing the foam along the front edge as you go.
Fold the remaining overhanging fabric along the bottom to the 20 mm line. If this is done evenly to the line, you will have a constant radius all the way along the edge.
Do this for each of the edges. You may wish to apply less pressure to the edges of the cushion that adjoin other cushions to leave a slightly more square edge.
Do not be tempted to wipe off any adhesive overspray with white spirit as it will wick through the mdf by capillary action and release everything you have just glued. DAMHIKT.
Repeat this for all the cushions. I found that this required 2 pairs of hands to compress the foam evenly along the full length of the edge of the bigger cushions.
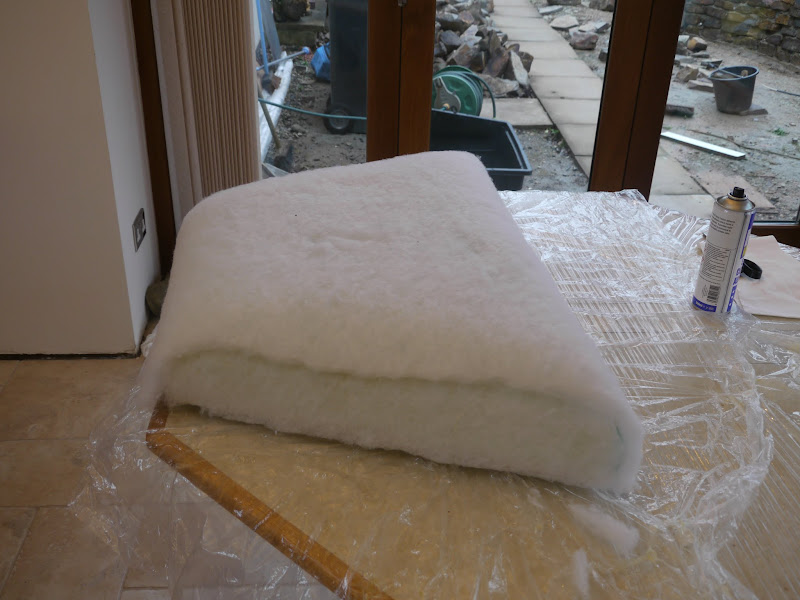
Next job is to cover the cushions with polyester batting. This will give the finished article a more luxurious feel, and get away from the “lump of foam covered in fabric” feel and appearance. I’ve used 2 layers of 20mm thick batting laid at 90 deg to each other, so that there are 2 layers across the seat but only 1 layer down the sides and edges. This is held lightly in place with spray adhesive - just enough to stop it moving about whilst the fabric is applied.
It would be quite acceptable to cover this with the top layer of fabric, but I decided to cover it in a cotton/polyester fabric to make it easier to get the final shape and tension in the top fabric right. Also it would provide some valuable practice. It will be attached with a staple gun.
Start by measuring the fabric accurately. I used some offcuts of the cotton/poly mix stretched around the cushion to establish the final dimensions, using the 40mm tramline drawn earlier on the underside as the measuring point, adding 20mm so that a 10mm hem can be folded over and ironed flat all the way round to provide a straight edge, and also to strengthen the fabric where it is stapled to the base.
Draw a line across the base half way along the longest axis of each cushion base, and also across the width. Make a similar mark on the fabric. This will enable the fabric to be positioned squarely on the cushion, and ensure that it is tensioned evenly.
Start by stapling one edge of the fabric along the front edge of the base. Staple the middle first, and then tension the fabric evenly in each direction, fastening the ends of the front edge. I used the 40mm tramline as my marker, and lined up the centre line of my fabric with the centre line drawn on the base. Stand back and wonder for the 100th time why it is that 46 years after engineers were able to land men on the moon, they still cannot design a stapler that doesn’t either jam, chew up staples, or just fail to fire a staple.
Wrap the fabric around the cushion, lining up the centre line marked on the fabric with the centre line drawn on the base. Using the heel of your hand, stretch the fabric both across the cushion and from side to side. Then staple the centre line of the fabric to the centre line on the base at the 40mm tramline. Then stretch the fabric in each direction along the back along the 40 mm tramline, stapling as you go. If you have measured accurately, this will tension the fabric across the width for the entire length of the cushion.
Then do the same across the width of the cushion to tension the fabric along the length of the cushion. I then folded in the corners to neaten them up. Repeat for all 6 cushions and you’ll end up with a covered set.
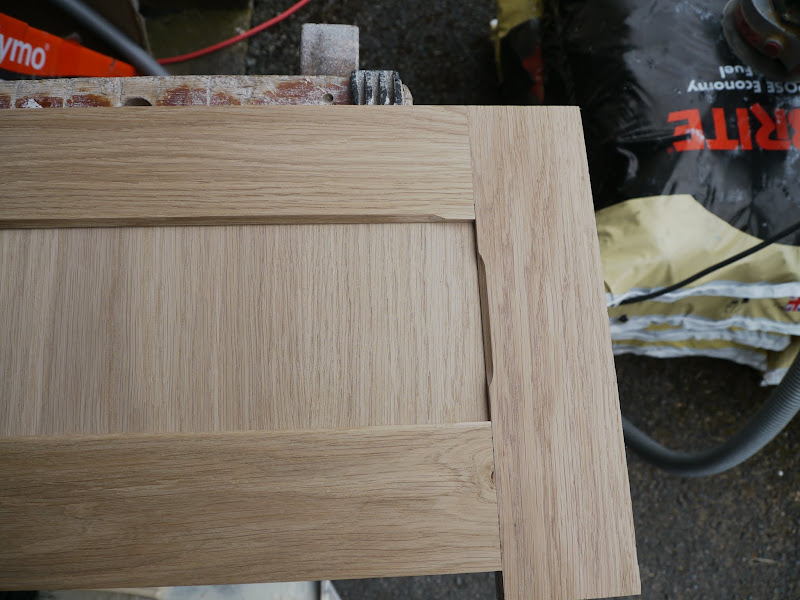
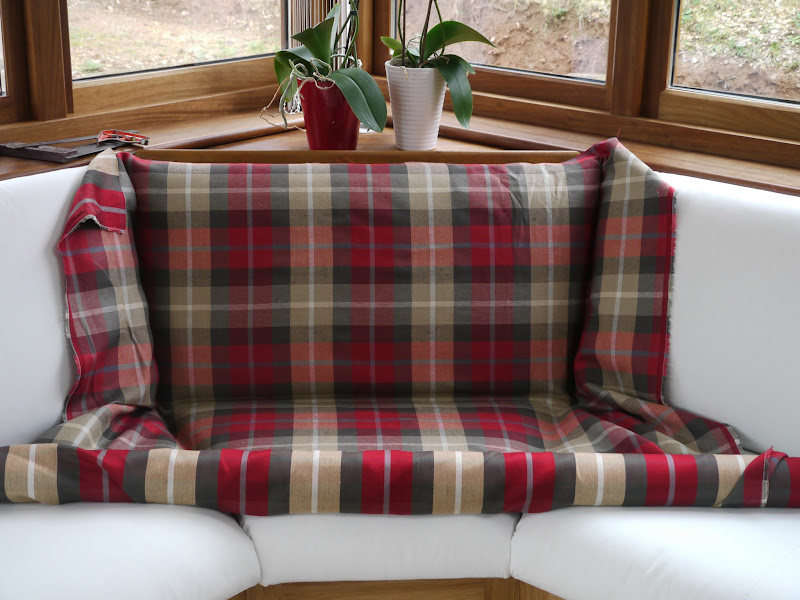
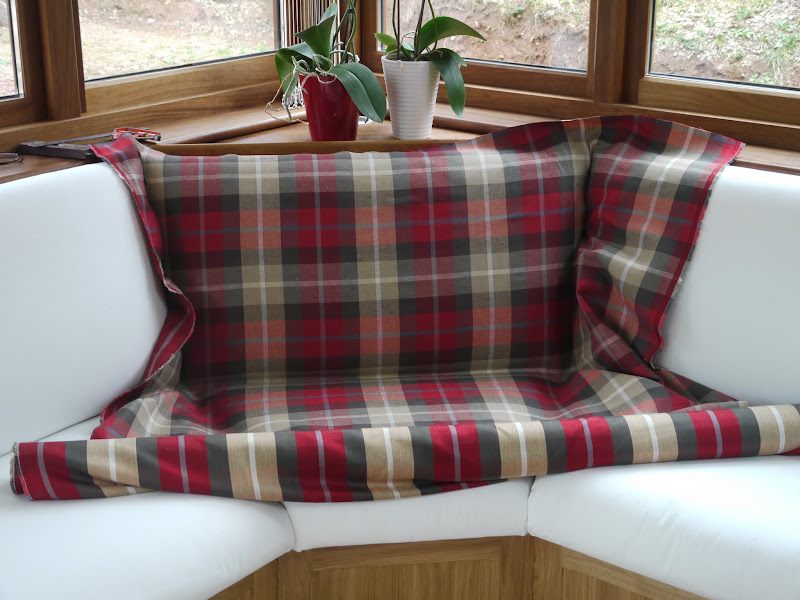
Now for the top fabric. We have chosen a check which will highlight any errors, but also provide plenty of visual clues for getting it evenly tensioned. The pattern needs to be matched vertically between the backs and the seats, as well as horizontally. I started with the centre back and want the pattern to be symmetrical across the cushion. We looked first at making it symmetrical from a red line,
......... and then from a brown one.
We elected to use a brown line as the centre line as we felt that not only did that look better, but also it was less wasteful of expensive fabric (6 metres at £43 per metre!) as it would leave a usable offcut down the sides of the smaller cushions which we will need for the largest one.
The centre line marked on each cushion is invaluable to position the fabric accurately to maintain the symmetry. Measure out the dimensions of the material using your offcut of cotton/poly, this time going to the 60mm tramline, and not forgetting to allow an additional 10mm for a folded seam at each edge. A sharp seam is ironed in. There is no pattern match to worry about on this first piece, just ensuring that it is symmetrically central on the back. I start by lining up the white central line in the brown stripe with the centre line drawn on the back and stapling the centre. Then, as with the cotton/poly first layer, I tension it along the 60mm datum tramline.
Again, as with the first layer, stretch the fabric across both the length and width of the cushion, and staple the centre line of the fabric to the centre line of the base at the 60mm tramline.
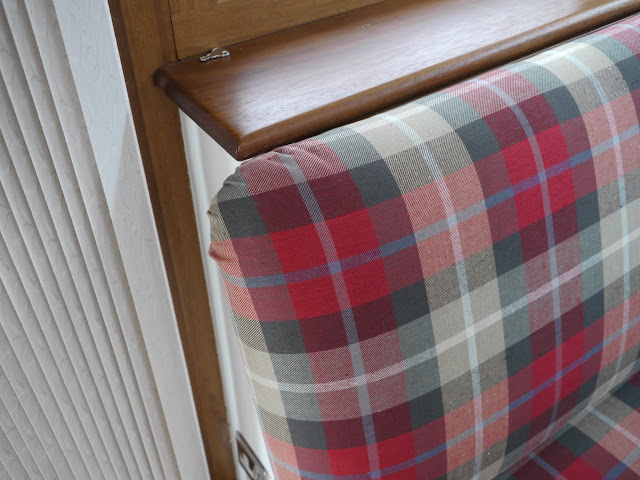
We found it helpful for one person to compress the foam with pressure on the cushion to make it easier to tension the fabric along the back edge. Stretch the fabric along the long axis of the cushion before stapling the ends. Turn the cushion over to check the appearance before stapling in between the initial staples. The lines on the check make it easy to spot any errors in tensioning and adjust as necessary. It’s worth getting this first one right as it will act as a pattern match template for the remaining cushions.
Do the same to the ends, matching the centre line of the fabric to the centre line on the base. Again, turn over and check that the tension is even, and that there are no creases, wrinkles, or wavy lines where they should be straight. You now have a cushion with corners which need to stapled down neatly, and this is treated differently depending on whether it’s a square corner, or a rounded one, and which edge of the cushion will be visible.
This is difficult to describe but I’ll try. I would strongly recommend that you practice with a scrap piece of foam first. I tried it out first by covering the seat of my mock-up with a piece of scrap material and it taught me loads!
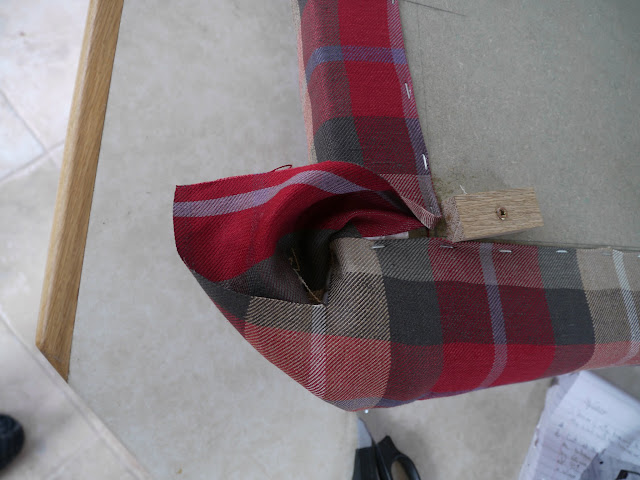
This first corner is bottom right of the back, so will be close to 90 deg and unseen. That’s one reason why I chose to start with it. Start by making a 90 deg cut across the corner, about 20 mm past the end, and continue it for about 40 mm, so that it stops about 20 mm in from the back edge.
Fold the cut edge down and staple it to the end of the mdf.
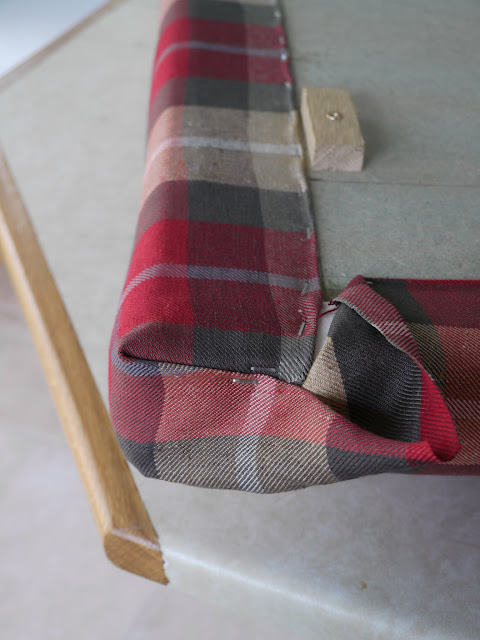
Make a similar cut in the other edge, and then cut a triangle across the corner at 45 deg to remove unwanted material. Then fold the edge inwards and staple it to the same edge as before.
Tuck the loose material down the side and staple the remaining material down.
The eagle eyed amongst you will have noticed that the first 2 photos are different corners to the last 2, and differently handed, but hopefully the principle is clear.
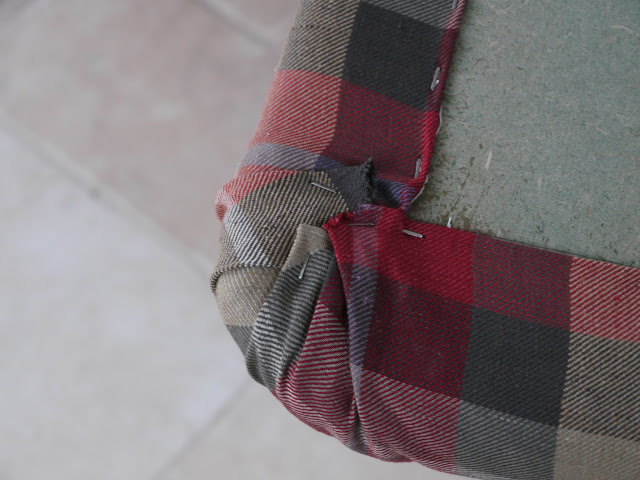
Rounded corners that show are treated a little differently. Cut a corner off the fabric to reduce bulk, and then tension the fabric around the edge at the halfway point of the corner. Then keep halving the corner, stapling the material back with excess taken up in neat pleats. The number of times you do this will depend on the radius of the corner and the thickness of the fabric.
This particular fabric matches every 9 ins both vertically and horizontally, and needs to be matched in both directions. A pattern match between the back and base is relatively simple. With the completed back cushion in place, take your material and lay it on the seat cushion, and find where the pattern should match with the back. Choose an easily identifiable line on the fabric that is as close as possible to the centre line on the cushion, and make a mark on the cotton/poly cover at that point.
Measure the distance from the centre line marked on the cushion and extend that across the width of the cushion. This is the datum that I used to align and tension the fabric. Then I measured back from the pattern match mark on the cushion around the back edge to the 60mm tram line, added the usual 10mm for the hem, and carefully cut along the back edge line. Then I measured the width of fabric needed using my offcut of cotton/poly, stretching it around the cushion and cut it to size.
Having ironed a straight edged hem along front, back and sides it was stapled to the seat base in exactly the same way as I did for the back, making sure that I aligned the pattern match mark on the fabric with the amended line drawn on the cushion, thereby ensuring that there was a pattern match.
Those are the centre cushions, back and seat, completed. It just remains to pattern match the fabric to the adjoining cushions and treat them in the same way. This is where a check fabric really helped. For the adjoining cushions, rather than centre the fabric on the cushion, I elected to make the fabric “book match” the centre cushion.
Again I started with the back. All the back cushions are the same height, so it was simply a case of identifying where the top of the fabric met the 60mm tram line on the centre back, and ironing a hem along that line. Then I did the same for the bottom and cut the fabric to length along that line. The fabric was placed loosely on the cushion and moved sideways until there was a “book match” at the join. The centre was marked on the fabric and cushion in exactly the same way as before, the length of fabric needed measured and marked off with the strip of cotton/poly and then cut to width. Now when the identical line on the fabric as was used for the centre back cushion was stapled along the 60 mm line along the back, starting from the centre as always, the pattern would have to match vertically because it’s starting from exactly the same place, and provided that you have matched up the centre lines it has to match horizontally as well.
Repeat the process for the seat cushion, again using the edge of the fabric of the centre cushion as the datum. If you start from the same part of the pattern, and staple it to the same 60mm line, then it has to match the adjoining cushion.
The final cushions on the right of the seat were slightly wider than the fabric which meant having to join an extra piece of fabric, which was when I was pleased that we had gone for the least wasteful orientation for the fabric at the outset as we were able to use the off-cuts from the centre cushions. This was machined in place using a “half fell seam” which is the second one demonstrated in
this video.
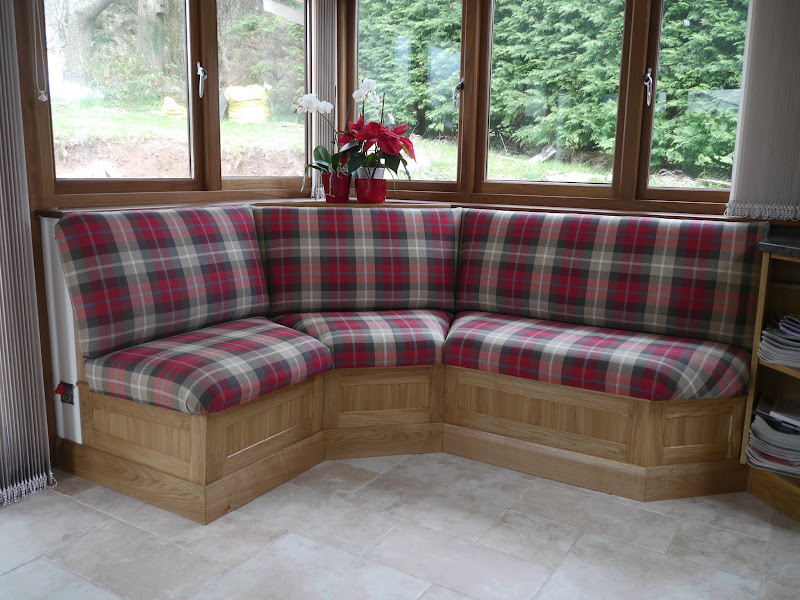
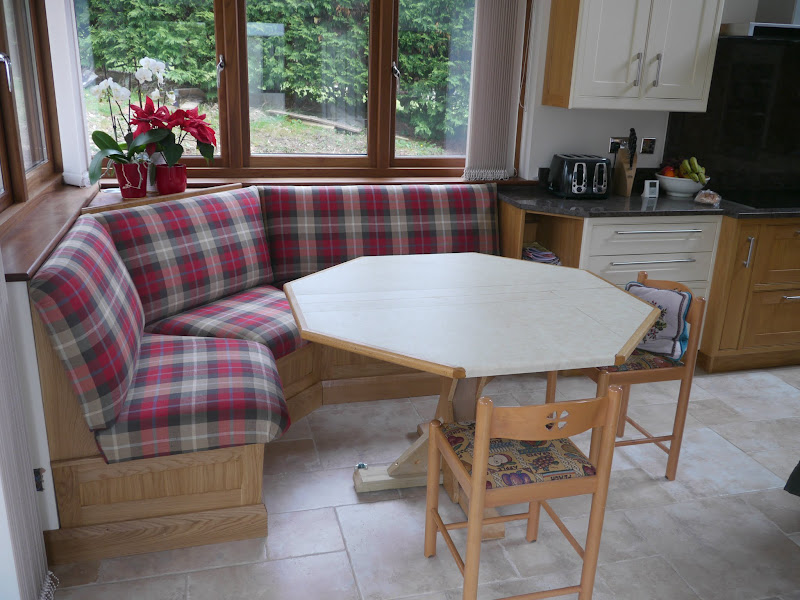
It just remained to spray the whole lot with “Scotch guard” and we were finished.
Replacing the temporary table and chairs will be a project for next winter.
This is my first upholstery project, and whilst I’m sure that I have made some mistakes both in technique and skill levels, I’m not dissatisfied with the outcome. Initially I had thought I had made the seat a little too low, but the effect of the upholstering is to make it firmer so that now it feels exactly the right height. Overall, the upholstering, including cutting the foam, took about 20 hours so it’s not a quick process, although I’m sure that I would speed up with practise.
If you have a similar project i would encourage you to give it a try. However, I would strongly recommend practising with a foam off-cut and some old fabric first as you’ll learn so much. I found that to be invaluable, and despite that, I still went back to the first corners of the seat that I had done, unpicked the staples and rearranged it as my results improved with each cushion tackled.
Finally, many thanks to “Pinch” for his original thread, from which I “pinched” many ideas, and to Joan Milton for the
“upholstery Hints and Tips” section of her website from which I learned many techniques.
And if you got this far without losing the will to live, thanks for reading.


")