Building Wegner's "The Chair" .

UKworkshop.co.uk

Help Support UKworkshop.co.uk:

This site may earn a commission from merchant affiliate links, including eBay, Amazon, and others.
Hi Custard

Your suggestions for clamping up are very helpful. Before any glue is applied, I shall find a way to ensure clamping along the length of the joint as well as across the joint.

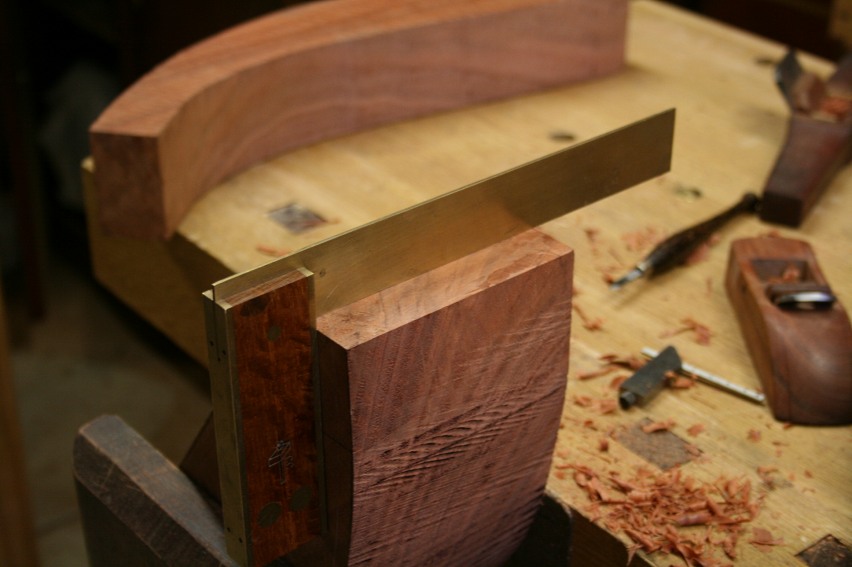
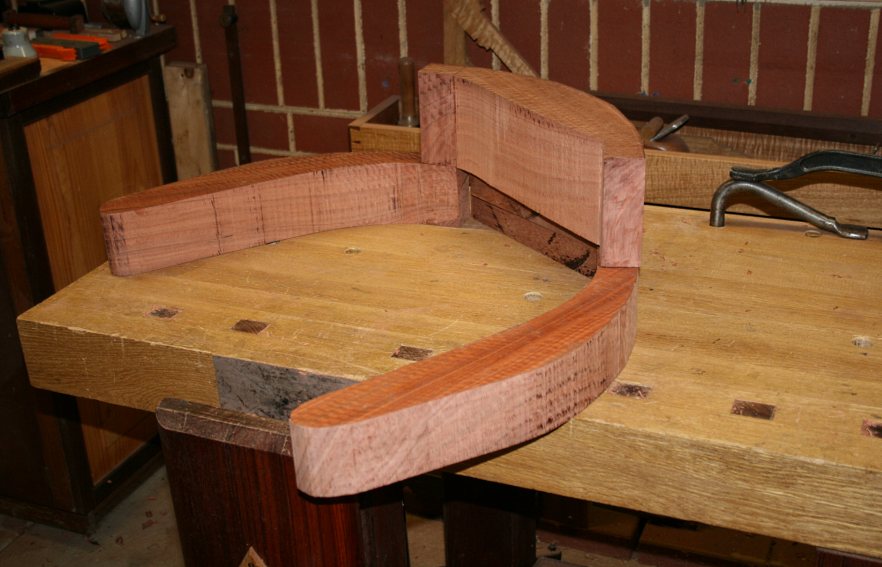
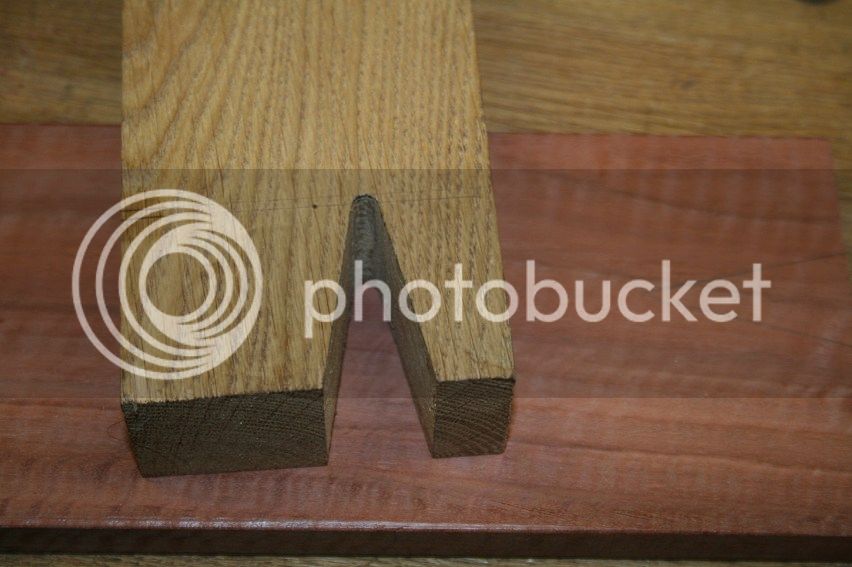
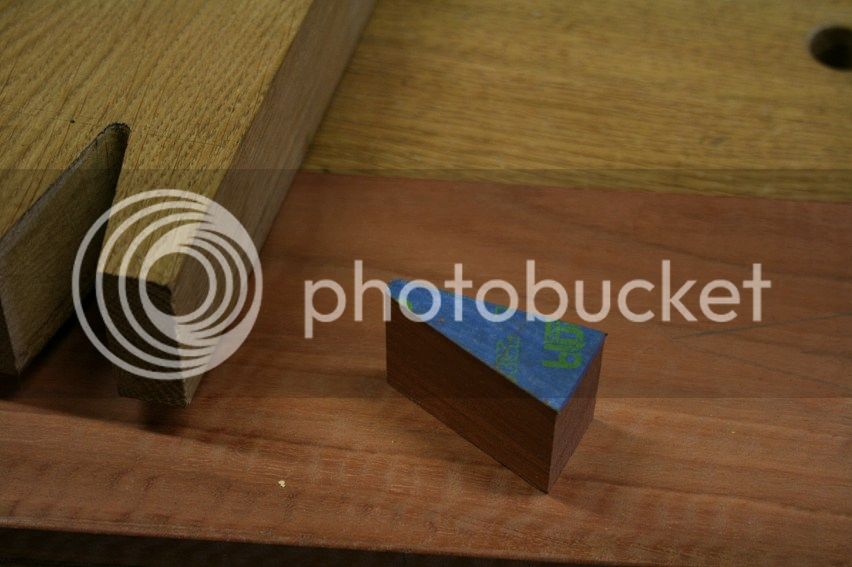
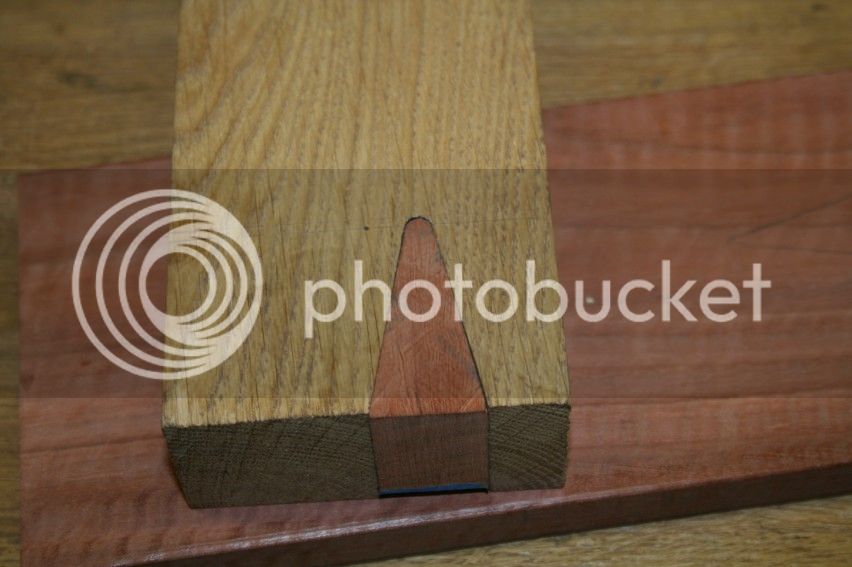
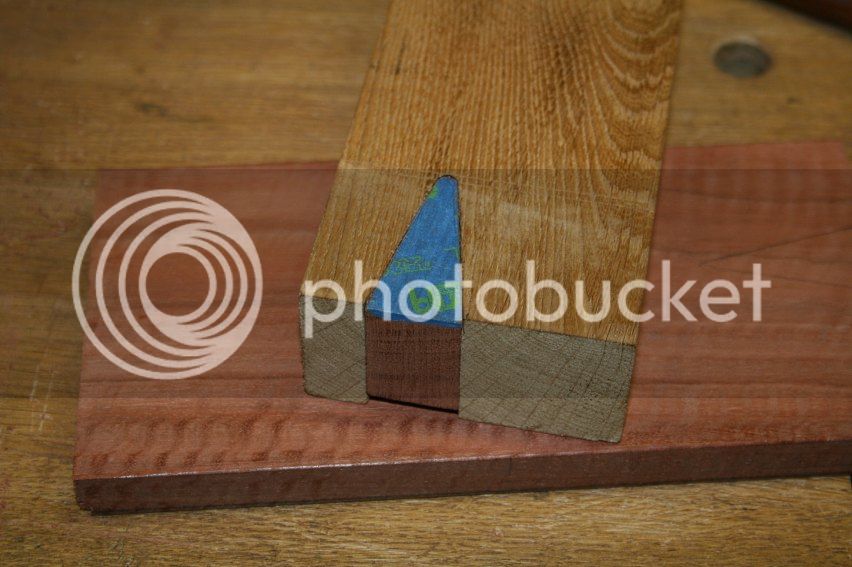
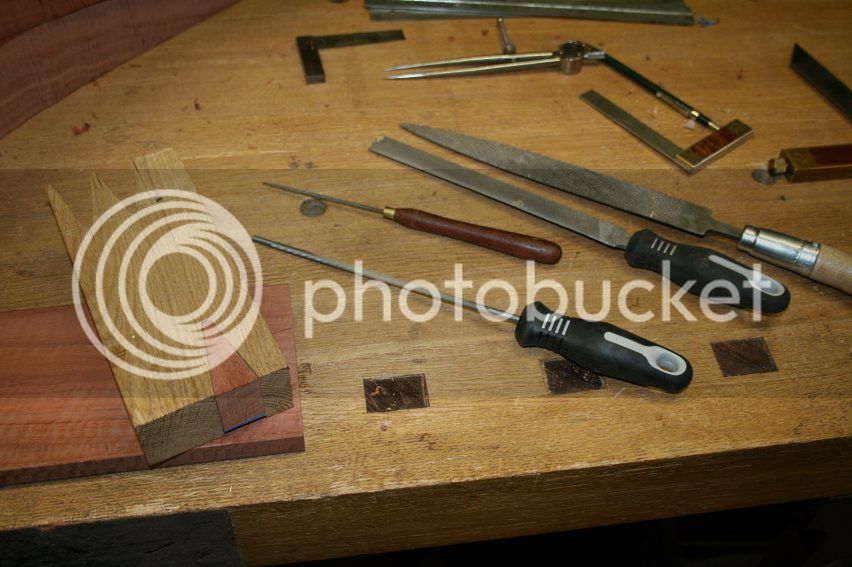
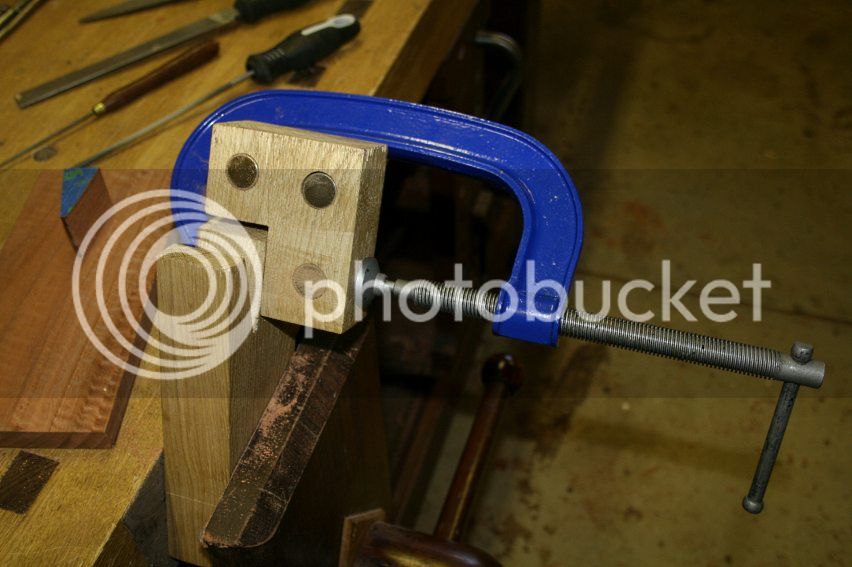
Your analogy of sawing a difficult dovetail is spot on. I would go so far to say that this is the most difficult dovetail I have faced to date. Bar none! The problem child is that bloody round end. I have created a jig that hand drills exactly where I want and does so accurately through a 50 mm thickness - this thickness is what makes accuracy (or not!) so evident.

Now the issue is whether I drill first and saw to the circumference of the hole, or saw first and then drill to the centre of the sawn lines?

I have begun practicing both ways. The first requires great accuracy, otherwise you are left with a step at the end - hence consideration given to adding the hole later. But the latter also has a problem in that there is guesswork now where to locate the hole. The added complication is that all this is difficult enough on the face side of the joint, but must also be as accurate on the back side as well!

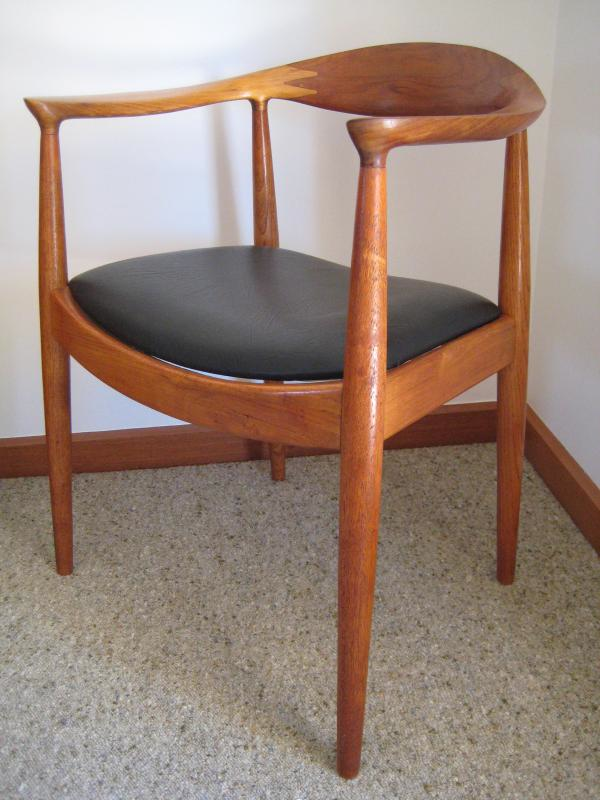
I doubt that there is an early version with a pointed finger joint. As far as I can ascertain, the finger joint was added by the factory to strengthen the connection of arm and backrest after the design moved to #503 (the solid seat) to compliment the original #501 (the woven seat and back). I guess my one fallback is that I can add a woven back if I totally screw up this joint!

I shall do some more practice today. Yesterday I built a jig for drilling and a guide for sawing. My initial failures had me cursing in a few languages, some of which I invented. I was convinced this joint was impossible. I have not yet managed a perfect one, but I am getting a little closer, enough to see that it is possible with perfectly parallel pieces. Are mine parallel enough? There is a long way to go before I do this for real.

Regards from Perth

Derek
 
.... if I totally screw up this joint! .... Derek

No don't screw the joint Derek it will look terrible after your brilliant earlier work :)
Seriously I am confident you will crack this and look forwards to the results and your write up.
If you were to use animal glue would you need the same level of clamping?
xy
 
Template routing perhaps with the workpiece held in a cradle (in your case probably an overarm router) really is the way to go. Build the templates by hand to satisfy the Jonesing for hand tool use:

http://www.patwarner.com/precision_routing.html

There honestly is more overall skill and woodworking smarts on display in coming up with a solution to cut this joint accurately, repetitively, and with minimal waste of wood using machinery and shop-made templates. You can pare and fit your way to this by hand, chalk/pare/chalk/pare, etc. but it would be a lesser accomplishment I think.

Maybe it makes sense to reconsider the project, not as a one-off, but a way to make at least a set of four without ruining a forest's worth of wood in the process or spending so much time on one that the whole exercise essentially becomes absurd.

If the intent is to reproduce something beyond just a likeness of the original, something that pays homage to the great industrial design this chair represents, then some machining is more than just desirable it is essential to capture the ethic, and as a practical matter the crispness, fit, and repeatability that machining offers in this particular situation.
 
Derek,
Thinking about the previous post I understand that you wish to work by hand. How about a purpose made Plane? It could be used to clean up a sawn joint.
xy
 
not sure this will help

if u insert a dowel thru hole...longer than the 50mm depth
could u then clamp a straight edge against it
or connect 2 straight edges with bolts u can tighten either end as a clamp
not sure i would use your "posh" saw against against a metal edge though

Steve
 
You are most likely right Charles, but I prefer not to go that way.

A bit more practice today to create a rounded finger joint.

http://www.inthewoodshop.com/Furniture/ ... conut.html

Opinion and recommendations gratefully received.

Regards from Perth

Derek

Make a scratch or just carve the ends of the male side of the joint to match the female side you've bored out with a drill. I would have attempted matching the drill bit to a beading cutter out of a set for a Record 405, for instance, and then maybe just use the 405's beading cutter as a scratch. Something along those lines. You need a dead match for the drill bit you used for the holes.
 
I need to explain why I have been so bloody minded about persevereing with the drilling and sawing strategy.

The arms and backrest are being shaped in a different way to the legs and stretchers/rails. The front and rear rails were shaped to fit the legs because I could not be sure of the angle of the mortice and tenon joints. The M&T joints are also internal joints and any gaps could be filled with the epoxy used to glue them together.

By contrast, the arms and backrest are known angles, however their joinery is on the outside where it is visible. The joinery here must be spot on. The connecting sections were purposefully made square and oversize. They will be joined and then shaped (in contrast to the legs, which were shaped and then joined).

TheChairArmBackrest(part1)_html_m43e4d0f7.jpg


TheChairArmBackrest(part1)_html_7930a919.jpg


In spite of being as careful as I could in squaring the square end sections, I realise that there will be some deviation, or that I should assume that there is some deviation for a worst case scenario. Consequently, I must find a way to saw the joinery from one reference side. In my mind, working inwards from two sides will create errors, even if they are small. This will lead to gaps. If the joinery is perfectly square from the reference side then it should not matter what the opposite side looks like: the parts will fit, and the outsides are going to be removed anyway.

The ability to drill perfectly square from the reference side is one example. This was demonstrated to work reliably. The irony is that the jig I made will drill a hole with greater accuracy (for the purposes here) than the best drill press could!

The ability to saw to the circumference of the hole is important because the wood is too hard and too thick to file to shape, and anyway I have always sawn dovetails to the line, never deliberately played "safe" and left room to pare away waste. I believe in this instance that, with a guide, I should be able to saw to the optimum spot (melding into the edge of the hole). Not only that but, done from the reference side, it should allow for a square joint all the way through the work piece.

Some terminology at this point: I am not sure what to call the finger joint parts. The joint is sort of like a dovetail, but tail and pin does not apply here. Why do I care? Because the joint I have been practicing will have a counterpart, that is, a "male" finger that fills this "female" section. Both end in a round. And the fingers are also separated by a round.

TheChair-Introduction_html_m16864063.png


I returned to the workshop this afternoon for a little more practice. First I tried carving the finger, that is, marking it out and paring from both sides. It was quickly apparent that this was not going to work and was a LOT of effort.

I had an idea about the errors that occurred previously. What was in common was a saw cut to the one side of the guide and the guide was positioned at the side of a board. My thought was that the clamp I used was pulling it over slightly at that spot because it could not be centred on the guide. I simply used a different clamp.

With everything else exactly as before, this is what I achieved ...

73_zps9134b1d5.jpg


Other side ...

74_zps80d38232.jpg


I was very happy with this. All that was needed was a little cleanup with a 3/16" round chainsaw file.

There was time to try a male finger. All I had to hand was a small piece of Jarrah waste. This was just enough.

I covered the Jarrah with blue tape and marked it from the female finger (this is how I plan to match the arm and backrest, as if it was a dovetail joint - another reason why the reference side must be able to create the non-reference side). The guide was clamped to the Jarrah and the sides sawn out. This left a pointed end, which was shaped with a file ...

75_zpsd74c7e2e.jpg


I had deliberately sawn the male finger a fraction oversize. This was rasped to fit (just needed a few strokes) ...

76_zps286d1c45.jpg


77_zpsab561d0f.jpg


Tools ...

78_zps9cf9e100.jpg


And the Record clamp that helped ..

79_zpsd49abdb4.jpg


A few more practice runs are needed before the real thing.

May I have your opinion about working from a single reference side?

Regards from Perth

Derek
 
Derek,
You are getting close, well done on the perseverance.
Go from one reference side. Working from two doubles the setting up, and areas of possible errors.
Have you considered making the second half of the joint in the same way? After all the same spindle cutter was used originally, and if you can cut one side to a line, then why not the other?
xy
 
Hi Derek

I have been reading you wip form the sidelines. All I can say is that this is a cracking piece of craftmanship. I doff my hat to you sir, a fantastic piece of work.
 
I take my hat off to you Derek, your perseverance and patience are the hallmarks of a real craftsman!
 
Derek,

Can you get Colt drills on your continent?

Disadvantage: they're metric sizes. Advantage: extremely clean cut and, if in a power tool, very clean exit. I have this set, bought when it was on offer from Axminster (who've ceased to stock them, which is sad)
.
Peter Sefton sells Colt here, but I'm not sure if he stocks the same range - there is another one that's quite a bit cheaper, but not quite as cleanly cutting as the ones pictured (I have both).

I am so pleased I bought them. There was a big intake of breath at the time because of the price (even discounted!), but they work incredibly well. It's true I haven't used them in a hand brace, but I don't see why they shouldn't work - they're essentially lip and spur. They would almost certainly work in a wheelbrace of some sort, and the V-block alignment tool would work well. The centre point projects significantly beyond the spur, making starting easy, and they don't wander at all (not that I've detected, anyway). I bought them for dowelling, but they've become my preferred drills - I have to remind myself to use cheaper alternatives, which I should, as replacing them will now be very hard.

I wonder, too, if you might go a step further than the V-block:
keyhole.png

The purpose of the cutaway being to enable you to easily see into the hole for alignment, and to clear chips in use.
You might get a cleaner cut with a Japanese saw, too (for which there are excellent saw guides) but I suspect that may be anathema.

However you resolve the issues, it remains a tour de force!

E.
 

Attachments

  • keyhole.png
    keyhole.png
    3.7 KB · Views: 797
Hi Eric

I don't own Colt drills but I did, in fact, look into getting a set because of this project. However they are all metric and the dowel guide is Imperial. They do look good and have a fine reputation.

To all, many thanks for your encouragement. It is needed - the hardest part is yet to come.

Regards from Perth

Derek
 
Any updates Derek - I was following this avidly but no posts for over a week now. How's it coming on
Cheers
mark
 
Hi Mark

I've been out of the workshop since my last post - back at work and flat out. Then this past weekend was my son's 21st birthday, so no time again.

I am, however, ready to saw the fingers, and that is planned for this weekend. .... Ooops ... no. My wife reminded me we are away this weekend, driving south for a weekend away, jazz concert under the stars (Diana Krall), set in a vineyard.

Regards from Perth

Derek
 
Wow amigo, you are gonna have a great time. If the joints have been a bit stressing Ms. Krall will leave your taut nerves in a state of cat-like langour. She puts on a lovely show. Have a blast mi amigo.
 
I was tempted to wait another week before posting this part of the build. However it is two weeks since my last post and I had begun receiving email asking whether I had given up! Oh to have the time to be in the shop during the week! But I am back in my day job and it will be another week before I again get a chance to do anything, so here is the update - about 3 hours worth over this weekend past.

http://www.inthewoodshop.com/Furniture/ ... t1%29.html

Since there is time, any feedback is welcomed, particularly with regard methods of transferring finger outlines.

Regards from Perth

Derek
 
Your thoughtfulness and attention to detail continue to impress me!

An example to us all.
 
Back
Top