You are using an out of date browser. It may not display this or other websites correctly.
You should upgrade or use an alternative browser.
You should upgrade or use an alternative browser.
Cutting Dados on a TS WITHOUT a Dado Head ?
- Thread starter wizer
- Start date


Help Support UKworkshop.co.uk:
This site may earn a commission from merchant affiliate
links, including eBay, Amazon, and others.


SketchUp Guru
Established Member
Wizer, are you going to build one like that?
SketchUp Guru
Established Member
Let me know. I haven't had time to do much in the shop over the weekend.
9fingers
Established Member
Even though I am an advocate of the safe use of dado heads fitted to large solid tablesaws, there are times when I just want a quick few slots cutting and use my combination blade to nibble these out.
Hence I have been very interested in this thread and after some thought have built my own to a revised design with an extra feature that I’ve not seen elsewhere.
I’m publishing my work here for interest only and for no commercial gain. If others wish to copy or further improve it then please feel free.
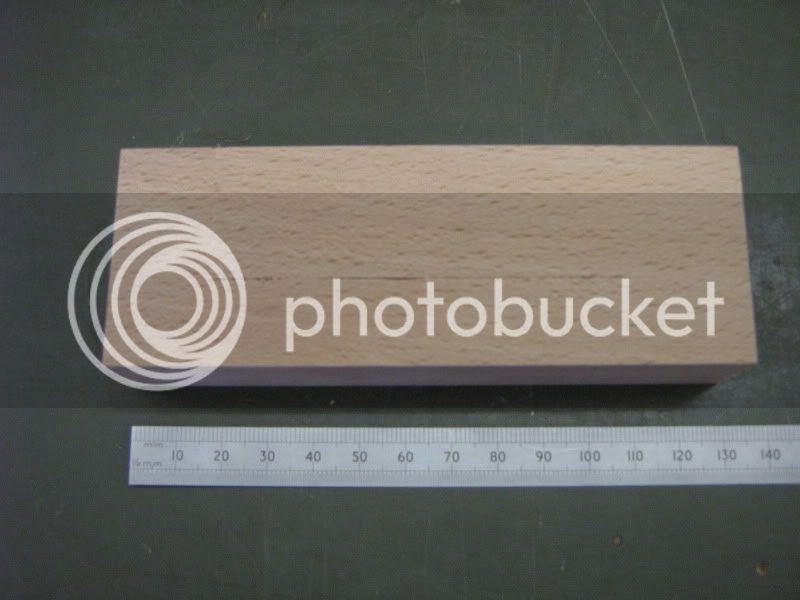
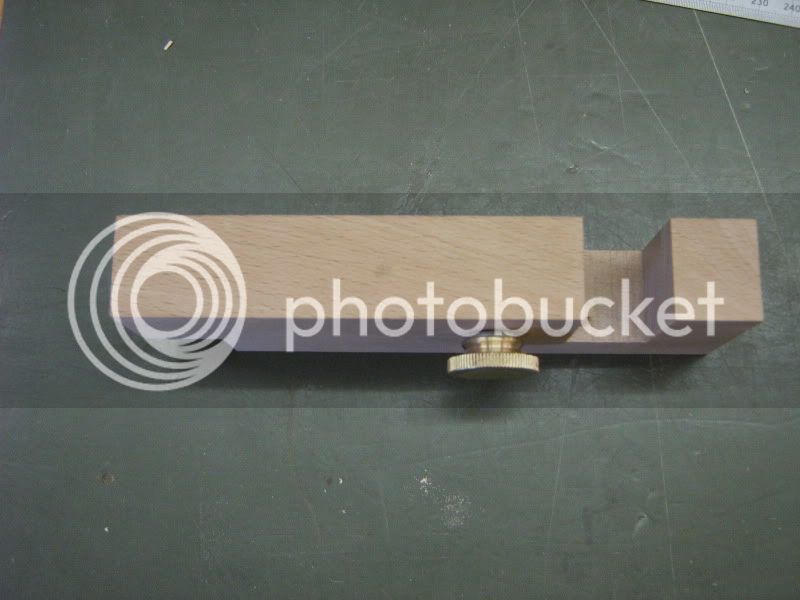
I started out with a block of beech approx 155 x 26 x 55 out of the scrapbox with the intention of a gauge that could handle slots/dadoes upto 75-80mm.
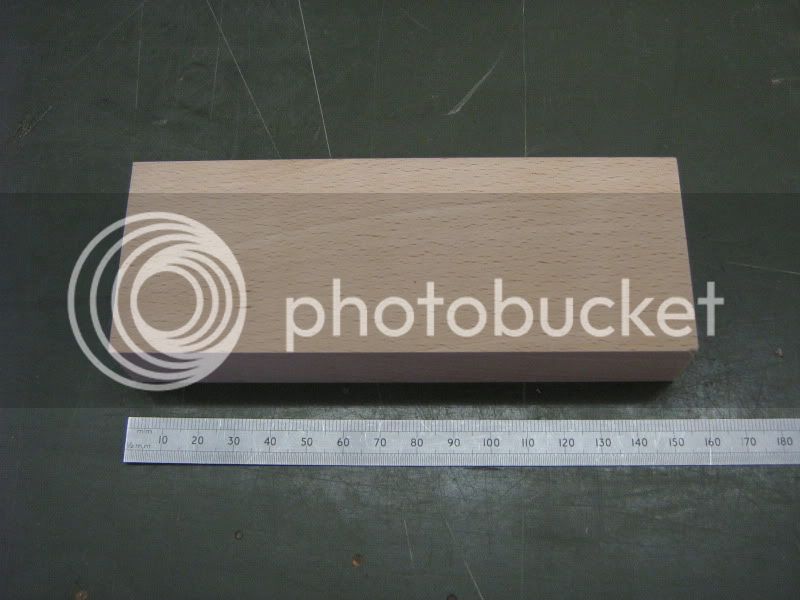
The first step is to plane all over.
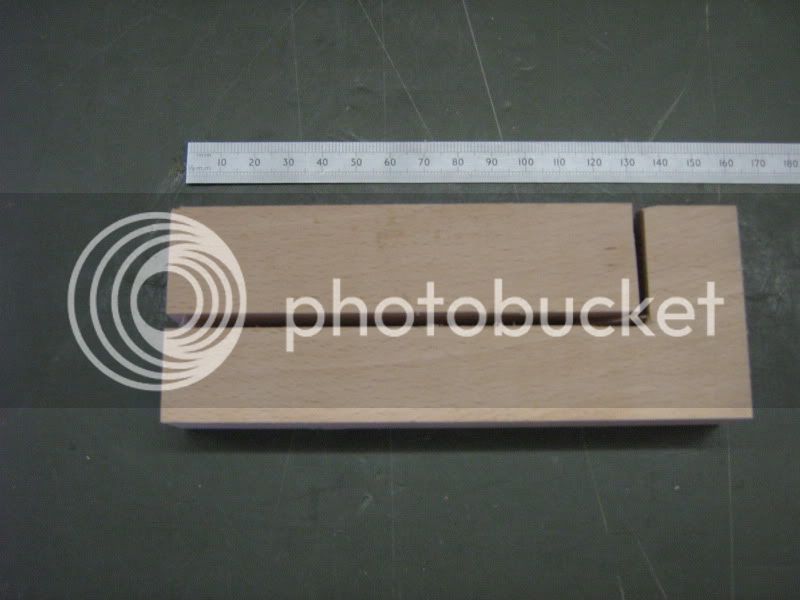
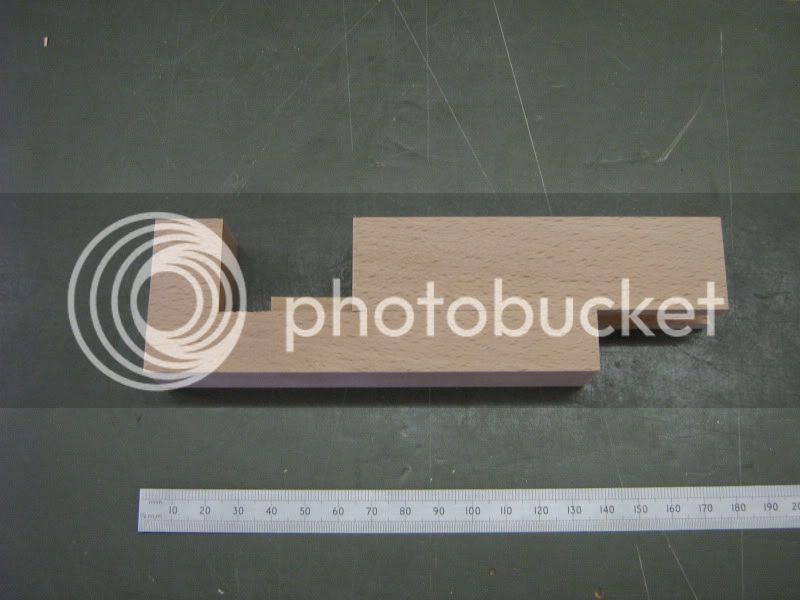
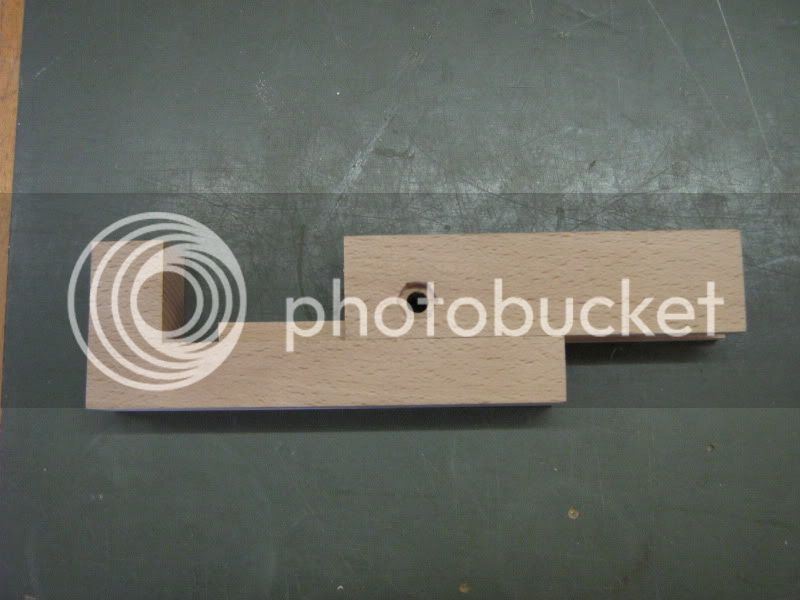
Then cut by whatever means into what I will call the body (L shaped part) and the slide.
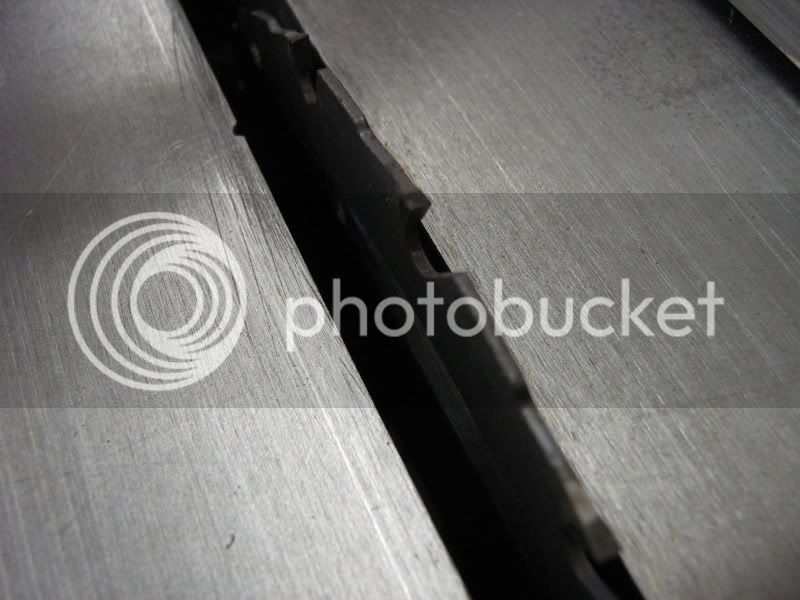
Run the cut face of the slide over the jointer and then cut a central female dovetail slot 6mm deep along the length. I used a ½” x 11 degree cutter and after the first cut, cleaned up each face by moving the cutter 0.1mm. The resulting slot was therefore 12.9mm at the widest point.
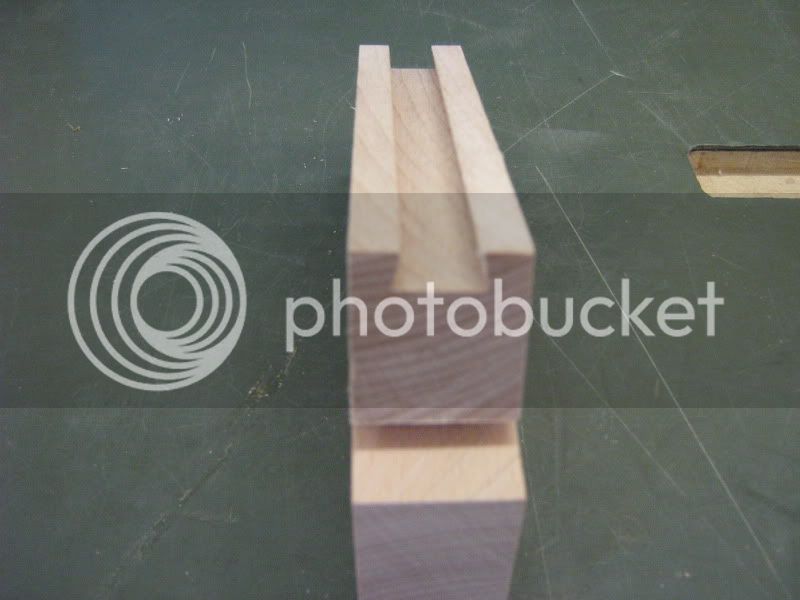
Then cut a male dovetail centrally on the body making fine incremental cuts until the slide will just fit but be a bit tight. This dovetail should be a shade less than 6mm deep to ensure the parts and retained by the flanks of the dovetail. Mine was set to 5.9mm.
You won’t be able to cut all the way up to the jaw face on the body due to the radius of the cutter. This it dealt with in the next step.
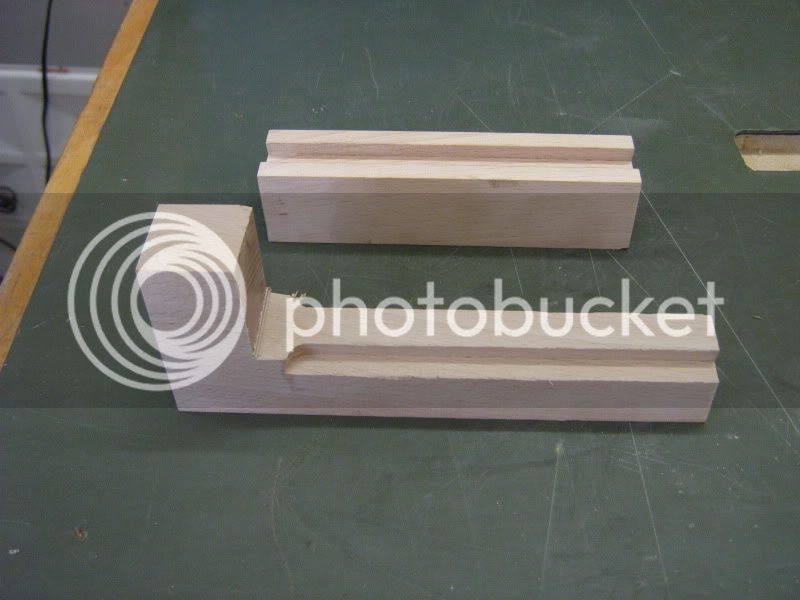
Fit the two parts together as far as they will go.
Make a rip cut against a fence set to take a shade off the slide and to cut the body jaw level. (Oops! no picture of this).
Make sure your saw is set to cut spot on 90 degrees for this next step. Use a piece of scrap wood against the mitre gauge to minimise tearout. With the gauge placed jaws-down and the blade height set to kiss the shoulder of the body dovetail, cut a sliver off the fixed jaw and progressively open up the jaw gap until you have taken a sliver off the sliding jaw. This should be the last time you have to cut a slot by eye!!
The jaws should be clean cut, and parallel by now.
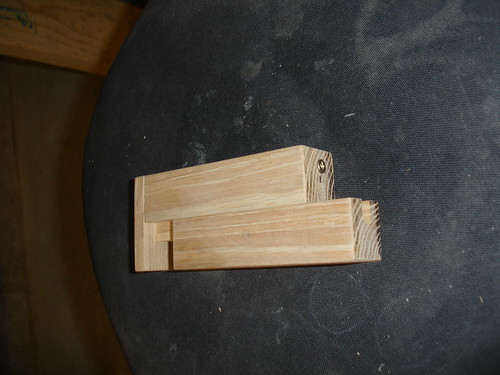
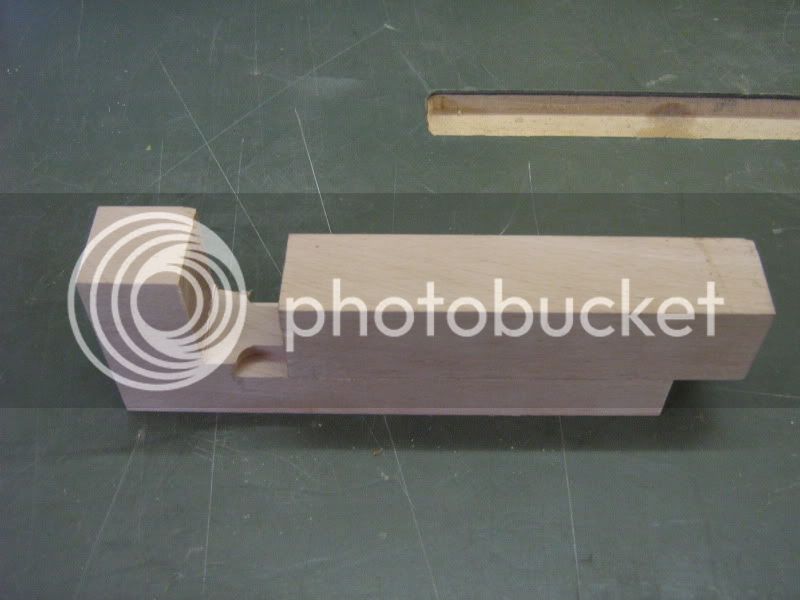
Slide the jaws shut tight and take a cross cut over the other end to make that level.
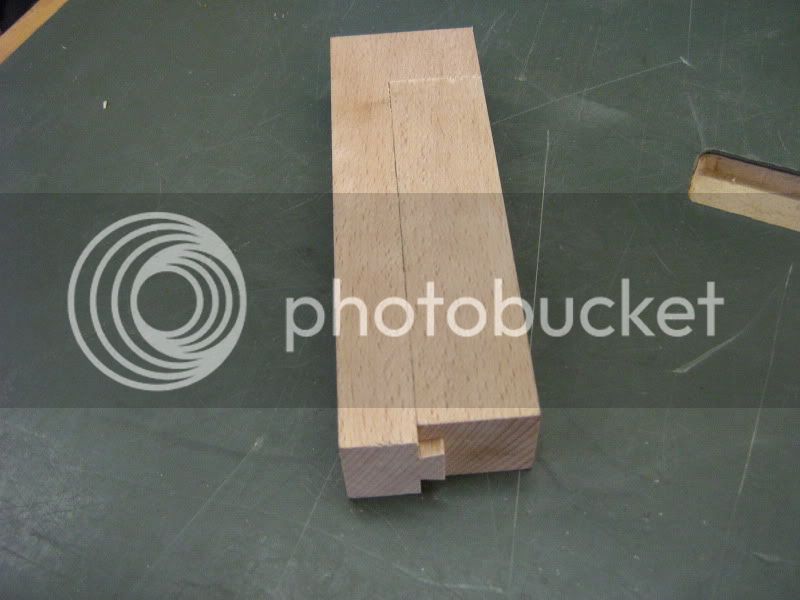
When closed it should look like a single block of wood again!
and when slid open, like this.
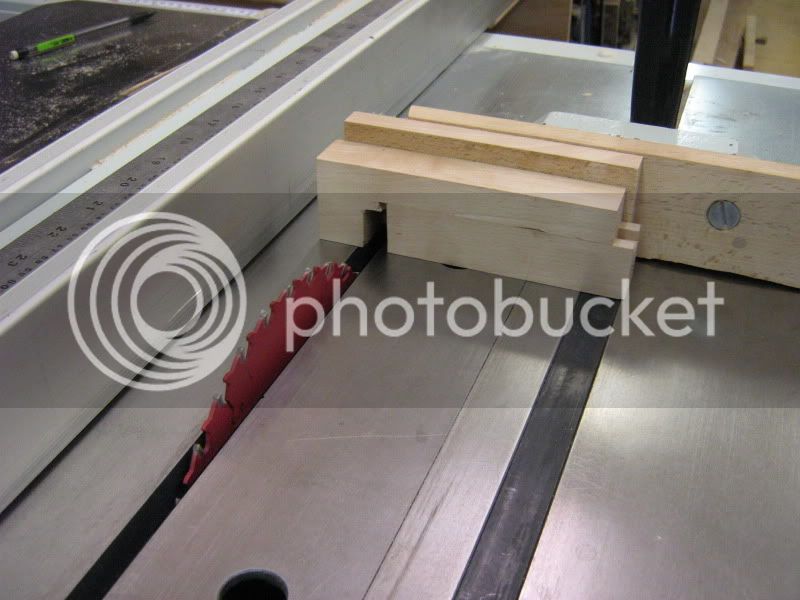
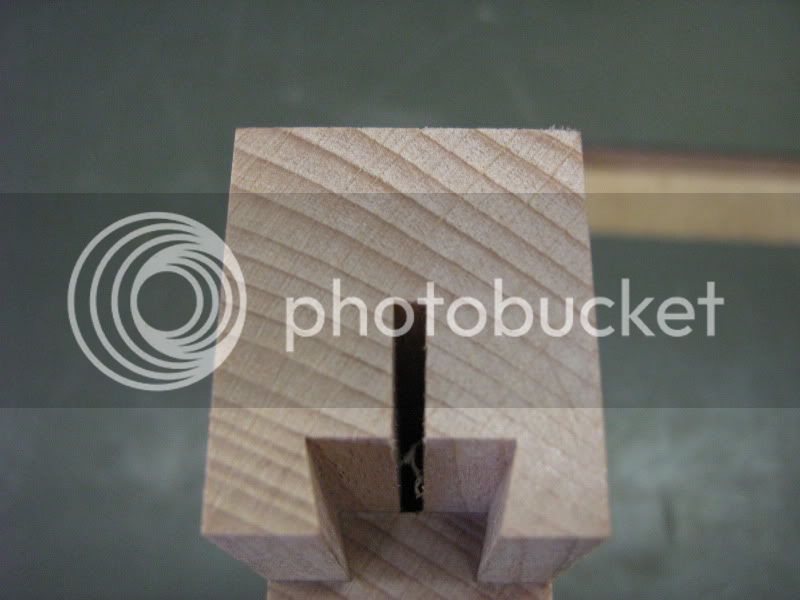
Separate the parts and make a kerf cut 15mm deep in the slide using a fine kerf blade if you have one but don’t worry if not.
Refit the parts and close up the jaws
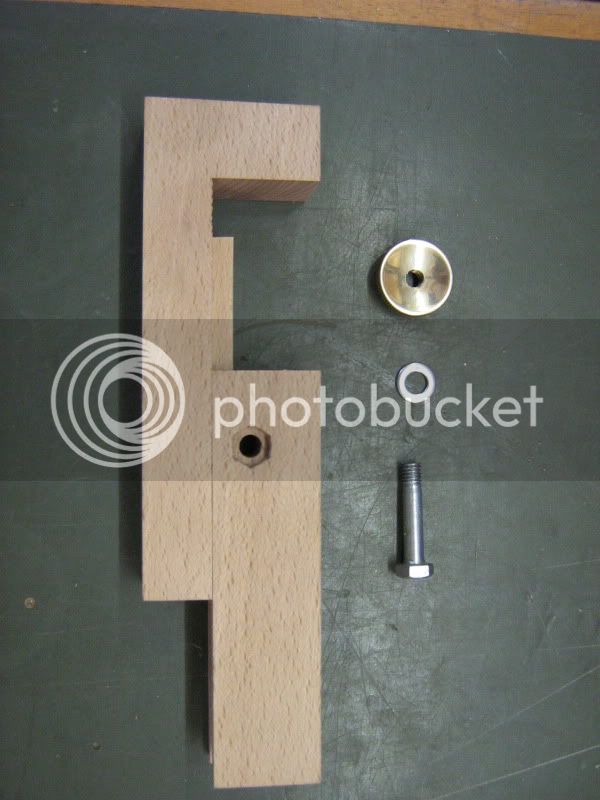
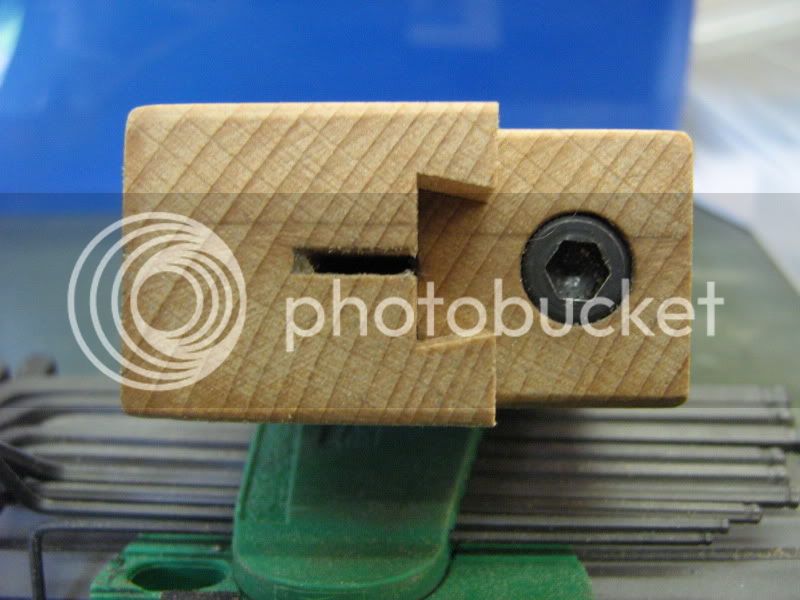
Drill a hole for the clamp bolt approx 40mm from the jaw end and to pass though the kerf cut and not touch the dovetail. – About 18mm down from the top of the slide in my case.
Counter bore this 5mm deep 10mm diameter for the head of an M6 bolt. Carefully cut a hexagon with a small chisel
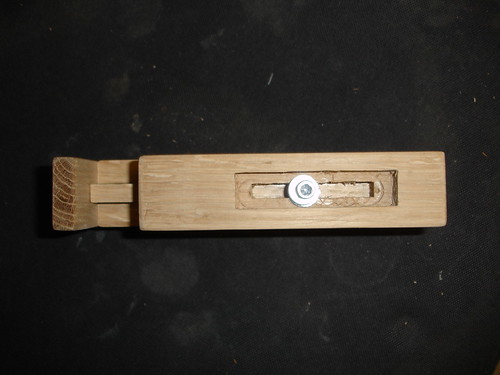
The next picture shows the hex bolt plain washer and brass knurled nut. The latter is not essential but adds a bit of glitz and makes it easy to use. Trivial to knock up if you have a metal lathe and some scrap brass. Otherwise a hex nut is just as effective.
A couple of shots of the assembled jig so far.
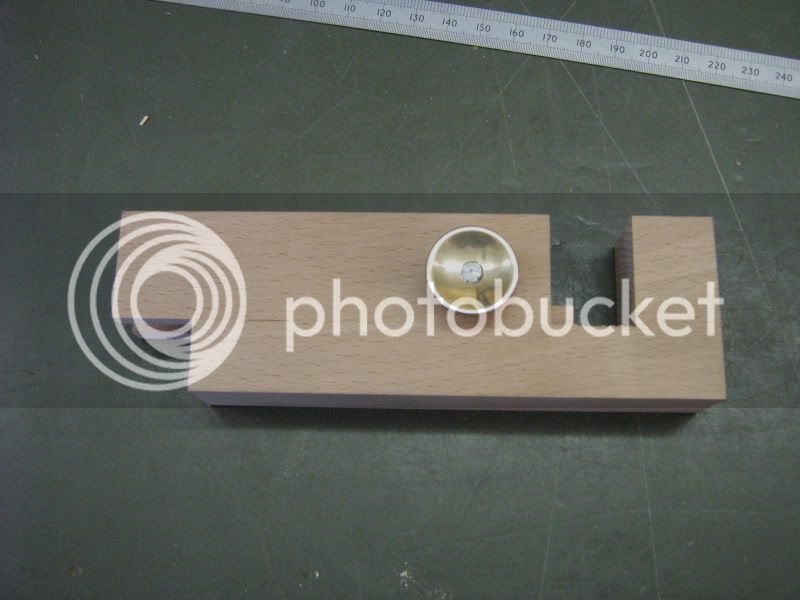
The finals steps are to add an adjusting screw to allow for the blade kerf and to add my main modification, a second adjusting screw to make dados with a sliding clearance such as a panel door or other application where a tight fit is not desireable.
Drill a hole 5mm diameter hole counterbored 10mm diameter and 7mm deep. Tap both holes M6 and fit a socket cap screw into each end.

Finally smooth over all the sharp corners and apply a wax finish, allowing the wax to lubricate the dovetail which until now will have been tight and now should slide nicely and yet lock up tight with the thumb screw.
The blade kerf screw can be set as per the original method and the clearance screw turned to get the required fit. For an M6 thread, 1 turn is 1mm advance so by judging the position of the allen key, it is relatively easy to set to the required clearance.
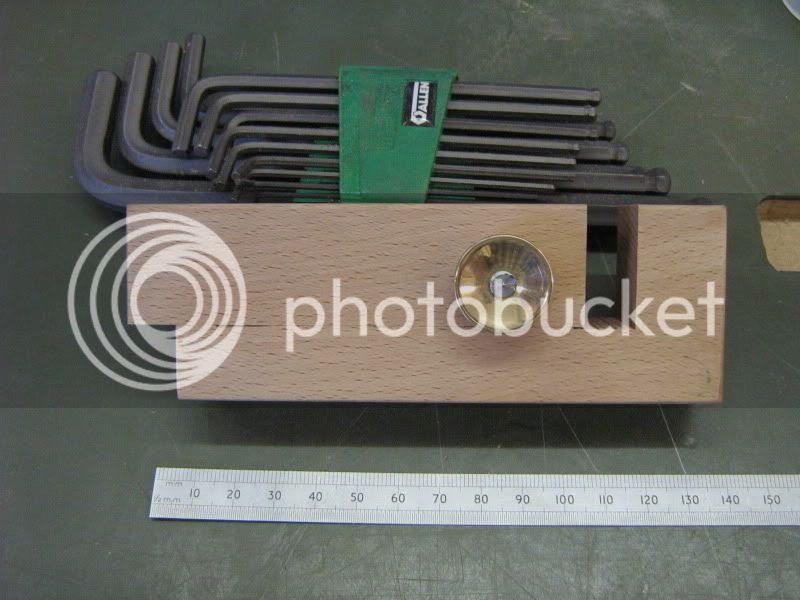
The final picture:-
Hope you find this useful
Bob
Hence I have been very interested in this thread and after some thought have built my own to a revised design with an extra feature that I’ve not seen elsewhere.
I’m publishing my work here for interest only and for no commercial gain. If others wish to copy or further improve it then please feel free.
I started out with a block of beech approx 155 x 26 x 55 out of the scrapbox with the intention of a gauge that could handle slots/dadoes upto 75-80mm.
The first step is to plane all over.
Then cut by whatever means into what I will call the body (L shaped part) and the slide.
Run the cut face of the slide over the jointer and then cut a central female dovetail slot 6mm deep along the length. I used a ½” x 11 degree cutter and after the first cut, cleaned up each face by moving the cutter 0.1mm. The resulting slot was therefore 12.9mm at the widest point.
Then cut a male dovetail centrally on the body making fine incremental cuts until the slide will just fit but be a bit tight. This dovetail should be a shade less than 6mm deep to ensure the parts and retained by the flanks of the dovetail. Mine was set to 5.9mm.
You won’t be able to cut all the way up to the jaw face on the body due to the radius of the cutter. This it dealt with in the next step.
Fit the two parts together as far as they will go.
Make a rip cut against a fence set to take a shade off the slide and to cut the body jaw level. (Oops! no picture of this).
Make sure your saw is set to cut spot on 90 degrees for this next step. Use a piece of scrap wood against the mitre gauge to minimise tearout. With the gauge placed jaws-down and the blade height set to kiss the shoulder of the body dovetail, cut a sliver off the fixed jaw and progressively open up the jaw gap until you have taken a sliver off the sliding jaw. This should be the last time you have to cut a slot by eye!!
The jaws should be clean cut, and parallel by now.
Slide the jaws shut tight and take a cross cut over the other end to make that level.
When closed it should look like a single block of wood again!
and when slid open, like this.
Separate the parts and make a kerf cut 15mm deep in the slide using a fine kerf blade if you have one but don’t worry if not.
Refit the parts and close up the jaws
Drill a hole for the clamp bolt approx 40mm from the jaw end and to pass though the kerf cut and not touch the dovetail. – About 18mm down from the top of the slide in my case.
Counter bore this 5mm deep 10mm diameter for the head of an M6 bolt. Carefully cut a hexagon with a small chisel
The next picture shows the hex bolt plain washer and brass knurled nut. The latter is not essential but adds a bit of glitz and makes it easy to use. Trivial to knock up if you have a metal lathe and some scrap brass. Otherwise a hex nut is just as effective.
A couple of shots of the assembled jig so far.
The finals steps are to add an adjusting screw to allow for the blade kerf and to add my main modification, a second adjusting screw to make dados with a sliding clearance such as a panel door or other application where a tight fit is not desireable.
Drill a hole 5mm diameter hole counterbored 10mm diameter and 7mm deep. Tap both holes M6 and fit a socket cap screw into each end.
Finally smooth over all the sharp corners and apply a wax finish, allowing the wax to lubricate the dovetail which until now will have been tight and now should slide nicely and yet lock up tight with the thumb screw.
The blade kerf screw can be set as per the original method and the clearance screw turned to get the required fit. For an M6 thread, 1 turn is 1mm advance so by judging the position of the allen key, it is relatively easy to set to the required clearance.
The final picture:-
Hope you find this useful
Bob
wizer":3l1i5r66 said::shock: Miles and Miles beyond me.
This is not beyond anyone on here, I am a site chippy, hanging doors pitching roofs etc.
I have only in this past year got my own workshop and started doing some proper joinery. Last time I was in a workshop was as an apprentice 17 years ago.
filsgreen
Established Member
wizer":1eqri41z said::shock: Miles and Miles beyond me.
Same here Tom!! Bob, I thought that was a Niki special, well done mate

Phil
9fingers
Established Member
Niki":1pm1i8lc said:Bob
Beautiful presentation...
I "Bookmarked" you...even though, it's a little bit beyond me because of the Dove Tail (believe it or not - I've never cut a Dove Tail in my life)
Regards
niki
Thanks Niki!
Praise indeed from the "Jig Master"
Bob
Steve Maskery
Established Member
As we all seem to be at it...

Sliding dovetail like Bob's (well actually not like Bob's- I bet his is a good fit It was tight and I took of just one molecule and now you can drive a bus through the gap )
American Black Walnut and Ripple Sycamore, brass bolts, phenolic knobs. It's a bit long, I can see me cutting it down a bit.
Now where am I going to keep it?
Cheers
Steve
Sliding dovetail like Bob's (well actually not like Bob's- I bet his is a good fit
It was tight and I took of just one molecule and now you can drive a bus through the gap )American Black Walnut and Ripple Sycamore, brass bolts, phenolic knobs. It's a bit long, I can see me cutting it down a bit.
Now where am I going to keep it?
Cheers
Steve
Steve Maskery
Established Member
The gap at the end is indeed for the kerf, adjustable by the shorter half of the front section. The sycamore is glued and two 25mm brass screws hold it in place. I know that's screwing into end grain, but it's not under any strain so I expect it to hold well.
Cheers
Steve
Cheers
Steve
9fingers
Established Member
Steve Maskery":13aj3pu9 said:Sliding dovetail like Bob's (well actually not like Bob's- I bet his is a good fit
Cheers
Steve
I guess you need to be working at atomic level to get those fits spot on Steve :lol:
Mine was cut deliberately tight with the intention of easing it on completion but when I put some wax on the jig, it eased up a lot so no fettling needed.
The walnut/sycamore looks good. I've not got much choice in my scrapbox so it had to be beech (from Sarah's science table legs)
Bob
Steve Maskery
Established Member
Yes, well, I don't cut sliding dovetails every day. But I know from experience that it's a mistake to make them too tight, it's so easy to break the pin. And if you leave it together and the pin shrinks or the tail expands, you are scuppered. On the other hand, because of the angle, one shaving makes an enormous amount of difference.
I was hoping that applying a couple of coats of finish would tighten it up, and I think it has, a bit. After all, 2 coats = 8 layers. Perhaps I should just keep polishing it!
Cheers
Steve
I was hoping that applying a couple of coats of finish would tighten it up, and I think it has, a bit. After all, 2 coats = 8 layers. Perhaps I should just keep polishing it!
Cheers
Steve
jlawrence
Established Member
Looks like a very useful gadget. I think I've some ABW in the bit box so might have a go at making one of these.
Similar threads
- Replies
- 0
- Views
- 813
- Replies
- 42
- Views
- 3K