Pedestal table WIP - Finished!

UKworkshop.co.uk

Help Support UKworkshop.co.uk:

This site may earn a commission from merchant affiliate links, including eBay, Amazon, and others.

stuartpaul

Established Member
Joined
11 Feb 2003
Messages
1,062
Reaction score
59
Location
Somerset
Well, - I've asked enough questions on this forum I thought it about time I actually started some woodwork!

I'm as determined as I can be to try and keep a WIP all the way through, - a novel thing for me to attempt but here goes.

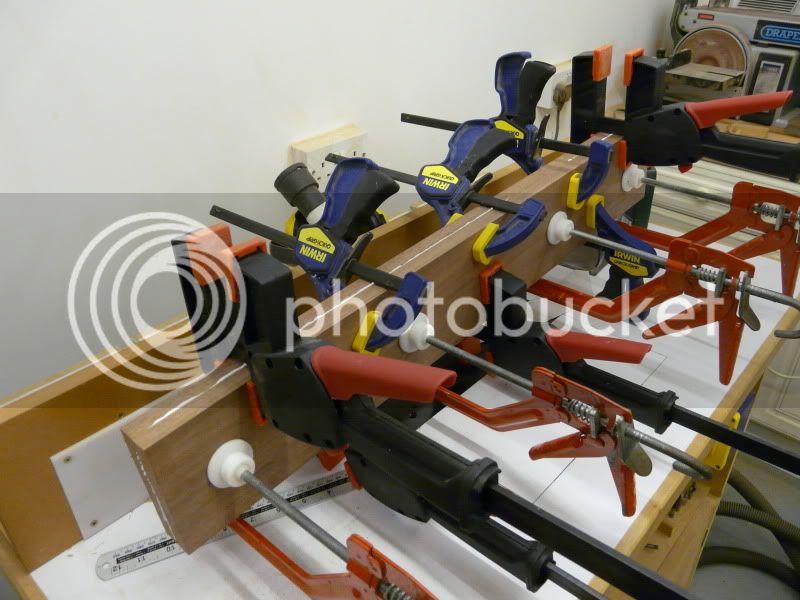
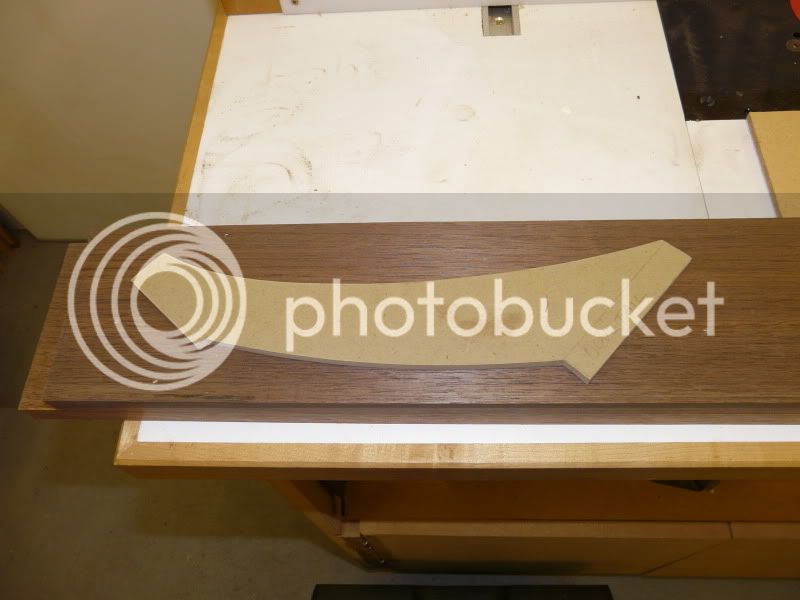
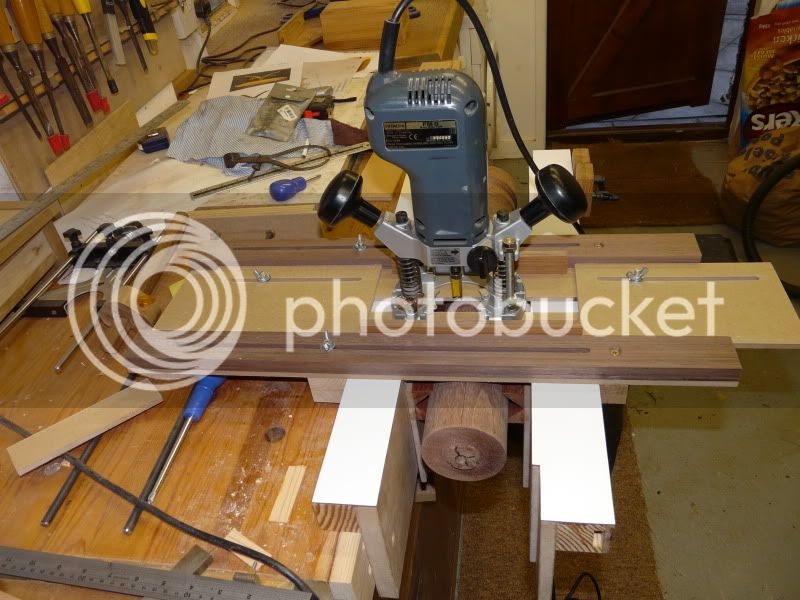
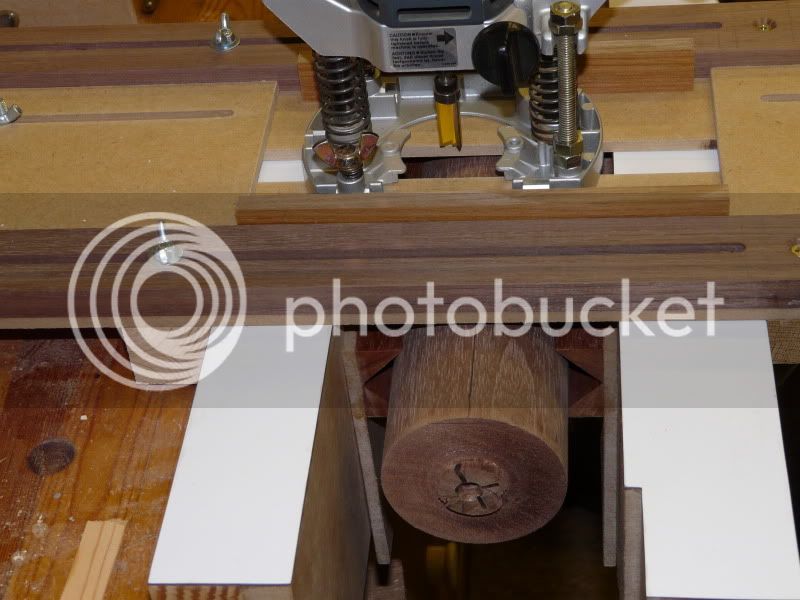
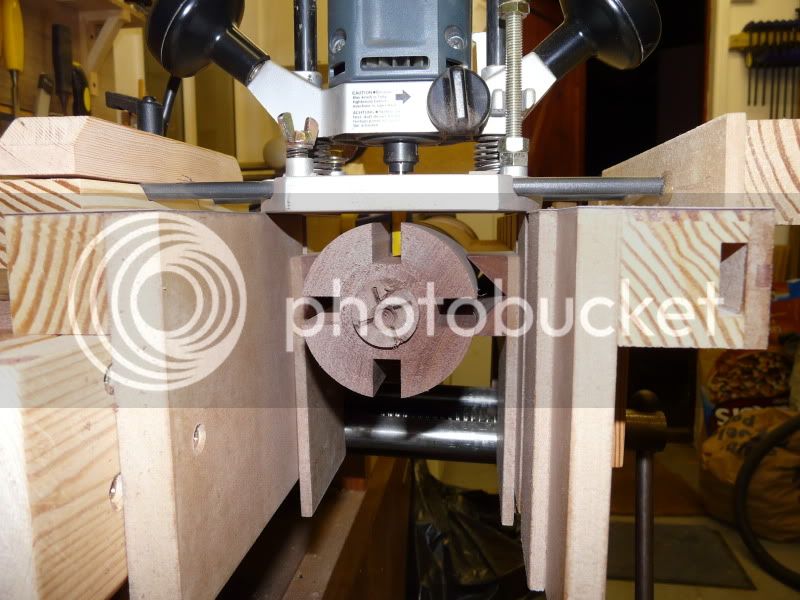
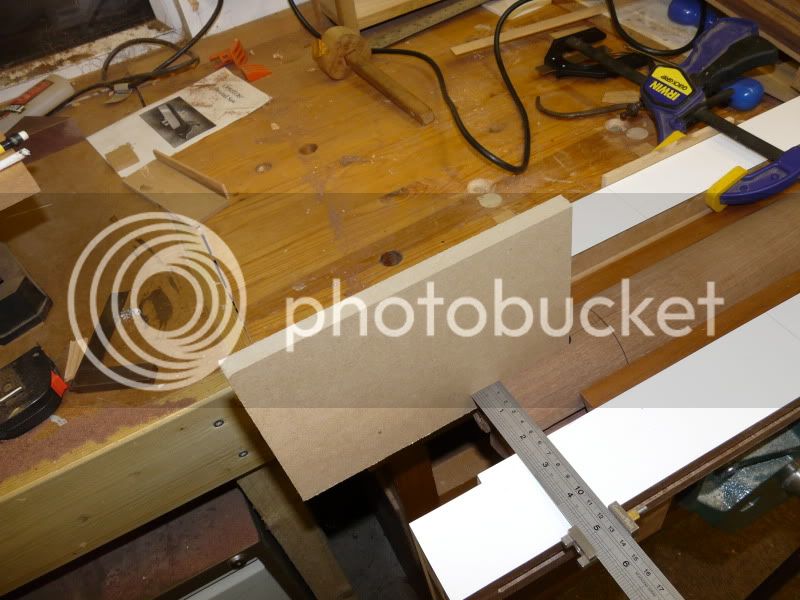
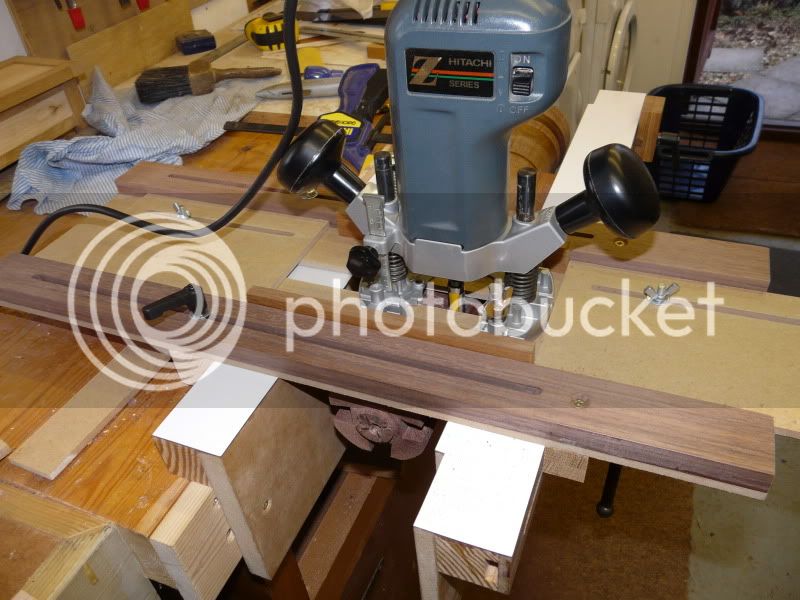
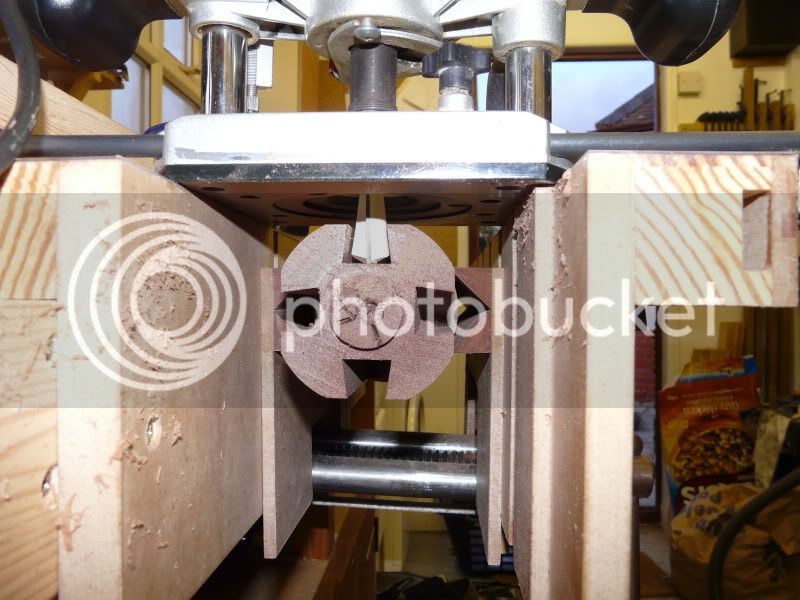
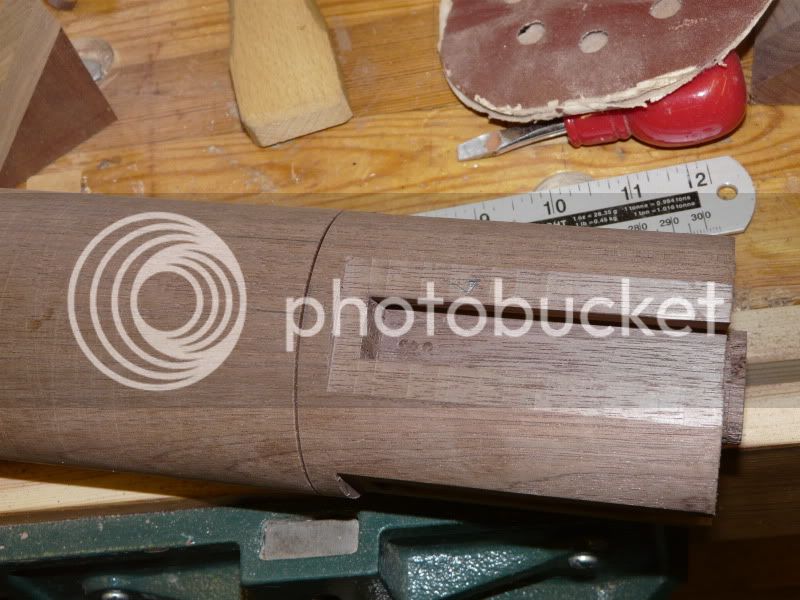
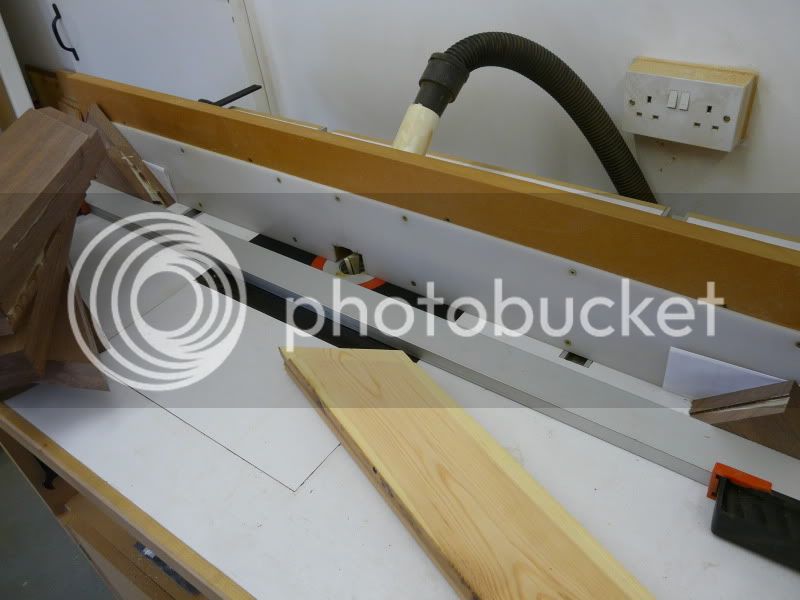
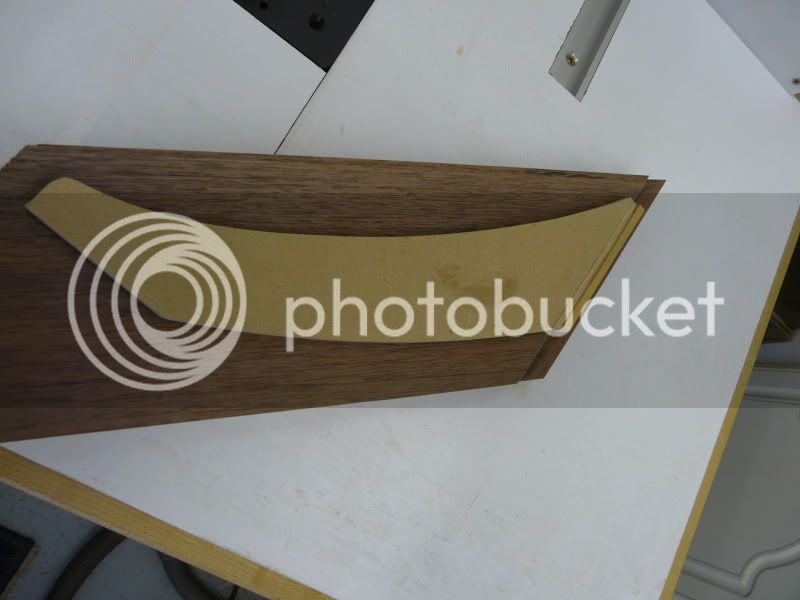
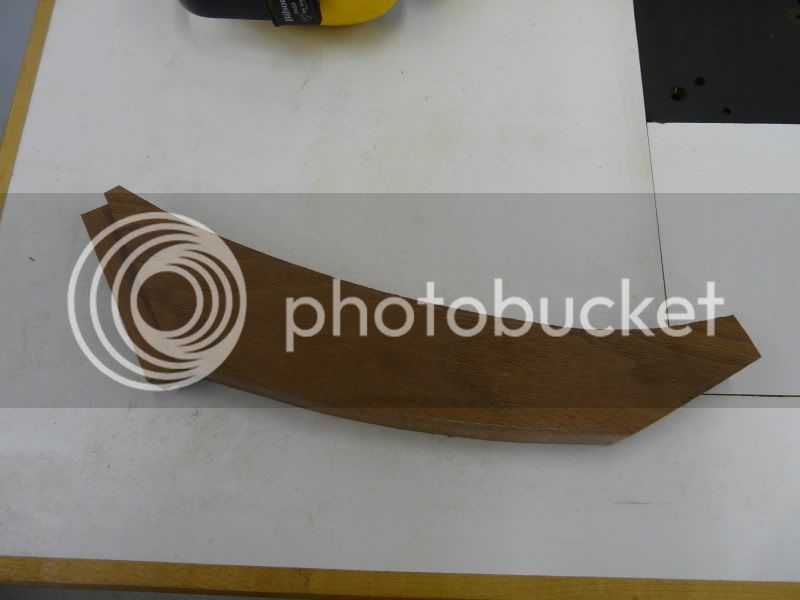
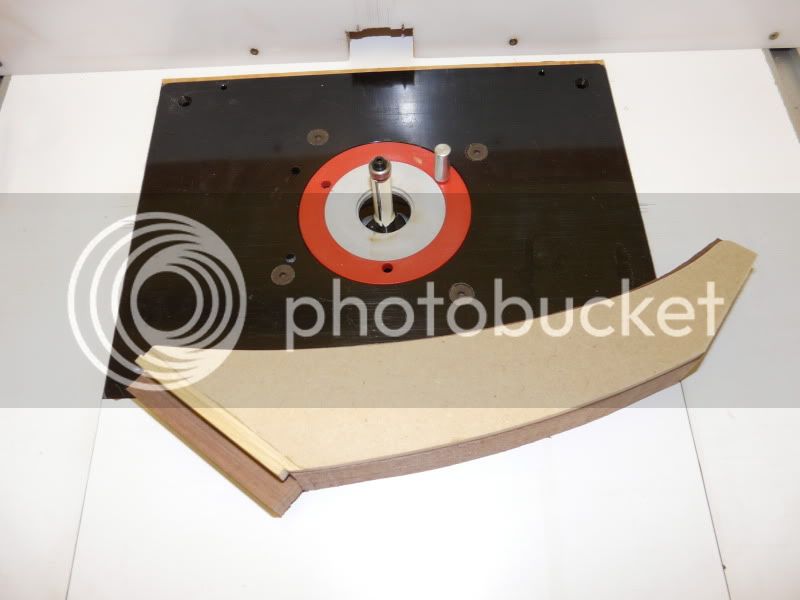
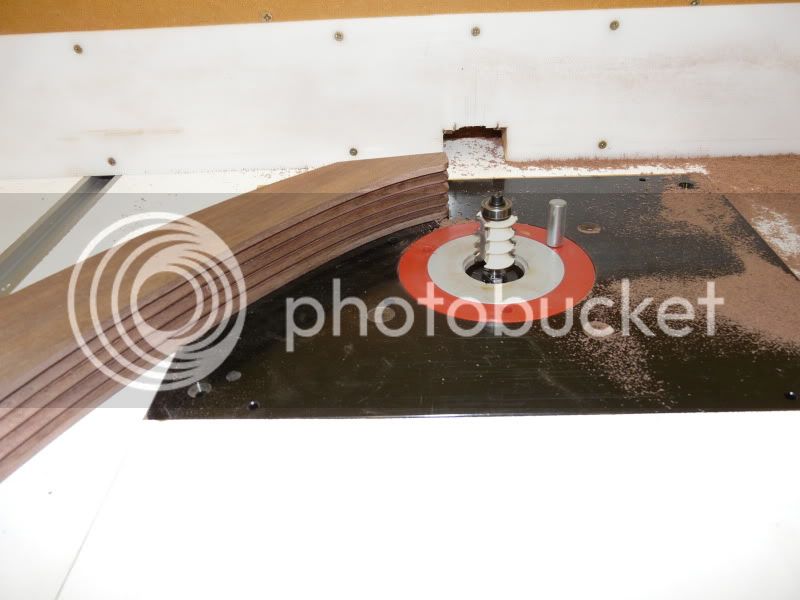
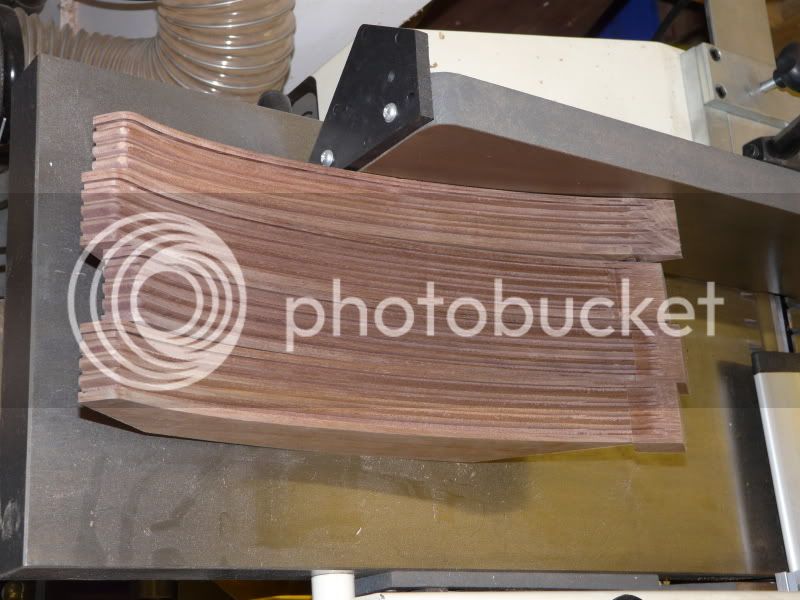
I knew that I'd be using sliding dovetails so the last few weekends have been spent on Mr M's mortice jig:

P1020808.jpg


P1020809.jpg


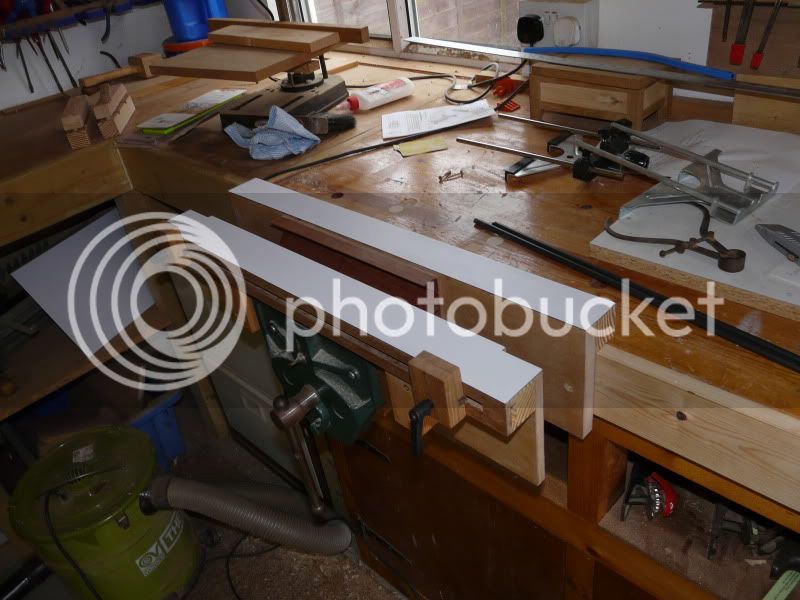
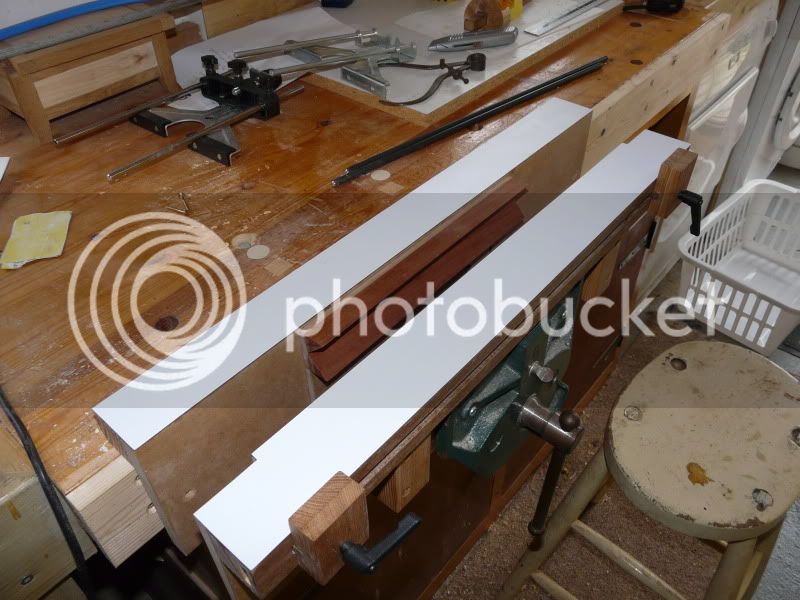
I'm reasonable happy that this will enable the sliding dovetails to be relatively straightforward (I might end up regretting that statement!).

The design:

The client (MIL) knows nothing about woodwork but knows what she wants! An oval pedestal table. The only constraints were the overall size, no more than 20" high and wide.

Given that I have the design ability of a month old cow pat this bit hasn't been easy for me. I'm OK copying but it's the relationship between proportions that usually causes me problems. After much effort with sketchup I've finally (I think!) settled on a final design.

P1020800.jpg


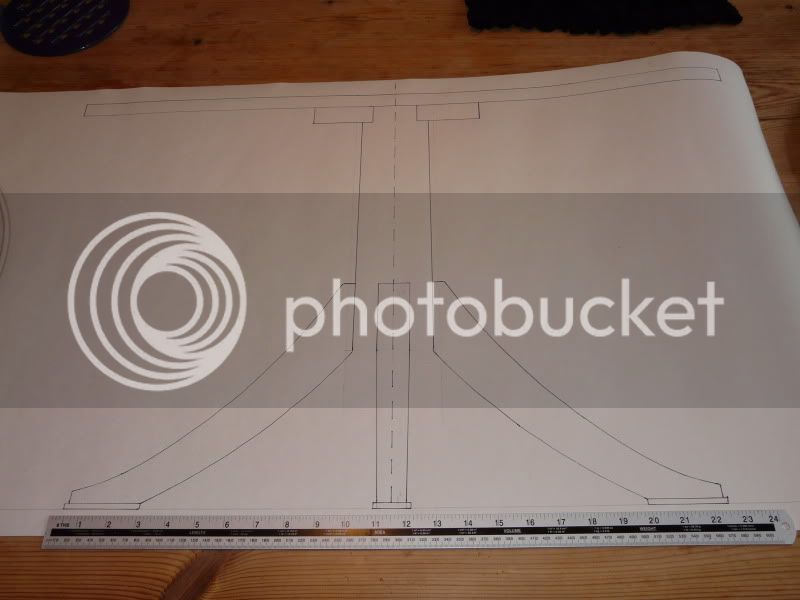
Now I suspect that many will notice that this isn't in sketchup but mk 1 lining paper. I did have the luxury of a design studio which will also double as my finishing room (SWMBO calls it a dining room). This does give me the benefit of a full size drawing which I always do anyway.

I'm not 100% convinced with all the dimensions and there may well be some 'adjustments' on route. I'll see how things go.

P1020803.jpg


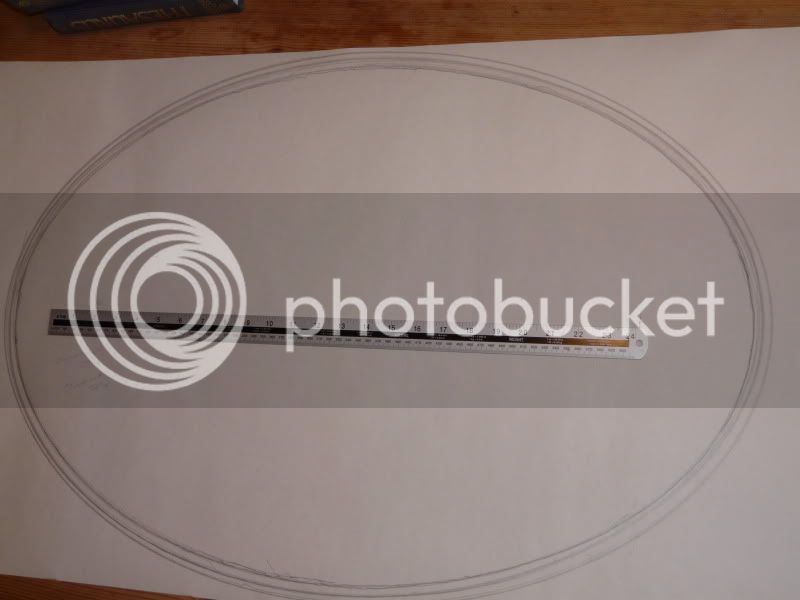
The size of the top is dictated by the final width so with pins and string I end up with a top that's 20 x 30" (the inner line). Appears to be about right.

Material:

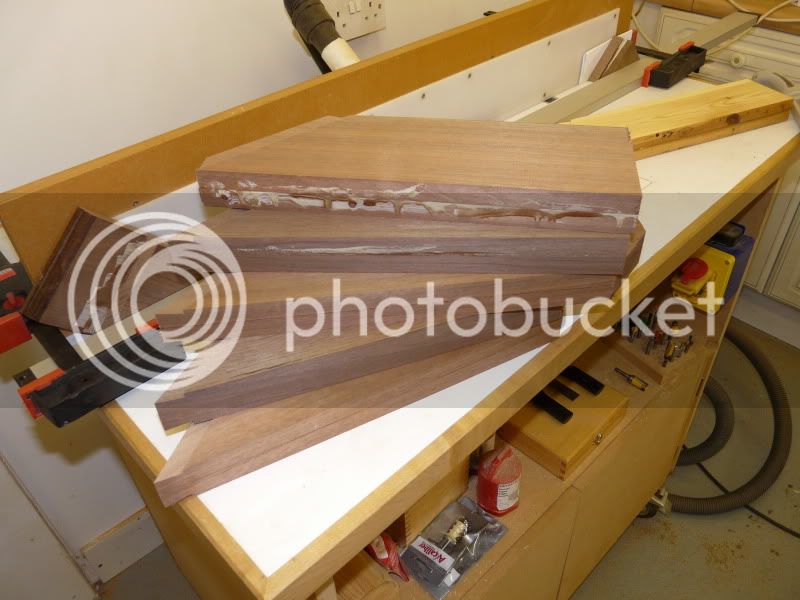
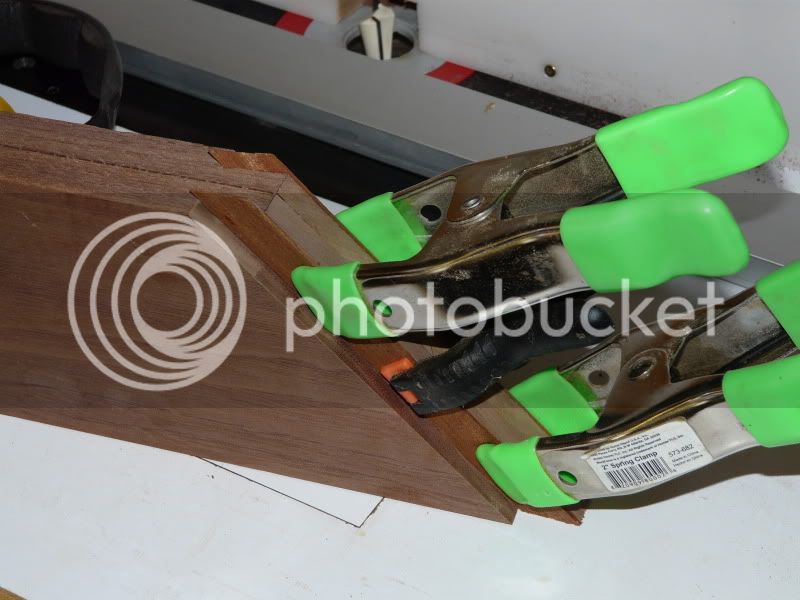
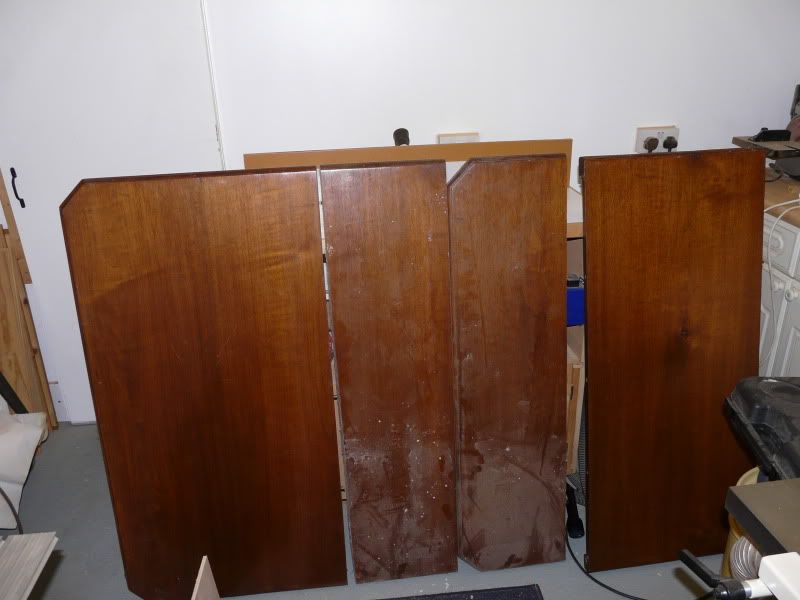
One of my biggest woodworking 'kicks' is from recycling old timber. This time it's an old victorian dining table (broken up by others) which should provide plenty of material. At a little over 3/4" I should be able to remove the finish and have some nice mahogany to play with.

Unfortunately the panels are suffering from some degree of bowing, probably due to me leaving them leant against the garage wall. This may mean have to cut and rejoin to get the top flat.

P1020804.jpg


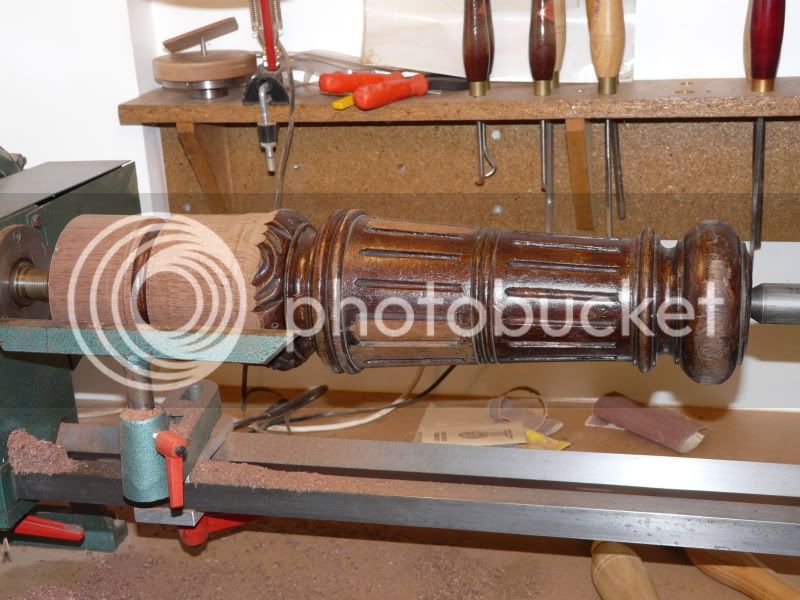
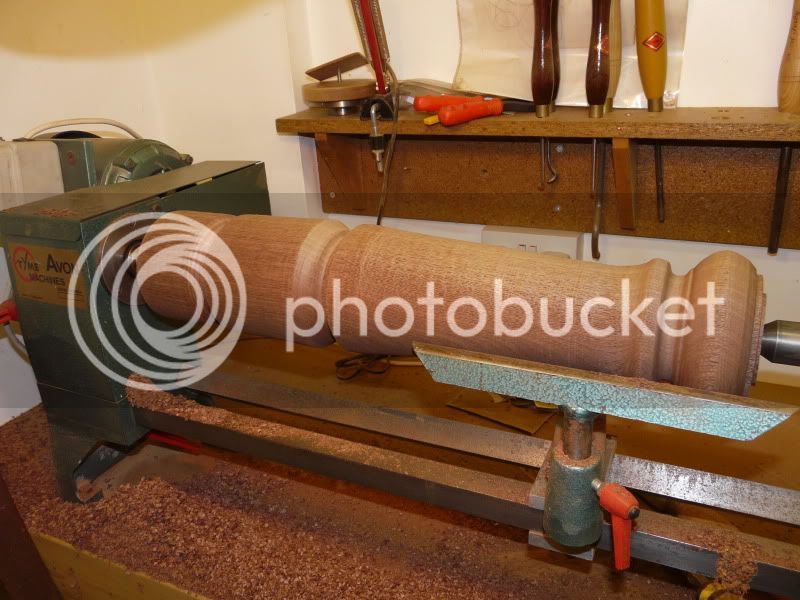
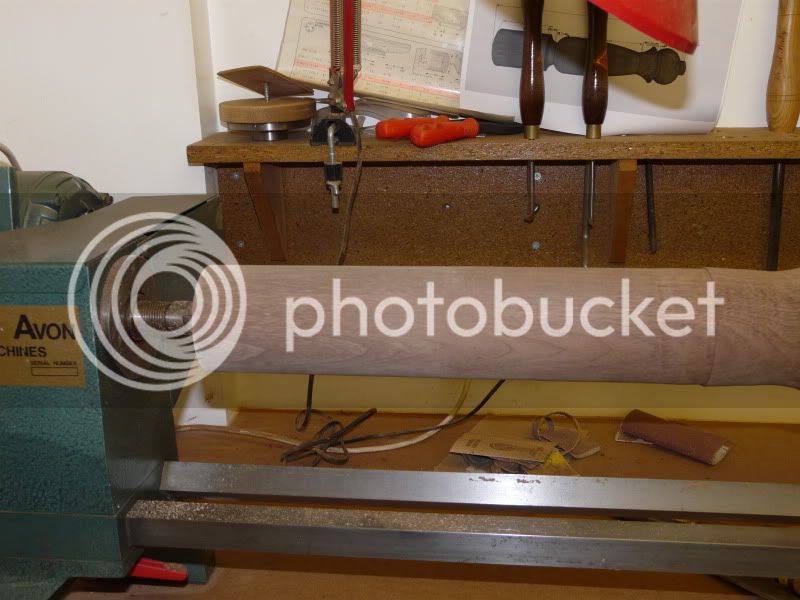
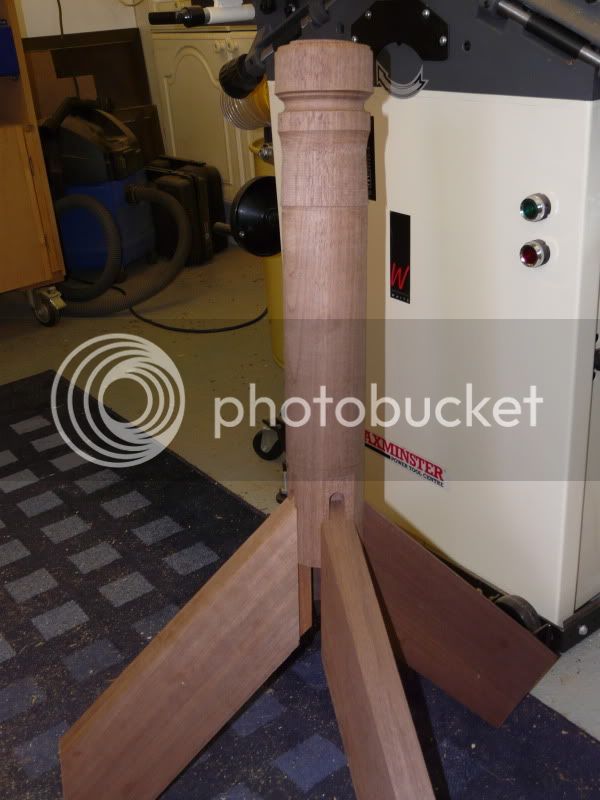
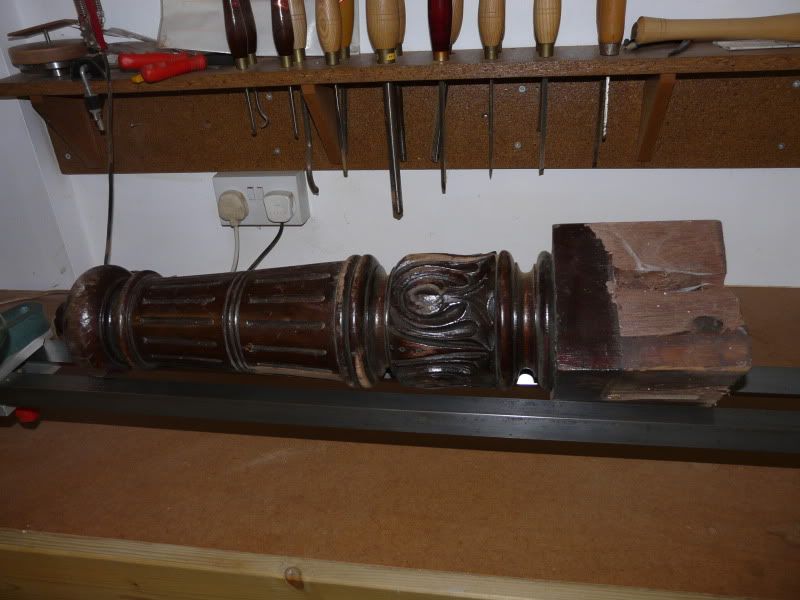
The legs for the dining table have quite a lot of molding on them but with a minimum diameter of 3" I'm hoping to be able to turn the pedestal from one. With a bit of luck I might be able to retain some of the molding in the final version. As I've got 4 there is room for experimenting!

P1020806.jpg


This morning was spent 'recommissioning' the lathe which would have been much easier if I'd actually decommissioned it! It's been sat virtually untouched for about 5 years. The odd switch on to make sure it still worked and exercise belt and bearings but that's about it.

As I clearly haven't done any turning for the same period of time this is going to be a slow and steady part of the project and is where I intend to start.

Now it's either rugby or turning. Hmmmm

Given that this project only involves 7 pieces of wood I find it hard to believe how much effort it's likely to take. I've never taken on anything like this before so I'll be doing some learning on the way.
 
stuartpaul":3skgi33d said:

stuartpaul":3skgi33d said:
The only constraints were the overall size, no more than 20" high and wide..

I think you're in trouble then aren't you? ;)

I'm looking forward to this one. I don't recall that jig, was it on the first DVD?
 
This will be an interest one to follow. :) Do you have anywhere you can stack those boards flat? It might be enough to remove some of the bowing, while you're working on the rest of the construction.

Will you be adding any cleats underneath to keep the top flat and prevent it from cupping?
 
Looking good, but I have a completely unrelated comment. The hoover in your first picture, I have one identical and its called 'the bin' it was given to me by my dad and its about 25/30 years old. He bought 4 or 5 of them at the time for his business. I am on my second and the one I have is the last remaining. Just surprised to see another. Sorry to take this boringly off topic. :D
 
Thanks for the initial thoughts. I wouldn't do too much breath holding waiting for progress as I suspect this is going to be a long job with all the other 'stuff' I've got to do this year.

I think you're in trouble then aren't you?
I reckon you missed your calling Tom, - you should've been on the stage :D

Clearly the length of the top is related to the width of the oval. It might need a bit of a tweak, - I'll find out when I cut the template.

nice job of that jig
I put that down to the good drawings and the dvd!! Good stuff Steve.

Olly - I've just stacked them flat on the garage floor and will have to see if that makes any difference. I haven't got the room to leave them there until I get to the top so will have to find somewhere else in due course. Also noticed that the largest piece (that's going to be the top) has split so will probably have to recut and glue anyway. Will try and talk SWMBO into letting me bring it indoors and see if that helps.

Wasn't going to add any cleats, - do you think it will need any? I was hoping that being relatively small and from well seasoned stock I wouldn't need to add anything like that. Thoughts welcome.

I've had my 'bin' for over 20 years and it's still going strong.
 
First update is rather a list of disasters and c0ckups.

I'm developing a love hate relationship with sketchup - love what it can do and how it shows what something will look like. Hate the fact that no matter what I do I just can't seem to get to grips with it and that the smallest model takes hours to complete!! I will persevere.

I have mentioned that I can't design to save my life and this week proved it. The drawing was in side elevation (i.e. table length) and I discovered that this meant that the 'feet' would have stuck out from the width of the top. This has lead to a redesign of the legs to keep within the footprint of the top. At least this was discovered before major work began.

The most serious issue nearly ended up with a trip to A&E, - luckily it was only bad enough for minor injuries unit :oops: I've mentioned before that I haven't used the lathe for over 5 years so lots of time spent making sure everything was tight and ready for use. In particular I made sure that the drive belt was on slowest speed setting. The old leg was going to be out of balance so a slow start up was vital. Chop off the damaged top where the mortices had been:
P1020811.jpg


Use the hole where the end caps or castors had been:
P1020813.jpg


So, - a dead centre to drive and a live centre at the tail stock. Leg centred as best as I could, - not massively out but enough to know that it would vibrate a bit.

Stand back (a tad) and switch on. An almighty bang and a searing pain to the end of my nose told me that things were not going to plan. A bit of blood and a lot of swearing (apparently no new words but some novel combinations!) and I was off to minor injuries. I'm not sure if having SWMBO working in the same (small) hospital is a good thing or not. Once the initial concern dies down the recriminations start.

I had no idea what caused it but was glad the pain had died down and that no major harm done - except to ego.

I returned to the workshop determined to try and find out what had happened and spent ages trying to figure it out. Checked and double checked everything and everytime time I attempted to startup (from behind cover!) it vibrated like a machine possessed. Yet more checking and then when looking over the drive belt realised that I had in fact set the lathe on highest speed. For some obscure reason I had completely misread the belt position so instead of about 500 rpm it was more like 4800. No wonder it went walkabout!!

Thankfully no major damage but I shudder to think what might have happened (all comments about d1ckheads, morons etc accepted).

Anyhow, - with the belt at the low speed position (no - really. I double checked :oops: ) I made a start:
P1020814.jpg


I've managed to get the whole leg down to a well balanced spindle
P1020816.jpg


A day off on Friday meant that SWMBO had to be rewarded for her earlier actions so I took her shopping. It was an unfortunate coincidence that we had to go past Axminster so I managed to get the dovetail bit. It's a shame that one of those bevel box thingies also fell into my basket!

In another brain fart moment I realised that I'd misread the specifications for the bit and instead of being 32mm wide at the base it was only 20.5mm (it's 32mm depth of cut).

I'm now wondering if this is going to be big enough to achieve the strength I'm likely to need?

After what seems like an age on sketchup this is how I think the bottom of the pedestal will look:
pedestalbase.png


Of course one of the options is to increase the size of the base where the legs fit but as I've started turning I'm almost at finished size now.

I'd welcome any thoughts on the potential strength of these joints.

Me and me nose are off for a well earned drink.

This can't get any worse can it?
 
dung I bet that hurt! :shock: :shock: That's the reason I got FVS, I'd have done the same, many many times!

FWIW, I think the dovetail will be absolutely fine.
 
You've just put me off turning large spindles and bowls for life!!! (...Well, at least until I could buy a full-face visor, anyway.) :shock: Hope it heals up okay.

I disagree with Tom, though - those dovetails are going to severely weaken the that end of the column! There isn't much wood between the sockets at their widest points. Before cutting any wood, I reckon you should try reducing the depth of each socket by at least 3mm, maybe 5mm (ie. 20mm becomes 17mm or 15mm, and see how that looks.

Pins don't really need to be as long as that and you'll only be asking more work of your router cutters. If the table is dragged about on carpet or kicked by passers by in future, I just worry that those areas are too fragile. :?
 
Can I make a slight suggestion: when you come to glueing up the legs
Do one at a time & let it set (one a day)
The adjacent "holes" might need a trim before fitting the next
If you do them all at the same time the weak bit will split DAMHIKT
 
Thanks for the comments - apart from feeling a giant pratt no real harm done and a really valuable lesson learnt (duck quicker :D ).

Olly, - I've redrawn taking account of your thoughts, - a socket depth of 17mm. Gives me something like 9mm between widest points of the dovetails. I've also 'shortened' the socket by 25mm from the original 100mm. The 17mm for the top of the socket is probably too big but it's a quick freehand measure of the router bit!
pedestalbase2.png

Do you think this will be an improvement? I'm acutely aware that this is the weakest point so time spent now will be well worth it.

If I take the dovetail depth down to 15mm surely this will be too weak? Obviously having never done this before and being a pure amateur others may know an awful lot more than me.

I was planning on some sort of finial or capping on the bottom just to tidy things up a tad. Won't add a lot of strength as it's end grain to end grain but it might help stop any future movement?

Jim, - you're assuming I get as far as gluing!!
 
I think that's a definite improvement, Stuart. :) I reckon you'll be okay with that, following lurker's advice.

I've not done one these before but I'd glue the two opposite feet in first, leave them in the warm for a few hours and then attach the other two. I don't see why you can't do all four in one day (depending on how much free time you have), as long as you let the glue cure properly.
 
And so it goes on ....

Progress has been slow for all sorts of reasons but I'm getting there.

Pedestal is finished size at the dovetail end. Managed to get and extra 5mm diameter to help with more wood between dovetails. The small 'shoulder' to the right hand end is deliberate to help reference in the mortice jig. The drawing behind is the final design (I hope!).

P1020819.jpg


Prepared and laminated one of the table tops for the feet

P1020817.jpg


Worried about the glue line so considering what molding to apply to the tops of the feet to help disguise it. Probably some beading, - I have to see how they look when fully cut. Template prepared

P1020820.jpg


Need to get a larger template following bit as at 35mm thick I'll need longer reach than I currently have.

Pedestal transferred to the sliding mortice jig

P1020825.jpg


I'd neglected to make the cross mortice jig in the hope that I could 'get away' without using it but it became clear that it was going to be vital in maintaining stability so half a day lost to that.

I'm ready to start cutting but I've been pondering the order. I've got two routers and the big one will be doing the dovetails as this is almost certainly going to need some power. My other smaller router will be used for flats and rebates. The obvious order is the flats then rebate to ease the work of the dovetail bit and then the dovetails. This done without moving the pedestal so it all references from the same place.

Because my old Hitachi won't let me preserve the depth setting for the flats and then cut the rebates I'm wondering if I can cut all the flats first and then return to do the rebates. My worry is being able to return the cut flats at 90 degrees to the router base to keep everything referenced properly (the 'bits of scrap' in the jig keep the smaller router base referenced centrally).

P1020824.jpg


So I've come to a grinding halt until I can find a way of sorting this out logically.

Any ideas?
 
A while since I last updated but I've been busy working quietly away on the table.

I managed to overcome the problem with router settings (thanks to Steve M - again!) and the sliding dovetails have been cut.

First with a 12mm straight cutter to cut all 4 initial rebates

P1020826.jpg


As I'd used a 12mm cutter for the rebates I could use a offcut of mdf to help realign each rebate to then cut the flats and dovetail. This was a huge help in lining things up again but I still took about 20 minutes for each one constantly measuring and remeasuring to make sure all was as it should be

P1020830.jpg


Then using the cross mortice jig to cut the flats. These were cut one at a time so the dovetail cutter would reference from them.

P1020831.jpg


The rebates really do take a lot of the effort out of using the dovetail cutter, - it went surprisingly well.

P1020833-1.jpg


The dovetails all cut

P1020848.jpg


Some of the most nerve racking routing I think I've ever done.

Having already laminated the timber for the legs they were cut overlength with one end at the correct angle for the dovetails to join the pedestal. Then on to the router table to cut the tails. You might notice five legs, - one for luck/spare/trial cuts (also a softwood one for set up cuts etc.).

P1020835.jpg


I used a simple guide to try and keep everything well referenced and cut the same

P1020836.jpg


Unfortunately even with careful, small cuts I managed to have one of my obligatory cock ups and cut one too small. I ended up gluing a thin strip to the dovetail and then recutting to ensure a good fit.

P1020838.jpg


This will of course only be the first of many such 'instances' :oops: :oops:

First rough fit - is it finished yet!!

P1020840.jpg


Then to shape the legs. MDF template and transfer to legs and bandsaw close to final size

P1020842.jpg


P1020843.jpg


Double sided tape then used to hold template and finish off with guided router bit. Had to do one side with top guided and the other with bottom guided due to grain and direction. Lots of bit changing but worth it to avoid those heart stopping moments when a bit 'bites' (DAMHIK).

P1020844.jpg


I then decided in conjunction with my design consultant (you know who) that there was a need for some form of molding to provide some interest and help camouflage the join from the laminating.

Ended up with a 3 bead bit and by careful measuring and running each leg through twice (one 'up' one 'down') to centre the beading.

P1020846.jpg


P1020847.jpg


I've spent the last week or so just sanding and trying to get the legs to a state ready to regard as finished. The two 'outside' cuts are waste and have been removed in the clean up process just leaving the 3 central beads.

Despite the grain direction of the legs being about as good as it could be I'm still going to have to fit some form of 'pad' on the feet to prevent any damage when the table is being moved. This is going to be fiddly but then I always knew it would be.

To date it feels like good progress but I still have to face putting the pedestal back on the lathe and finish that, - really not looking forward to that given the state of my skills in that department.

We'll see ......
 
I specially like your use of recycled timber - some lovely clear stuff there which could so easily have been sent to landfill and wasted.
 
Back
Top