Oak cot bed WIP

UKworkshop.co.uk

Help Support UKworkshop.co.uk:

This site may earn a commission from merchant affiliate links, including eBay, Amazon, and others.

cusimar9

Established Member
Joined
26 Mar 2014
Messages
253
Reaction score
2
Location
Sheffield
So this has been a long time coming but since this project is finally coming to an end I thought I would get started with this WIP.

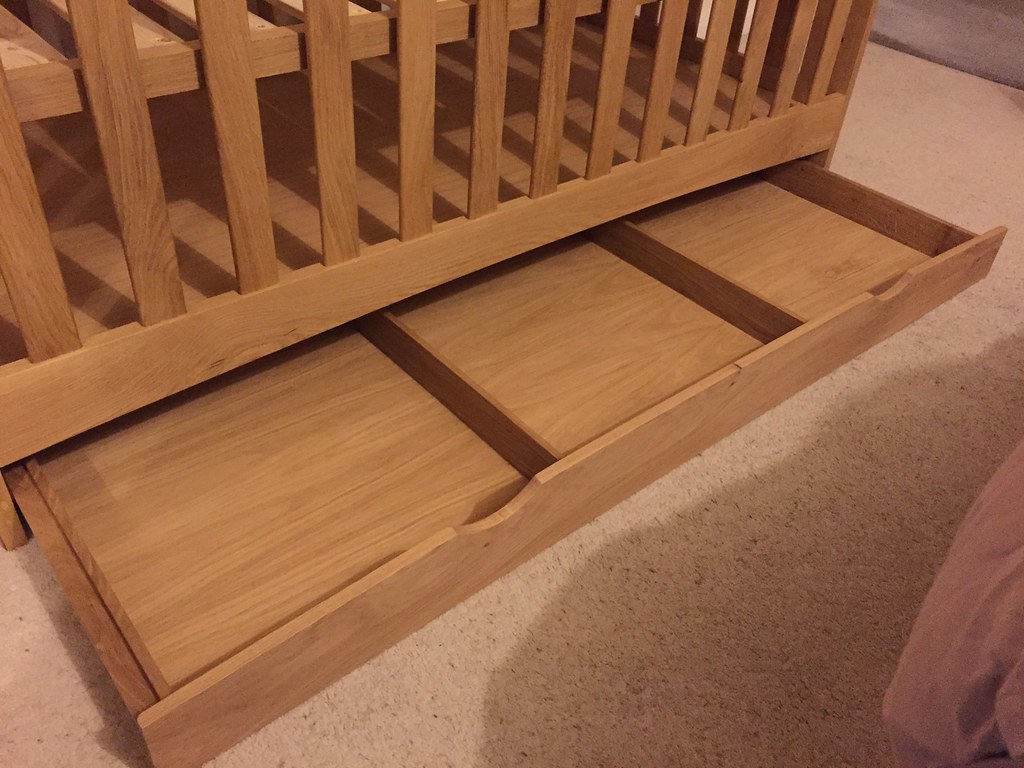
Our first baby arrived in May this year and despite being a relative amateur to woodworking I thought it would be nice to make a cot. Once the decision was made I set about finding a design that I liked, and I eventually came across a thread on here with a design by Simon Blakeney which was exactly what I was looking for. I used his design as the basis for mine, with some slight tweaks and the addition of a drawer in the bottom.


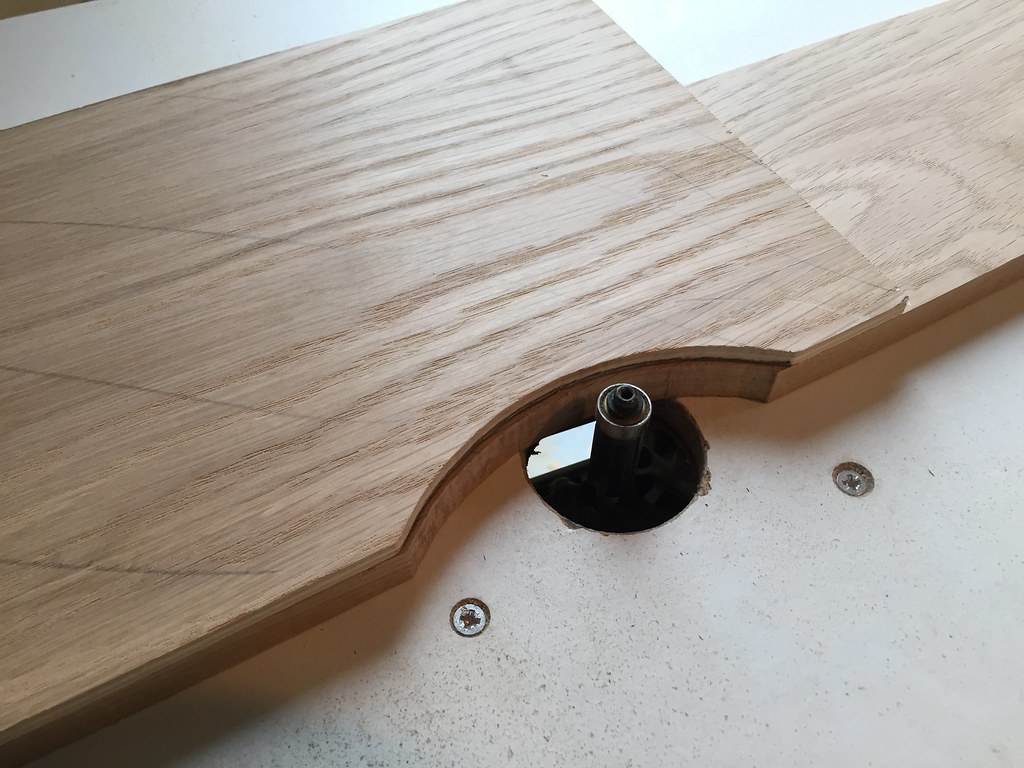
I took a delivery of Euro oak from British Hardwoods, their calibrated boards are 24mm x 200mm and relatively cost effective. I definitely needed a thicknesser as many pieces are only 10mm thick, with the frame being 20mm.

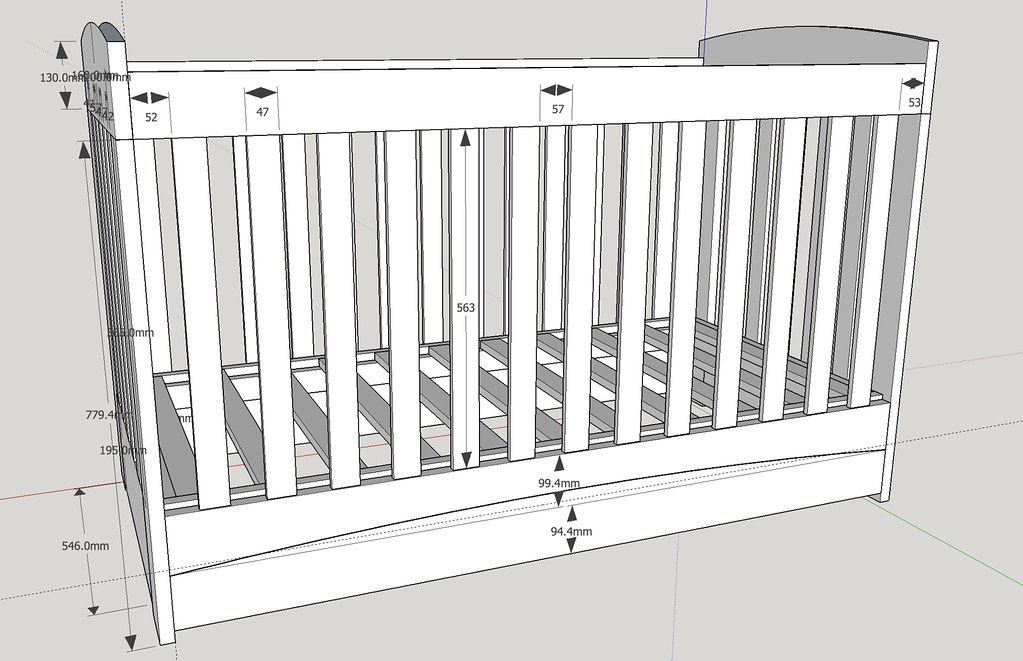
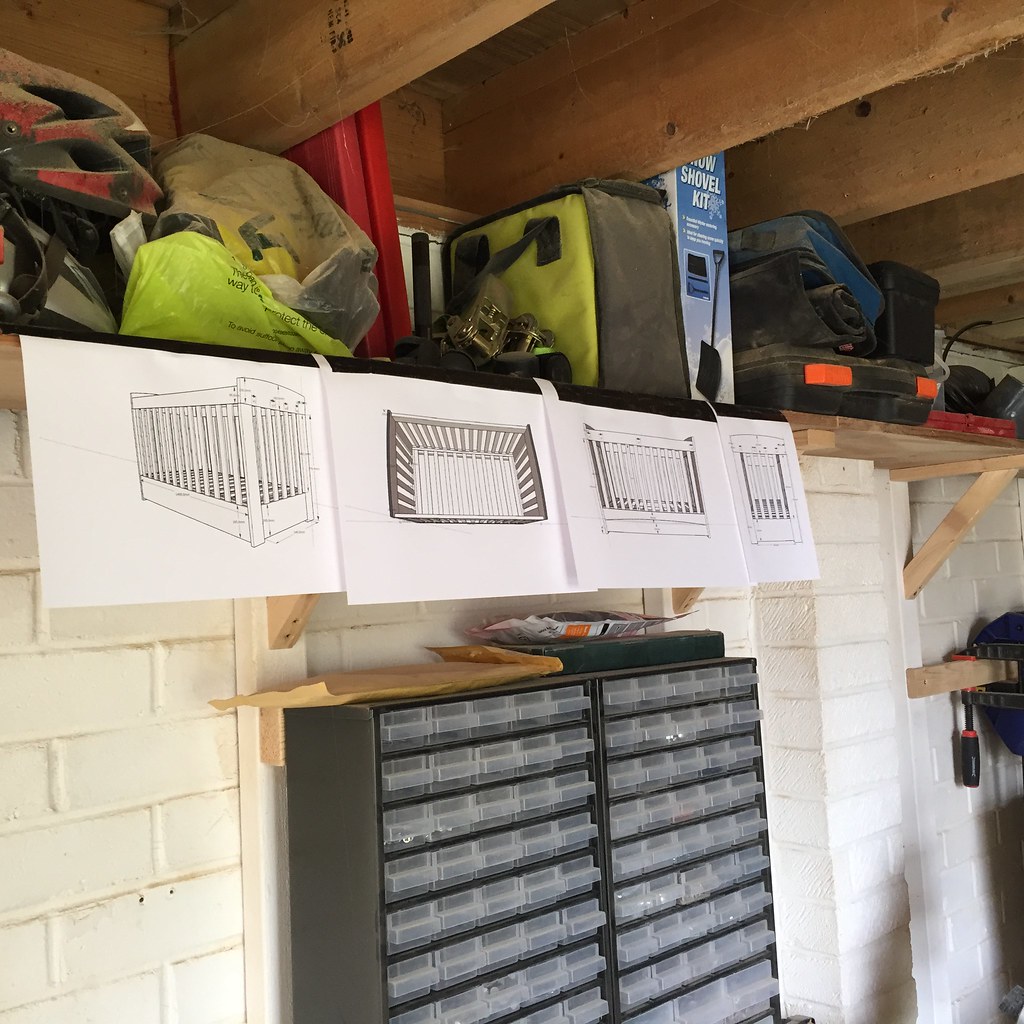
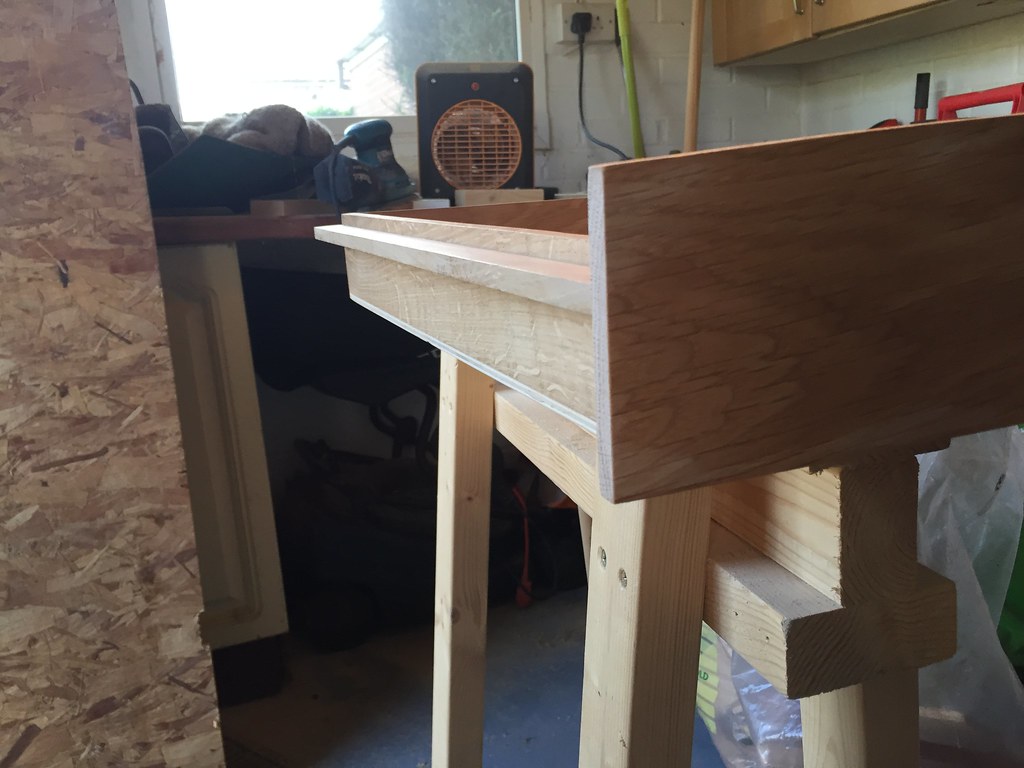
I set my designs up and I was ready to go:


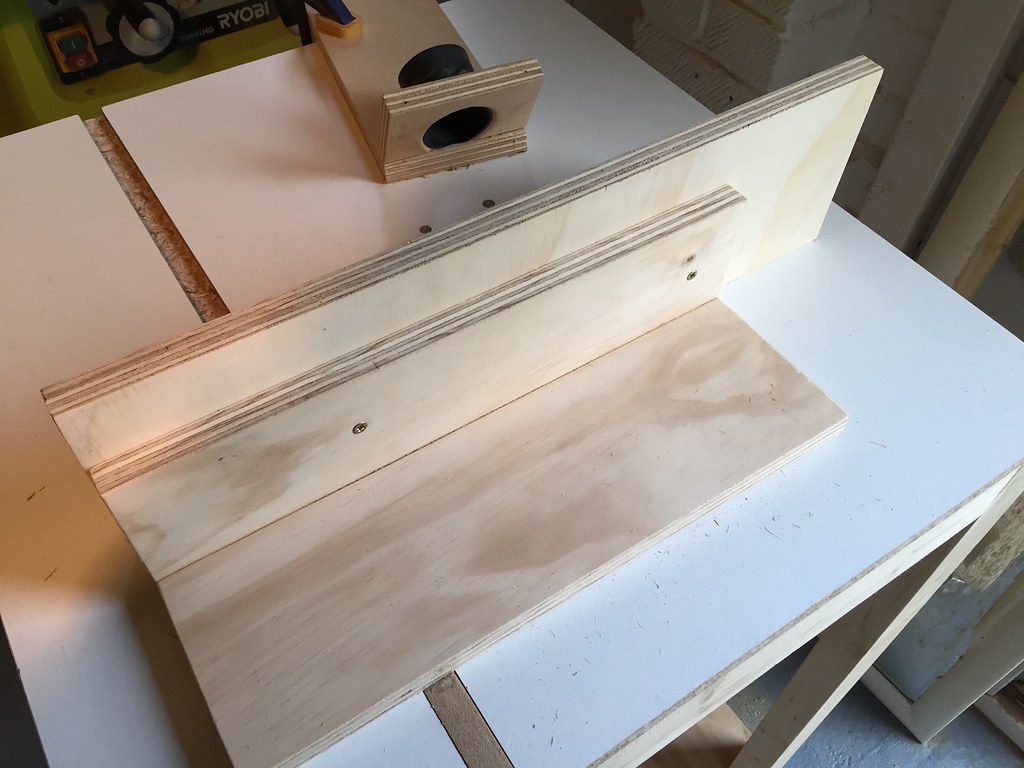
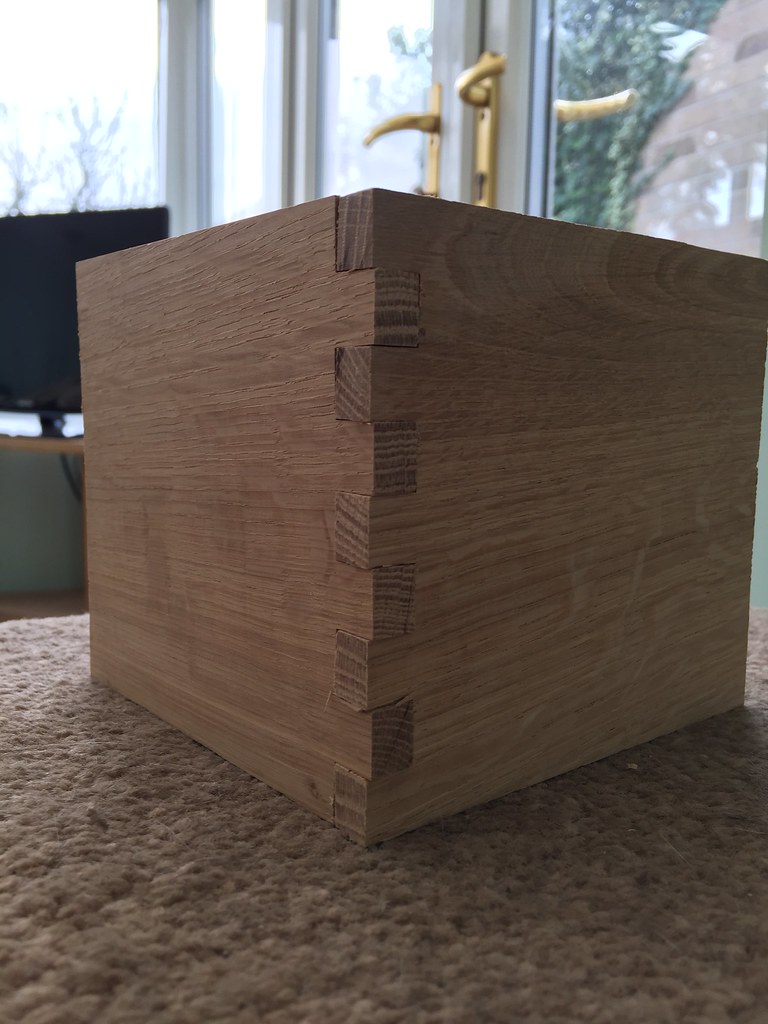
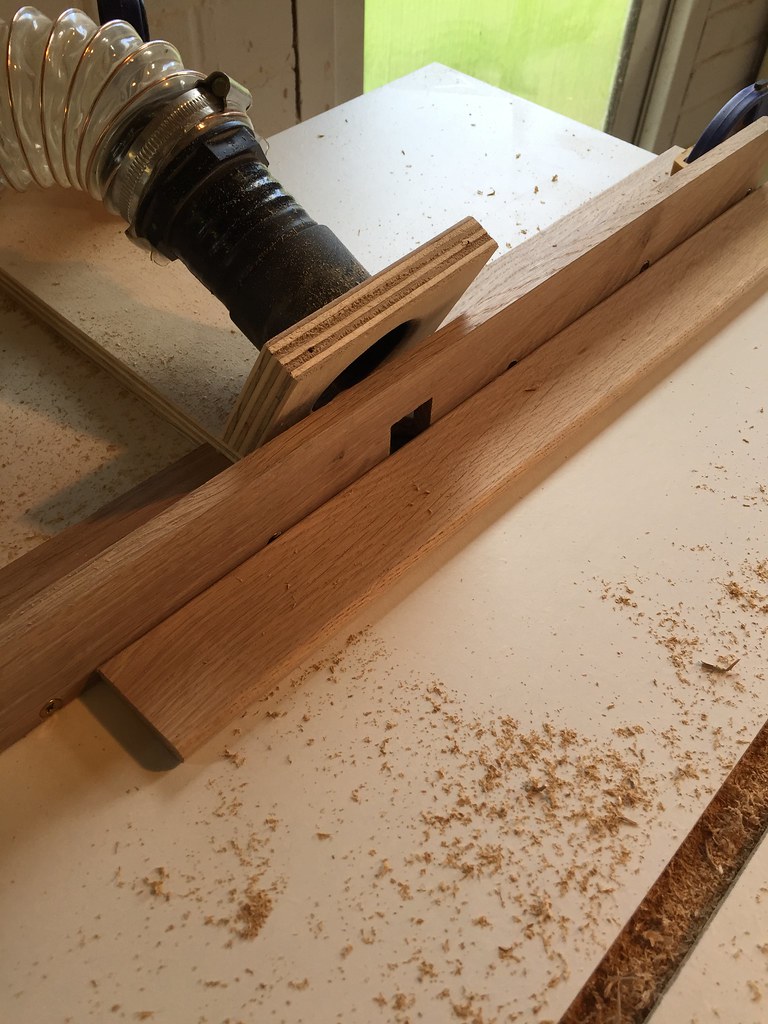
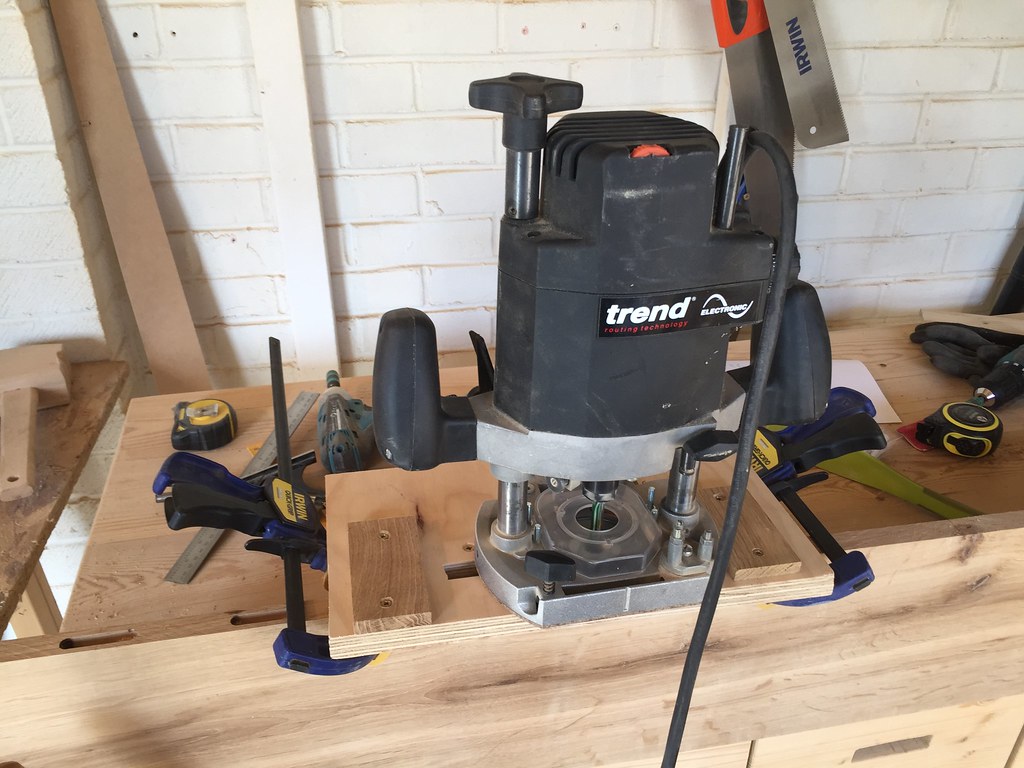
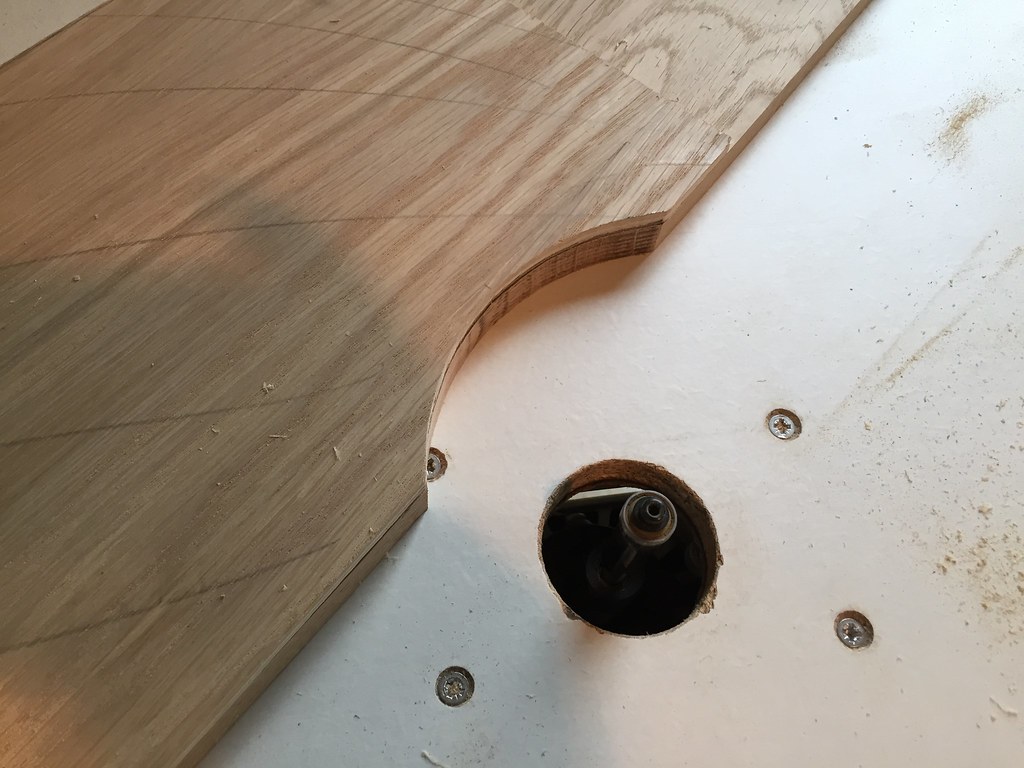
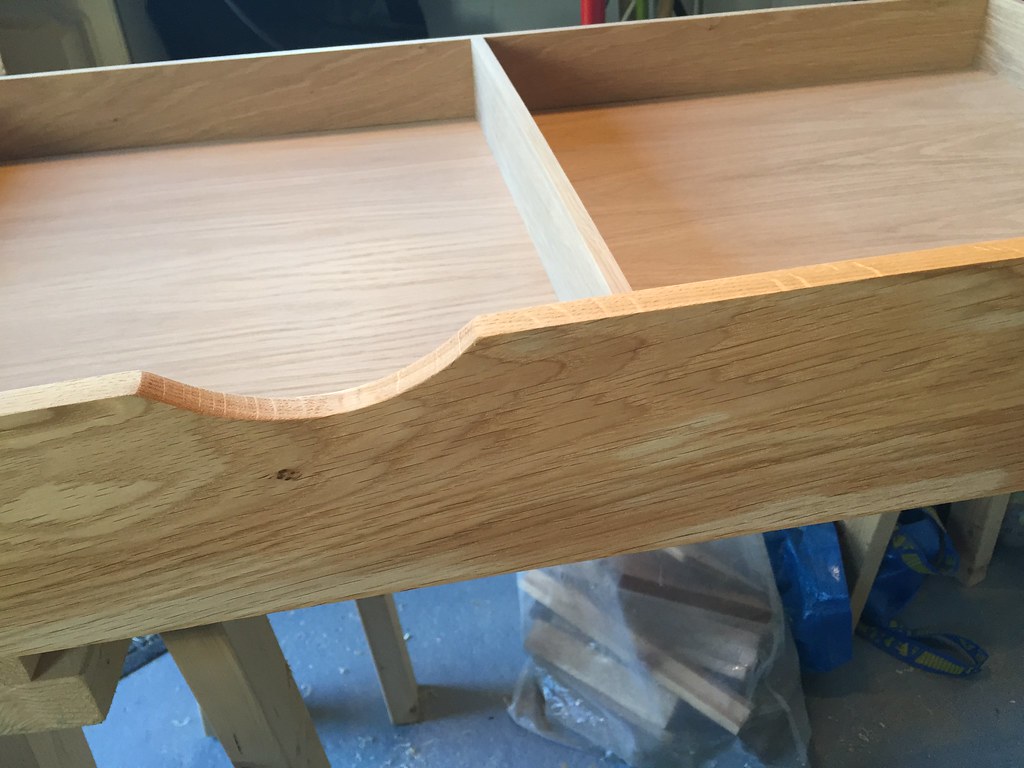
Firstly I needed to make a router table, and I then went on to make a box joint jig, which works brilliantly.


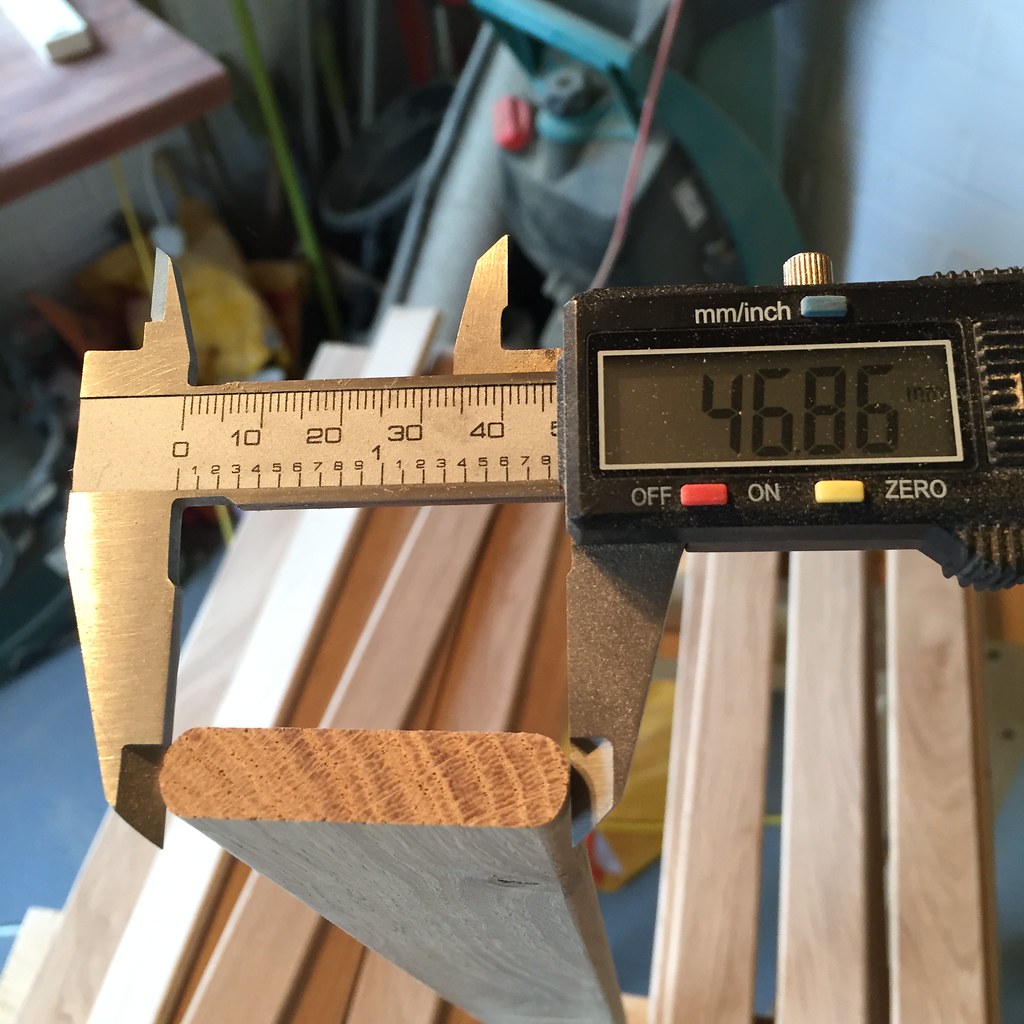
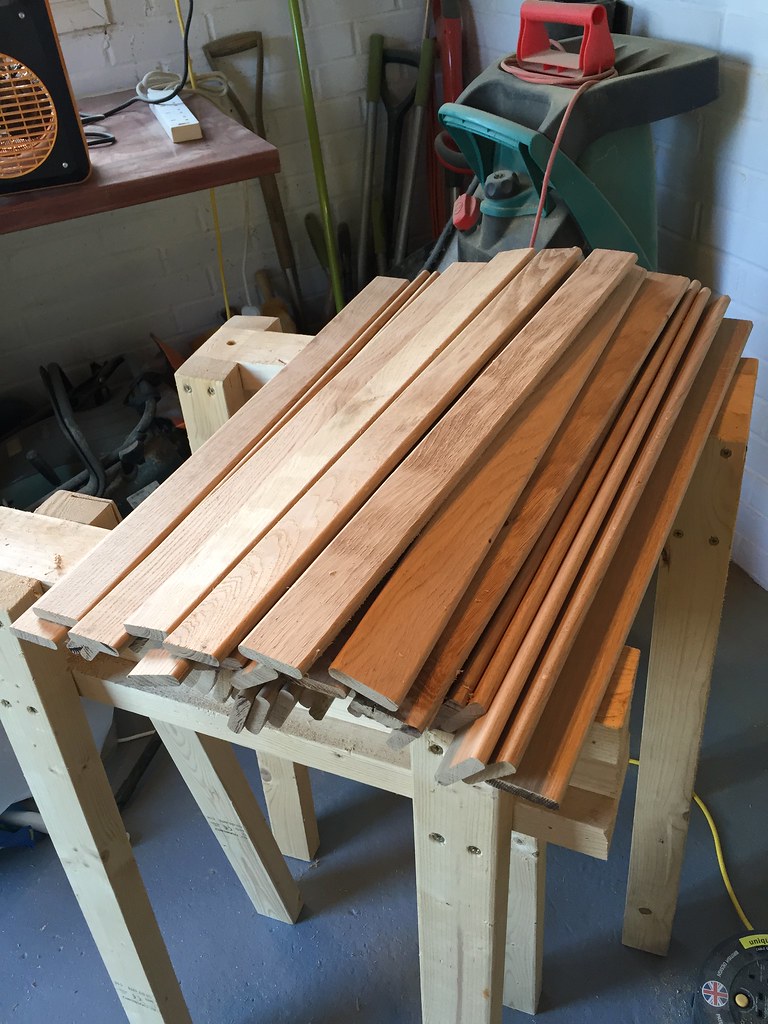
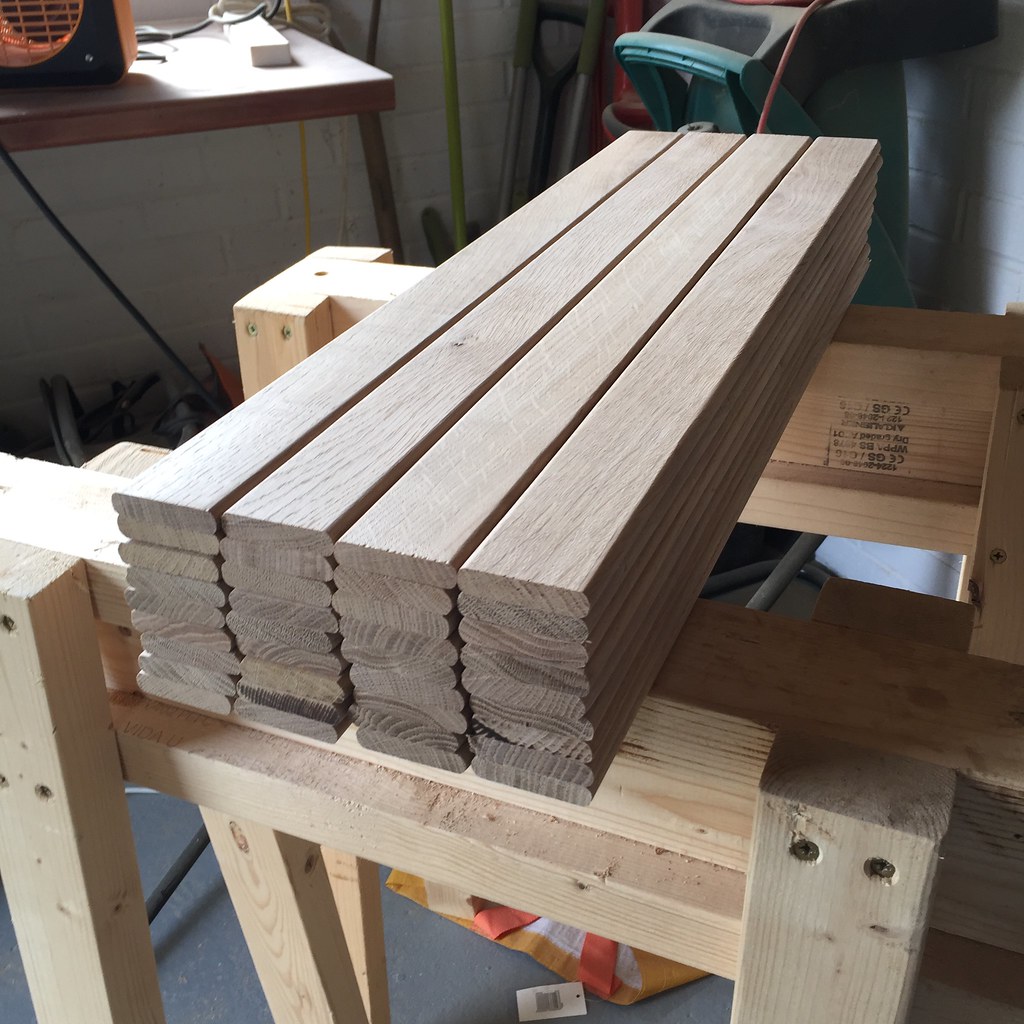
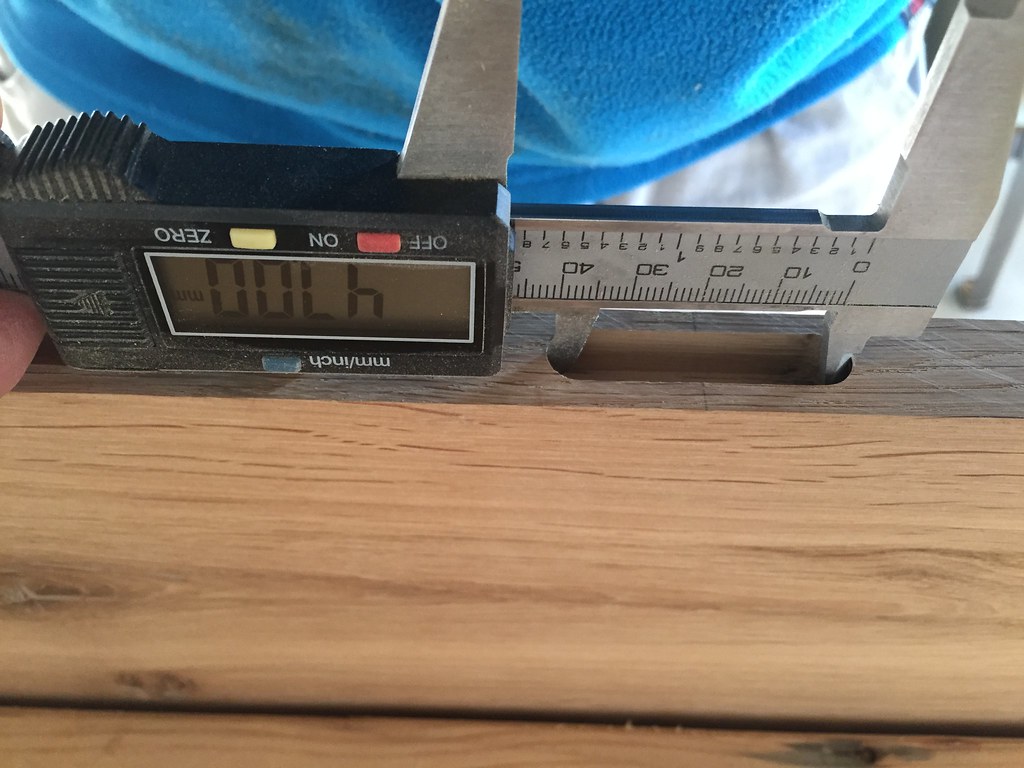
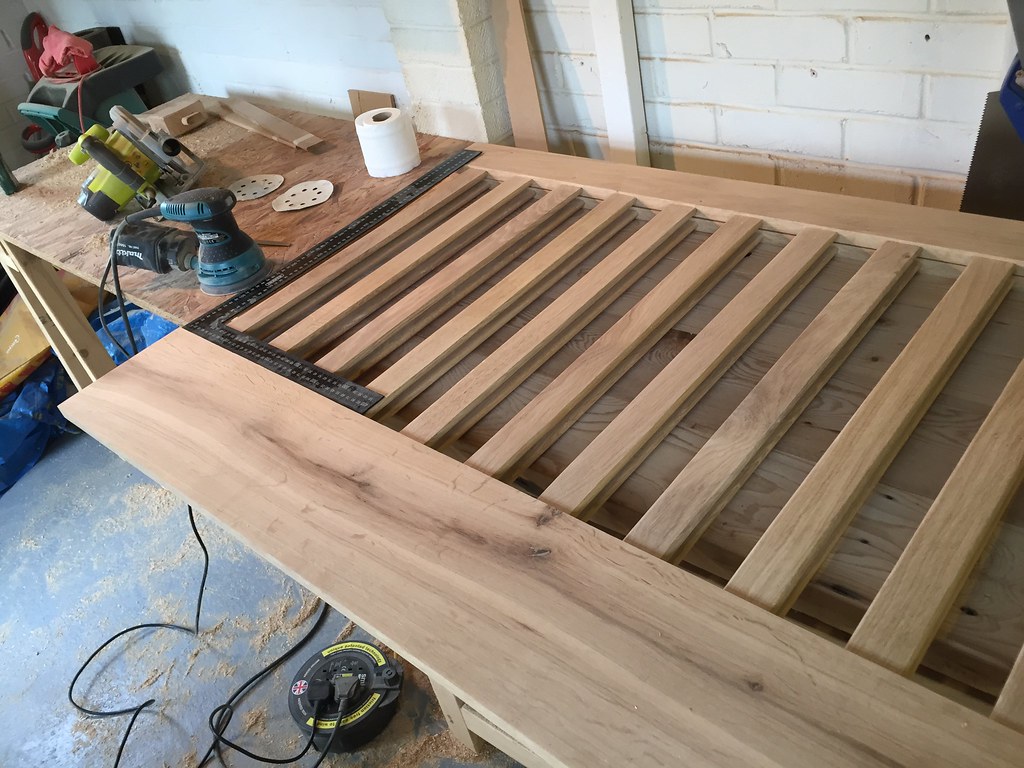
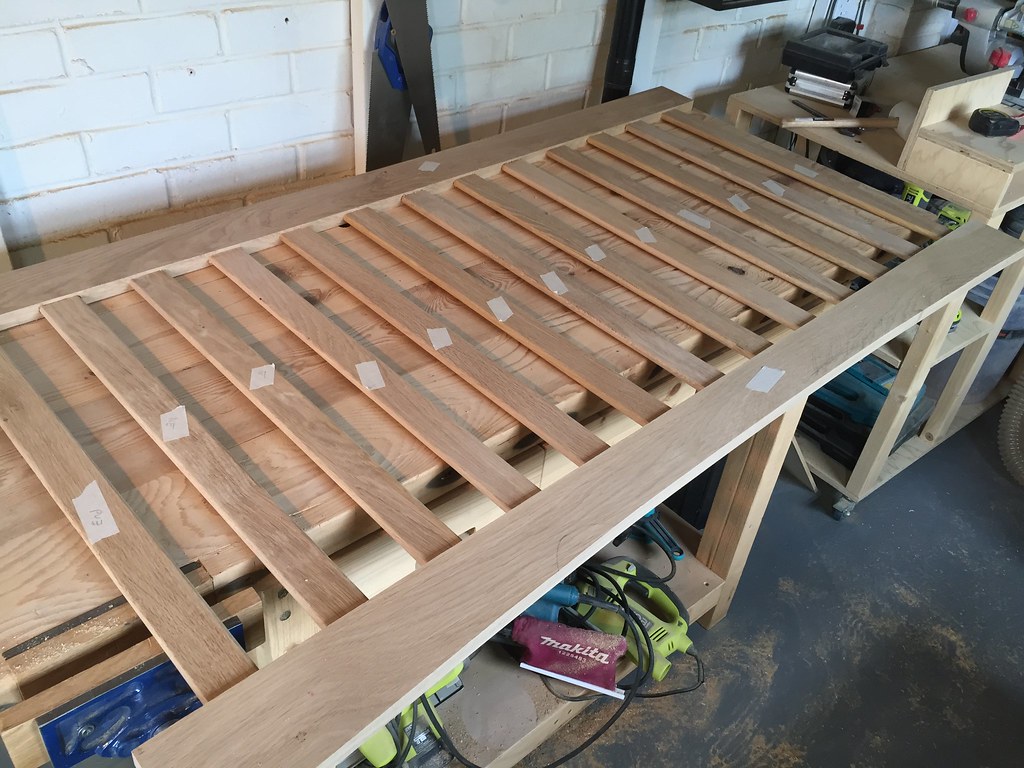
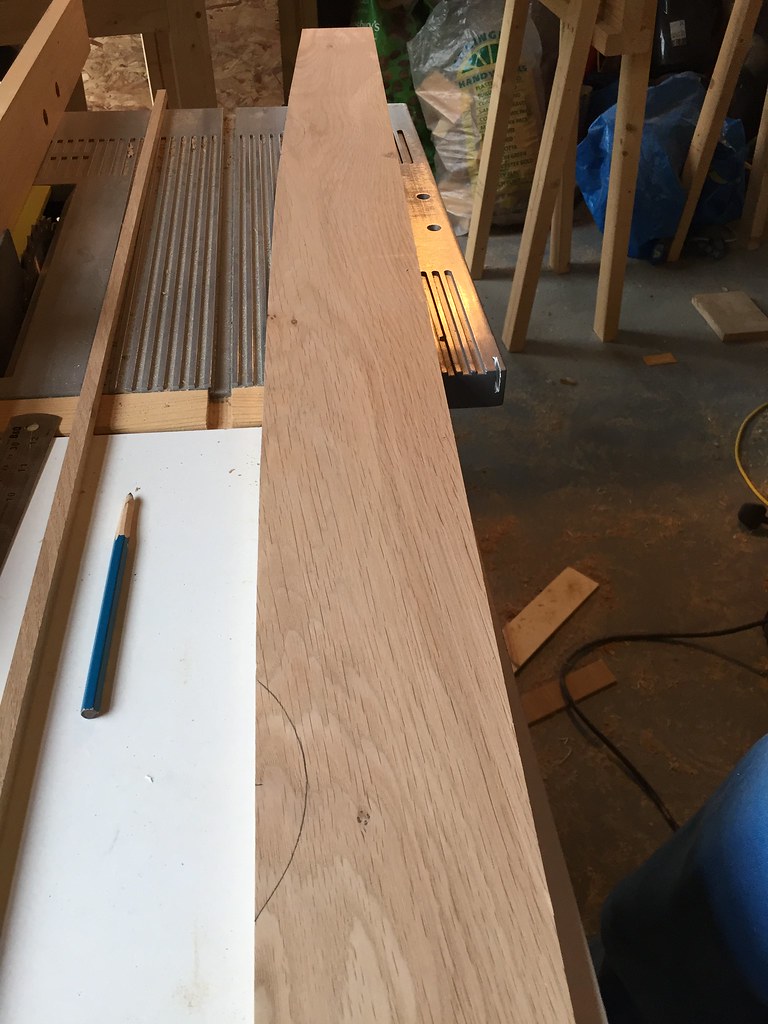
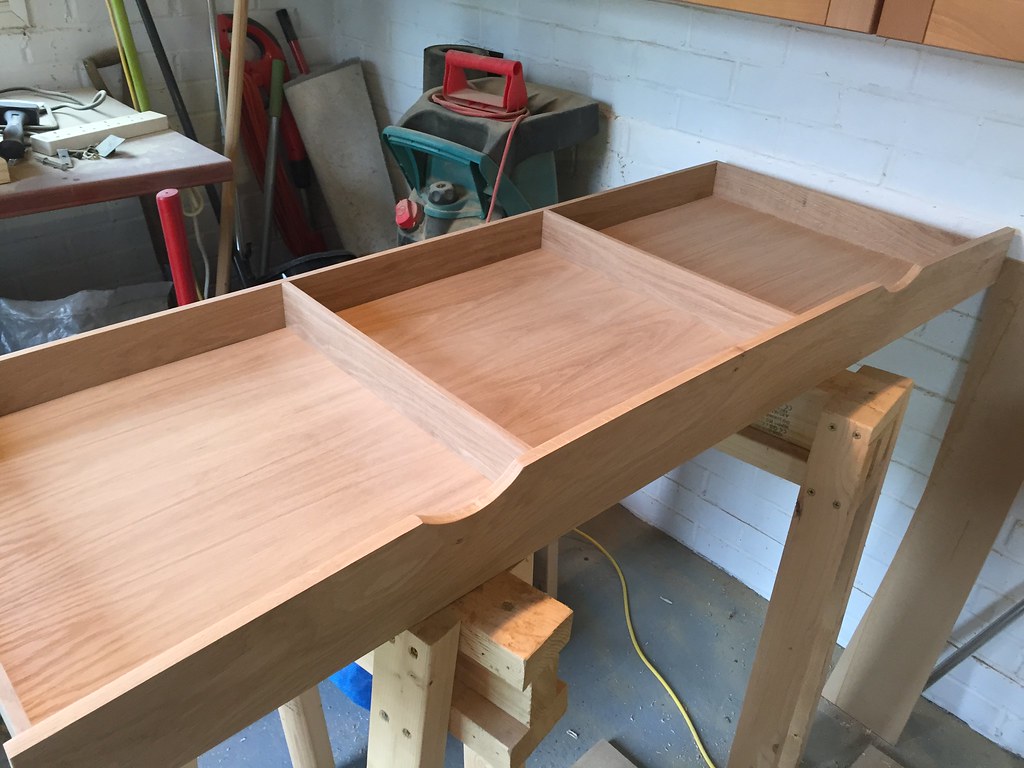
I then set about making the slats. There are 36 of them, each 10mm thick. I was very conscious to make these as accurately as I could since these would be going straight into a mortice. They were all cut to within 1/10th mm and rounded over on the router table.


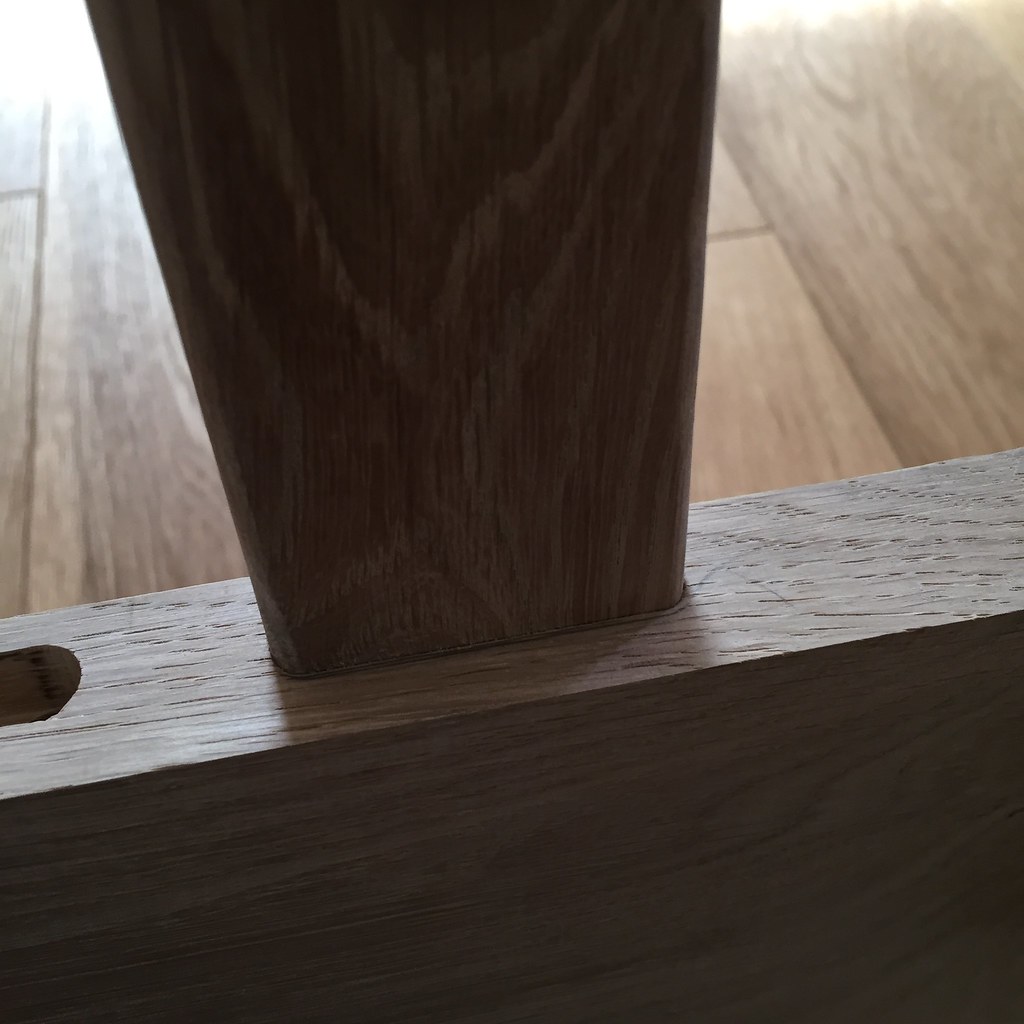
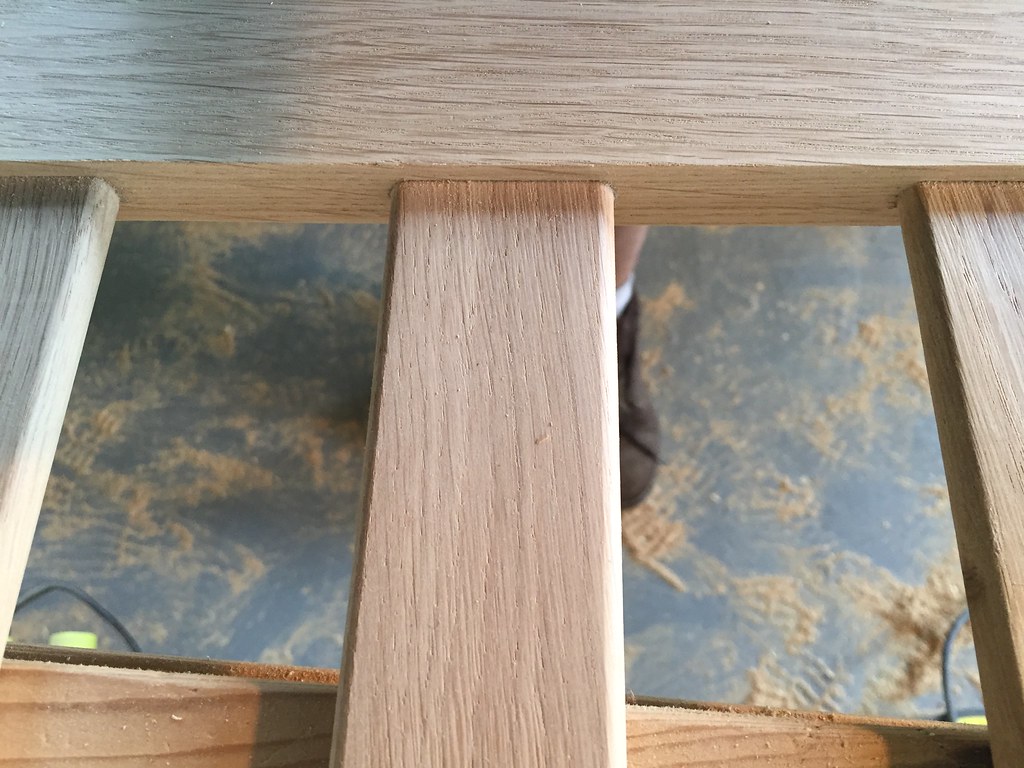
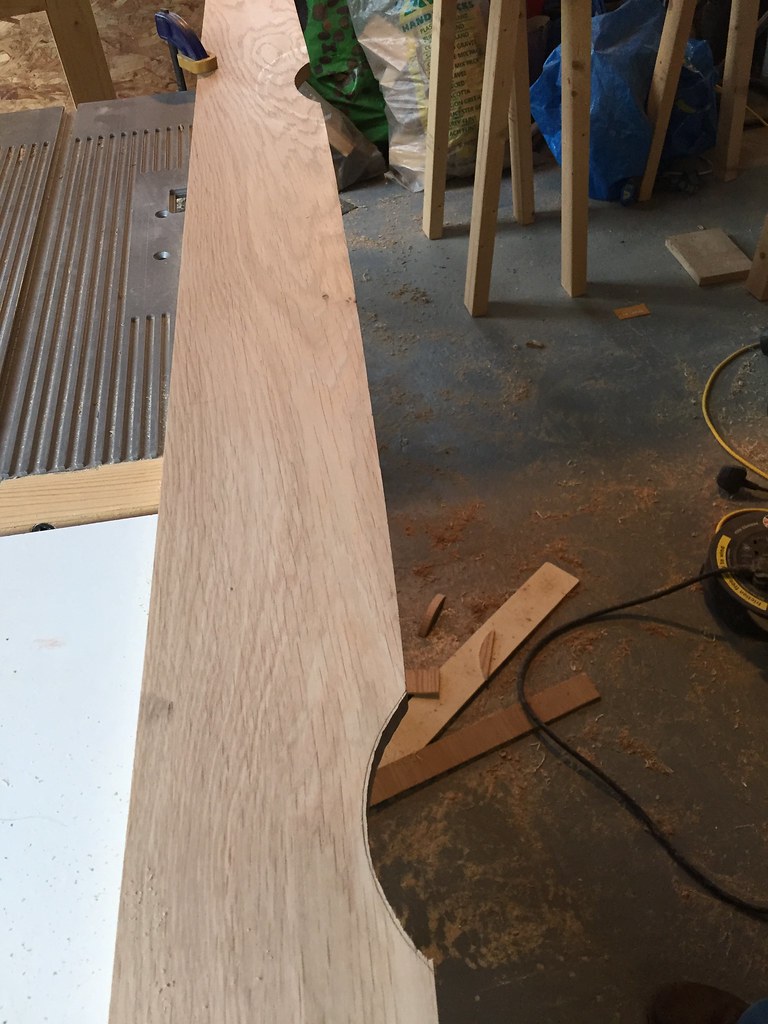
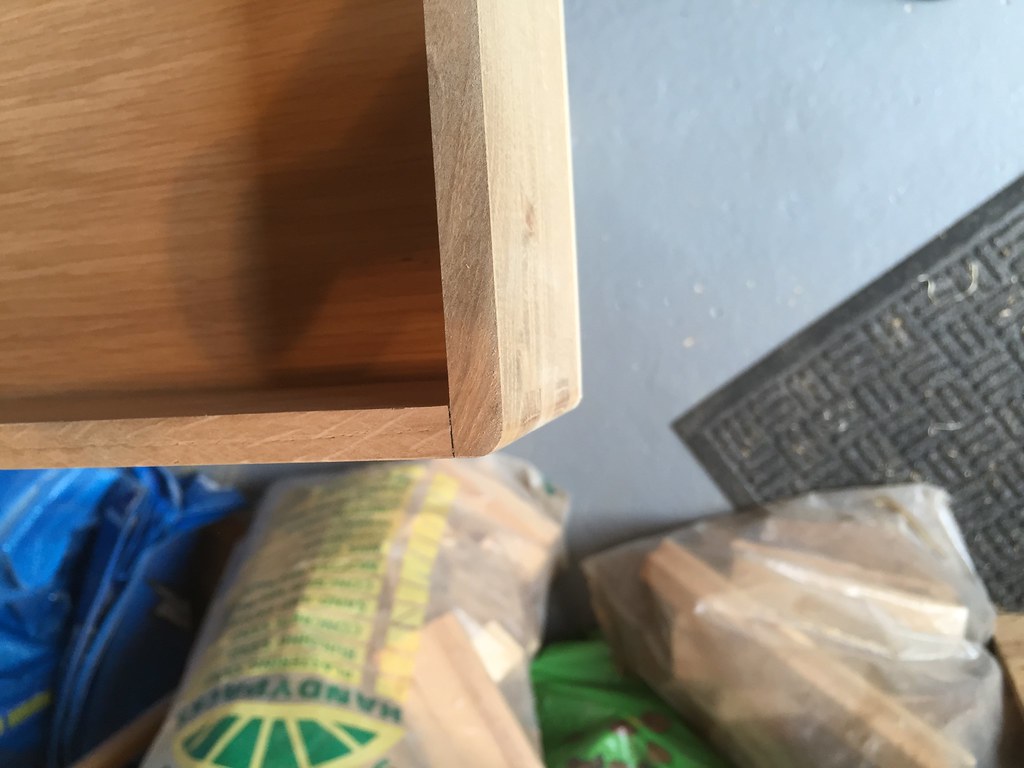
After a few test cuts of the mortices I finally got a perfect fit


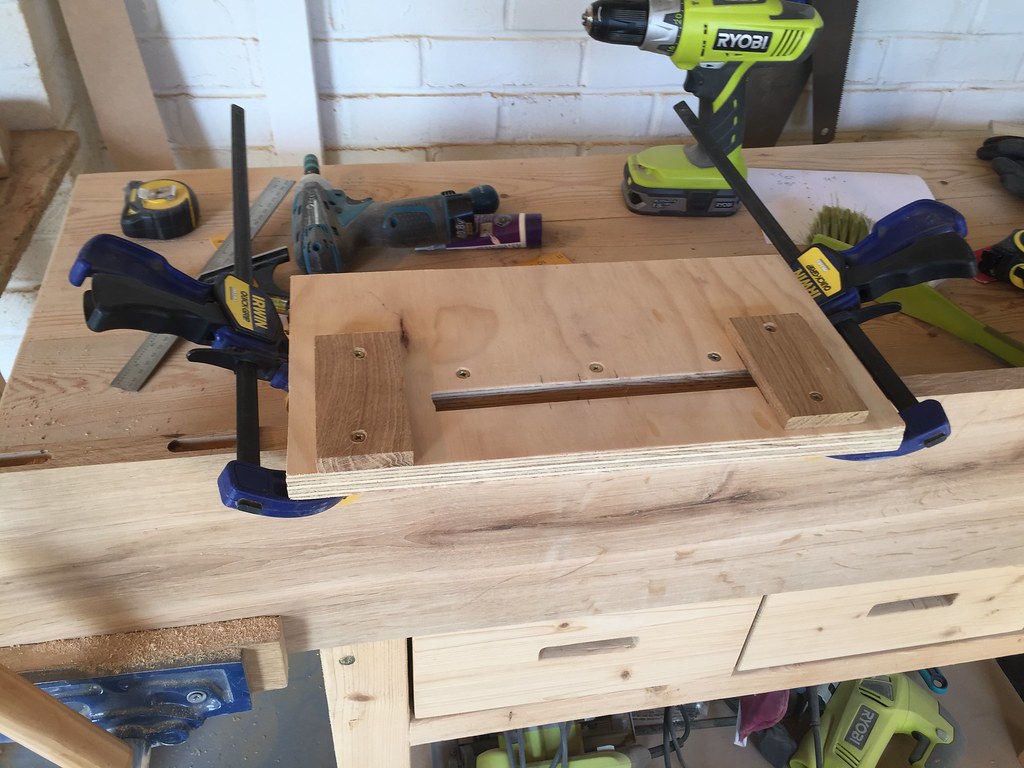
I made a simple mortice jig which was very effective
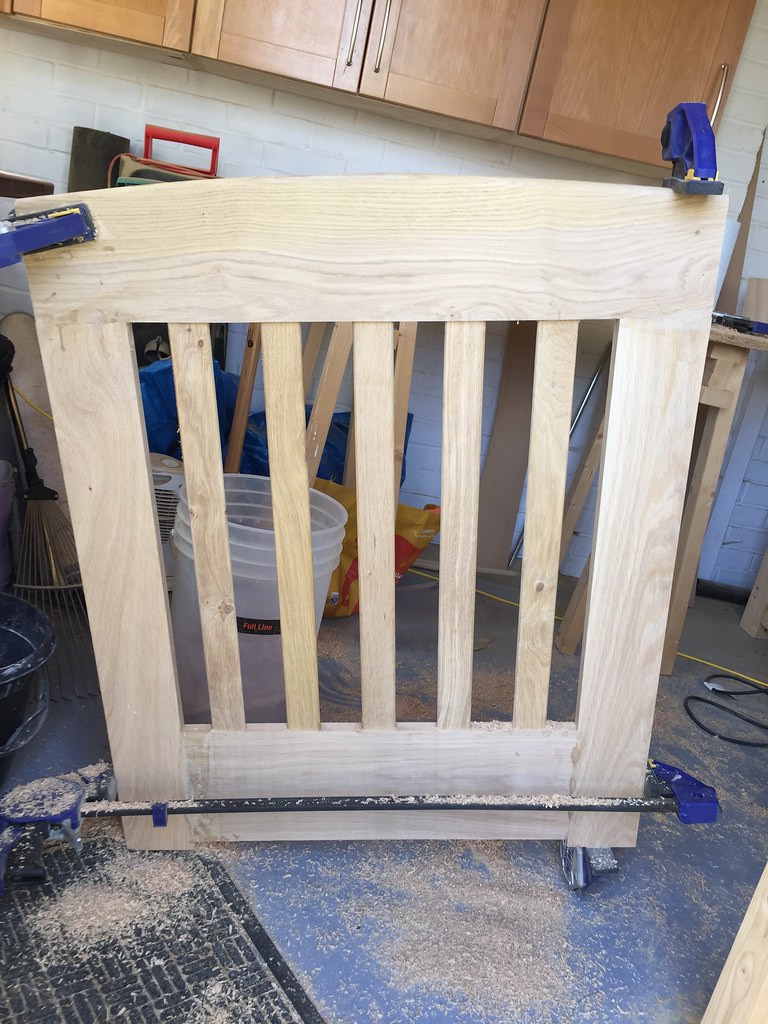


Test fit


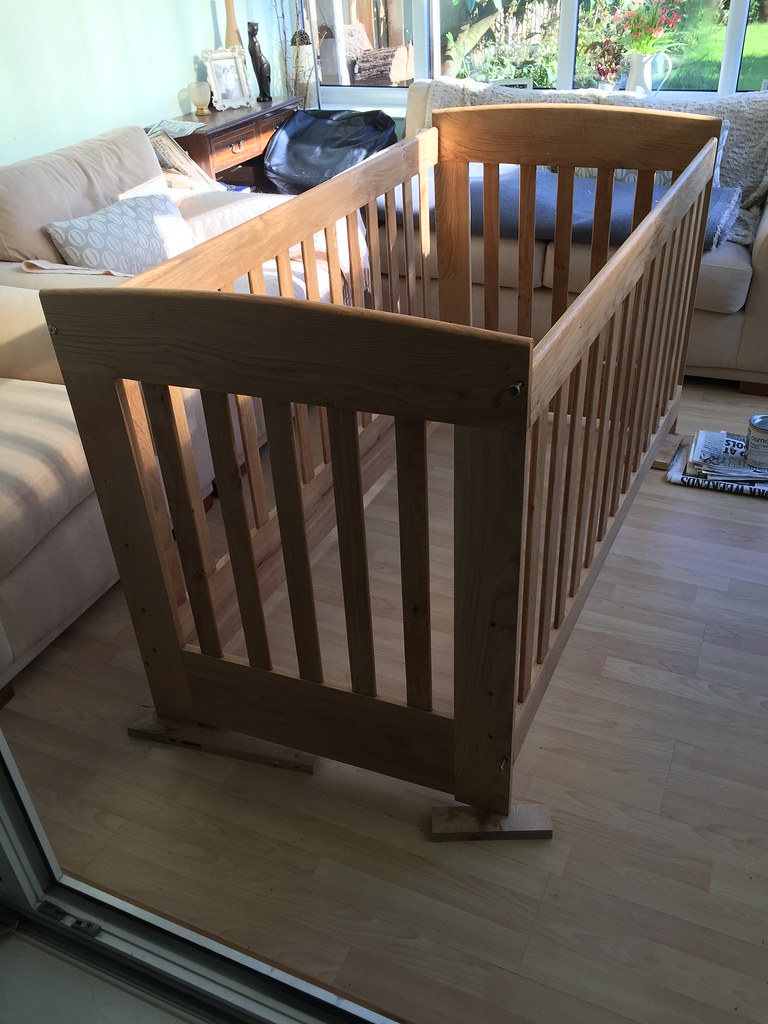
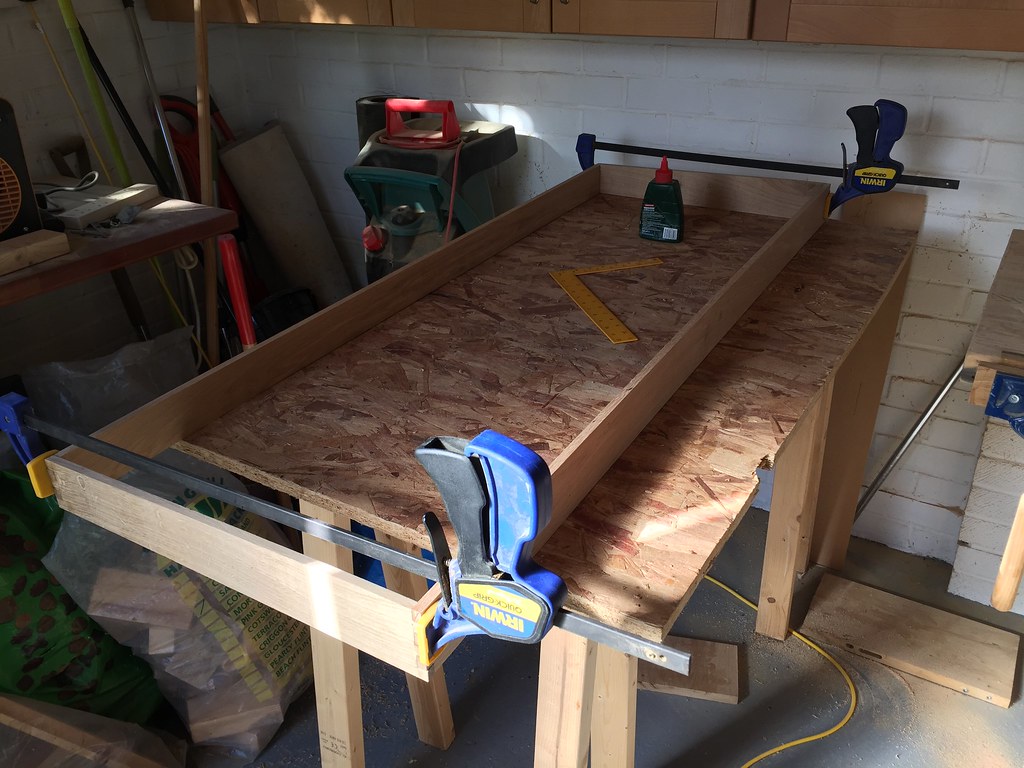
Eventually I was able to start putting it all together, I have to admit there was some swearing but it all worked out in the end


Then the sides were put together, nicely square


And the other side


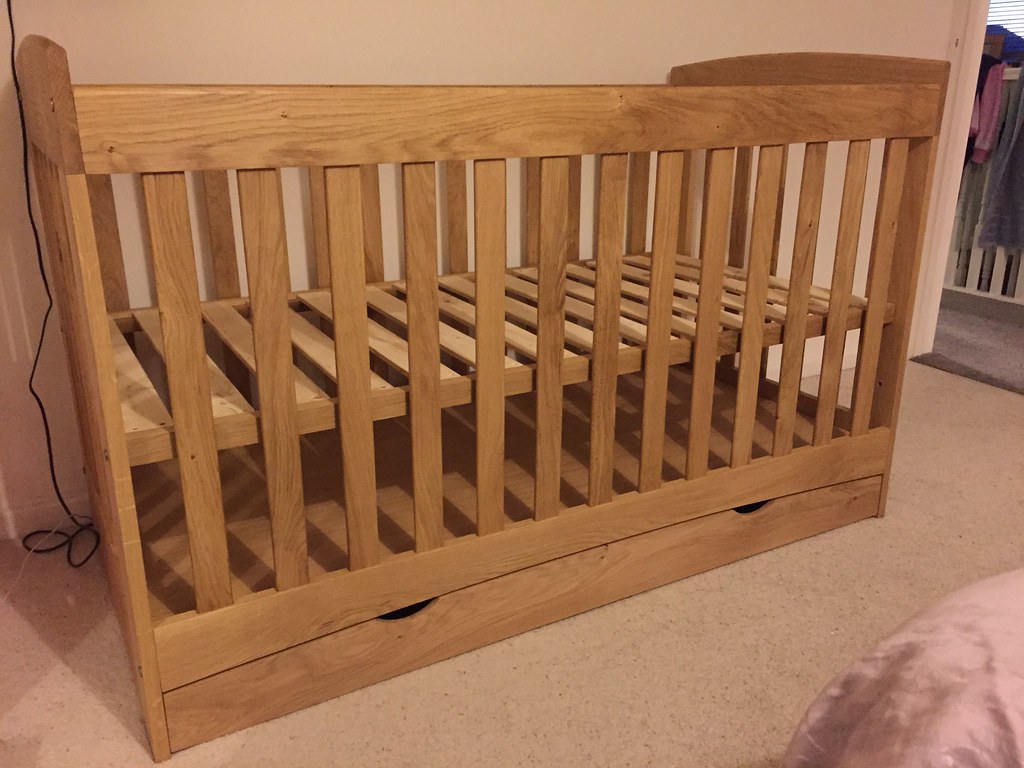
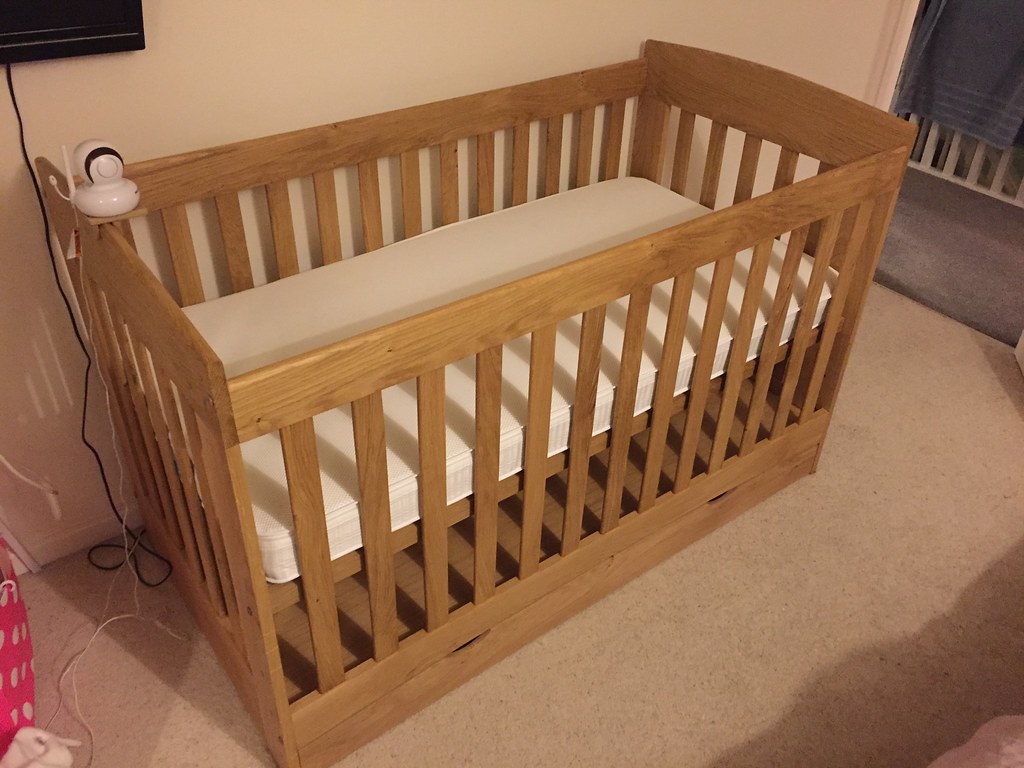
And finally putting it all together!


And after two coats of osmo oil


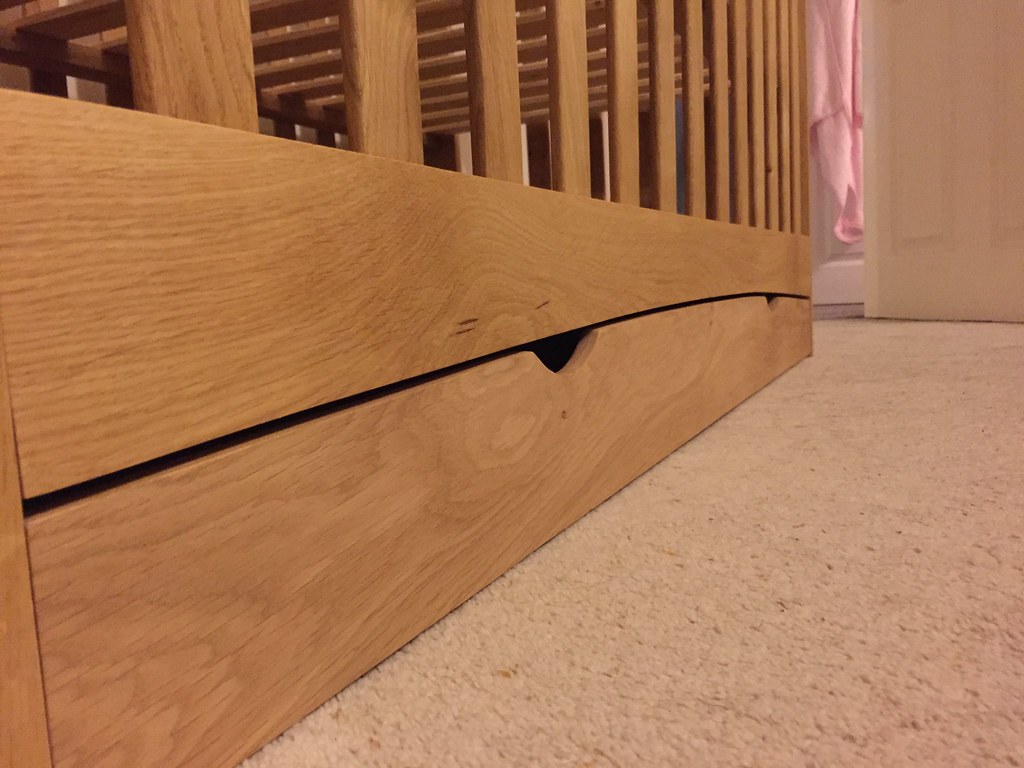
Now I'm just putting the finishing touches to the drawer so there'll be another update in the next week or so. Cheers!
 
thats a stunner Rick
something to be proud of

I will watch this thread to the end

a family heirloom for sure

Steve
 
So now we get onto making the drawer

Marking out the handles on the drawer face:

21780900182_5ee0db3580_b.jpg


Handles roughly cut out with a jigsaw:

21801792221_fd6a47a08d_b.jpg


Cut out with a template on the router table:

21605353749_f9665fe559_b.jpg


21801717001_4ac943a635_b.jpg


Assembling the drawer:

21802430941_ac00ba3f66_b.jpg


Drawer assembled:

21766105446_293d2bc5a8_b.jpg


Rounded the rear corners of the drawer to reduce chance of it catching while sliding out:

21171168583_c7036f9fbf_b.jpg


Raising the grain prior to the final finish:

21169530864_de5206c75e_b.jpg


Drawer runners installed:

21801210471_f25bae596d_b.jpg


Drawer finished and installed:

21603865438_c0942c292f_b.jpg


Drawer front and cot cross member were cut from a single piece of oak:

21791717915_7da546b6f3_b.jpg


21170672753_513ef20d10_b.jpg


21779985832_4bbe43da21_b.jpg


Thanks for looking!
 
lovely job mate.
great quality work considering you class yourself as a beginner!

just out of interest what joint did you use at the corners of the cot?
and how many hours work do you think it took?

Will
 
will1983":1fg9lfgv said:
lovely job mate.
great quality work considering you class yourself as a beginner!

just out of interest what joint did you use at the corners of the cot?
and how many hours work do you think it took?

Will

Hi Will,

At the corners of the cot frame these are simply doweled together. Then the pieces are held together with furniture bolts for easy assembly.

I've no idea how long it took, too long to be honest! Starting with 24mm thick boards when most of the pieces you want to end up with are from 10mm to 20mm is not the best way to make progress!

Rick
 
Very nice. Looking closely I think I see that the matress can be lowered from its current position, which is definitely a good feature when the climbing phase starts. Though sometimes when mine was little I thought that a lid would have been an even better idea :lol:
 
Absolutely Tony the bed height can be adjusted, there are 3 different heights. A lid would be a good idea!
 
Hi Rick,

Thanks for posting this. I would really like to make a cot and the web seems quite short on good plans. Your cot is great and by far the nicest I've seen. If I can get close to this I will be really pleased. I'm just building up the workshop and I've only worked with mdf with bits of pine trim for shelves cupboards so this would be a big step up.

Do you still have the sketchup files? Any chance you could post them or send them to me?

I've got a few more questions if you have a minute

For the side slats, you've planed them down a lot, I only have a cheap tabletop planer/thicknesser, I'm wondering if I could leave them the same thickness and cut tenons. Not sure if that would look odd.

Looks like you use furniture bolts with maybe barrel nuts for both knock down and to hold the mattress base at the different heights? Is the base just two rails that the bolts go in to and then slats on top?

Did you think about making a side removable? I'd like to be able to convert to a small bed. Maybe I could have a separate curved side rail to the main side panel to allow the side to be removed.

Did you look up the cot safety spec for the side slats?

How are the draw dividers done? Set in grooves front and back and then separate drawer Bases?

Any other lessons learned?

Thanks a lot.
Matt
 
Hi Matt,

Thanks for your comments, really appreciated.

Of course you are welcome to the sketchup files, if you PM me your email address I will gladly send them over.

My thicknesser is the £100 woodstar planer from screwfix, I posted a thread on here about that a few months ago. It did the job for me though I appreciate a better thicknesser would have made the job easier.
If you went with this design and cut tenons you would have about 72, so bear that in mind, it would be a big job.

Yes I used furniture bots with threaded inserts to hold the sides and the base together. Yes it's just two rails with slats, very simple.

One side is removable and I have a seperate curved piece to replace this when the time comes.

Absolutely cot safety is paramount and I researched this at length before I started. Suggest you do the same for peace of mind.

The drawer dividers are just screwed in nothing fancy!

Other lessons learned is it took ages so be prepared for a long haul!
 
I am about to build one for my granddaughter, I know this thread is a few years old but it looks fab, I wish I had found this before! Ive pretty much settled with my design but I was thinking about putting the slates into mortices but had decided to use tenon's now I've seen this I like the look of how much simpler it is, trouble is any slip on 1 mortice slot and it will show.
 
The mortices were very straightforward to cut once I made a jig to limit the length of each mortice, they were very close in size. You can always oversize the bars slightly and sand them to a snug fit
 
Nice work, well done!
And not a hand plane in sight! :)

Many moons ago, I made a cot like that for my daughter.
(2 drawers instead of 1)
We gave it away. Some people needed a cot.
Would've been nice to keep it for grand kids, but what can you do...
 
Very tidy work, sir!

I'll have to do the same, once I get some wood in, so great to see other's efforts!
 
cusimar9":2jocqqio said:
The mortices were very straightforward to cut once I made a jig to limit the length of each mortice, they were very close in size. You can always oversize the bars slightly and sand them to a snug fit

Rick, can you tell me how you rounded the slats? I presumed a rounding bit but now realising to get the mortise perfect the rounding would have to match the router bit radius . My slats are 15mm not sure I’ll find the same radius.
 
Back
Top