Eclipse projection board...27deg

UKworkshop.co.uk

Help Support UKworkshop.co.uk:

This site may earn a commission from merchant affiliate links, including eBay, Amazon, and others.

woodbloke

Established Member
Joined
13 Apr 2006
Messages
11,770
Reaction score
1
Location
Salisbury, UK
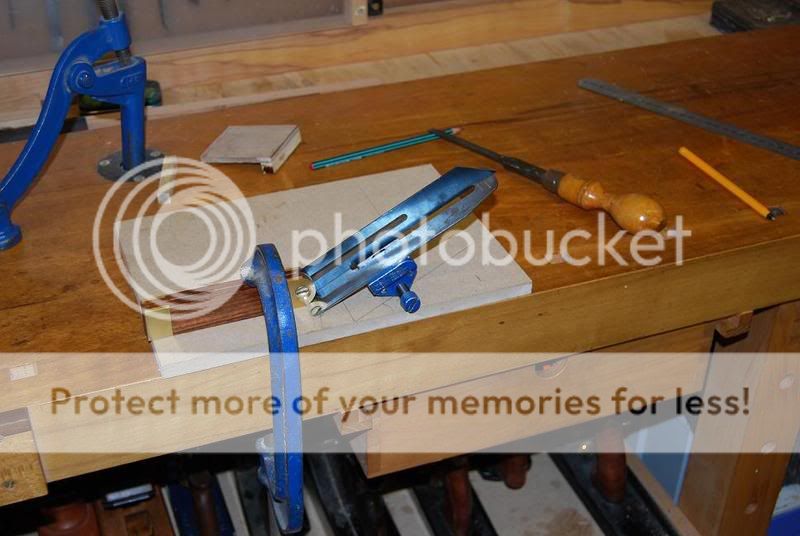
As an excuse to get out into a cold 'shop tonite here's how I do my projection board for the Eclipse gauge. This is the stuff I need:

gauge004small.jpg


Draw a line with the protractor at the desired angle onto the surface of the mdf, in this case 27deg:

gauge005small.jpg


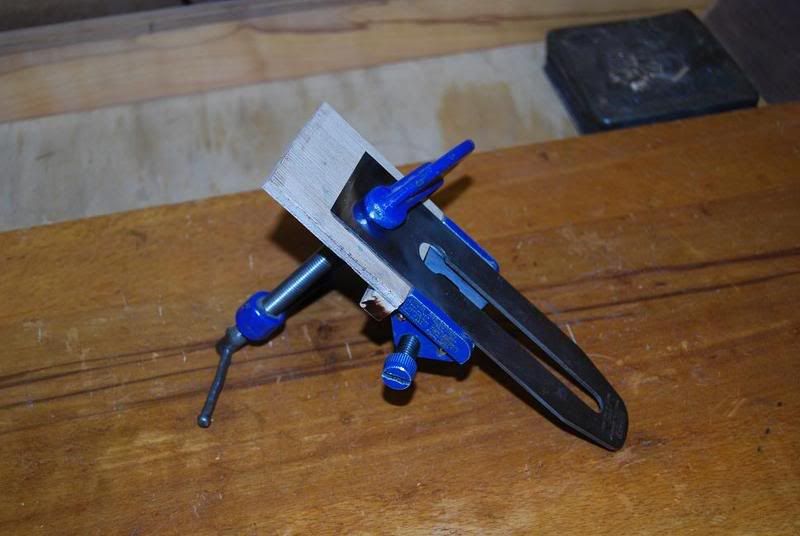
Set the sliding bevel to exactly this angle and cramp firmly to the board:

gauge006small.jpg


Offer up the plane blade under the bevel and then locate the honing guide onto the blade and tighten:

gauge007small.jpg


Cramp the blade and guide into one half of the new projection board:

gauge008small.jpg


and then glue on the second bit so it makes contact with the edge of the plane blade:

gauge009small.jpg


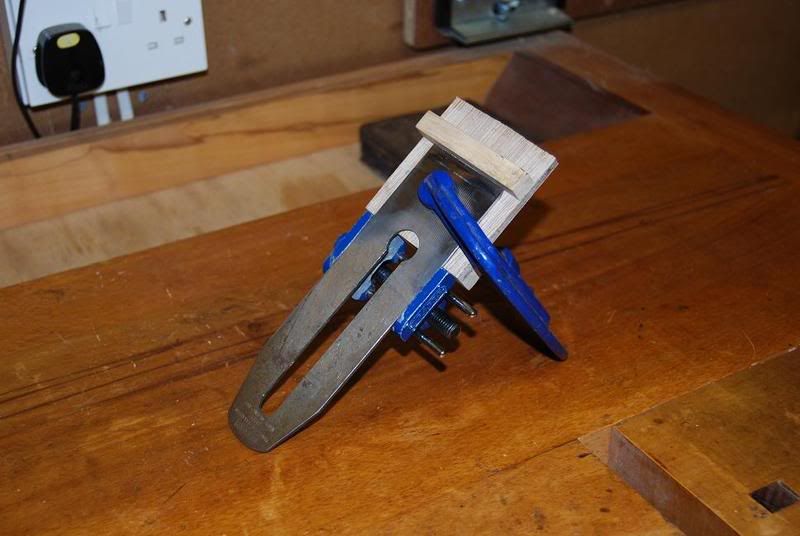
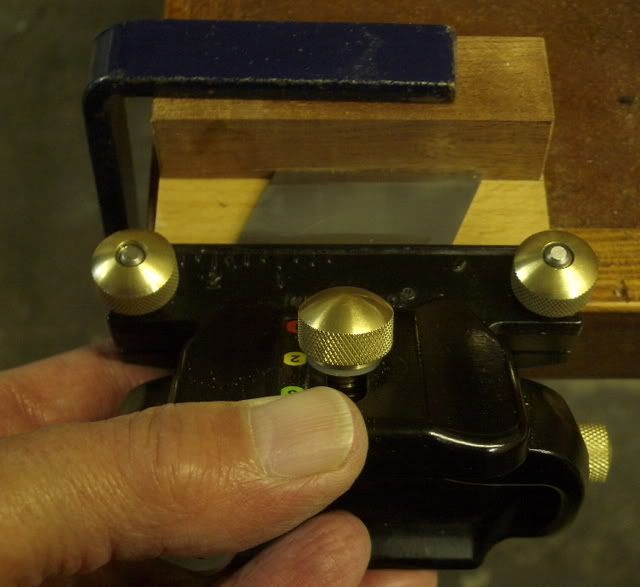
so that the finished job is thus:

gauge010small.jpg


I used the hot glue gun as Gidon thought...13 minutes, but I had to take the pics with the D60...Paul :lol: - Rob
 
Very neat. Being a bit more geeky I did a bit of trigonometry and skipped the sliding bevel stage.

ECLIPSE.gif


You want to calculate projection (P) to achieve a honing angle (alpha + beta). W and R are functions of the honing guide. H is also a function of the honing guide for chisels, but for plane blades you also have to take into account the blade thickness. I chuck all this into a spreadsheet I devised and I get a graph showing honing angle for a given projection.

eclipse2.gif


In hindsight the sliding bevel/protractor would have been quicker, but my office is warmer than my workshop. :D Once the spreadsheet is set up I can work out the required projection for any blade and honing angle.

My plane blades get honed at 37mm (32 degrees) and polished at around 35mm (33.5 degrees). I know Mr C doesn't measure the projection for the polishing stage, but just pulls the blade back a couple of mm, as that increases the angle enough to ensure you are only polishing the front of the bevel, and the angle isn't critical.
 
toysandboats":165z6act said:
Woodbloke, you make it so simple, I must get out there and make myself a couple.

Thanks for the tip
David

I agree. 8)
 
Surely this is a classic case for a bench mark? I simply fitted my blade into the honing guide at the correct angle, then offered it up to the edge of one of my benches and marked where the blade came to with a pen.

At least my way there will be no searching around for a small ply jig amongst the 100 other small ply jigs!!!

Mike
 
Mike Garnham":3ckvxm7r said:
Surely this is a classic case for a bench mark? I simply fitted my blade into the honing guide at the correct angle, then offered it up to the edge of one of my benches and marked where the blade came to with a pen.

At least my way there will be no searching around for a small ply jig amongst the 100 other small ply jigs!!!

Mike

Mike - agreed, you could offer it up to a pen mark on the bench. The thickness of the pen line is negligible, but there may be a bit of parallax error as the edge sits above the bench by the thickness of the blade and unless you're eyeballing directly overhead there's a chance that you'll be looking it at skewed, in which case the distance you set won't correspond to the angle you want. With these projection boards, the distance and angle is guaranteed every time...and I just lob it in my sharpening drawer with all the other bits and pieces - Rob
 
PaulO":2sllsotf said:

Since (even for bevel up blades) the actual variation with plane blade width iis rather small, I feel my approach of not caring too much about accurate bevels, merely repeatable ones, is nicely justified by this graph.

If one wants repeatable micro (aka polishing, or final) bevels, a thin (e.g. 2mm) shim can be used in the same gauge to give a related, but reduced, projection.

BUgBear
 
Derek Willis.":1plukzgn said:
Use a Veritas jig and it is done for you!!!
Derek.

...but can you set up any angle? I tried to set up 38 deg (as I said on the other thread) and couldn't do it, or maybe it was me :? - Rob
 
woodbloke":2653e10n said:
Derek Willis.":2653e10n said:
Use a Veritas jig and it is done for you!!!
Derek.

...but can you set up any angle?

Yes you can, you can use one of your jigs with the Mk.II. But the Mk.II covers pretty much any standard angle, so most woodworkers won't obsess about an extra 2 degrees here or there.
 
wizer":5pcbwx2a said:
woodbloke":5pcbwx2a said:
Derek Willis.":5pcbwx2a said:
Use a Veritas jig and it is done for you!!!
Derek.

...but can you set up any angle?

Yes you can, you can use one of your jigs with the Mk.II. But the Mk.II covers pretty much any standard angle, so most woodworkers won't obsess about an extra 2 degrees here or there.

Tom - which then begs the question...why spend £40 odd on a jig that you need to use with a homemade projection board (for a particular angle) when you can buy a jig for about a fiver that'll do the same job?...if you get my drift. It's just one of those little GOM things that irritated me the other day at Waka's when I couldn't make the VII do what I wanted it to do. As we said yesterday, the odd 2deg in the long run of things don't matter too much, it's just being able to make the tool do what I wanted it to do, rather than have it dictate to me - Rob
 
I'm not qualified enough to comment on what percentage of woodworkers need those odd angles, but I'd guess it's quite low. I'd have thought such woodworkers wouldn't have bought that jig in the first place and if they realised after that they needed an odd angle, then they'd make the jig. I haven't ever read a Mk.II review that mentions odd angles and everyone I have spoke to who owns one has been happy with it. So as I said in the other thread, it's just a case of horses for courses. I really like the Mk.II, it makes sharpening a doddle.
 
Rob, there is a 38 degree position (well, actually 37.5 degrees) but its not labelled for some reason - just set the guide on the yellow position and set the scale to the mark labelled as 50 degrees for the red position. I agree with you, though - if you want complete flexibility about angles then you may as well stick to the Eclipse. The microbevel facility is nice, though...

Cheers,
Neil
 
wizer":1cdj5zuq said:
percentage of woodworkers need those odd angles

It was just one of those angles that was picked completely at random, really just to illustrate that that the VII isn't quite the all singing, all dancing jig (note the pun :oops: ) that it's made out to be. I agree that for most users, it'll do the job very well. The Eclipse jig also has it's limitations (skewed cambers :x ) which is irritating as well, so nothing is ever perfect - Rob
 
Derek Willis.":1md0c5ry said:
Whilst my Veritas jig is the earlier Mk. 1 model it does have sufficient choices for most people at, 15/20/25/30 and 35 degrees, more than enough for me.

I assume you're referring to the angle setting device that comes with the Veritas Mk1. I've had one of those for years and never got on with it. When I use the Veritas Mk1, I now use it with a Woodbloke-style wooden setting block because I find it guarantees that the edge of the blade is parallel to the roller.

By the way, Rob, great definition from the D60 :wink:

Cheers :wink:

Paul
 
woodbloke":1gneacl0 said:
Derek Willis.":1gneacl0 said:
Use a Veritas jig and it is done for you!!!
Derek.

...but can you set up any angle? I tried to set up 38 deg (as I said on the other thread) and couldn't do it, or maybe it was me :? - Rob

You probably can, Rob - but then you could also use one of your wooden set-up blocks. Here's one in use with the Veritas Mk2 and the Veritas skew rebate blade

Veritasskewrebate17.jpg


In fact you can use the wooden set-up blocks with almost any guide, provided the front part of the body is parallel with the roller.

Cheers :wink:

Paul
 
Dr Gary Heald wrote an articel in F & C #87 April 2004 p 57 setting out the mathematics. The key issue is that the thickness of the plane blade is important. The formula can be adapted to other guides as well.

For an Eclipse

Plane Blade thickness
Required angle Angle in Radians
2 2.4 2.8 3.1 3.6 4.8
20 0.34906585 68.4 69.5 70.6 71.4 72.8 76.1
22.5 0.392699082 58.1 59.1 60.1 60.8 62.0 64.9
20 0.34906585 68.4 69.5 70.6 71.4 72.8 76.1
22.5 0.392699082 58.1 59.1 60.1 60.8 62.0 64.9
25 0.436332313 49.9 50.7 51.6 52.2 53.3 55.9
27.5 0.479965544 43.0 43.8 44.6 45.1 46.1 48.4
30 0.523598776 37.3 38.0 38.7 39.2 40.1 42.2
32.5 0.567232007 32.4 33.0 33.7 34.1 34.9 36.8
35 0.610865238 28.2 28.8 29.3 29.8 30.5 32.2
37.5 0.654498469 24.5 25.0 25.5 25.9 26.6 28.1
40 0.698131701 21.2 21.7 22.2 22.5 23.1 24.5
42.5 0.741764932 18.3 18.7 19.1 19.5 20.0 21.3
45 0.785398163 15.6 16.0 16.4 16.7 17.2 18.4
47.5 0.829031395 13.2 13.6 14.0 14.3 14.7 15.8
50 0.872664626 11.1 11.4 11.7 12.0 12.4 13.4
38 0.663225116 23.8 24.3 24.8 25.2 25.8 27.4

Note
1 20º is about the smallest practical angle, a 2º back bevel needs a blade projection of around 880 mm which is not really practical
2 Chisels over 1.5" in width can use the plane blade base
3 The instructions say 2" for 25º and 1.5" for 30º, so very close to Table above
 
Back to the Veritas Mk.1 jig, using each pre-set angle, one can change that by 3 deg. by turning the knurled knob at the side giving 1 deg. each position, this, of course, is made so that a secondary bevel can be achieved, but can be used as one feels fit.
Derek.
 
Back
Top