Traditional Stopped Chamfer Plane.

UKworkshop.co.uk

Help Support UKworkshop.co.uk:

This site may earn a commission from merchant affiliate links, including eBay, Amazon, and others.
Mine is 52 degrees. 62 is steep!
I've had loads of trouble with tearout with a user modified (me), single iron, 45 degree woodie with some V-shaped fences nailed to the bottom. Not even a backbevel helped much. I still don't understand that one. My "new" Moseley is much better. Here is a video from me using the plane, maybe that helps a little bit?

https://www.youtube.com/watch?v=ChCv9lj8X2M
 
Nice work Corneel.

The technique I found best for me was to start the chamfer an past the starting edge and plane the chamfer until the blade stops cutting, then turn the plane around and finish off the last but of chamfer against the grain.

I also found that it the board is being held vertical in a vise it was easier to hold the plane so that most of the pressure was side on against the main face rather than over the top against the edge. If the board is laying face up over the bench then the weight would be more downward across the main face rather than side on.

As part of getting used the chamfer plane I think part of the problem I was having with the softer woods was due to having too much initial set on the iron. If I had less set as it looks like you have done within the video the 55 degree bed would be fine.

Is there a chance you could try your chamfer plane on a soft wood and let me know if you found the results satisfactory. That feedback would help as a lot to better understand my current set up.

regards; Stewie.

ps. I am a little envious to the fact that you, Andy, and Jimi already have your Simon Barley book to read while I am still waiting for mine to arrive in the mail.
 
swagman":zhzhhxo7 said:
ps. I am a little envious to the fact that you, Andy, and Jimi already have your Simon Barley book to read while I am still waiting for mine to arrive in the mail.

Ha, maybe you should move to more reachable parts of the globe :mrgreen:

I'll give it a try this weekend. I have plenty of spruce construction wood around at the moment.
 
I did a test on rubbish white wood from B&Q this morning and it worked fine...

20140912_131329.jpg


No tearout even when I took quite a coarse shaving. (what looks like rubbish this end is my fault!)

This at 62 degrees so to conclude...it works fine on softwood (firewood) and hardwood (English oak)

Jimi
 
Thanks for that Jimi. I assume you had a fairly fine set on the iron.

Its dawning on me that the problems I experienced with chamfering the soft wood was primarily due to me putting too much set on the iron. Touch over 2mm.

regards; Stewie.
 
swagman":37kmdcsp said:
Thanks for that Jimi. I assume you had a fairly fine set on the iron.

Its dawning on me that the problems I experienced with chamfering the soft wood was primarily due to me putting too much set on the iron. Touch over 2mm.

regards; Stewie.

Well I wouldn't exactly call it a fine shaving Stewie but it sure as hell ain't 2mm. That would be a scrub chamfer wouldn't it mate! :mrgreen:

One of the actual shavings I took can be seen in the above picture.

Cheers

Jimi
 
Hi Jimi. The generous set on the chamfer plane was all part of learning how these type of planes work. Much the wiser now.

Cheers Stewie;
 
Hi Jimi. I am currently doing the final fettling of the plane and what's obvious due to the stringy nature of the shavings, a generous clearance from the mouth and throat is a requirement.

All good fun.

Stewie;
 
An opportunity for further discussion and feedback.

To create a good chamfered edge of equal proportion along the full length a basic requirement is that the full length of the hand planes sole needs to remain in good contact with the edge being worked. By doing so your able to keep the cutting edge of the iron at a constant depth of cut.

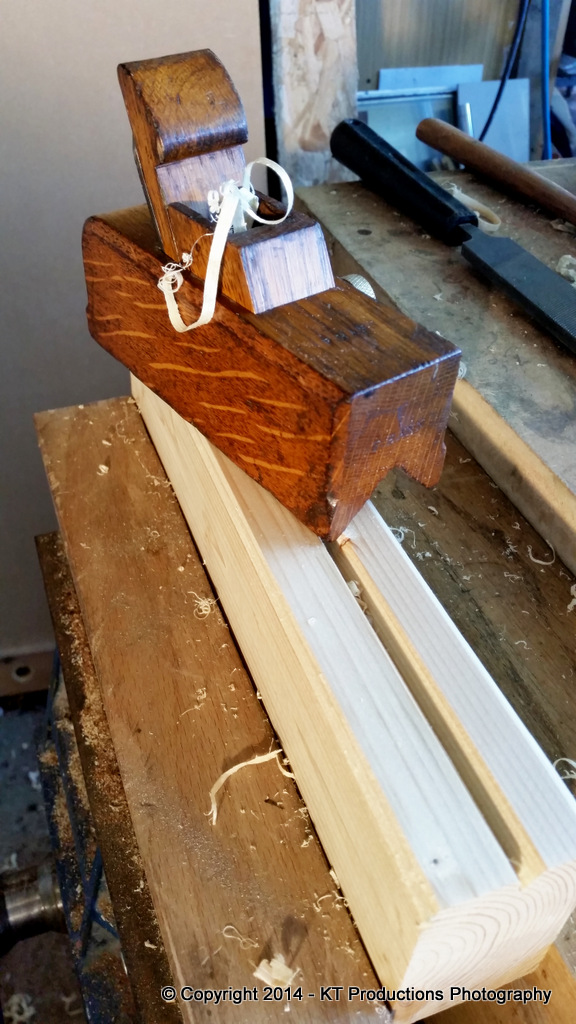
Now lets look at the basic set up of the boxed chamfer plane.


You will note that the length of the stop at its base only represents about 1/3rd of the soles total length.

When the base of the stop is set at or above the top point of the planes V sole the edge of the board is able to make contact along the full length of the sole.

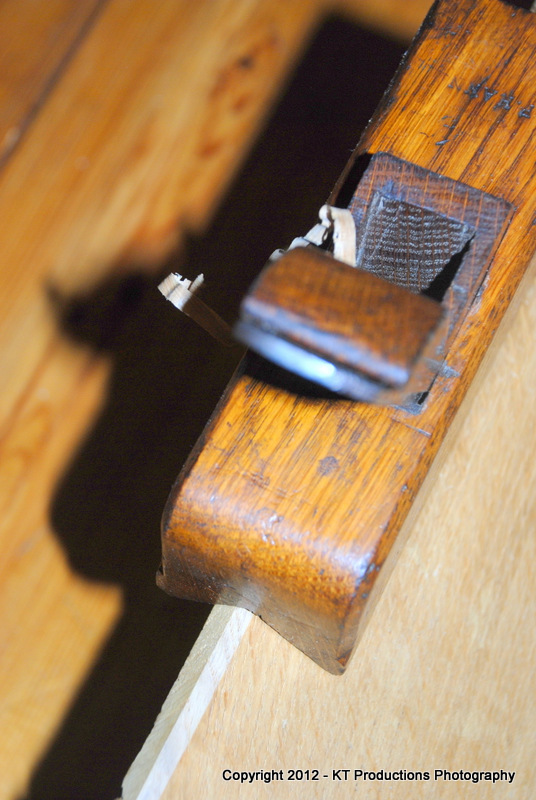
As this base is then moved down to a level below the top point of the V sole the boards edge now only rests on the stops base. 1/3rd the total length of the sole.

This creates an unhealthy condition where the plane is now able to rock forward or back as its moved along cutting the chamfered edge.

The most prominent areas of this rocking motion being the very start of the chamfer or the very end of the chamfer. Noticeable by resulting overcut.

Those that have used a boxed chamfer plane in the past will be aware of what I am talking about.

Its relevant to note that the further the base is set below the top point of the V sole the greater the level of rocking achievable.


Now. A possible solution.

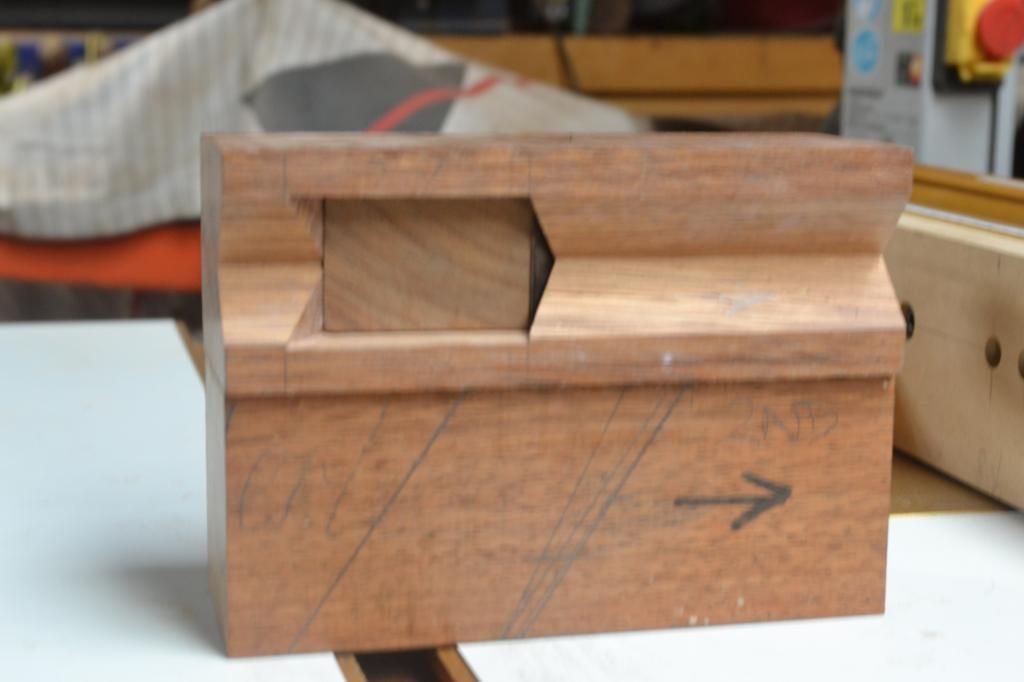
Instead of moving the stop to change the width of chamfer why not keep the stop set at the same height as the top point of the V sole and just adjust the cutting edge incrementally lower to control the width of chamfer.

By my calculations if a 12mm chamfer was the maximum requirement needed then that would see the cutting edge at around 5mm below the top point of the V.

At that depth of set the back of the iron is still well seated within its bed, allowing such issues as chattering to still be avoided.

As an added benefit the sides of the boards edge being chamfered are also making full contact with the sides of the V sole which will add even great value to the stability of the plane during chamfering.

What I am suggesting may sound a slightly unconventional approach to those that are traditionalists at heart but if can have a some bearing on the consistent quality of the final chamfers outcome and make it much easier for the user to control the plane's movement then I think its a worthy consideration to take on board.

Now its over to you guys for your thoughts and feedback.

Stewie;
 
I'm probably reading this wrong but what you're suggesting seems to be to disable the stop and then increase the depth of cut to enable different chamfer sizes.

If this is the case then this is not how the device works. The idea is that the box stop prevents the cut from being too coarse by lowering the amount of effective depth of cut whilst allowing the shavings to be smoothly removed. As the chamfer deepens the cut remains the same but the shavings get wider.

This carries on until the sides of the V actually make contact with the side and face of the stock at which point the chamfer is done.

I find (as with a lot of woodies), that starting the cut at the end of the stock and working progressively backwards initially starts the cut and as you progress through the depth of cut then you can take progressively longer cuts...as is the case with a rebate plane.

I tend to let the blade exposure measure about 1/2 mm and if you look at the bottom shot I took of mine...

DSC_1063.JPG


...the mouth is irrelevant as it is huge.

This way the cut is not too aggressive and the resultant chamfer is smooth...

DSC_1075.JPG


I don't put much pressure on the plane throughout the entire process...keep it in one hand and keep it level yourself...the actual rocking is evident but is not an issue as the final cut is the one that matters as then the sole is in total contact with the wood and the chamfer becomes regular...all previous deviations being rectified with this last pass.

The iron has to be very sharp to get the fine cut though...how did it go with the Fallkniven stone?

Jim
 
Hi Jimi. The Fallsniven stone did a great job resulting in the iron being razor sharp.

I am aware of how the stop is meant to function. The issue I am raising is that as soon as you adjust the stop below the top V of the sole the edge of the timber is only being supported by the stop meaning 2/3rds of the sole are making no contact with the edge of the timber until you reach the full set depth of chamfer. This small area of contact across the bottom of the stop does make it more difficult to stop the plane from tipping forwards or backwards especially at the start and finish of the full chamfer.

What I am suggesting is: if you were to leave the stop locked at the top V height you could effectively just rely on just tapping the cutting iron a little further down after each time the cutter makes no further contact with the timber edge. Its not overly difficult to do. Just give the top of the iron a light tap down followed by another tap on the top of the wedge and your ready for your next run. Each change in depth has a doubling effect on the width of the chamfer.

This would generate a much more stable base for the plane to move across the timber edge, and greatly prevent the likelihood of the plane tipping forward or back at each end of the chamfer.

If you look at the previous photo you when you chamfering the soft pine. The wider chamfer on the nearest end is of the timber edge is where the chamfer has been overcut. Likely caused by the front of the plane tipping forward.

I am suggesting an optional approach and that's open for general discussion.

Stewie;
 
Hi Jimi. Let me explain it slightly differently. If you were to retract the iron and stop so its their above the top of the V. You then place the V sole onto the 90* edge of the timber. The sides of the V would easily remain in full contact with the timbers edge as you moved along the full length of the timbers edge. Now add a small amount of cutting edge to the equation. There should still be no loss of contact with the sides of the V sole as the start of the chamfer is being cut. Add slightly more cutting depth. You should still have good contact while and gaining a slightly wider chamfer. All done without the risking of overcut.

Good value topic.

Stewie;
 
That end damage was already a chip which broke off when I got to the end...rubbish wood basically.

I am off to work now so will do another clean chopped piece when I get a chance (probably tomorrow).

I personally don't see it as an issue and if I read you right it kind of negates the purpose of the stop...so it would be redundant.

I might be misunderstanding completely so do tell me if I am.

Jimi
 
Hi Jimi. I went back and looked at Corneel in action with his box chamfer plane. I just noticed how he keeps one side of the V sole hard against the widest side of the board being chamfered. That may make a big difference to controlling the plane. I am going to try that technique tomorrow.

Stewie;
 
I don't have a chamfer plane, so I have to visualise how a chamfer plane works. I suppose one way is to keep one side of the V against the workpiece, which acts as the fence. You then take shavings, their thickness depends on how far the blade is advanced, the part of the plane the blade is set in is in fact the sole of the plane. As you take the final shaving, the other V side (acts as the stop) will meet the workpiece.

Or you could just keep the plane centred on the corner of the workpiece and take shavings without the sides of the V touching the workpiece. I guess it would help if there was a sole behind the blade as well as in front of it, but maybe it just works well enough just with a sole in front, as shown in the photos upthread.
 

Attachments

  • chamfer.jpg
    chamfer.jpg
    48.5 KB · Views: 1,234
Hi John. Thanks for that. Good value in the sketches you did. I have been trying to keep the plane centred on the corner of the work piece clear of the both sides of the V and it just unreliable that way, resulting in overcut on each end of the chamfered edge.

The way you have shown it within your sketch would be much more reliable way of using the chamfer plane and a much more efficient way to control the plane.

I noticed when I went back and watched Corneel using the chamfer plane within the short video he was doing it the way you have drawn it.

There is little historical information on the correct use of a boxed chamfer plane so there's been a lot of guess work on my behalf.

Thanks to the input from yourself, Corneel, and Jimi, I am now much the wiser.

Thank you all for your assistance.

regards Stewie;
 
I may be wrong Stewie but you version looked like it had a narrower "V" than mine...the one I have goes virtually to the wall.

A narrower v sole will certainly not aid stability.

Can you confirm.

Jim
 
swagman":10xm7qeo said:
Hi Jimi. The V is 30mm at it widest point.

Stewie;

Hi Stewie

I just got in from work and my one is out in the workshop so I will look tomorrow but the width on mine goes out almost to the sides so I am guessing it's a lot wider.

I will let you know tomorrow...have to hit the sack as working tomorrow too.

Cheers my friend

Jimi
 
Back
Top