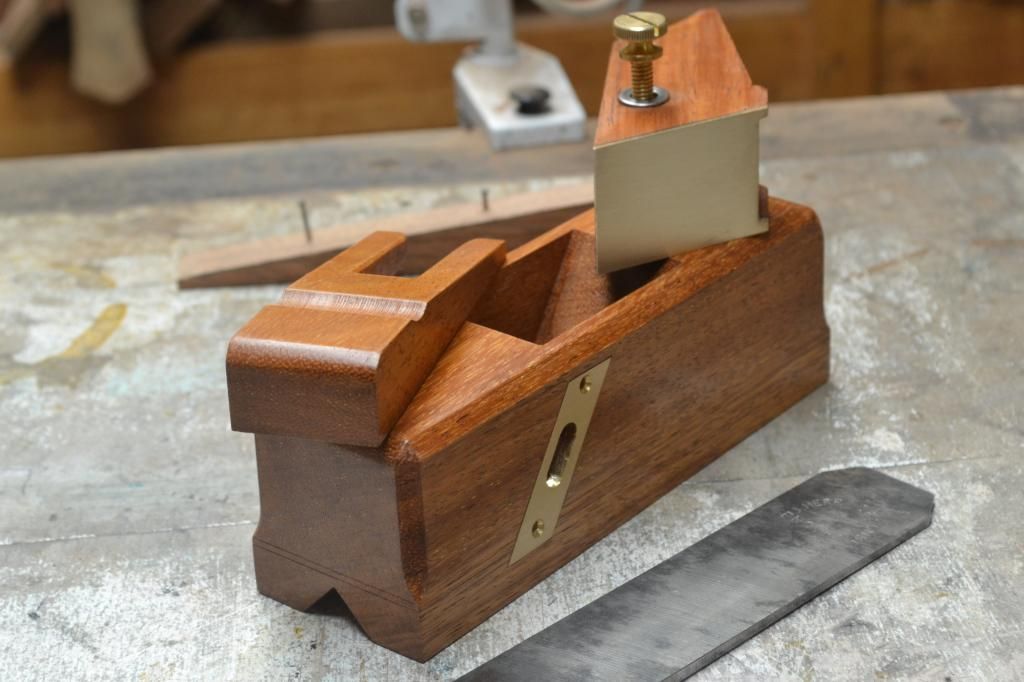
Traditional Stopped Chamfer Plane.

UKworkshop.co.uk

Help Support UKworkshop.co.uk:

This site may earn a commission from merchant affiliate links, including eBay, Amazon, and others.
AndyT":2neav01e said:
swagman":2neav01e said:
I am quite happy to recess the brass plate, but the knurled adjuster is staying put. (hammer)

Stewie;

Fair enough! I reckon that this sort of discussion is something that a forum can do really well. It's better to know what the alternatives are, and be happy with your own design choice, than to look at the finished article and belatedly realise that you missed an option you would have preferred.

And there's plenty of room for all approaches. If I was making a tool, I would copy an existing design, where I can see that you like to experiment and innovate, as you have shown us with your saws.

But the last thing we need is design by committee!

Hi Andy. I greatly appreciate the personal feedback from the forum. Sometimes its difficult alone to come up with a design that's going to be ascetically pleasing to the majority of viewers.

I understand what your suggesting with copying an existing design. They indeed performed their intended task admirably. But to be fair, a majority of the earlier made boxed chamfer planes looked pretty ordinary from the underside, with the tines of the wedge poking through and gaps exceeding their own requirements.

I personally think what I have put together with this design is a visual improvement to what was considered acceptable in much earlier times. No disrespect intended.

regards Stewie;
 
The current screws for the brass plate are only brass plated. that's all I had available in the workshop in this size. I plan on applying an antique finish to all the brass fittings on the plane. I will go ahead and purchase a box of solid brass slotted screws and replace those that are there at the moment.

I have finished shaping all the chamfering on the plane body, and started applying coats of shellac.

I will sharpen up my new inlay knife tomorrow and then flush mount the brass plate.

Stewie;
 
swagman":16tyyywy said:
The current screws for the brass plate are only brass plated. that's all I had available in the workshop in this size. I plan on applying an antique finish to all the brass fittings on the plane. I will go ahead and purchase a box of solid brass slotted screws and replace those that are there at the moment.

I have finished shaping all the chamfering on the plane body, and started applying coats of shellac.

I will sharpen up my new inlay knife tomorrow and then flush mount the brass plate.

Stewie;

Since everyone had a go at me about my crosshead screws...are you going to use slotted head?

I think it would save you from comments later on! :mrgreen: :mrgreen:

Jimi
 
Not much work left to go to complete this 1st boxed chamfer plane.

All the chamfers has been done on the plane body and the back has also been rounded over to increase the comfort.

The side plate has been inlay ed flush to the side of the plane body.

When the solid brass screws arrive in the mail for the side plate I will also fit those.

I have also fitted the brass sole on the boxed depth stop.

2 more coats of garnet shellac to go.

Stewie;

 
For the user to quickly set the bottom of the stop to the same level as the top point of the V sole, I am thinking about the benefits of adding a reference line to the adjustment side of the stop. In practice if you want a fine or starting chamfer, you would slide the stop down and then lock it in place when the reference line was at same height as the top the plane body. The cutting edge of the iron would then be set just below this point. Then the wedge would be tapped down to lock the iron in position.

Any thoughts;

Stewie:
 
The progress of the plane is stunning as usual Stewie and the difference between the recessed plate and the proud one is like night and day...much better now it's recessed.

The brass plate also suits very well and will be a great boon to wear and aesthetics too.

A datum line is a fine idea. You are doing some inlay work I believe...how about a contrasting wood inlay or even a tiny brass strip to match the other brass accents?

Looking good matie!

Cheers

Jimi
 
Thanks Jimi. I achieved a very close fit with the side plate inlay. Rather pleased with my efforts. The brass sole on the stop should work out real well. I used a 2 part epoxy to bond it. Both inside surfaces were ruffed up with a scrap piece of toothed saw plate to maximise the the grip of the epoxy. After the epoxy was set I then filed the brass to its final shape.

The inlay for the datum height sound a good idea Jimi. I think it only needs to come in from 1 corner about 10mm to serve its purpose well, rather than straight across the full width of stop. I will have a look tomorrow and sort out if its to be done with brass or wood.

The new bench stone arrived today. Haven't had time to use it yet but will do so when I sharpen up the cutting edge of the iron for this plane. Any pointers from your experience with this type of stone. I notice the gold side feels rather coarse at the moment. I understand this should fine up after some uses. Have you had time to test the fine ceramic side so far. I understand the fine side is 25 micron, but there are no details available to identify the micron on the coarser side.

Stewie;

http://www.sharpeningsupplies.com/Sharp ... 21C60.aspx
 
There will come a time when you wished that coarseness back mate!

The diamonds soon settle down but use light pressure and let the stones cut without damage. This is the same for all diamond stones I find..not too much stress.

The other black side leads to a near polished surface and both are super flat.

Clean off with dry paper towel most of the time until it gets really clogged then use a green plastic scrubber...some soapy water and let dry naturally.

Looking forward to seeing the datum line

Jim
 
I have found one old way of attaching brass is by using brass nails, tapered in shape, then look like they when snipped off the same brass sheet hammered in and peened over, they are very hard to see.

Pete
 
Racers":1rbzpn5n said:
I have found one old way of attaching brass is by using brass nails, tapered in shape, then look like they when snipped off the same brass sheet hammered in and peened over, they are very hard to see.

Pete

Hi Pete. I have used the similar principal in the past on brass soled planes using brass escutcheon nails. A drop of CA adhesive in each of the brass plate holes prior to each nail been driven down. I then file the heads down flush followed by flat sanding over glass. The 2 part epoxy method is certainly a more straight forward approach.

Stewie;
 
Sharpened the iron today using my new Fallkniven diamond & ceramic bench stone. I have taken photo's during each stage of the sharpening process and will post them as a review of my results later on.

Having the iron sharpened also gave me an opportunity to test out the boxed chamfer plane and understand much clearer the way its designed to function.

Here are some personal observations:

The depth stop is not an accurate description of its function.. Its real purpose is to provide a platform base for the top surface of the timber to slide on. Not dissimilar to that role served by the bottom sole of a hand plane.

The actual depth of cut is represented by the distance the cutting edge of the iron is set below the bottom of the stop. This depth of cut will remain at a constant up until it starts to reduce which is very close the maximum set point of the chamfer width.


The final width of chamfer is measured between the V at the same height as the bottom cutting edge. This also represents the height at which the cutting edge stops making further contact with the timber surface.

Stewie;
 
jimi43":24e48ftg said:
Good description of the functions of this type of plane Stewie!

Look forward to the sharpening review and the shavings!

Cheers

Jimi

Hi Jimi. I tried the chamfer plane today on some softwoods and hardwoods. On the softwoods If too much set is applied below the bottom of the stop its difficult to avoid dig in early into the chamfer. The hardwoods were okay. The problem as I see it is that the corner edge of the timber lacks the same surface resistance that you would encounter with a flatter timber surface,. As a result a heavier cut is experienced. I am thinking that on the next chamfer plane build I might be better to lower the bed angle from 55 to 50 (York pitch). That should allow the plane to be more user friendly on softwoods but still work fine with the hardwoods.

Any thoughts on this idea.

Stewie;

I think I got that right. A lower pitch rather than higher pitch to handle chamfering the softer woods.

Correct me if I am wrong forum members.
 
The set only needs to be adequate...the "stop" and iron in concert being set down in the "V" sole to the depth at which the chamfer is needed to stop to create the required amount of bevel.

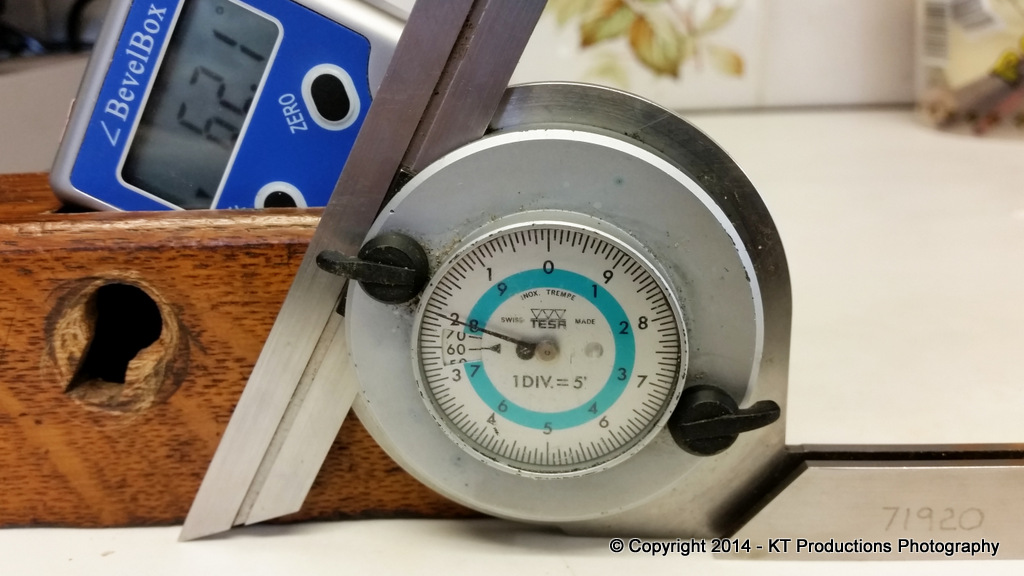
I never bothered to look before on my old oak one so I decided to see what the pitch was....

20140911_174639.jpg


...it's 62 degrees....in either digital or analogue..take your pick!

I tried it on oak but haven't had the need to try it on softwood so I will go and do a test and let you know.

Jimi
 
I've just been and measured mine - approx 52 degrees on the one like this with the sliding box. About 42 and 30 degrees on the others. Picture evidence available if wanted - but they are a bit old and scruffy!
 

Latest posts

Back
Top