Hello newbie here, timber frame log store project

UKworkshop.co.uk

Help Support UKworkshop.co.uk:

This site may earn a commission from merchant affiliate links, including eBay, Amazon, and others.
It’s approaching evening so I’ve downed tools ready for the weekend. Friday is steak chips and a glass of wine night. After this week’s work I think I’ll make that two glasses!

Where was we, oh yes, tenoning (is that a word?). My evening class teacher said “let the saw do the work, don’t force it”, so I sat there for ages, and the b****y saw did nowt, just like the apprentice. So I had to get up and do the work myself! I’ve got one side of my body like Popeye now and the other like Olive Oyle.

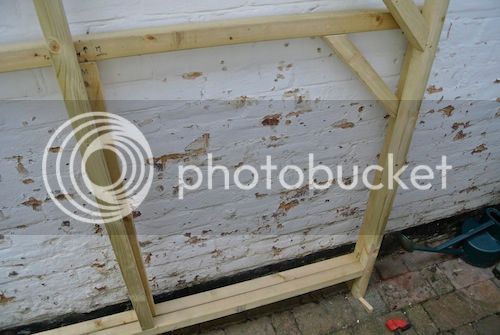
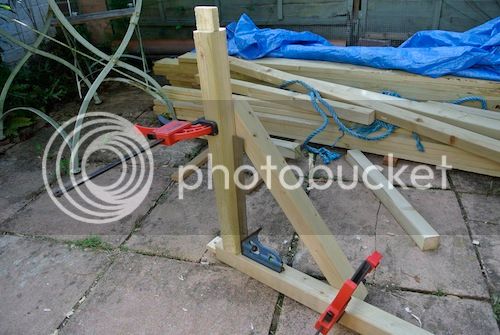
Meanwhile, back on topic I was going to start marking out the mortices for the joists and tie beams. So I lined the two frames up to see which way round they ought to be. The first shot shows where the feet are together but everything else is on the p*** (at an angle);


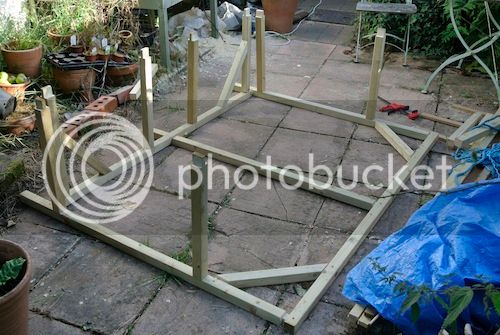
….the next shows both frames matching near perfick like;


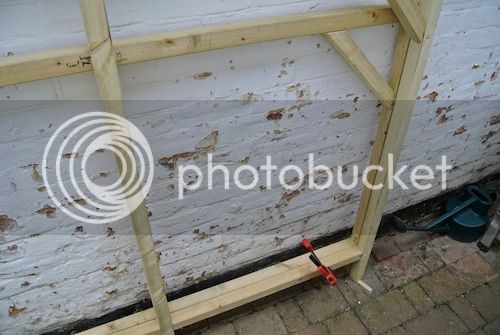
…obviously that was all intended and “ahem!” we need not worry about the whole thing leaning slightly to one side. It’s well within spec! Once both frames were levelled and matched together, I marked out the positions of the mortices. These were set about an inch from nearby mortices or tenons, to leave some strength in the wood;


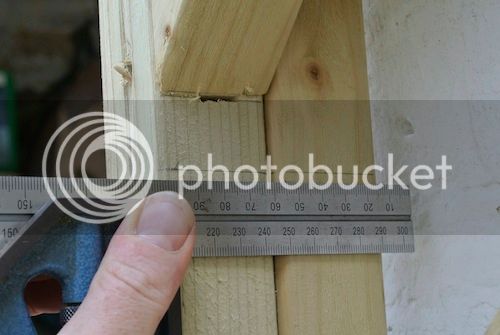
…and to make sure I didn’t b****r it up next time, I marked the rear frame to know which way round it ought to go;


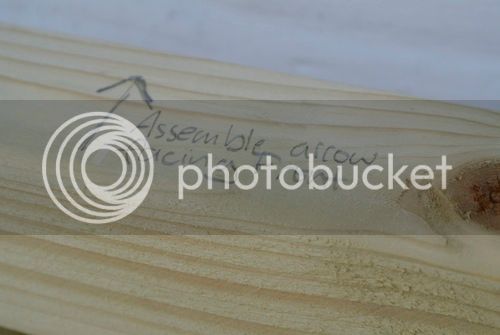
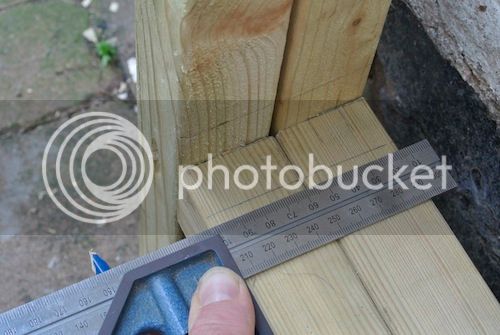
I find writing instructions all over the wood is better than doing it on paper, it’s generally harder to lose the wood than paper! I also marked the side of the line I needed to mark the mortices and which side of the timber needed the hole cut in it;


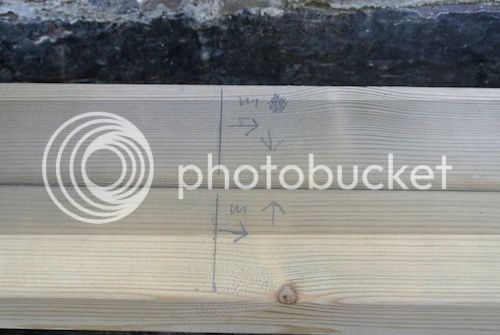
This was ‘cos the faces for the mortices were the ones clamped together. I then marked the mortices out and found an old bit of tenon waste was handy to mark the width out with;


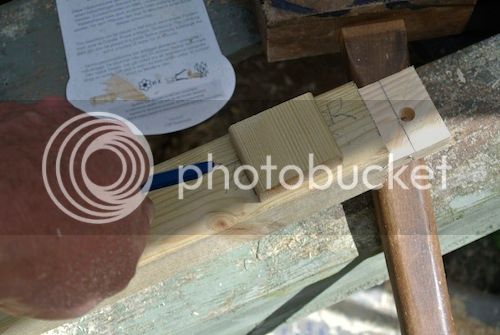
Although, this being carcassing, no two bits of wood are the same thickness! BRRR WHIZZ WOOF OUCH and here we are, one end of the wood fitted to the other bits of wood. There is an issue about the other ends but we’ll leave that for now shall we.;


I could now do the braces for the floor. These could have been done at 45 degrees like the others, but me back were killing me so I just bunged ‘em in any old how. No-one’s going to care, they’re going to be boarded over anyway!


I’m sure, as long as the joist is at 90(ish) degrees, we’ll all be happy. BANG, CHOP, WHIRR, TWEET, OUCH and;


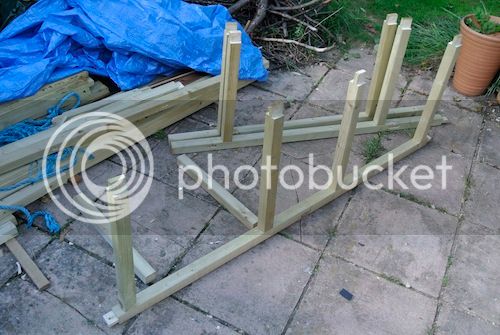
…the pile of sticks is starting to look like something at last here’s it with the other frame dumped on top;


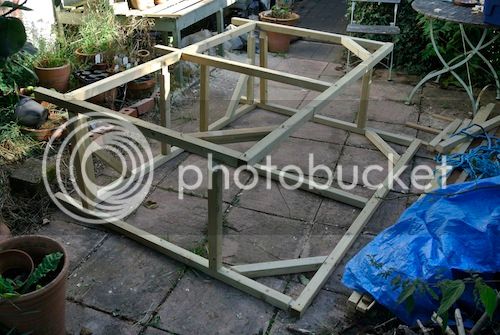
I’m quite pleased with that, particularly the floor;


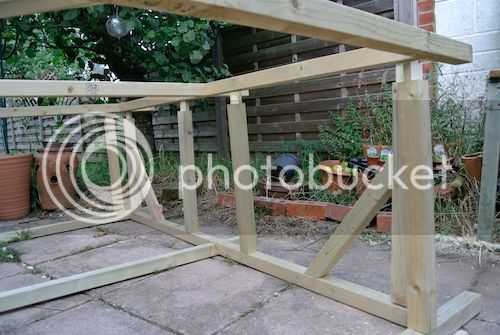
…even though it’s pretending to be a stud wall at the mo. Mind you, last time I was pleased with something, it broke! We’ll have to see what the morrow brings.

TTFN
 
Being a bit anal, like, I just went out and counted the mortices and tenons, 38 so far! Only 6 more to go if my calculations are correct, so who knows how many there'll be! I think I've chopped out more wood than I've left!
 
Crumbs, I’m finally getting somewhere at last. Last time we saw each other I’d got the back frame lying down with some tie beams and joists sticking out of it. All I needed to do was make some mortices in the front frame and fit the tenons to the mortices (oh and make two braces). This time I thought I’d trim the tenon ends of the braces before cutting the tenons;


I’m not sure if that saved me any time but who knows? Next I fitted the tenons to the mortices. I did this by laying the tenon piece on the mortice piece with the edges flush;


And using the chisel I could mark if any of the tenon was wider than the mortice. You might be able to see that the tenon and mortice are slightly off centre, due to the way I’m using a chisel thickness to mark in from one common edge. Then all I needed to do was shave (pare?) the bit of the tenon which was too thick. This was slightly more planned than previous attempts, where I just made the wood fit in the hole. Doing that didn’t help the edges of the wood lie flush.

Next thing was to square up the braced tie beam. So I popped this in its hole with the brace;


And checked for square (with a square!). Here you may see a gap. By now I was starting to realise there were a number of ways to fiddle these things in, trimming the tenon shoulders, moving the hole one way or the other, or, in this instance I trimmed the end/edge/whatever of the tenon to shift it sideways in the hole;


All I needed to do now was make the mortices in the front frame pieces. However some of you may remember that I thought I’d be clever and peg it all together. This left me two choices; a, put the morticer on the floor, under the frame and cut the holes, or b, take it all apart again. Neither choice seemed particularly effortless, however I did go for b, using;


….a de-framing hammer and a de-framing nail. Put the flat end of the nail on the end of your peg and bash the pointy end with the hammer! A few thumbs later (lucky I’ve got a good supply of them!), I realised that if I held the nail with some pliers, my thumb supply would last longer. BBBRRRR WHHHIZZ SHIMM SHIMM and look, I’ve got a big pile of sticks again;


The problem with the traditional framing style, is that you start off with a pile of sticks, offer them up to each other, trim a bit here and there, fit ‘em together and then you take it apart again. This goes on for b****y ages. Essentially you build the whole thing a bit at a time about 70 times over again. Oh and look who came out for a hard afternoons sunbathing;


If I had half a mind I’d stop paying the little blighter! Anyway, he did offer to give a hand putting it together….and then fell asleep;


So I had to do it me-sen (as they say in Sheffield). First off, get the back frame laid out and pegged up (or is it laid up and pegged out?);


Then add some joining-together sticks;


Which is nearly exactly where I was 6 hours of hard work earlier! And then bung the front frame on;


…and hey hum, Robert’s yer fathers brother, job done! One made up timber frame log store (nearly);


Or I suppose it could be one bizarrely naked Welsh Dresser! And here’s one of the last views of a nicely braced floor before the boards go on;


Crumbs (again), I’m absolutely knackered and there’s salt stains all over me polo shirt. Bring on the morrow and I may have actually nearly finished this job (I seem to remember thinking that this time last week!)

TTFN
 
RossJarvis":2ewngela said:
Anyway, he did offer to give a hand putting it together….and then fell asleep;


All that running the other day must have tired out the poor bloke :lol:

Cheers :wink:

Paul
 
Ooh, Ow, Eek, Me Back. Absolutely shattered for some reason. It’s been one of those days where I seem to have been doing stuff all day, I’m worn out, yet nothing much seems to have got done, and what was done seems very unsatisfactory. Ever had one of those days yourself?

First thing I thought I needed to sharpen the big Swede (chisel), as he’d seemed to be getting a bit blunt yesterday, so I might as well do the block plane iron too. Out with the stones and, ooh, they do seem a bit curvilicious and not particularly flat. So on with flattening stones, several-teen hours later there’s a ton of grit in me sink (with last nights washing up!) and two possibly, or possibly not, bits of sharp metal. Then out to the “workshop” and what shall I do now? Hmm, let’s get rid of some o’ them pegs shall we, so lets find the pull saw;


I’m presuming it had a few more teeth when I bought it! (I also believe the blade may have been straight too, not quite so S shape!) Anyway, ZZZZd ZZZe and off popped the peg ends;


…and the large Swede (Rutabagan!) seemed to be up to a bit of paring down;


Then I came back to an earlier idea about making some of the adjoining timbers a bit flusher, plus dealing with the slight (ahem) surface imperfections. This is where I think it all started going downhill at a greater rate of acceleration;


….Let’s concede to modernity shall we! Put a big motor on summat and see what we can do. B******s it all up is what we can B****y well do matey! SSSSSSKKKRRRREEEEEEEE VVVVRRRRRIIPPP, large amounts of shavings everywhere (you should see the state of the apprentice’s A**e where he’s been sitting down all day) and a complete B******s of a surface finish everywhere;


And that’s after I’ve tried tidying up with a proper plane and the big Swede! I imagine there was a good reason for buying that thing and I’m sure it’s been of some use at some stage, but generally I’ve never been satisfied with how it sounds, the blinking cable always getting snagged, or the finish. It’s okay for getting rid of wood quickly, but you’ve always got to get a proper plane out to make stuff look nice. Plus, it’s terrifyingly easy to go wrong too quick.

Nextly, putting in the floor. I bunged a board down and “hey ho”, looky here the boards bent;


I don’t know if you can see, but the end of the board is about ½” away from the far post when the middle is touching, the near end is ½” out from the post too. Not a problem, if I mark in the same distance from the posts, I can cut some notches in and it’ll all be right. Did one side and put a board in the other side and blow me, another bent board. I know I’ll turn it round and the bend might be the right way round! Ah! Ummm, It appears the boards are actually straight and the log store’s bent. Hey ho, worse things happen at sea (so the boat builders tell me, which is why they never leave dry land!). Measure in the same distance from the posts, knock out some square holes and bamm! It fits. Time to revert to modernity again;


..I’mm at that point where I don’t care how a traditional floor was laid, this one’s going to be nailed down with them twisty nail things what get turned into the wood. On with the handy doo dah, which drills and countersinks in one go!;


…or to be slightly more precise, breaks your drill and doesn’t countersink in one go (I have two sets of these, Screwfix and Disston, they both work (not) the same way). WHHHIIIRRR JJGGG JGGGGG, and here we have it, one floor;


There were bits of board sticking out each end, so I had a clever idea, cut them after they’re fixed and you’ll have nice even flush ends;


….B******s I will, I’ll have a lot of scrappy chunked out bits of wood and cuts all over the ends of me log store. However, in with the Bosch and;


Moderately, slightly less bad ends! Humdy Ho, Thought I might have had the roof on and job finished today. Let’s see what tomorrow brings shall we? See you later!
 
I don't like the platform position at each end laying underneath the cross pieces, I think I would start again. (hammer) (hammer) (hammer) :) :) :) :) :) :)
 
devonwoody":1tc9xkbl said:
I don't like the platform position at each end laying underneath the cross pieces, I think I would start again. (hammer) (hammer) (hammer) :) :) :) :) :) :)

Aha, you've seen the special design feature :lol: . This prevents the floor boards flying off into the air, or falling down if the store is exported to Australia :D
 
Phweeweee! It was very hot today so I took a small break at about 2:00 and then popped out at 6:00 to put everything away. So not a massive deal has been done but at least the rafters for the roof are now underway, even if none have been cut yet! In fact it was so hot, this is the sum total of action from the apprentice;


“Ooh wot’s’is then”


…”looks a bit of orl right this gaff, I can see meself movin’ in when it’s finished”;


….”Yeah, (Yawn) very cumfy, I think I’ll just have a quick lie down, zzzzzzzzz!”

..And as I say, that was him for the rest of the day, didn’t even want to go out and get Hob-nobs!

I’d been wondering about the end rafters (there’s probably a proper word for them, something to do with eaves or what-ever). I’d never really been sure about the first lot I did;


They were 3” by ¾” board, laid on their side, with sort of bird’s mouths cut into them. The principle seems okayish (yes, you don’t need to remind me rafters should only be cut into 1/3 of the way, I do remember something from night school!). But the bare beam ends seemed a bit clumsy. I had thought of cutting into the beam ends and laying the end rafters onto the posts, but this would cut into where the mortice and tenon was, and the post could “pop’ out the end of the beam. Or I could just screw the board onto the edge of the posts, but there would only be enough room for two screws and I thought this would be weak. Plus you would see two, non-traditional posi-drive Screwfix screws. So after a number of cups of tea I decided to put a rafter down the ends, made from 2” x 2” and see if I could stick a board on the end next to it. First, clamp a bit of batten on the end to support a bit of wood;


The top of the batten is in-line with the top rear corner of each post. Then stick a bit of 2 x 2 on this and mark the top of the post;


After this, I clamped the bit of wood up so that the lines for the “birds mouth” were vertical and apply some damage;


…I know it looks like the saw is “doing the work itself”, but believe me, I’ve tried forcing and not-forcing saws, they never do the work themselves. And after a bit of faffing and paring, voila, one rafter (sort of);


Once this was in place I could lay up the board next to it and a bit of batten on top. The batten was to raise the height of the “rafter” to the top of the board, so that this could take the weight of the roof, not the end board (barge-board?);


That photo actually had me trying to be clever with some other jiggery pokery, but hopefully you get the idea. Next thing was screwing the “barge board?” to the rafter, I could get more screws in now, but the screw heads would look ugly, but suddenly “bing” (light bulb goes on over my head). What if I screw in from the inside, with the pointy bit inside the board, that’ll do the trick. However I realised, out of what remains of my 3000 odd screws, all the sizes were just wrong. Either they’d stick out of the board (ouch), or not go far enough into it to hold;


So I’d need to counter-bore the hole. I could use the counter-bore wotsits, but as mentioned earlier, they don’t, well not in this type of wood anyway. So I counterbored with a big and little drill, using the “piece of masking tape round the drill” method for depth control and there we were, nice counter-bored screws. (no-one’ll see ‘em anyway!);


Resulting in a bit of wood screwed to another bit of wood screwed to some more wood;


Do that again and..lots of wood stuck together. Next thing was putting the middle rafters in. I had though about setting them into the beams (wall plates?) somehow, not just resting them on the beams (plates) with “birds mouths”. Apparently there was a traditional method of angled housings/slots what-ever, but I decided to just do some straight slots/lap-joints (“So, the accused says he wandered into Double-mint Hippo, under the apprehension it was a pub?” “Yes M’Lud” “Look Michael, we both went to the same school, You should know the ‘pubs’ on Fetter lane are not for the likes of us, you really should try ‘Ooh Lah Whiplash’ on Chancery Lane”) Cutting in for the joints;


Now I’d have to go get another chisel as these were 1” joints, so off for the Medium Swede, which is 25mm, so not right but close enough. However, although being somewhat sharp, t’was not sharp enough so off to the “grinding station”, only to discover what happens if you leave your nice Japanese Whet-stones wet for too long;


Hmm, Crumbs, crumbs! There seems to be lots of conflicting advice about these (strangely enough), I’d suggest either drying and refacing them every time you use them, or, buying new chisels every time you need to make summat! Shimm shimm shimm and a bit of assault and battery to some wood. I found I was still not getting great joints as this wood chunks out a lot, so I got a 1” (25mm) spade bit and used a motor to remove a lot of it first, the finish seemed to end up better that way;


Now it was time to start marking out the middle rafters so, line them up so the top end is above the back face of the store;


….mark out which one is which and where the birds mouth’s going to be;


And then stick ‘em in, temporary like, with wedges;


And that’s as far as I got in about 4 hours. For whatever reason, it knackered me out. Oh and then the apprentice woke up. “wotsat, who’s er, ah, got any Hob-nobs?”

 
Somebody somewhere, I think, and it wasn't Devonwoody, definitely some-one else, was wondering about the floor being "suspended' at each end, screwed into the bottom of the side "tie-beams".
The "floor", is actually on four joists. The end joists are 1" in from the posts. There are two "tie-beams" 1" up from the position of the joists on the end posts. So the floor is actually on a joist and wedged under the tie-beams on the sides, as it's 1" boards. Very well wedged! I had to knock 'em in sideways with the "big wooden hitting stick". They aint going nowhere in a hurry, screws or no screws. The only screws are two each end on the boards to keep them from shifting "fore or aft" or "athwarships". Not sure how clear the following are but they show the arrangement.


In fact, the structure doesn't really need the lower tie-beams at the sides, but they act as stops to stop the bottom logs rolling out the sides, plus I think it might look odd without them. The thing is, all the joists and two angle braces are mainly hidden under the boards.
 
In normal circumstances it would be a close thing, particularly bearing in mind the apprentice's appetite for Hob-nobs :-& , however, as we went to a retailer with the initials TP, the wood has cost more 8-[ :-k . At least 6 months worth of Hob-nobs!

Speaking of which, I realised I under-catered on the batten and feather board for shingles, the price just goes higher :-$
 
Phewee, two days work to write up. We had friends round for tea last night, jolly tasty they were too! But it’s put me a day behind keeping updated.

I think last time I’d put the end-rafters on and cut slots for the normal rafters, but not cut in the birds mouths. So, with all the rafters in place, I strapped The Big Austrian across the rafters;


…and measured the drop to the end boards;


I could then mark up the rafter and squared back;


I could then cut out the birds mouths;


These boards were “waney edged” I think it’s called, with bark along the edges on one side;


Then I could start putting the rafters in;


I found one was a little out;


..so I recut the other birds mouth;


And then they were all in;


I wanted to mark out the front edge of the roof, so set the distance from the top of the end rafters, in multiples of 3 inches to where the front looked okay, I used the 3 inch measure as the “shingles” were 6”. I cut a kerf in the rafter to slot the tape in;


Then I could clamp up The Big Austrian to mark out the ends of each rafter to get a good straight line;


Then I squared down for the rafter ends and marked out the “bottom” of the rafter, on one, to use as a template;


Then a bit of ZZZd ZZZe ZZZd ZZZe;


And then I could cut the end rafter from the template, I also cut away some of the internal support, so it wouldn’t be seen so easily;


..and before we knew it, a bunch of rafters;


Some how, all my slots were a wee bit wider than necessary, so I cut some mini-wedges;


to wedge the doo-dahs;


….and then bashed some nails in to hold them down;


And then I could put the first three battens on;


The first two were on edge and the third was flat, this was to take account of the front row of shingles not having another shingle to rest on. I used a rule to mark a straight line from the top of the front batten down to the third;


…..then apply the noisy blue machine to get a smooth planed line (not);


We’ll not get too worried about that, let’s just put some more battens on shall we;


…and then we’ll cut up some shingles;


I placed the shingles on the front battens, starting on a centre(ish) line, with a ¼” overhang, drilled holes for two nails at the top (to prevent splitting) and DDDRRRRRLLL, Bang;


I also pinned the front of the shingles down to prevent movement. These pins are just plain steel wire, so will rust out in time;


and voila, two rows of shingles;


That was yesterday, and today ZZZd ZZZe ZZd ZZe, BANG BANG BASH;


A finished log store! I must say I’m well chuffed with the result (and even more chuffed with some of the jokes I’ve come up with along the way). I generally enjoyed doing this and felt working in the garden, with only a bit of staging for a workbench was quite liberating. I’ve learnt a lot and had some good repartee with people on this site. I hope you enjoyed watching and had as much fun as I did.

Here’s a few details;


Here’s what’s left of the £150 of wood;


And here it is gone;


Thanks for watching and thanks for all the friendly and helpful comments. Cheery bye!
 
You can be very proud of the log store.
I'm already getting withdrawal symptoms. What have you got planned for your next project?

Rich
 
Hi. Ross, it nice to have job satisfaction at the end of a project, looking forward to your next.

(hammer) (hammer) (hammer)
 
richard56":2tquu5ga said:
You can be very proud of the log store.
I'm already getting withdrawal symptoms. What have you got planned for your next project?

Rich

Thanks for the comments and Interest Rich. I'm currently looking at a book on Japanese Joinery. It contains some humungously complicated joints. Anyone for a Japanese Pagoda style log store?
 
The Eriba Turner":32rpcqe0 said:
Well done Ross and thanks for the entertainment.Maybe think about marketing them as flat-pack and take on IKEA!
Regards Keith

Keith, I think if I wasn't paid for my labour, and gave most of the wood free and only charged for the nails, I might meet their price target :lol:

Now if I could get some bespoke type customers, such as Tory MPs, we might be cooking on gas (hammer)

Thanks for the interest and comments, it really has helped keep me going, same to everyone else who's chipped in.
 
Back
Top