Following on from my bench build and saw station build, the next job is a sandpaper storage solution. I'm fed up of all the sheets of sandpaper scattered all over the place so I refered to the oracle (Google) and something like this seems to be the solution for me...
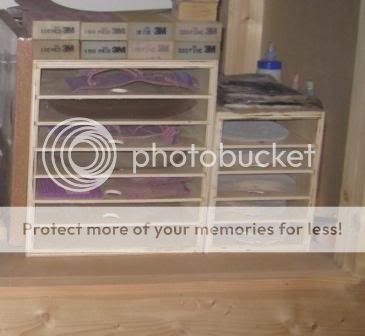
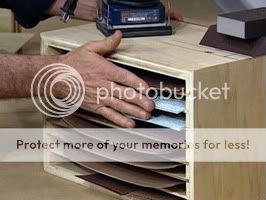
Each one of the shelves slides in and out of the unit. I will go for something similar to the second picture.
I'm gonna be doing this in between a few other jobs I've been set but tonight I should really be able o crack on a bit...
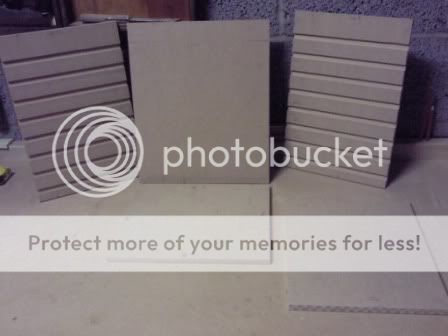
Got myself a couple of sheets of 12mm MDF and drew out a plan.
I needed to work out how far apart the drawers need to be and how tall the unit needed to be to accomadate the 8 drawers I needed. I didn't want anything to big and bulky that was gonna take up a lot of room. According to the plans it should be; H: 420mm, W: 370mm, D: 260mm :wink:
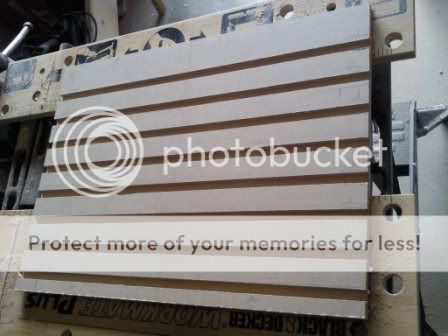
So, I've got to get the grooves for the drawers exactly lined up on the left and the right hand side pieces. . Best approach I could think was to measure out the left and right side pieces but leave them joined together, route straight across both of them then cut the piece in two.

NOTE: I am using a router with a straight edge clamp. I made a set of spacers to set the distance from the cut line to the clamp edge. This saves me measuring every time and ensures the clamp is set in the correct place every time. I have a set of these spacers, one for the large router, one for the small router and one for my hand held circular saw.

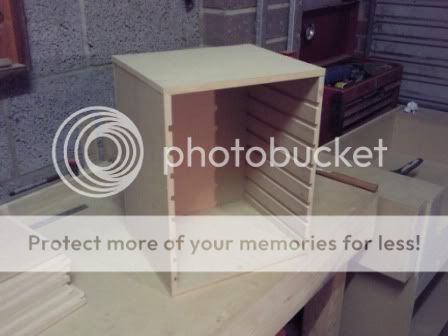
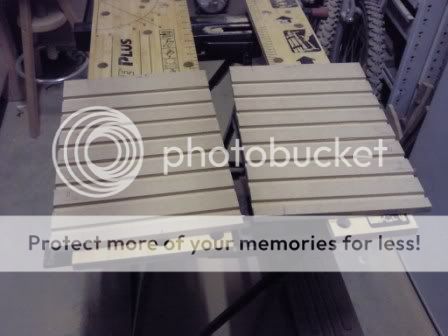
Anyway, with the slots routed I now have this...
...which after a quick sawing turned into this...
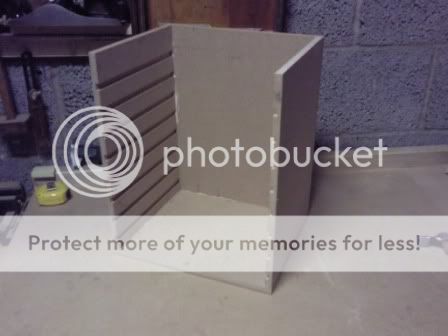
Next up, I cut the lid, the base and the back for this unit. Easy straight cuts using my straight edge clamp guide and my hand held circular saw.
Here's the bits in situ. waiting to be assembled...
Brew time while I decide what method to use to assemble the pieces...
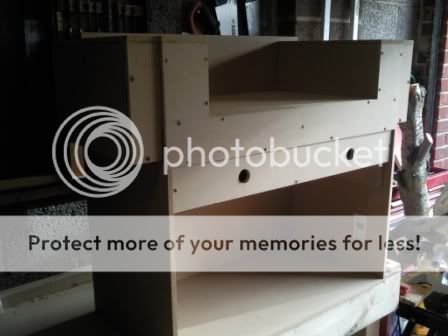
OK, decided I would glue the edges and use MDF-Tite screws. Doesn't need to be any more complicated. I might of chosen the biscuit method had it of had any pressure on it but it isn't gonna carry any weight so screws will be fine, I hope.
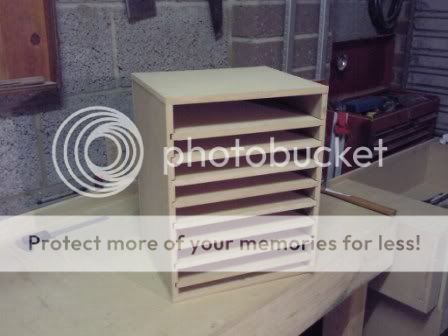
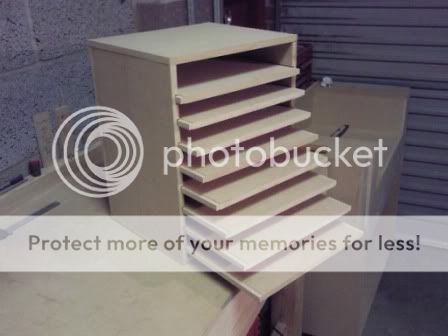
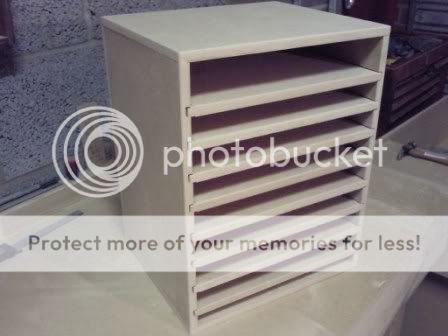
Here it is screwed together...
I've left the lid off until I get the drawers sorted out. I cut the drawers...

...to be continued over the weekend.
Question : I was looking around the workshop for a suitable space to put this unit. It's not that big so it would mount on any wall. However, I measured the space in the bottom of my saw station and it fits height wise absolutley perfectly.
In here..
What do you reckon? out in the workshop or discretley located in the bottom of this unit?
opinions please.
Each one of the shelves slides in and out of the unit. I will go for something similar to the second picture.
I'm gonna be doing this in between a few other jobs I've been set but tonight I should really be able o crack on a bit...
Got myself a couple of sheets of 12mm MDF and drew out a plan.
I needed to work out how far apart the drawers need to be and how tall the unit needed to be to accomadate the 8 drawers I needed. I didn't want anything to big and bulky that was gonna take up a lot of room. According to the plans it should be; H: 420mm, W: 370mm, D: 260mm :wink:
So, I've got to get the grooves for the drawers exactly lined up on the left and the right hand side pieces. . Best approach I could think was to measure out the left and right side pieces but leave them joined together, route straight across both of them then cut the piece in two.
NOTE: I am using a router with a straight edge clamp. I made a set of spacers to set the distance from the cut line to the clamp edge. This saves me measuring every time and ensures the clamp is set in the correct place every time. I have a set of these spacers, one for the large router, one for the small router and one for my hand held circular saw.
Anyway, with the slots routed I now have this...
...which after a quick sawing turned into this...
Next up, I cut the lid, the base and the back for this unit. Easy straight cuts using my straight edge clamp guide and my hand held circular saw.
Here's the bits in situ. waiting to be assembled...
Brew time while I decide what method to use to assemble the pieces...
OK, decided I would glue the edges and use MDF-Tite screws. Doesn't need to be any more complicated. I might of chosen the biscuit method had it of had any pressure on it but it isn't gonna carry any weight so screws will be fine, I hope.
Here it is screwed together...
I've left the lid off until I get the drawers sorted out. I cut the drawers...
...to be continued over the weekend.
Question : I was looking around the workshop for a suitable space to put this unit. It's not that big so it would mount on any wall. However, I measured the space in the bottom of my saw station and it fits height wise absolutley perfectly.
In here..
What do you reckon? out in the workshop or discretley located in the bottom of this unit?
opinions please.
")