wadkin pk restoration

UKworkshop.co.uk

Help Support UKworkshop.co.uk:

This site may earn a commission from merchant affiliate links, including eBay, Amazon, and others.
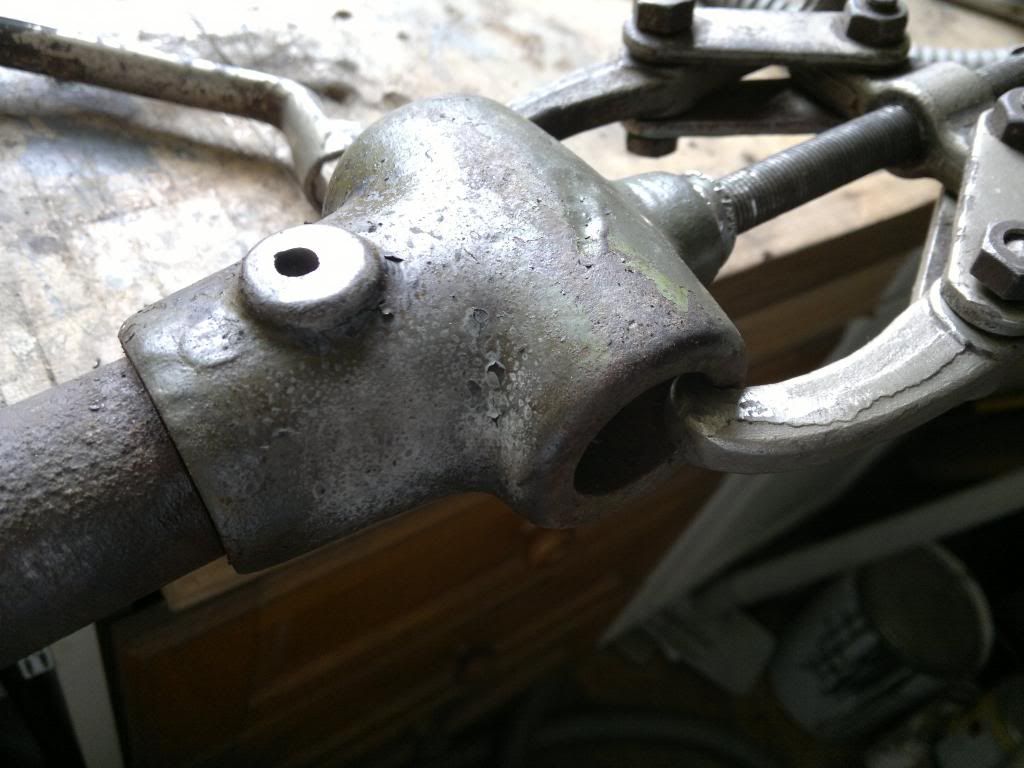
This crown guard support is from a standard sized pk, the one I have has an extension table so the length of round bar is not long enough. I thought the pin was going to be stuck in, but with a good wack with a punch it popped out.


Getting the bar out was a different story. I gave it a good soak with plus gas and heated it up but it would not come out. I got it to turn with the use of stilsons and a long extension. I tried using various pullers with no success


In the end I just chopped it off, before I busted the casting. I can change round bar easily but I cant replace a damaged casting.


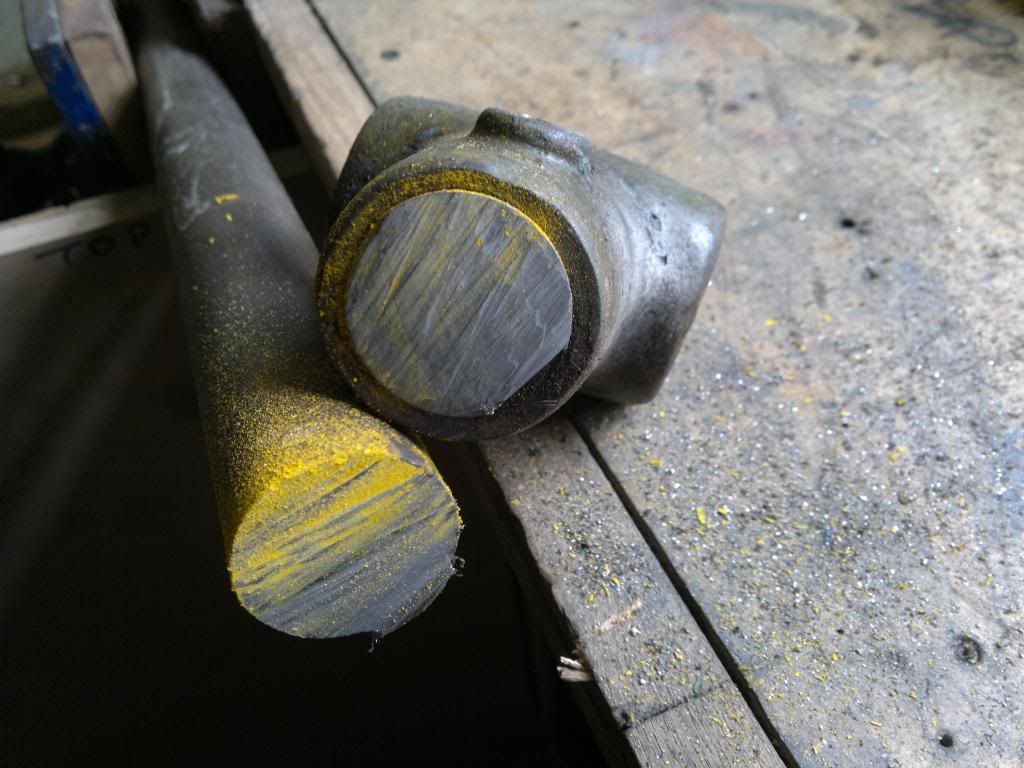
I cleaned the end up and my plan is to use some quite nice bright bar I already had. This stuff cost £40 a length so I've been saving it for something decent. Its smaller diameter than the original so I'm going to get the piece that's stuck in the casting drilled and reamed to accept the smaller stuff.

 
I thought it was time to start the sliding table. This does not seem to have faired so well. Its pretty heavy so I had to use a hoist to turn it over.


Most of the oilers are toast


I found a couple of the eccentric pins broken, they look like fresh breaks so I think it may have been something I did.


There are some bearings missing and snapped studs

 
Jimi I find messing about like this reasonably easy, its the wood work that gets me :)
I made some more bits shiny


And then cleaned and derusted the slider frame.


There are a few snapped bolts to get out


I made a list of all parts I need which includes the eccentric shafts for the bearings. I don't know what their made of but they are really heavy for their size. They must be hardened as well. The bearings are different thicknesses, they must have been replaced.


I removed all the button oilers because they were jam packed with crud, I had to chisel the top open to get the ball bearing out and then I had to drill the brass body out. The weather was good so I got a few bits primed and top coated in a day.


I got the motor installed but had a few issues with the brake that came with it so I installed a wadkin mag starter
 
Nicely done Wallace as always!

I have a couple of quick questions on painting cast iron machines which I hope you won't mind me asking you; Many of the items you have restored seem to have badly chipped paint jobs which you then go on to restore to their former glory. What steps do you recommend for preparing castings to receive the paint or primer? I also notice that you are a dab hand at taking these machines apart which allows you to prepare, prime and finish each bit individually. If you were trying to restore an item with a bit of casting that you couldn't get off so you had to address it in situ how would you go about doing so? I have a little project in mind but could do with some guidance on this points before kicking it off.
 
Hi Memzey, with cast parts you have two ways to tackle. 1, remove all old paint and filler then remove any casting defects by sanding with a flapper disc or a grinder then you can prime and paint. Method 2 is to leave the old paint and filler and then fill any bits damaged and sand everything for a good key. Then just prime and paint. I tend to do the latter because old machines used a lead filler which is pretty toxic. You can also use a direct to metal paint but your prep would have to be spot on for a good finish. I think that's what Jack Forsberg uses on his machines and they don't come better than that. For something that you don't want to take to bits I would use a wire wheel in a drill and maybe use some rust converter which you can paint over. Sorry a bit long winded but if you need any help give me a shout.

A bit more progress, the slider top was pretty crusty


Rust junkie heaven


After using a brass wire wheel

 
Thanks Wallace that is very helpful. What type of filler do you recommend? I would guess that regular wood filler won't do. Also where there are areas where paint has chipped do you fill those as well?
 
Hi Memzey I use car body filler, you can fill any chips or dints and then just sand.

I have not had much of a chance to do much because I bought a over head router and the courier company did not strap it when delivering, so it ended up falling over and getting damaged. Because it was nearly falling through the curtain of the wagon I would not accept it because I thought it was too dangerous to tackle. The driver never even had any ratchet straps to secure it so I had to use my own to make it safe so he could get back to his depot.

53d9200ecc644.jpg


Luckily not too much damage, a broken foot pedal and a bent depth stop.

I did a little bit on the slider carriage, the button oilers were toast so I replaced them.


I soaked the slider bearings for a week but they were still stuck solid so I just took them off and got some new ones


Cheers Wallace. So that's the P38 stuff they sell in Halfords right? Great job on the PK and looking forward to a WIP on the router!
 
Yes that's the stuff. I get it from my local motor factors so its a bit cheaper than Halfords. The router was bought in working order so it will be a while before it gets 'wallaced'. I had to move my wood rack with about 2 cube of timber, knock a wall down and move a few machines around just to make room for the new lump.
 
Its not huge but to be able to use it properly I needed to rearrange things. I needed to knock a wall down to make way for the sawbench as well. The router is about 5' deep and 2.5' wide.
It was pretty close getting it into my workshop plus it was quite entertaining getting it upright and in position, it weighs in at about 1.2 tonne
53d7da1948767.jpg


53d7da5e4b6da.jpg
 
I really like the router because its got the compound table.
I installed the new bearings, to protect the new bearing I used an old one and then a piece of wood and a little wack. One of the new bearings wouldn't go on so I checked the inside bore and it was 0.5mm to small.


Oh and I made them all shiny


I then put the slider carriage on the saw


The covers for side bearings had been replaced with baked been tin I think, I made some nice brass ones. I think the correct way to put holes in sheet brass is to use a punch, all I did was to pile all the pieces together and tape them up then clamp them between some wood before marking and drilling them all together.


Fantastic job on your PK, I'm fixing one up myself, not as a restoration project just a lick of paint and new grease etc.
My saw dates from 1915 so it a couple of years older and has a few slight differences. I've got a question about the method of stopping the saw riser. Mine looks like it uses the top one of the two bolts supporting the plate that holds the riving knife. It seem to use the top of the slot allowing the vertical travel as a stop. This has broken a piece of cast iron at the top of the slot which in turn has bent the bolts allowing the riving support plate to hit the saw blade. There are grooves in the plate from the blade so someone must have seen a few sparks shooting out of the table at sometime.
The question is does your saw have the same method of rising stop or is there a bolt some where that does the job?
Regards Neil
 
Hi Neil sorry for the late reply I never noticed your question. This forum moves so quickly you sometimes loose track. 1915 is an early saw, how did you date it? It must have the tilt wheel on the side. I've never really noticed what stops the blade rise I will have a look. Have you got a picture of your saw.
I finally got some more done on the saw. I wanted to flip the extension table over and paint the underneath but I couldn't do it myself and I couldn't work out a way to flip it using my block and tackle. So I had to leave it undone which is a shame. I got the fence and crown guard adjuster done.


I replaced the cord that goes around the electrics door.


The saw fits quite well and I can use the full 48" cross cut


When I replaced the bearing button oilers on the slider I wondered how they got so trashed I now know why. I started making the slider the same level as the main table and the bottom of the sliding table catches the oilers. From the looks of things I think I will have to countersink the oilers.

 
Wallace,

I love watching your restorations, those machines ooze quality and it is great to see them brought back to working order.

Thank you for the posts.

Tim
 
Hi Mark, the saw is looking good, in this picture you can see the true size of this extra large wadkin PK, hows it fitting in to your workshop ?. :shock:

thanks mark
 
Back
Top