jack55
Established Member
Hi, having spent last year rebuilding my workshop I needed to fit it out, only after splashing out on a new table saw It would have to be done reasonably cheap.

I also bought this SIP lathe off Ebay but the stand is a bit naff and takes up space.

The challenge then is to put in some storage units and worktops to store all the bits and bobs we accumulate, whilst trying not to use shelving.
I managed to get hold of some boards which look like scandinavian redwood? They came from a salvage centre and cost me £7.50p each. their 9ft long over 12"" wide and 2" thick, theres 12 in total.

The great slice out of each of them was a bit of a put off at first but I thought I could find a solution. I came up with the idea of cutting them into three pieces and gluing up two of them to give me two boards. It actually made them easier to machine.


The starting point was to replace the lathe stand and sit it on top of a unit to make better use of the space underneath the lathe. The height of the present stand set the height of the unit. I raided my storage shed and pulled out some of the scraps I have been saving for a rainy day.
The frame is some old 40mm square i salvaged from my old workshop, sitting on a 18mm chip board T&G flooring again from my old workshop.

Some draw frames made from bits of the kids old bedroom furniture, (thought it may be useful someday), along with some 1/2" ply from the inside walls of the old workshop.


ending up with a carcass.

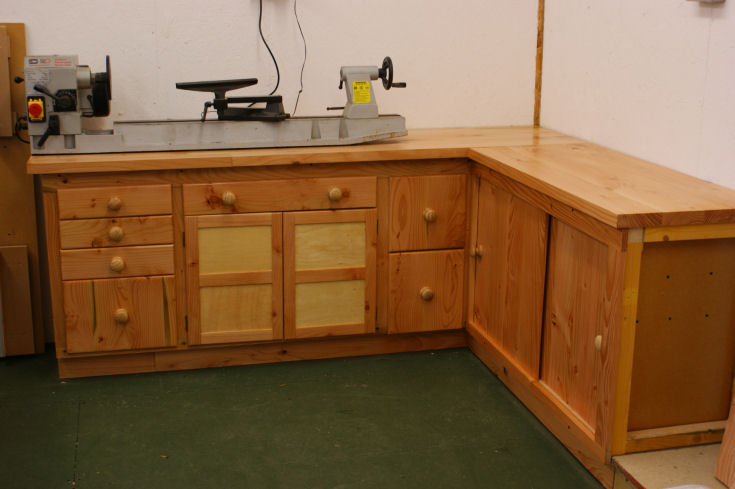
A face frame was made from the machined up boards, using dowels at the joints.

along with the top


The draws are also made out of odds and ends with the joints being a simple rabbit and tongue .
I used 1/2" stock and a quarter inch router bit to cut the joints. I simply fit a 1/4" spacer to the fence of the router and route the ends of the draws. Then remove the spacer and route the sides. This way I only set the router once.


The end is left open as I am coming down the side wall just started on that still lots left to do.
I also bought this SIP lathe off Ebay but the stand is a bit naff and takes up space.
The challenge then is to put in some storage units and worktops to store all the bits and bobs we accumulate, whilst trying not to use shelving.
I managed to get hold of some boards which look like scandinavian redwood? They came from a salvage centre and cost me £7.50p each. their 9ft long over 12"" wide and 2" thick, theres 12 in total.
The great slice out of each of them was a bit of a put off at first but I thought I could find a solution. I came up with the idea of cutting them into three pieces and gluing up two of them to give me two boards. It actually made them easier to machine.
The starting point was to replace the lathe stand and sit it on top of a unit to make better use of the space underneath the lathe. The height of the present stand set the height of the unit. I raided my storage shed and pulled out some of the scraps I have been saving for a rainy day.
The frame is some old 40mm square i salvaged from my old workshop, sitting on a 18mm chip board T&G flooring again from my old workshop.
Some draw frames made from bits of the kids old bedroom furniture, (thought it may be useful someday), along with some 1/2" ply from the inside walls of the old workshop.
ending up with a carcass.
A face frame was made from the machined up boards, using dowels at the joints.
along with the top
The draws are also made out of odds and ends with the joints being a simple rabbit and tongue .
I used 1/2" stock and a quarter inch router bit to cut the joints. I simply fit a 1/4" spacer to the fence of the router and route the ends of the draws. Then remove the spacer and route the sides. This way I only set the router once.
The end is left open as I am coming down the side wall just started on that still lots left to do.