Trimming to shape with router... Give me your tips PLEASE :D

UKworkshop.co.uk

Help Support UKworkshop.co.uk:

This site may earn a commission from merchant affiliate links, including eBay, Amazon, and others.

goldeneyedmonkey

Established Member
Joined
15 Jan 2010
Messages
1,121
Reaction score
0
Location
Buxton, Derbyshire
Ay up folks,

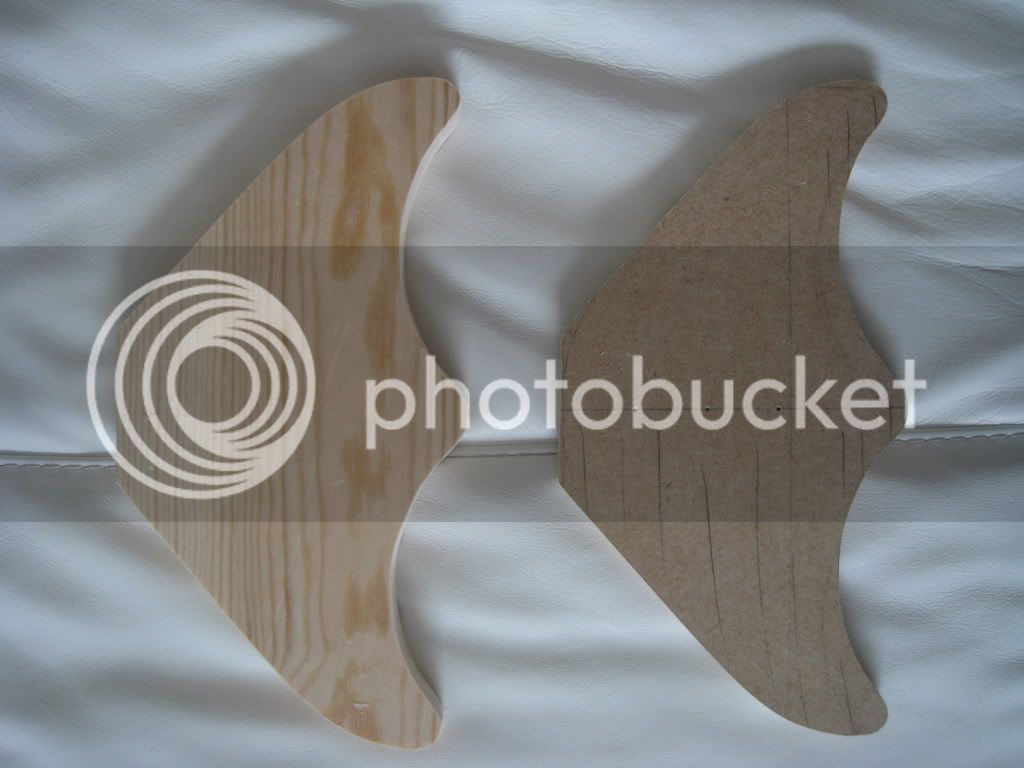
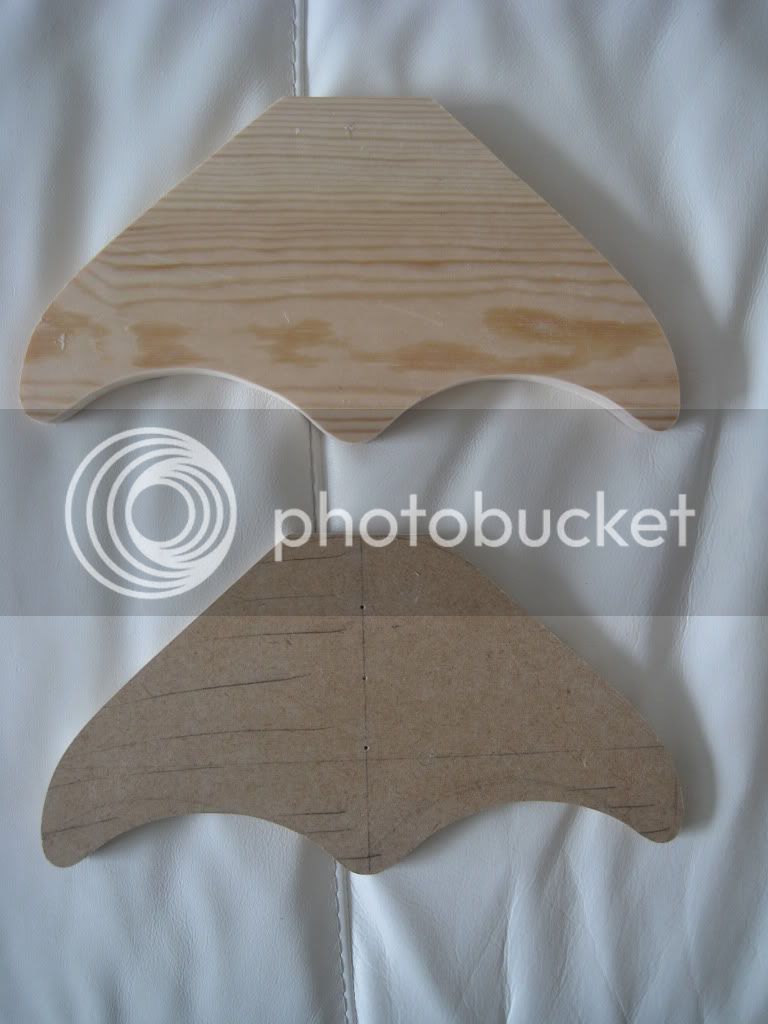
I've been working on a few kids toys, mainly a couple of ride-on aeroplanes and some balance bikes. I've made templates out of 9mm MDF so that I can (in theory) make them fairly quickly once said templates have been made. I've got both bearing guided twin-flute straight bits, one with the bearing on the top and one with the bearing on the bottom of the bit, in a table. Template attached to the stock (1" pine for these prototypes), and then cut nearly to size with a jigsaw as my B/S is playing up (don't get me started! :)) However, when routing I'm getting mad tearout, coupled with the fact that I've got no dust extraction due to DE being sent back on a warranty claim, it's driving mental, there's been a fair few unscheduled brew breaks to calm down and take a step back, believe you me :twisted:

Anyway, what am I doing wrong? I initially had it a top speed, thinking this is what CNC routers would use, after getting a scary snatch from the bit I turned the speed down and this worked a bit better, but still getting tearout on the end-grain. This isn't the case when I'm using a round-over or similar bearing guided bit, but with these straight bits it's catching and producing tearout. Is the answer to do most of it in the table, and then change to using it in a handhled router? - for the one side of the end grain that's catching/ tearing out.

The finish is very good (Wealden bits), better than I was expecting, but the only issue is the tearout.

Sorry for rambling, it's been a long day. Any help/ ideas would be much appreciated as with the BS, DE being out of order, having to wear a mask all day and getting dust everywhere, this template issue is driving me loco!

Thanks all. _Dan :)
 
dan i think your going the wrong way. try stopping before the area that your getting tear out and go onto the other side of the iffy area and go backwards. this should solve this, but please be careful. maybe someone more in the know could confirm this before you go ahead.

adidat
 
There's a very interesting article in the latest "Fine Woodworking" that recommends climb cutting (working backwards) for half the curve to avoid tearout, with just a light normal cut to clean up after.

Si.
 
I'm only taking about a 1-2mm off, so I thought it would be plain sailing. I thought that a climb cut was to be avoided. I'll have a go on a large piece, using some push-paddles. I'll check this again in the morning to see if this is the general consensus. Thanks chaps.
 
Hmm. Whilst what GW is true, I hope that at somewhere in the rest of the DVD he points out with rather more emphasis the dangers of climb cutting. A novice doing what he is doing could have a very nasty accident. I'm not saying that the technique has no merit, but it is playing with fire somewhat.
S
 
Rob Platt":2mc625bu said:
Seems by the sound of it you are getting to an unsupported part on a curve maybe?

Yes, sorry should have been more specific, unsupported curve on end grain. I was only taking 1-2mm off as said before, but I had a few big chunks ripped out. I've always been wary of climb cutting for obvious reasons, but I'll give it a whirl. I feel inclined to use this method in a handheld rather than a table though. I'll turn the speed down more and do tiny passes. Thanks for the link mate.

You know what the yanks are like Steve, they love playing with fire, especially in the 'shop, over a pile of plane shavings. :D

Cheers _Dan
 
Dan, the article was about climb cutting with a hand held router. The author (and I) warns against doing this on a table. The piece will almost certainly be dragged from your hands with the danger that fingers will slip. There are two problems. Firstly, there is no lead in on your template leading to snatching and, secondly, your are getting tear-out. You could adress the snatching by making two templates to complete the shape with each having an extension that would make contact with the bearing before the work does. Alternatively, you need a 'lead-in pin' on your router table which you hold the work firmly against as you roll the work into the cutter. Regarding tear-out, rather than climb cutting, consider making two templates and sandwiching the work between the two then you can simply flip the work over to ensure you are always routing downhill. You can flip a single template over and change the cutter to top/bottom bearing to suit but only if secured with tape since clamps would get in the way and this wouldn't be a good idea for batch production anyway. Don't climb cut on the router table, you will have an accident I can guarantee it.

John
 
John: I only mentioned not doing it in a table as I had it all set up in the table. I've always been taught to steer well clear of climb cutting. I've never done any climb cutting, especially in the table, and I don't intend to after reading this advice, don't worry. I've been working with a lead-on pin it's just the unsupported curve on the end of the piece, in end grain that was snatching and tearing out.

I am using double-sided tape as you rightly point out. You're suggestion to have a template on both sides is the obvious answer #-o

Thanks for your advice. _Dan :)
 
goldeneyedmonkey":2ktgm622 said:
I'm only taking about a 1-2mm off, so I thought it would be plain sailing. I thought that a climb cut was to be avoided. I'll have a go on a large piece, using some push-paddles. I'll check this again in the morning to see if this is the general consensus. Thanks chaps.

Although thats not much I'd get closer still before doing end grain with a bearing guided bit. Your probably making it harder for yourself doing it on pine, will the eventual models be in pine? What size bit are you using is it a smaller 1/4 bit or a half inch bit?

The bump method really works where you just go along bumping the bit into the work piece making a series of circular cut outs then finally route it flush.
 
I'm not taking anything more than 1mm off @ the mo. It's a 1/2" bit, just as that's what I had already. I'll probably get a smaller one. I'm not intending to make them all in Pine, probably Ash, but I'd like to get something closer grained really, depends on my budget. It's not a great deal of timber, so I could get some fairly expensive stuff thinking about it. My thinking is, if I can make them out of Pine then I can make them out of anything. - not sure if this is good thinking or not, but it's what came out of my mind-box :D

Just had a blast, and it came out pretty well, I left a tiny bit of material on the 'horn' (for want of a better word) so that I could take it off with a careful touch-up with a carroll drum sander.

IMG_2786.jpg

IMG_2785.jpg


Cheers _Dan
 
On the TV show "The Router Workshop" the hosts recommend the use of an envelope jig that slips over the rough piece and is identical on both sides. With the envelope type of jig , when you reach the opposing grain direction you simply flip the piece over and go with the grain from the other side. The jig can be secured on the blank with a piece of scrap holding the 2 sides together and by driving a couple of pin nails where they will not interfere with your routing. Hope this helps.
 
The problem with back-to-back templates is that it is difficult to line them both up perfectly. It's not so bad if you have somewhere to drive a screw through (such as a mortice or a drilled hole) but if you want a clear surface it is a problem. The workpiece filling is bigger than the bread templates, so it is easy for the profile to slip where you turn it over. If anyone has a foolproof way of handling that, I'm all ears.
S
 
I just routed most of the shape, steering clear of the offending end-grain/ unsupported bits going in the wrong direction. Then took the template off and mounted it on the other side, carefully lining it up with the parts already cut/ trimmed.
Only one piece 1 of the 11 (I think) has dowel holes all the way through.

I'll post what I've been making when I get all the component parts for them, thanks for all the advice. Cheers _Dan
 
I'd say what you said about making them with pine is true, if you can do it with pine you can do it with anything, sometimes pine is harder to work with that hardwoods.
 
Hi Steve. Sorry I was not as clear as I should have been. When cutting your env. jig sides , you would leave tabs on a reference edge (preferably a straight edge) and then use a piece of straight scrap to join the two sides as well as give a basic reference to the straight side of your finished piece. center lines or reference marks provide secondary and or tertiary marks to set up to. With curved pieces...no straight edges you would template cut a negative surface using your cut off as your sandwiches backing and work to a set of center lines or reference marks. It really is easier than I make it sound... heck , I can't direct people to the nearest town let alone how to build things.
 
I used to make replica Fender solid guitar bodies and neck, professionally, so am well qualified to speak on this subject. The bodies were 40mm thick and in a variety of hardwoods, most American Ash. With a bandsaw I could get to within 2mm of the required line but that still left a good deal of material to remove. I used templates secured with double-sided tape.

The answer proved to be a 1/2" table router with two bearing guided cutters with 50mm length cutters, one with the bearing at the router end, the other with the bearing at the far end. Then it was just a question of getting a really good grip on the work, and gently feeding it in at a flat area on the template and cutting those curves that were 'with the grain', then turning the work over, changing the cutter to the bearing at the other end, and then cutting the rest of the curves which were then, of course, with the grain.

I did experiment with climb cutting once. Not only is it dangerous, but, using the method outlined above, it isn't necessary.
 

Latest posts

Back
Top