Traditional Stopped Chamfer Plane.

UKworkshop.co.uk

Help Support UKworkshop.co.uk:

This site may earn a commission from merchant affiliate links, including eBay, Amazon, and others.
Hi Jimi. When you wake up you will have some interesting photo's to look at.

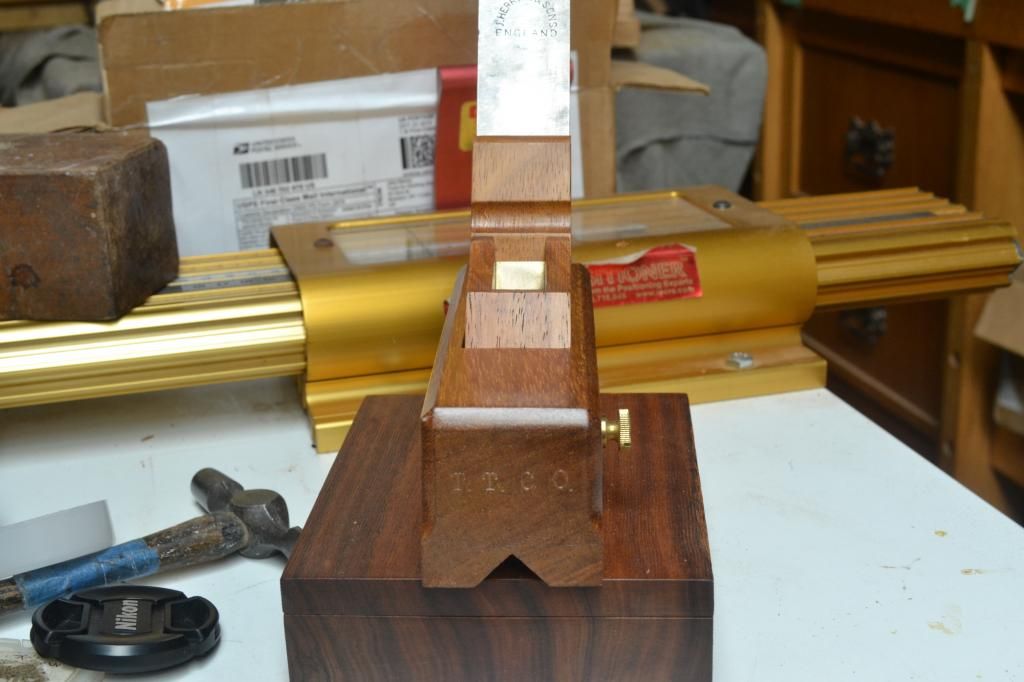
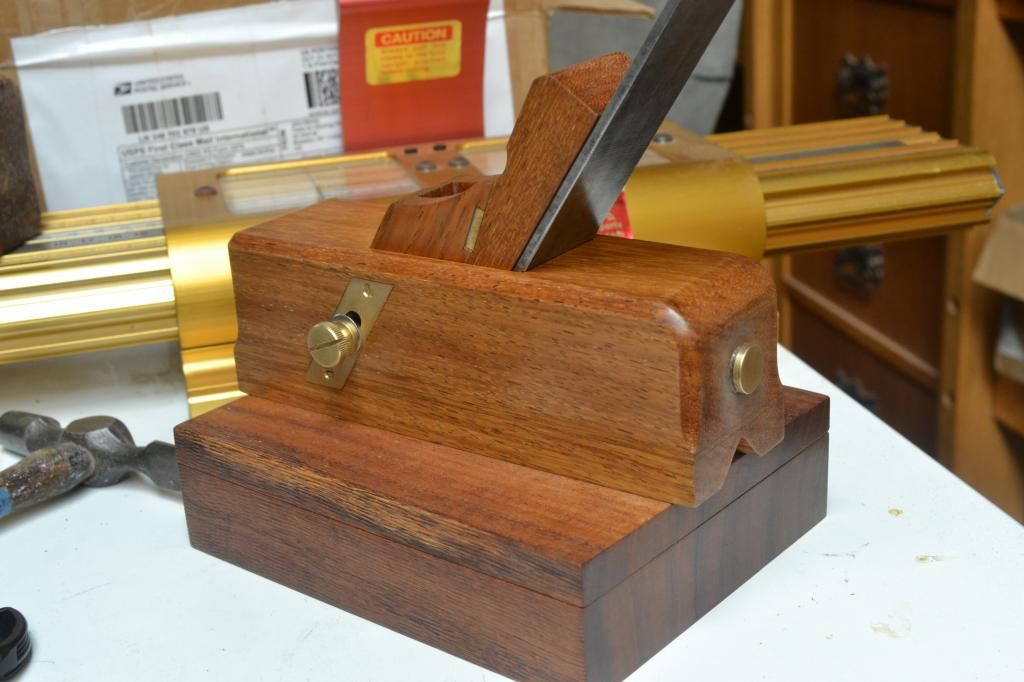
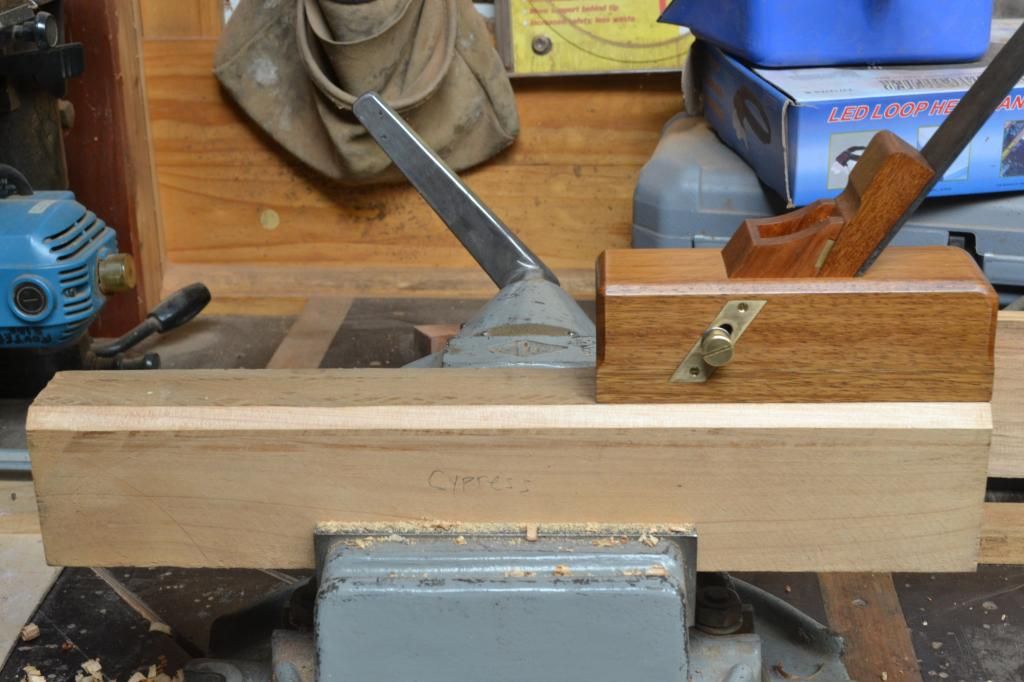
The following is the completed boxed chamfer plane. Its had it last coat of shellac and received its final sanding. I will need to wait a couple of days to allow the shellac to harden before I can add some shine to it.

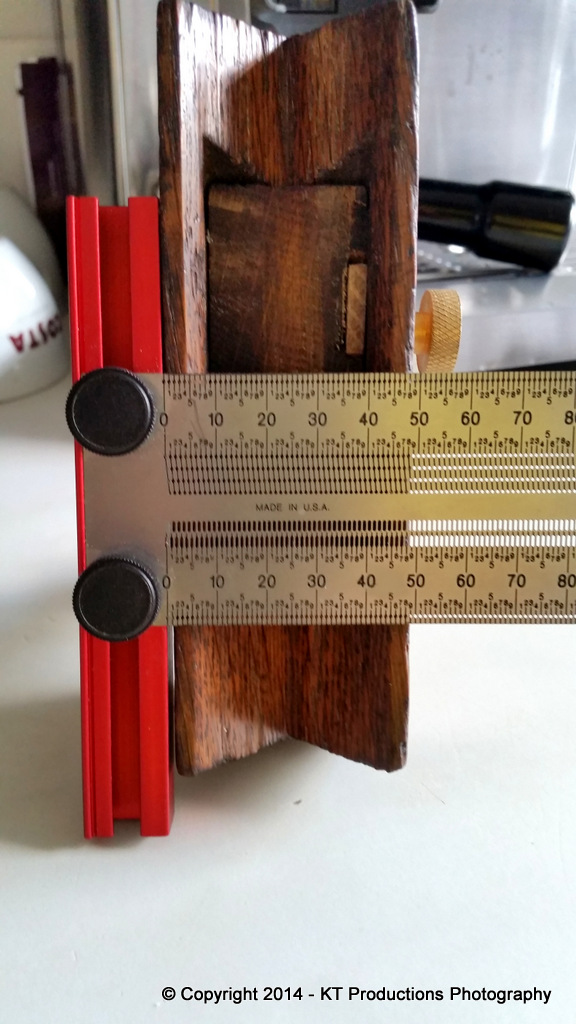
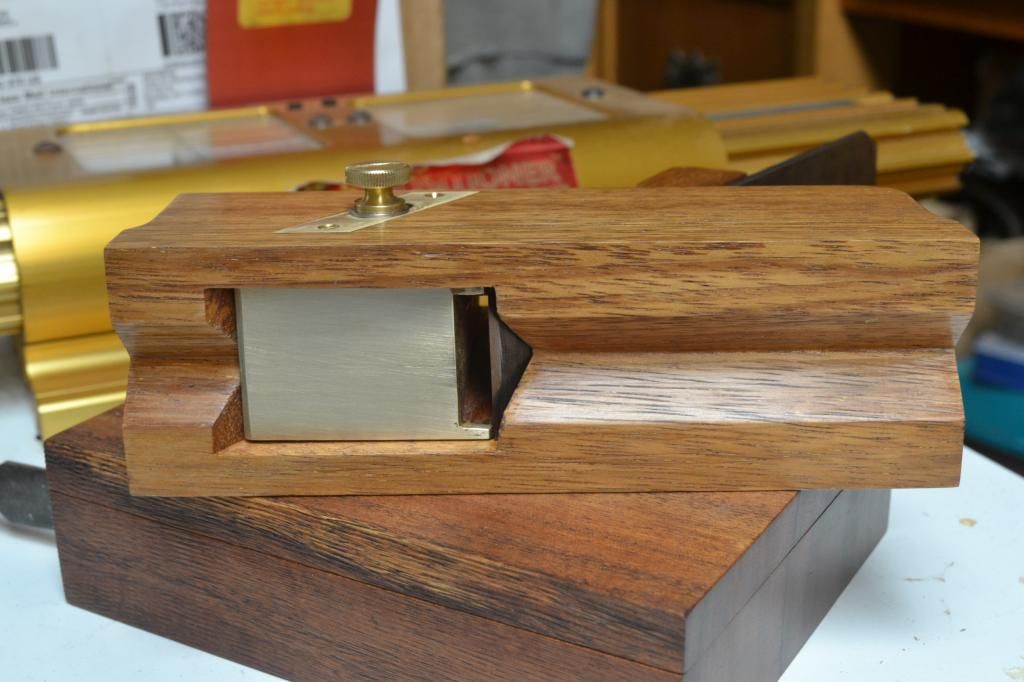
When chamfering the edge the shavings tend to be quite stringy in form. As such the boxed chamfer plane does requires a fairly generous mouth opening to allow these shavings to pass through unabated to the throat area.

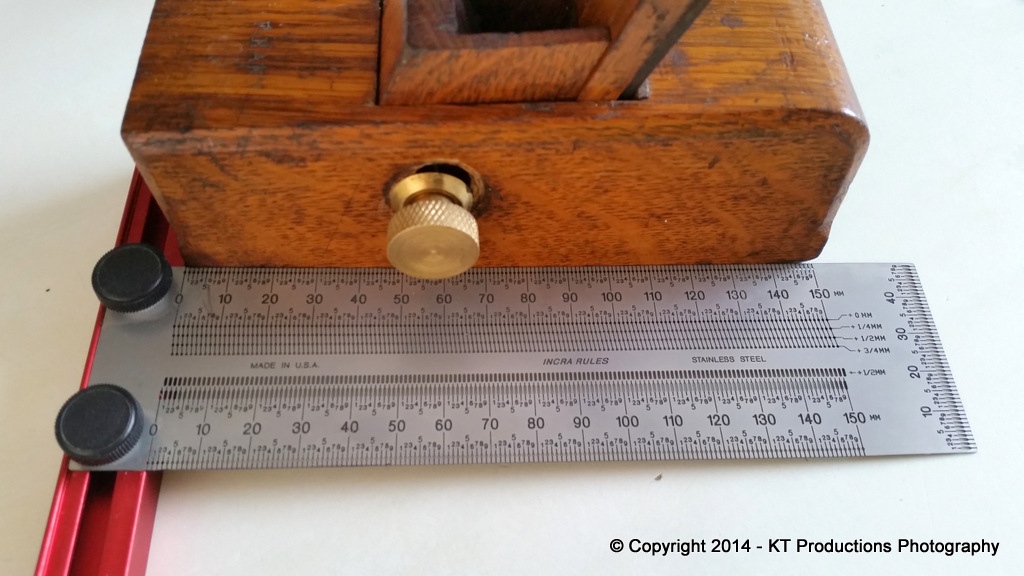
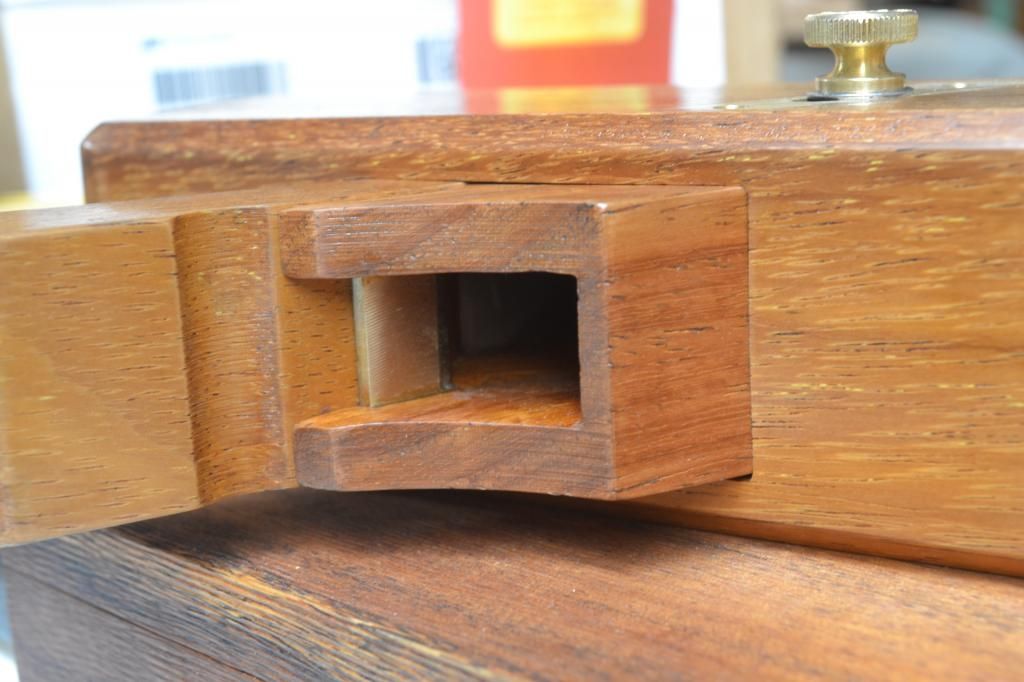
I have also added a brass piece between the upper tines of the wooden box to prevent later inward creep. An issue I noticed on some of the earlier made chamfer planes of this type.
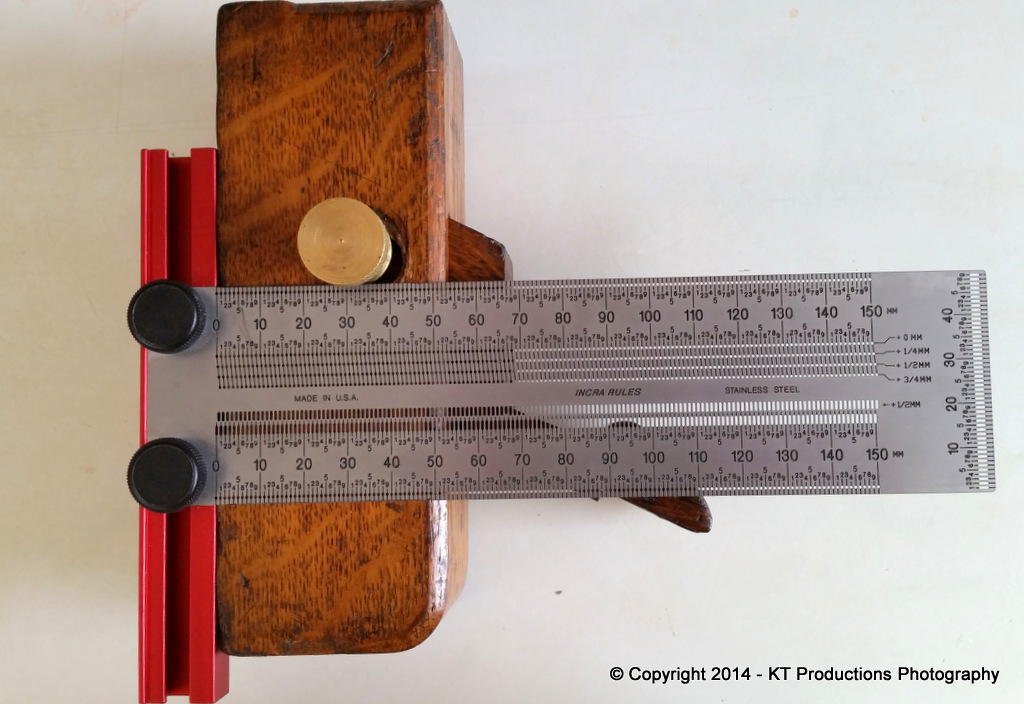
I added a bevel the lower edge of the brass brace to deflect the shaving..

And lastly a brass impact area on the back end of the plane to save damaging the wood surface.


Now for testing the chamfer plane out on some Australian Blackwood and some Cumquats grained Cypress. The stop was set for a 12mm wide chamfered and the cutting irons cutting edge set at around 0.5mm .


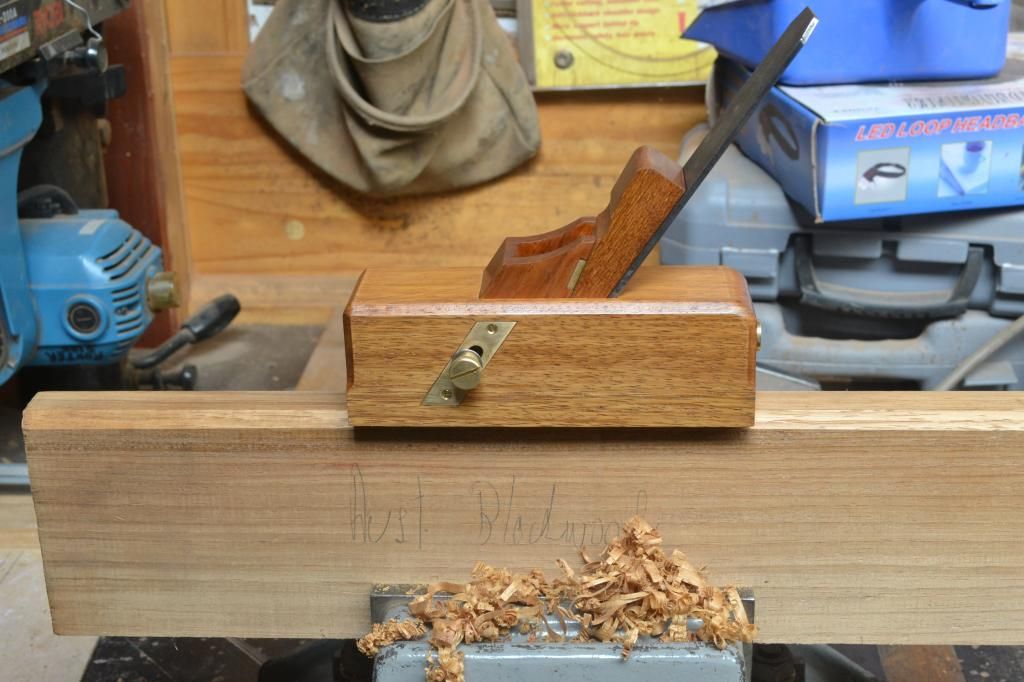
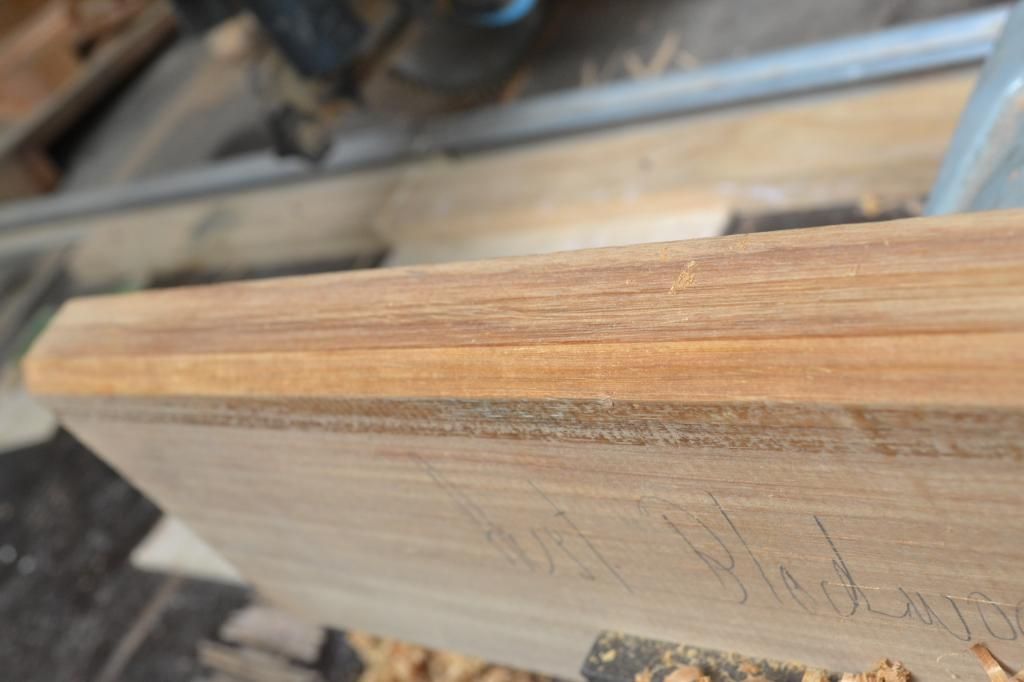
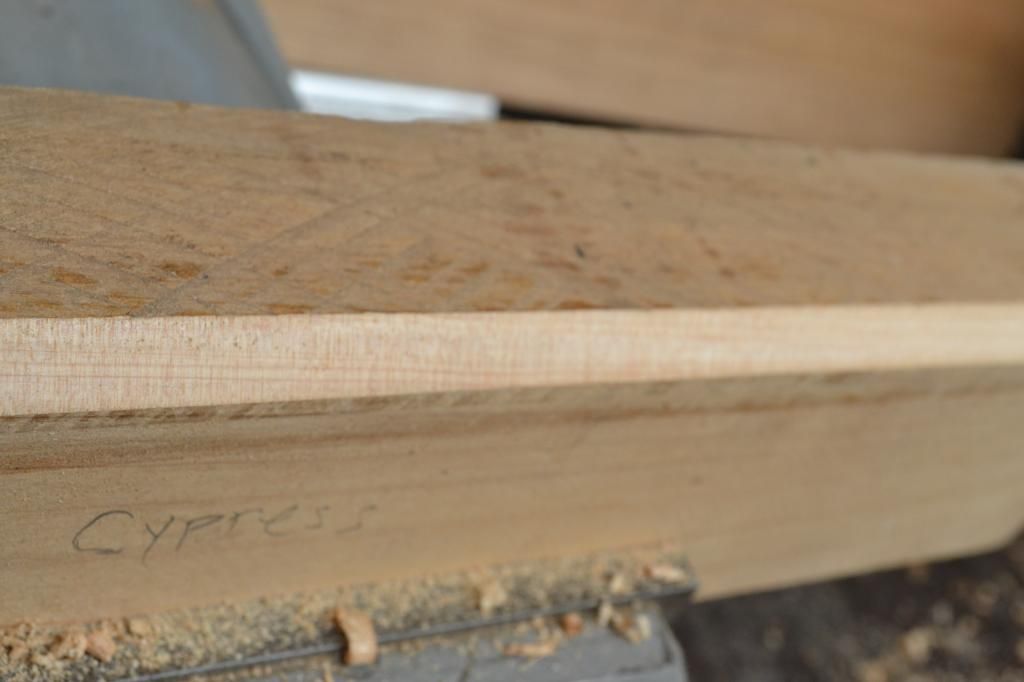
The 2 chamfers looked very good on consistent width and clean cut finish.

regards Stewie;
 
What's in the wooden box your asking.

A set of small knives blades I purchased a few years ago from a knife making supplier. The handles and storage box I made myself. Handles are Tas.Myrtle and the box is made from Tas.Blackwood. The top of the box has been grain scored with a toothing plane. The knife guards are made from hardened cow hide.


This knife is the one I prefer to use for inlay work.


Stewie;
 
I love the final touches and the overall plane sticks quite closely to the traditional with the flare of the modern once again.

It's a bit late in the day but I have confirmed that the "V" is almost totally the width of the sole...

20140914_130733.jpg


Of 50mm....the "V" maximum width is 40mm so a lot wider.

As I say..this will give a larger area for stability.

I know you make a few of these planes once the prototype is completed so this may be a thought for MkII.

Just for completeness...these are the other dimensions in both planes (ha!)....

20140914_130849.jpg


20140914_130907.jpg


That adds context.

Love the plane mate...up to your usual meticulous standards.

The knives are pretty cool too...not sure about the width of the handles but beautifully made.

Jim
 
Mine is 44 mm wide at the deepest point. it works on spruce too, but when I have a knot in the edge I do get teraout on one side or the other.

When you make a plane like this, don't make it with the blade hold on with two screws like mine! When I set it to a thick shaving, the blade is being pulled down, resulting in a mess. I can only take fairly light shavings. A wedge seems like a lot better arangement to me.

Mine also chatters on a thick shaving.
 
Corneel":2knk0w6q said:
Mine is 44 mm wide at the deepest point. it works on spruce too, but when I have a knot in the edge I do get teraout on one side or the other.

When you make a plane like this, don't make it with the blade hold on with two screws like mine! When I set it to a thick shaving, the blade is being pulled down, resulting in a mess. I can only take fairly light shavings. A wedge seems like a lot better arangement to me.

Mine also chatters on a thick shaving.

When I originally bought the plane, I couldn't get my head around the wedge/iron/stop combination in setting it and now it's second nature but I have to say...there is a lot more to the geometry of these things than meets the eye.

I don't envy you taking this on Stewie...but this is a very common addition to the finishing of a lot of furniture and tools and so I think the need to the "perfect" tool to do the job is ever present.

This should sell very well...and it's great the way you have stepped through the traditional design and questioned each step.

It makes us all look at the tools we take for granted more closely and wonder at the skills of those old craftsmen.

=D> =D>

Jimi
 
Thanks Jimi. I found the best way for me to control the chamfer plane was to keep the bottom bevel of the V pressed lightly against the vertical face of the board with the fingers holding the extended across top side of the plane to allow the fingertips to rest across the top edge of the board. As you slide the plane along the fingertips resting across the top edge of the board as well as the bottom bevel of the plane pressed lightly against the vertical face of the board act to keep the plane tracking nicely across the chamfer being formed.

If a further light single shave is required along the chamfer the easiest way was to give the top of the iron a light tap and the result should give you a very fine curly wisp of shave.

The best of the early craftsmen were certainly very gifted individuals.

Stewie;
 
Corneel":2t8tgw90 said:
Mine is 44 mm wide at the deepest point. it works on spruce too, but when I have a knot in the edge I do get teraout on one side or the other.

When you make a plane like this, don't make it with the blade hold on with two screws like mine! When I set it to a thick shaving, the blade is being pulled down, resulting in a mess. I can only take fairly light shavings. A wedge seems like a lot better arangement to me.

Mine also chatters on a thick shaving.

That's a shame Corneel. The idea of being able to independently lock the blade in position as yours does has some real merit. But it would certainly be a much better design if a wedge was then followed up to insure the full length of the blade was pressed hard up against the bed. Might be a nice little project for you.

Stewie;
 
Finally got around to sizing the wooden parts required to make another 4 box chamfer planes. Once these are completed I wont be making any more.

The body and stops are Merbau while the wooden wedges will be in Jarrah.

Stewie;


Seriously though for a moment (as if!)....I would definitely make the next one with a wider "V" almost to the sides to see if this makes for even better stability....I think it will.

Jimi
 
Hi Jimi. That's already part of the plan with these chamfer planes. I am aiming for about 1/8" of flat each side of the V. The body of the plane is 46mm wide.

Most of the labour time involved is focused on mortising out the body to receive the boxed stop. The tolerances are pretty tight in order to achieve a nice slide fit. It does require the use of chalk to highlight the tight areas. Its a good idea to turn on the radio on and listen to some music to help pass the time involved.

Stewie;
 
swagman":comk3p8e said:
Hi Jimi. That's already part of the plan with these chamfer planes. I am aiming for about 1/8" of flat each side of the V. The body of the plane is 46mm wide.

Most of the labour time involved is focused on mortising out the body to receive the boxed stop. The tolerances are pretty tight in order to achieve a nice slide fit. It does require the use of chalk to highlight the tight areas. Its a good idea to turn on the radio on and listen to some music to help pass the time involved.

Stewie;

Thought you might...nice one!

I got SPOTIFY...best thing I ever did...now I can find obscure albums I'd quite forgotten about as a teenager!

Cheers

Jimi
 
jimi43":2wepqouk said:
swagman":2wepqouk said:
Hi Jimi. That's already part of the plan with these chamfer planes. I am aiming for about 1/8" of flat each side of the V. The body of the plane is 46mm wide.

Most of the labour time involved is focused on mortising out the body to receive the boxed stop. The tolerances are pretty tight in order to achieve a nice slide fit. It does require the use of chalk to highlight the tight areas. Its a good idea to turn on the radio on and listen to some music to help pass the time involved.

Stewie;

Thought you might...nice one!

I got SPOTIFY...best thing I ever did...now I can find obscure albums I'd quite forgotten about as a teenager!

Cheers

Jimi

You might enjoy this one Jimi

http://thenostalgiamachine.com/index.html
 
Completing the mortise clean out on the 4th boxed chamfer body.


The previous 3 plane bodies after the mortise has been totally cleaned out and sealed with a coat of shellac.


Stewie;
 
To accurately describe how much fun it is to mortise these plane bodies out; "imagine watching a 3 legged tortoise compete in a 20k marathon, from the very start to when it crosses the finish line. ](*,)

Stewie;
 
not sure how i missed this thread.
beautiful work, I've had the pleasure to use the toothing plane, many thanks jimi. and if thats anything to go by then i would bet my last £ that this too will be a superb tool.
keep it up.

TT
 
Back
Top