Tool marks

UKworkshop.co.uk

Help Support UKworkshop.co.uk:

This site may earn a commission from merchant affiliate links, including eBay, Amazon, and others.

delaney001

Established Member
Joined
28 Jan 2015
Messages
73
Reaction score
8
Location
Ireland
Any advise on how to get rid of these marks when finishing a bowl.
They only really visibly appear when I get to about 320 grit (I usually go to 600)
Would going back to 120 and starting the whole process again solve it?

https://imgur.com/gallery/28nKZ

1gNK0ol.jpg


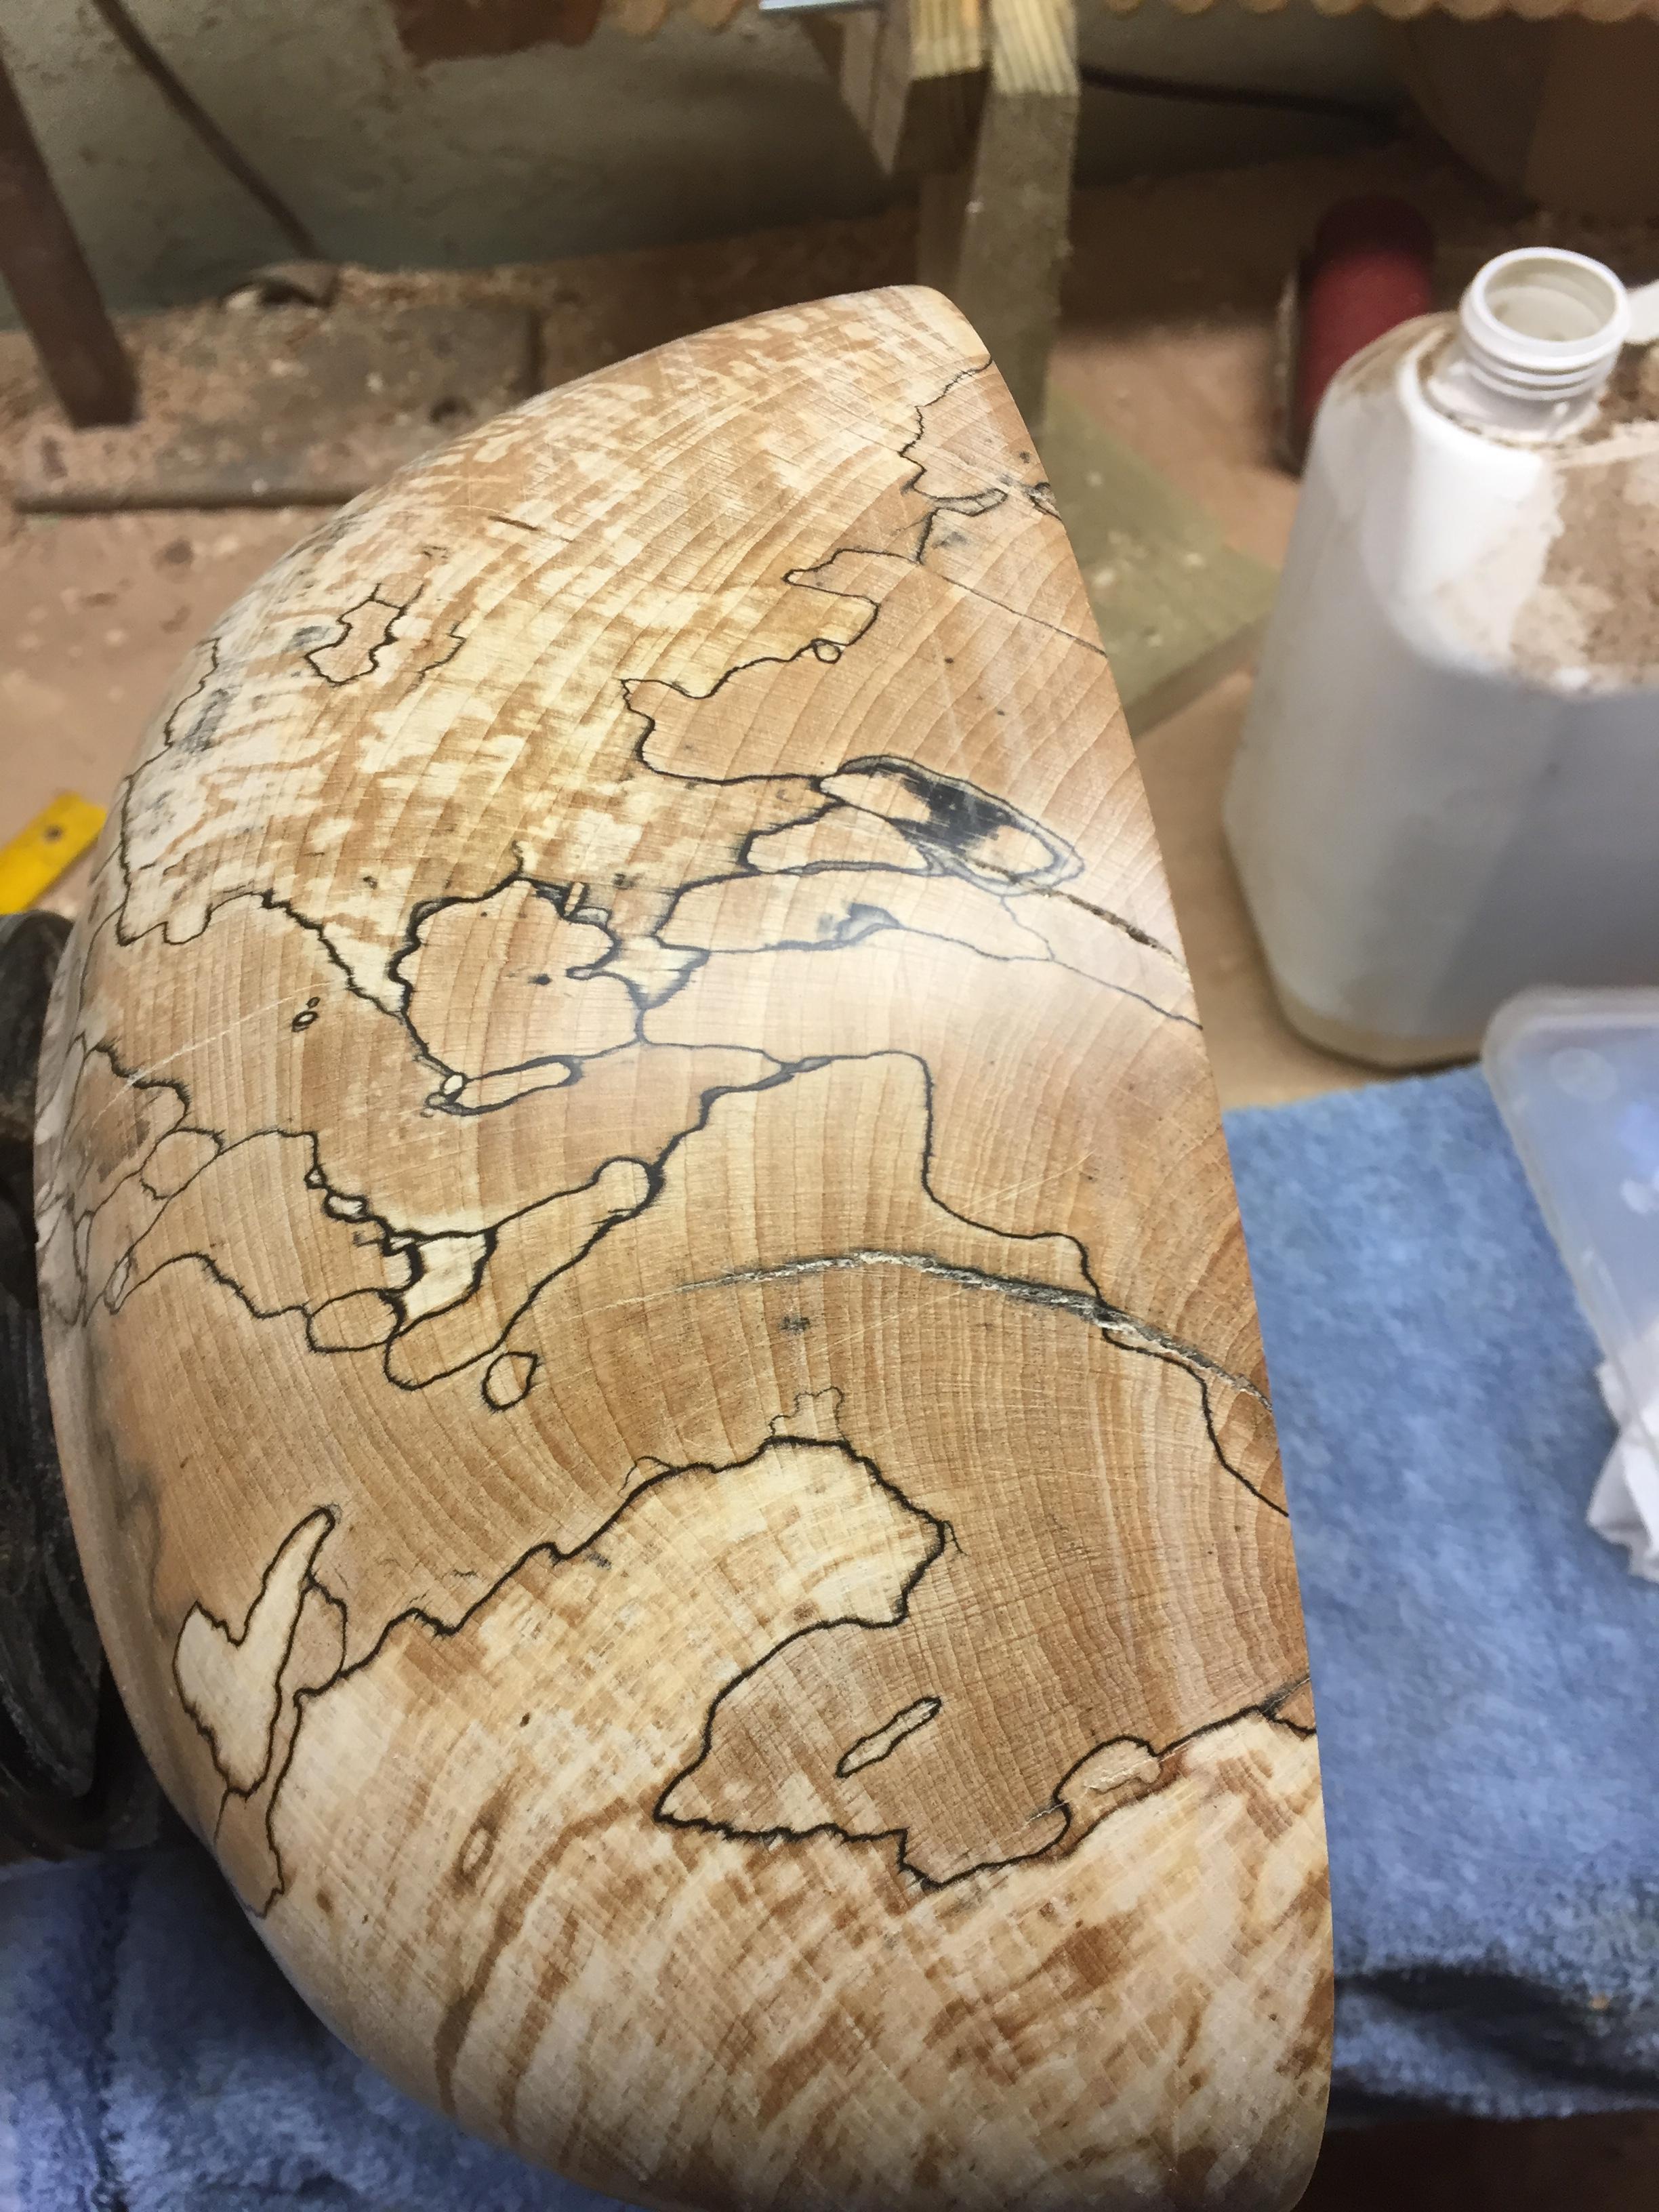
Hopefully the link works above. If you look about 1cm from the rim of the bowl, there is a tool mark running around it.
Any suggestions appreciated.

mod edit to add pic
 
Torn/pulled grain can go very deep, so was probably caused much earlier than you think in material removal.

With spalted woods especially, dependant on intended finish and compatibility try soaking the wood in Diluted Sanding Sealer, Water or Finishing Oil before you take the final cuts.

Wait a few minutes until the fibres have swollen this provides more fibre support and lubrication for the cutting.


Edit:- It could be that as you got near the rim the tool control was not as smooth or stable and those marks a fractionally deeper cuts that you have not sanded down to, if that's the case then if you don't want to practice soaking and a fine finishing cut, coarse sanding may get surrounding area down and blend them in.

As an aside, I would never consider going below 24o or 320 grit at the most on a coarse structured wood such as Ash, sanding at 240 with the grain with piece stationary if rogue grain is encountered should leave no discernible scratches to the naked eye.
 
Nice advice chaps but think you might need to go back to school for the timber ID :lol:
 
Beau":2zdd4lx1 said:
Nice advice chaps but think you might need to go back to school for the timber ID :lol:
Agreed, looks more like Beech Spalting but Grain structure is maybe a little coarse?
 
Tool marks can be reduced by using sharp tools, better presentation of the cutting edge at a skewed angle, removing heel from the gouge and use of a shear scraper.

As Chas has stated strengthening the fibres between cuts can help with spalted timber ( like spalted beech :) )
 
As Mark or Chas's comments. These can sometimes be produced if you rub the bevel to hard on the surface hence Marks comment about removing some of the heel of the tool
 
phil.p":1qyzhe8w said:
I think the need is to avoid them in first place. I've found ash to quite bad for these marks, and that you need to to take the last few cuts very lightly with a very sharp tool.

Ya I know what I you mean. I do try take skimming cuts at along times but I find it tricky to take a very light consistent cut without it going a little deeper or coming off the cut all together
 
CHJ":1cc01drn said:
Torn/pulled grain can go very deep, so was probably caused much earlier than you think in material removal.

With spalted woods especially, dependant on intended finish and compatibility try soaking the wood in Diluted Sanding Sealer, Water or Finishing Oil before you take the final cuts.

Wait a few minutes until the fibres have swollen this provides more fibre support and lubrication for the cutting.


Edit:- It could be that as you got near the rim the tool control was not as smooth or stable and those marks a fractionally deeper cuts that you have not sanded down to, if that's the case then if you don't want to practice soaking and a fine finishing cut, coarse sanding may get surrounding area down and blend them in.

As an aside, I would never consider going below 24o or 320 grit at the most on a coarse structured wood such as Ash, sanding at 240 with the grain with piece stationary if rogue grain is encountered should leave no discernible scratches to the naked eye.

Thanks for such a detail response Chas. I had never heard of that soaking technique before. I will try it on the next one.
Spalting can give such lovely finishes but it breaks my heart at times trying to get the last clean cut. Even more so actually on the inside. I find as he wall thickness reduces and slight vibration comes into it can be very tricky
 
delaney001":2a12j7l7 said:
Spalting can give such lovely finishes but it breaks my heart at times trying to get the last clean cut. Even more so actually on the inside.
I find as he wall thickness reduces and slight vibration comes into it can be very tricky

A couple of things that may help considerably on that front.

First Bowl gouges:- do you have at least two gouges with differing nose angles so that you can keep a good bevel contact at the bottom of the bowl by going straighter in.
and take the heal off the bevel to narrow the bevel area and avoid the heal bruising behind the tool as Mark mentioned.
tools-NoseAngle.jpg


With larger Bowls especially be aware that as soon as you start removing material from the core and get near the final wall thickness the turning is more than likely to go out of round.
To counteract this, finish to thickness from the open rim down the wall leaving support material internally as long as possible, working down the sides as you go while there is still maximum support.

Basically never go back to the outer edge and try to take a finishing cut, chances are you will get chatter or vibration from tool bounce.

I don't say you can't take a final sweeping cut over the whole internal surface, but until enough hours are under the belt to improve the tool control and assess the project it's best avoided.
 

Attachments

  • tools-NoseAngle.jpg
    tools-NoseAngle.jpg
    6.8 KB · Views: 1,020
One of the problems you can get when a bowl starts going out of round is that the rim may end up with different wall thickness due to wood movement.

One way to disguise this, and at the same time reduce the risk if gouge skidding across the rim face due to lack of bevel support when cutting in near the rim is to part a shallow grove in the blank face before you start removing material, this provides support for the bowl gouge bevel when starting the final cut.

Any slight difference in internal wall thickness can then be blended in whilst sanding without encroaching on the rim which will look an even thickness.
part.jpg
 

Attachments

  • part.jpg
    part.jpg
    9.4 KB · Views: 1,122
I have two bowl gouges. CAnt think of the angles off the top of my head. But they are GL3 and GL6 on the Tormek sharpening charts.
Thanks for all the solid advice there. I never think to leave material in the centre. I'll try that on the next one!

Cheers
 
Back
Top