Table saw (Wadkin AGS10) rise and fall problem - jagged

UKworkshop.co.uk

Help Support UKworkshop.co.uk:

This site may earn a commission from merchant affiliate links, including eBay, Amazon, and others.

Peter G Denmark

Established Member
Joined
17 Nov 2010
Messages
89
Reaction score
0
Location
Sweden
Ok - i thought i'd made a steal when i bought this saw for £170, but damn - this machine has got my number.

I thought i'd worked out all the problems but the rise and fall mechanism was very jagged. After 7 hours of fiddling i found out that there was a 0,2mm gap at the top between the slide bracket and the trunion assembly. When i tightned the set screw enough to take up this gap on what Wadkin refers to in the manual as the "motor bracket trapping piece" it actually held the rise and fall so tight it couldn't rise or fall anymore.

So now i've disassembed the whole motor mount again, and taken out the pivot pin for the slide bracket. I now found that the pivot pin has actually worn the brass bushing in the slide bracket, so it's loose by about 0,07mm (the 0,05mm feeler gauge could slide in and it still wasn't tight, but the 0,10mm couldn't slide in at all) which translates to a lot of deflection on the tip of a saw tooth.

I guess the pivot pin is what should hold the trunion and the side bracket parallel to each other, and the "motor bracket trapping piece" is only to make it snug - not to hold the whole weight of the motor, that puts on a massive outward pull.

Have any of you had the same problem and maybe found a solution? Is this the problem at all?

I've ordered some brass shim stock on eBay, but i'm a woodworker, not a machinist, so not sure if this will work?

This whole deal isn't made easier by the brilliant combination of metric and imperial measurements (the pivot pint and bushing is 3/4 inch). Not like you run to the nearest marked and pick up a selection of 3/4 inside diamenter bushing :).

The £1000 Xcalibur saw looks better and better for each time this old timer saww spits in my face.
 
Peter:

Can you post any pictures?

It's not unheard of to have brass parts used with steel or cast iron to form a wear surface. It sounds like (in the absence of pictures, and me not being familiar with the saw) that you may have to replace the brass bushing. These come in standard sizes, but you may have to ream it to fit properly. Have any machinist friends? This is a home shop machinist scale operation.

Don't give up on this--you'll appreciate it all the more when you're done. I assume you've done a complete cleanup of the whole mechanism. Tilt and raise mechanism can easily attract enough dust and chips to jam up. Lubricating with wax and/or graphite (or other non-stick lubricant) will keep the jamming less frequent.

Kirk
 
Peter G Denmark":3iqh9l80 said:
.....I've ordered some brass shim stock on eBay, but i'm a woodworker, not a machinist, so not sure if this will work?
.....
Peter I would suggest that trying to shim the worn bushing is unlikely to be practical, might work on one of your guitars but don't think it's on for this project.

If you can provide a sketch of the bushing with dimensions I'm sure someone around here can make you a new one.
 
I have worked on a few wadkin's and only once on a AGS. I did find it a fiddly arrangement unlike most saws. The pivot that you are having a problem with is simple. I take it there is ware on the bronzes thrust bearing(fancy word for a bronzes washer of an even thickness). When I had that problem I just turned it around. There are preload washers on the other side that keep it snug and a nut that you adjust the load on the pin IIRC .You want it as tight as it can be and still be free and this is done before the gib ways("motor bracket trapping piece") are adjusted so you need to open them up if they are as you say tight. The preload washers(fancy word for a wavy spring washer) keep a constant pressure on the trunnon and rise and fall casting but it gives whilst you rise and fall so there is a bit of play there . If its real bad i am sure any bearing house would have one just give the the measurements in the manual. This does not play a major roll in the fitness of the saw so i would just turn it around and if you do add shims add to the out side an put bearing compound between the brass shim and thrust washer. Once you have that out of your way its time the adjust the gib ways("motor bracket trapping piece"). I like to raise the blade and start at the top set screw than tighten the set screw finger tight. drop to the bottom and do the same. Put it through its motion and fine adjust until no play but is free,than just bring in the middle gib and set the the jam nuts tight. Every thing must be clean and lubed with a dry lube before hand. there is really not much to go wrong with this saws so good luck. hope this helps


jack
wadkinBAGSriseandfall.jpg


A a side I have only seen this rise and fall on one other manufacture. Its a Canadian maker Poitras. I have a 14" saw of there's that is very much the same but it uses chain instead of a worm grear.
 
Hello guys (and thank you to tool 613 for the in depth response)

Sorry about my late reply, and the lack of photos. I forgot yesterday was my wedding day, so gave my wife the attention.
The bushing doesn't figure as a spare part in any of the online pdf manuals, but as far as i can measure with my calipers the diamenter of the bushing is inner: 3/4 inch and outer 7/8 - which makes sense in the fact that it's nice even numbers. This is actually available on eBay in the US.

Does any of you know what the usual way of fitting this sort of bushing is? I've tried to tap the existing bushing but it doesn't seem to move- is it a friction fit or do you use some kind of resin? I really don't want to destroy anything by using to much force.
 
Peter G Denmark":20zwe7rq said:
Hello guys (and thank you to tool 613 for the in depth response)

Sorry about my late reply, and the lack of photos. I forgot yesterday was my wedding day, so gave my wife the attention.
OK, we'll cut you some slack--just this once.:)

Peter G Denmark":20zwe7rq said:
The bushing doesn't figure as a spare part in any of the online pdf manuals, but as far as i can measure with my calipers the diamenter of the bushing is inner: 3/4 inch and outer 7/8 - which makes sense in the fact that it's nice even numbers. This is actually available on eBay in the US.

Does any of you know what the usual way of fitting this sort of bushing is? I've tried to tap the existing bushing but it doesn't seem to move- is it a friction fit or do you use some kind of resin? I really don't want to destroy anything by using to much force.

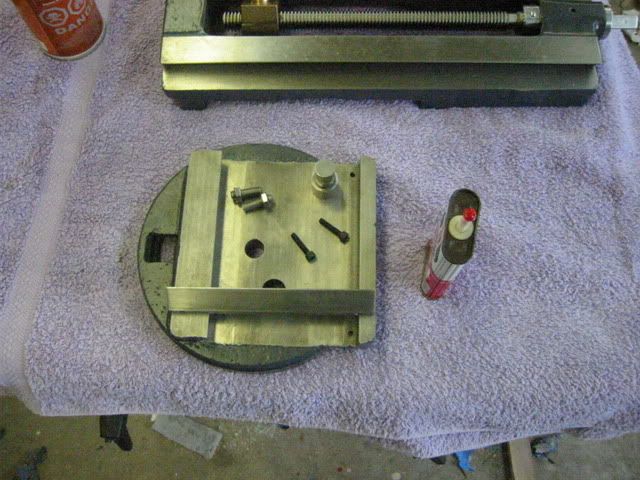
I was hoping for pictures, so didn't look at Jack's diagram as closely as I should have (and can't see it right now). How long (front to back) is the bushing? I'm assuming it's more of a tube than the washer that Jack was talking about. If so, and there's no set screw holding it in place, it will be a press fit. You might be able to support the casting and beat the bushing out with a hammer and hardwood dowel, but you're going to have to press the new one in place anyway. You're going to need access to an arbor press or shop press. Unless you can use a friend's press, just think of this as an opportunity to buy a new tool--it will be less painful that way.
On cost, please note that you bought a machine that cost quite a bit when new. Yoiu're buying quality, so don't be discouraged that you need to invest a little. I bought my tablesaw for $240, and spent another $700 getting it fixed up and working. That was an extreme case, but in the end you'll still be getting a bargain.

Besides, if you spend the money now, your wife won't realize it. Six months from now will be another story.:)

Kirk
 
Normal practice for replacing the bush in place would be to make up a Draw Bolt with appropriate collars and bushes to draw the old bush out and press the new one in.
drawbolt.JPG
 

Attachments

  • drawbolt.JPG
    drawbolt.JPG
    3.7 KB
peter

what model AGS do you have? the OLD one with a cast tub on tin base that the rise and fall sit in or the full tin base later model.

jack
 
CHJ":cj2r7frh said:
Normal practice for replacing the bush in place would be to make up a Draw Bolt with appropriate collars and bushes to draw the old bush out and press the new one in.


Chas
that is the way to do it and would make the press you need to put the new one in. I have made them in hard wood too. Please don't pound on the bush they are very soft and will deform.

jack
 
The biggest one I was involved with making up was to fit a replacement Wing Bearing Sleeve we had made in an F111 (about 10" diameter and 1/4" walls.) after the US manufacturer had destroyed all the tooling and nobody else wanted the job.

Lots of dry ice and crossed fingers.
 
CHJ":1r0n0igu said:
The biggest one I was involved with making up was to fit a replacement Wing Bearing Sleeve we had made in an F111 (about 10" diameter and 1/4" walls.) after the US manufacturer had destroyed all the tooling and nobody else wanted the job.

Lots of dry ice and crossed fingers.


F111 WOW

that your day job Chas?

jack
 
For the last nine years of my working life I was seconded to the USAF running a repair facility workshops supposedly for the european theater, but in actual fact we tendered for work from all over the world. Because of the skill level of the the workforce and the facilities for jet engine and aircraft component and structural repairs we were often 'volunteered' to fix a lot of 'one offs' that broke in theater that nobody else would tackle.
 
So - instead of trying to explain and take pictures, I decided to make a video instead - damn it's hard to hear your own voice trying to speak "English". Anyway - here the video:

http://www.youtube.com/watch?v=REjJPYUFYec

So now I need a hard wood dowel that's 7/8 inch (haven't figured that out yet - no lathe either) to press out the old bushing, order a new one from eBay.com, and press that in with the draw bolt.

The reason I’m getting impatient with the saw is because 4 years ago i decided to make some new drawers for the kitchen in our new (but old) house.
But I didn't have a workshop, and my tools were in boxes and stacks. So i decided to build a small shed as a workshop.
Then i thought to myself it would be nice to have heat and insulation, so decided to put the shed on posts and insulate it.
But posts seemed like a half ass job, so decided to make an insulated foundation instead. And now that I was making a foundation, I might as well make the roof of the shed a bit bigger, so the cars could also get out of the weather.
Then I started, but encountered huge rocks (op to 8000 kg), so I bought an old tractor backhoe, that was broken, so had to buy a welder, to fix up the backhoe. I got that working, but there was so many rocks, that I had no where to put them, so I had to drive to a dumpsite 2 miles away - one rock at a time, but first I had to break them into pieces the back hoe could lift, so bought a pneumatic hammer, and spent two months breaking them up.
Then I could finally start poring cement and buy some lumber, when I realized the biggest build I had ever taken on before was a shelf, in the apartment my wife and I lived in, before we moved into the house – and I have a broken back that hasn’t healed properly :).That’s the magnitude of my stupidity - i mean what was i thinking?

Anyway – long story short – it’s now 4 years, a 100m2 deck with roof (to have a place for the tool while I built the actual workshop), new sewage system, a complete 90m2 carport and workshop, (and a LOT more) later, all because I wanted some new drawers – which I still haven’t got.

So - you know – I’m ready to do some actual fine woodworking, not fighting with another hunk of iron :).

Ps. a picture of the nearly completed workshop
 

Attachments

  • House.JPG
    House.JPG
    93.5 KB
Peter

very nice work on the shop.


IMHO that bush is not worn out and changing it is not going to help you out. If you are going for perfection you may make it worse if you do not ream it out 90 to the glide. The broken parts are for the riving knife I think so to get that working you will need them fixed. I would JB weld(epoxy) and after they are set drill and tap a thread pin to hole them. You do not want to weld that part as it will deform.

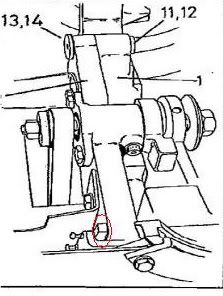
Your problem is simple . You are missing a key part to the gib Way(the parts that hold the slide in check) and sets agents the slide.

I have it marked in a red oval. click on image to enlarge.
wadkinAGS.jpg


all Gib ways have a plate that the gib screw set in and that is the ware surface and the part you are missing. BTW very easy to make out of brass.

here is one on the Wadkin RS cross slide. Its dovetailed but you will see what i mean.

toolcaragers003.jpg

toolcaragers007.jpg


jack
 
Jack.

I have had contact with 3 other Wadkin owners from Denmark, because i was worried about those "broken" pieces, but they had the same plate to hold the glide bracket against the gib way, and their saws worked fine.

I know from the manuals that the older saws had a cast iron L-shaped "motor bracket trapping piece" with 3 set screws that pressed on some kind of pressure plate.

The thing is - the rise and fall action i very smooth (on my saw) from maximum height to about 75% dowm, but the i hangs up - and it's the worm screw that forces the saw down. This is consistent with the problem being play in the pivot pin.
As written before - i can take up the slack between the glide bracket and the "gib way" but then it is so tight, that it holds the rise and fall mechanism too tight (takes A LOT of force to move it) - why should this change with a different "motor bracket trapping piece"?

If the motor mount was nicely centered on the saw, i would agree with your assesment, but since the motor pullls the whole slide bracket outwards, with about 85% of the slide bracket being unsupported, and 15% being pinned between the gib way and the "motor bracket trapping piece", the force to keep then snug, and in line, would be a lot.

I'm not looking for perfection - i'm looking for at usable saw.

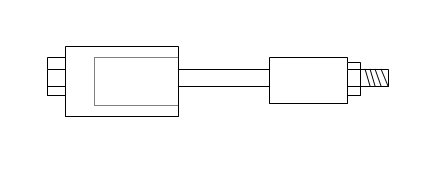
Here's an exaggerated drawing of what i mean.
 

Attachments

  • Example.JPG
    Example.JPG
    29.9 KB
Peter:

1st, I admire your persistence in doing all the other stuff and then finally getting back to the saw. That takes real determination.


I've been going back and forth on this in my mind. Here's what's been bothering me:

It's very unlikely for the bushing to be worn--it just shouldn't get that much use. However, I suppose it could have been damaged by dropping the saw with the blade retracted, so it would take all that weight. Note that if you change the bushing, you'll likely have to ream it slightly to get the pivot pin to fit. The busted fittings do support the idea of damage. Have you checked the pivot pin to make sure it's straight, and not bent slightly?

If the bushing is vulnerable to wear, that's implying the design on this was relying on it not wearing. Thus the design somewhat poor, because your diagram clearly indicates all the motor weight will be pressed against it when lowered, leading to a possible deformation. That's kind of hard to believe, given how overbuilt Wadkins usually were.

It also could be possible your bracket has been replaced. It looks like it could be longer, and note that it isn't painted to match anything else inside the saw. (This is a pretty small chance, though.)

Have you seen the internals of any of the other AGS saws yourself? Does the bracket match, or does there look like anything else is missing?

Jack, is it possible that the thing you have circled is the stop, as show in Peter's video?

If the pivot pin is straight, and the bracket is correct, I think you'll have to try replacing the bushing as you surmise.

Kirk
 
Peter

I know that the AGS went through at least 3 changes up until your saw from the 70s. It is still my contention that the play be taken up in the gib ways. What holds the other end of the pin in place? and are you sure you have all the parts for the pin assemblies?
if you do not have a manual Dolton has yours on line
that being said if the glide is faulty and damaged(as it is with the broken castings) it may be best to find a spare.

G&M tool has been know to have parts machines and my be a better way to go in your case.
http://www.gandmtools.co.uk/catalogue.php

jack
 
Kirk

Thank you for your insights.
I've checked the pin and as far as i can measure it's straight. The bracket is the original, and there is no parts missing. The color of the sllide bracket matches the inners of the saw, so maybe the bad lighting in the video is to blame, if you find the colors to be of.
I have seen another wadkin live, and i have talked to another danish Wadkin owner to check if there was something off with mine, but everything checks out.
The only thing i find strange is the fact that the bushing is inset by a bit from one side and not flush in both ends, so maybe the bushing has been replaced before because of damage, maybe with a part that didnt quite fit? Anyway - a bushing that is flush in both ends would allready be a big improvement for the stability.

Jack.

I appreciate your input, but i feel like your underestimate me, and my level of commitment in getting this saw fixed.
What i mean is, that i have stated in previous posts that i have all the manuals, but still you think i don't have them? You are sure the "motor mount holding bracket" is not original and the pieces of cast iron that has been taken from the underside of the trunion assembly is a sign it's broken, even though i have stated that i have seen the exact same setup on other saws? To prove my point i have attached a picture of a Wadkin saw that is not mine. Ok - there is a slim chance, that these pieces has been broken on 3 different saws, and then mended the exact same way in different parts of the world, but i'm going to assume that this is an outside chance.
I will weld a new and hefty "motor mount holding bracket" with 3 set screws at some point, and ad a brass retaining strip, which shouldn't be to hard - although time consuming, but i still don't think that this is the problem. I might make the acion smoother, but i wold put serious ware on the retainer and the bracket over time.

I follow this post though because a lot of people use google to find ways of fixing their saws, and if my troubles can help others to fix theirs - that's great.

Anyway - the pivot pin has two notches that receives two set screws. The pin is a snug fit in the trunion assembly, so the screws doesn't "pull the pin inward", but just prevents it from gliding out over time.

I will wait for my shim stock, and make a really tight fit. If this makes the action smooth, i will replace the bushing, since this is a more permanent fix.
 

Attachments

  • Another Wadkin.JPG
    Another Wadkin.JPG
    49.2 KB
Jack.

I appreciate your input, but i feel like your underestimate me, and my level of commitment in getting this saw fixed.

Peter
I think you got it and hope it works out for you.You come across as a capable craftsman. I love wadkin Machinery and think it is some of the best stuff around.

My experiences is with old wadkin. Wadkin's like the PK and the RD, RS, with out bursgreen(tho i have some bursgreen stuff before wadkin took Sagar bursgreen in 1952) and as I have said I only ever worked on one AGS.
so I tend to look at things from a design point of view because things really have not changed much over the years (maybe gotten lighter). I am not very good with the later models of Wadkin bursgreen thought i own a few of them from the 60s(the light gray ones not green ones like yours). So my interest is in what the problem are with the late AGS's and Will just tag along if you don't mind. I sometimes forget what its like to rebuild stuff your self. Best of Luck.

jack
 

Latest posts

Back
Top