


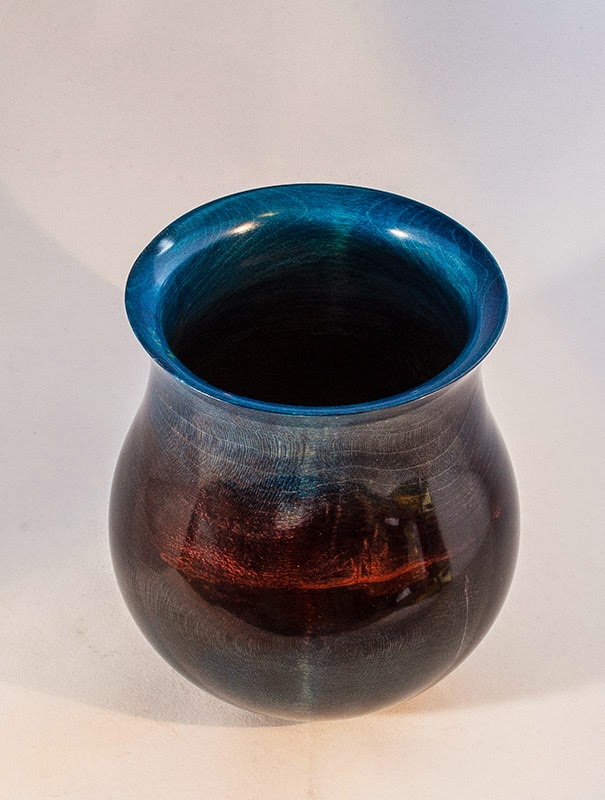
Pressing on with the goal of getting a shellac finish onto coloured pieces this is stage two, multi coloured, the main difficulty with this is that the shellac is a solvent (well the meths the shellac is in is a solvent!) to the colour, so applying the shellac with a rubber as per french polishing carries the risk of moving the colour about and even removing it, so not an easy task.
Why bother when I can use a rattle can lacquer? Well, I find the spray lacquers very good IF you get it right, but getting an even spray, avoiding bloom and the considerable amount of effort it takes to buff it up to a gloss, as opposed to the rather more straightforward process with shellac means that the shellac system offers a faster, more reliable and easier means of achieving the desired result.
On top of that the shellac is a bit easier to repair should you have a small accident.
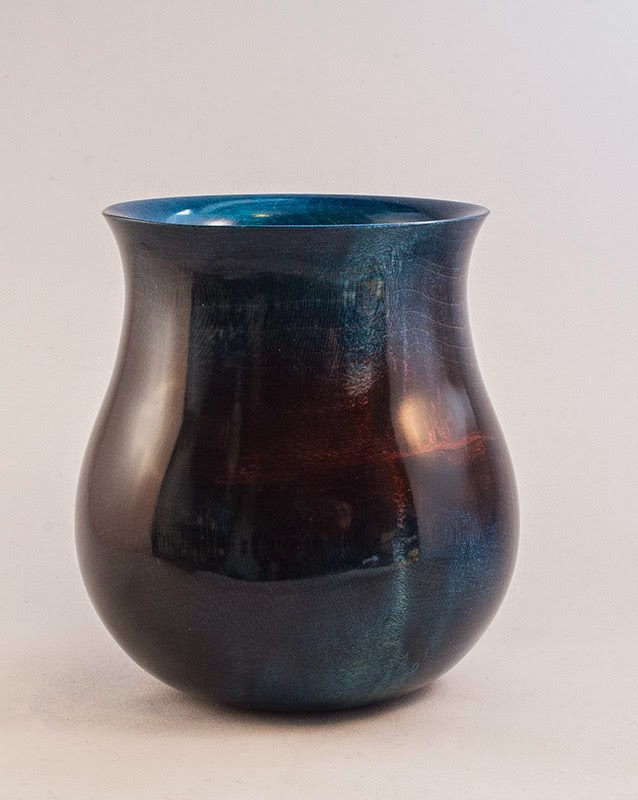
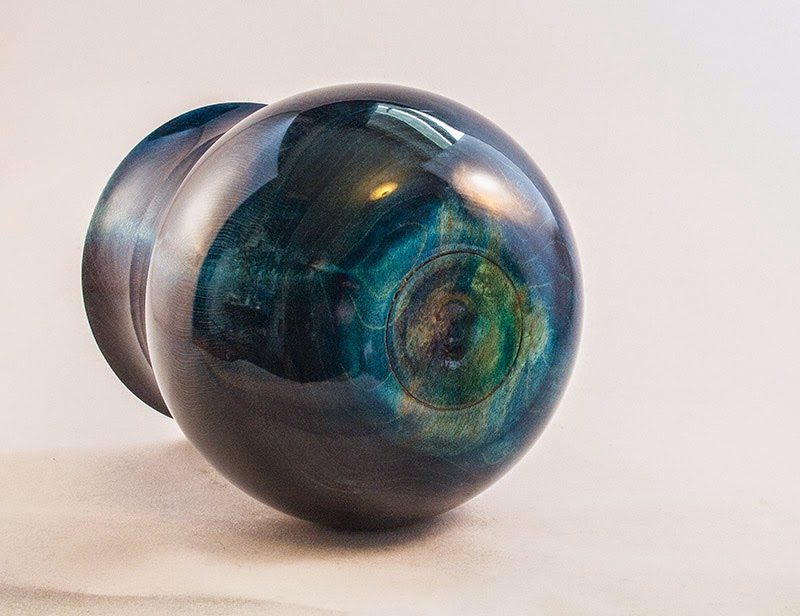
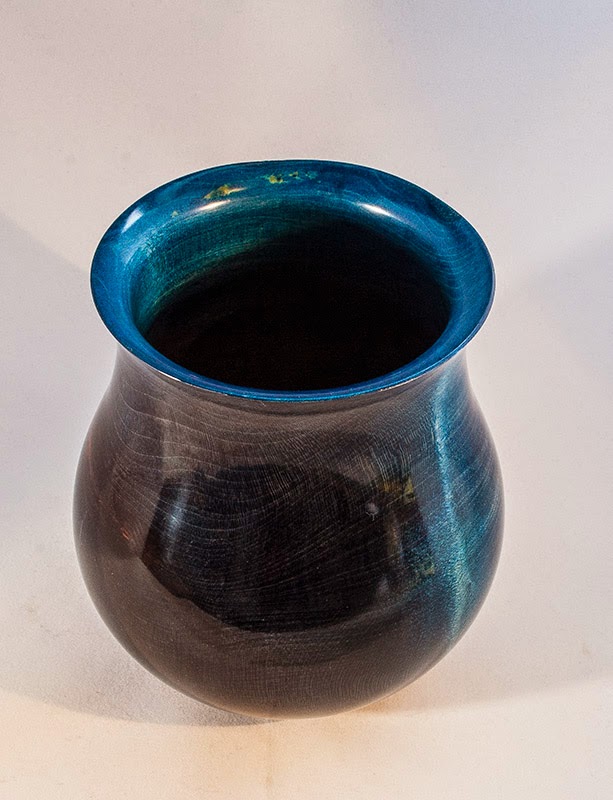
Finish wise, the shellac, if applied with care, needs a minimal amount of buffing to get it to a superfine gloss, this vase is as close to a perfect finish as I have been able to get so far, I am very pleased with the gloss, in the hand it is glass like, all over (the outside, the inside has shellac to about a third in and ebonizing lacquer for the rest).
Height is 115mm width 100mm Made from Sycamore, coloured with Chestnuts spirit stains and buffed with their wheel system for the finish.
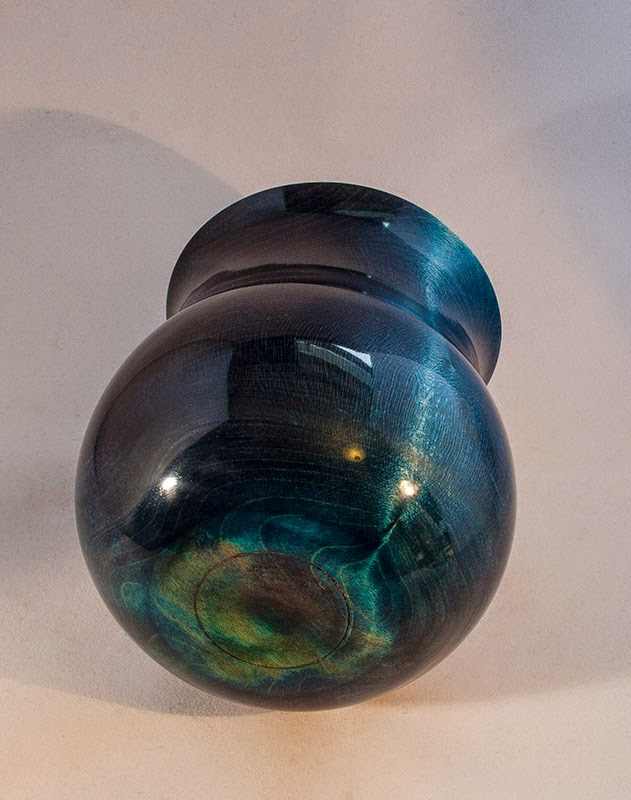
As with previous posts, the glossy areas you can see are representative of the whole thing, the slight satin look is a consequence of the light diffuser I use for photography.
Feel free to C&C.
Why bother when I can use a rattle can lacquer? Well, I find the spray lacquers very good IF you get it right, but getting an even spray, avoiding bloom and the considerable amount of effort it takes to buff it up to a gloss, as opposed to the rather more straightforward process with shellac means that the shellac system offers a faster, more reliable and easier means of achieving the desired result.
On top of that the shellac is a bit easier to repair should you have a small accident.
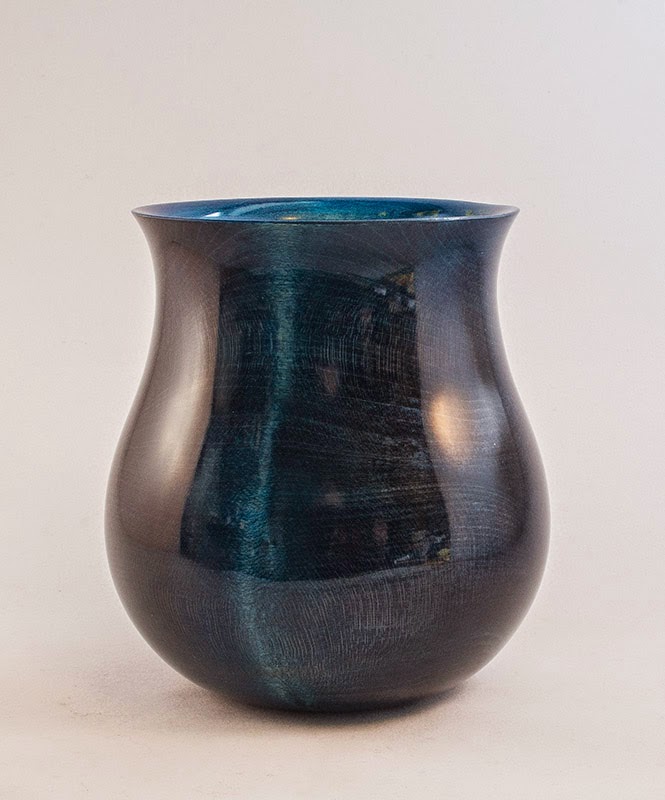
Finish wise, the shellac, if applied with care, needs a minimal amount of buffing to get it to a superfine gloss, this vase is as close to a perfect finish as I have been able to get so far, I am very pleased with the gloss, in the hand it is glass like, all over (the outside, the inside has shellac to about a third in and ebonizing lacquer for the rest).
Height is 115mm width 100mm Made from Sycamore, coloured with Chestnuts spirit stains and buffed with their wheel system for the finish.
As with previous posts, the glossy areas you can see are representative of the whole thing, the slight satin look is a consequence of the light diffuser I use for photography.
Feel free to C&C.
")