


lucky9cat
Established Member
Hi
Wanting to try something completely different I thought I’d build a box for my 2mm scale railway models. I’ve spent many years building up a small collection of models many of which are built from scratch. This box had to do them justice!
I decided on Cherry as I’ve not used it before. I started with a drawing made on SketchUp. Not having built a box before I was a bit unsure of how best to go about it but I settled on the following.
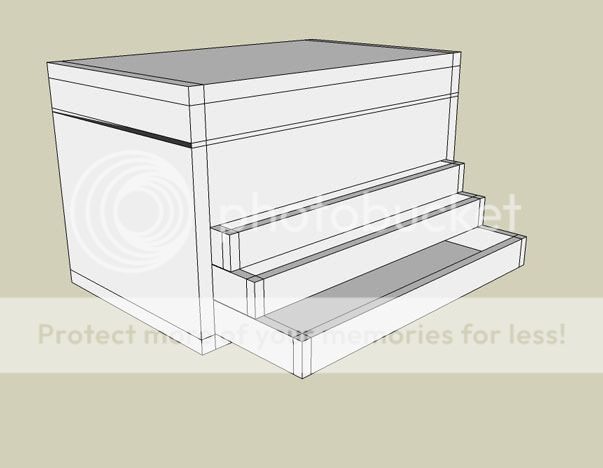
The box is 14” by 9” by 9”. Most of the wood is finished to 3/8”.
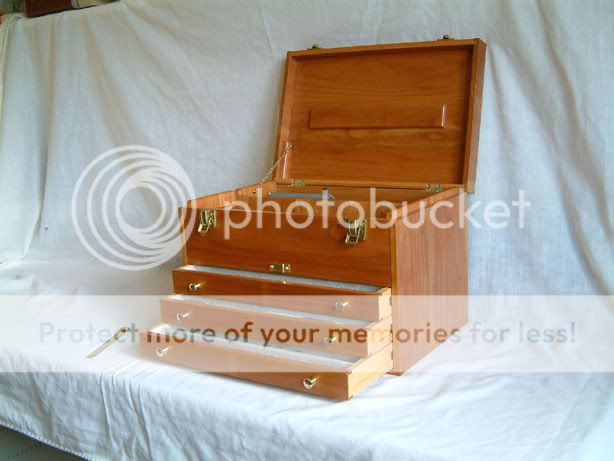
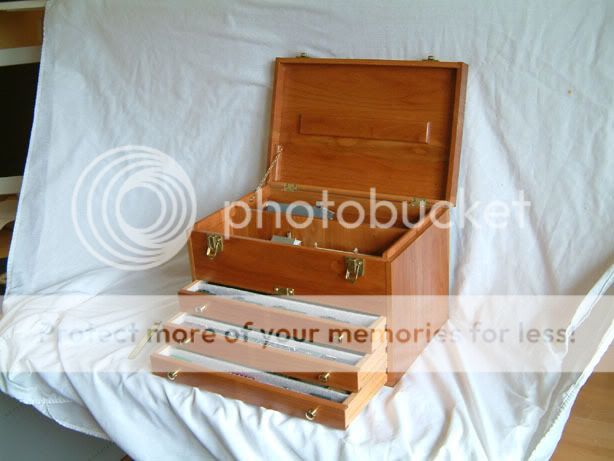
Three drawers for the stock and a box-section for the buildings.
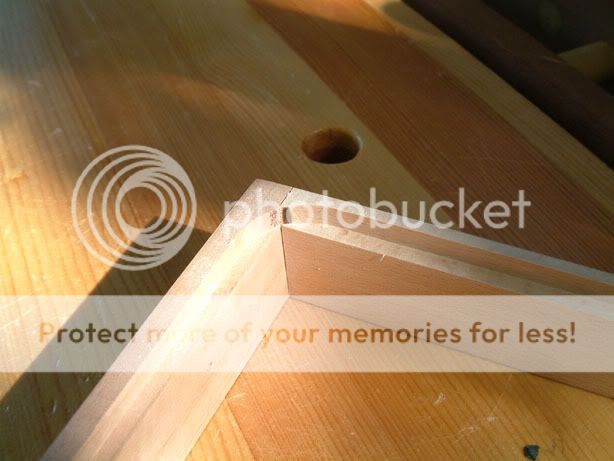
The sides are dovetailed to the top and bottom.
The front, back, and base of the box-section have tongues that slot into grooves and are held with a spot of glue in one place only. This allows for the different rates of wood movement where cross grain meets straight grain.
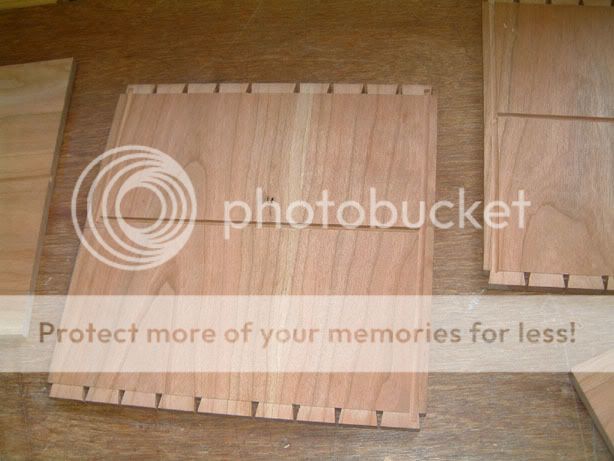
I dovetailed the sides to the top and bottom first. First the tails were cut after routing a 1/16” rebate along the inside edge. This rebate makes it easier to position the boards when marking out the pins.
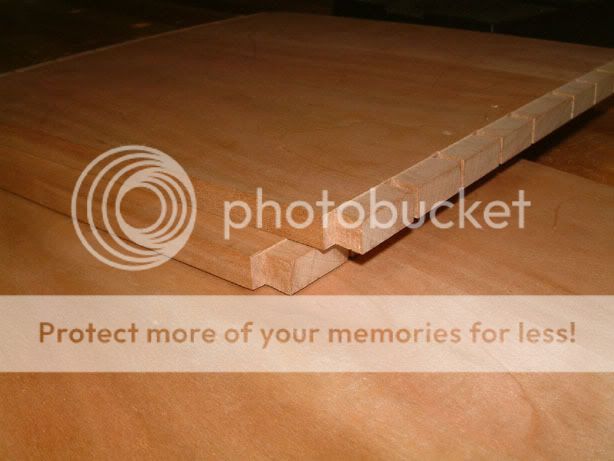
I prefer to cut tails first as they are more awkward than pins and any variation in angle (through poor cutting) is transferred to the pins when marking the pins out. Clamping the pin board in the vice at the height of a plane and then pressing the rebated edge onto the pin board really produces a solid set-up allowing the pins to be marked out easily.
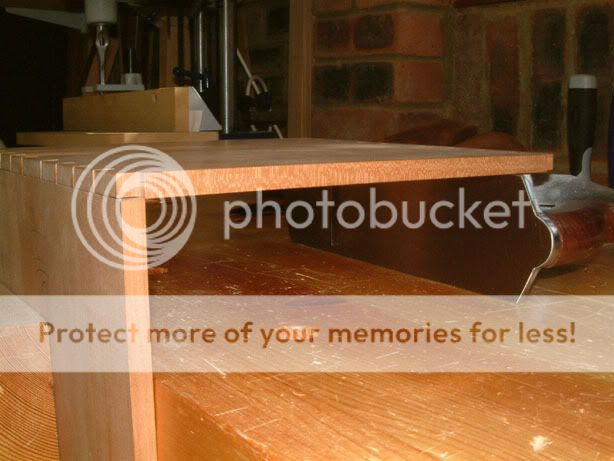
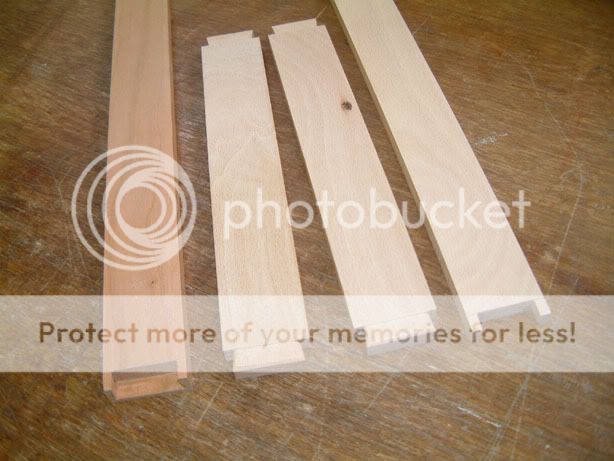
The grooves to accept tongues on the front, back and base of the box-section were then routed using a ¼” straight bit.
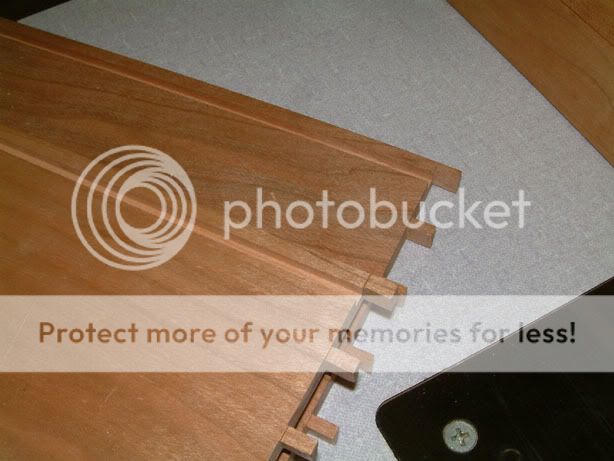
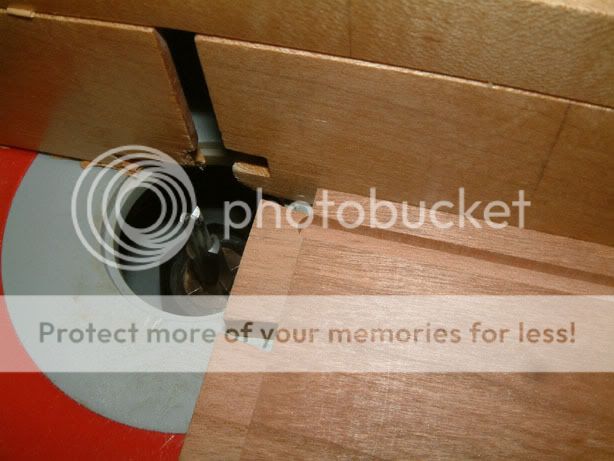
The rounded ends of any rebates were squared with a small chisel.

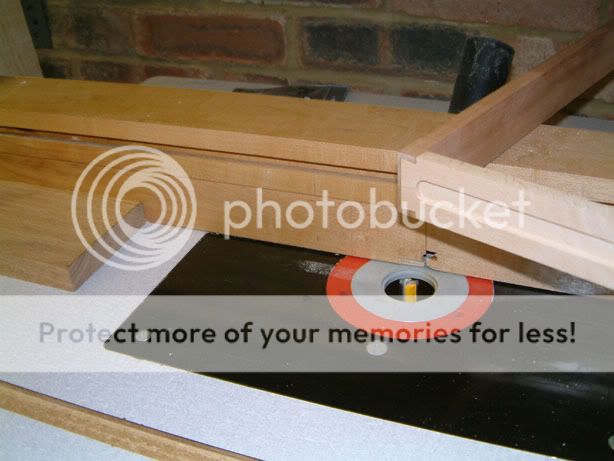
I next routed the tongues on the back, front, and base of the box-section. I tend to do most of my routing on the table as I feel I have more control. On the left in this picture is the back panel prior to the tongue being formed; the groove is to accept the box-section base.
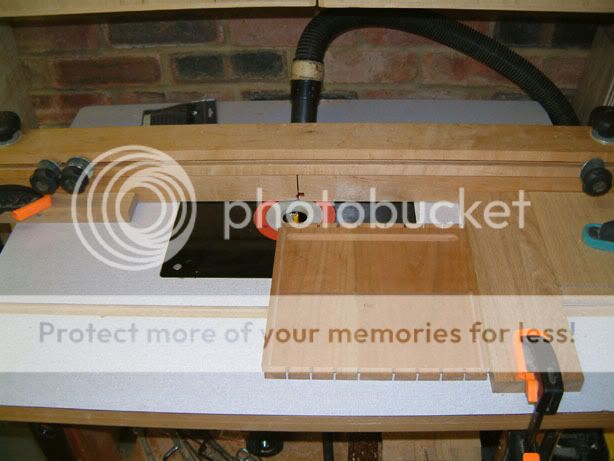
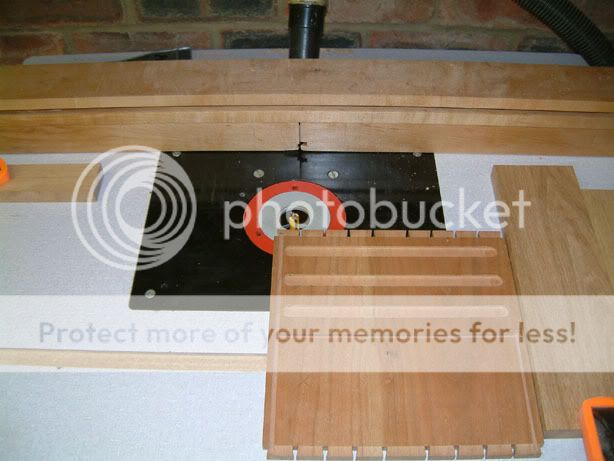
Next, the slots in the sides to take the drawer runners were routed. I set up stops to control where the slots started and finished.
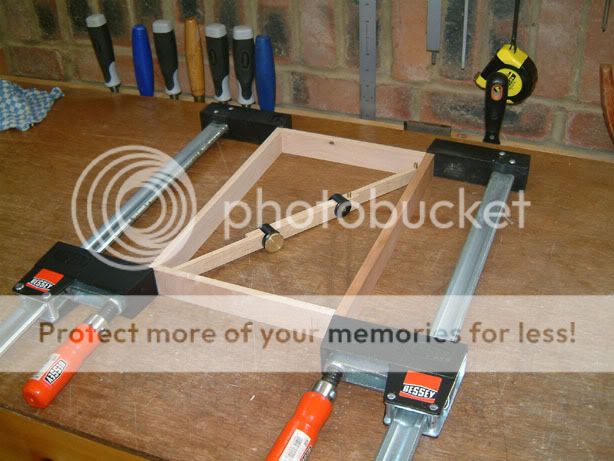
Now for the glue up (or should I say screw up!). The master plan was to glue up the four sets of dovetails with the loose back, front and box-section base panels floating in place. I would then cut through, about an inch from the top, to separate the lid and box parts. The floating panels would then be held in place with a dab of glue. But during the process I could see that the glue was setting too fast so I thought a two stage process would be better – glue the sets of dovetails diagonally opposite each other first and the other two later. Only when I came to glue the other two I realised I had reversed the boards of one (already glued) pair and force fitted them together!! I had no alternative but to cut through the botched set. Basically, this re-sized the whole box and a lot of my work had to be re-cut to the new size and new joints made. Stupid mistake!!
To top it, when I then re-glued, I forgot to put the floating panels in!!
I managed to remember to glue in the beech drawer runners! Only a dab of glue in the middle and the runners cut a bit under-length to allow for movement.
I then cut the lid on the table saw.
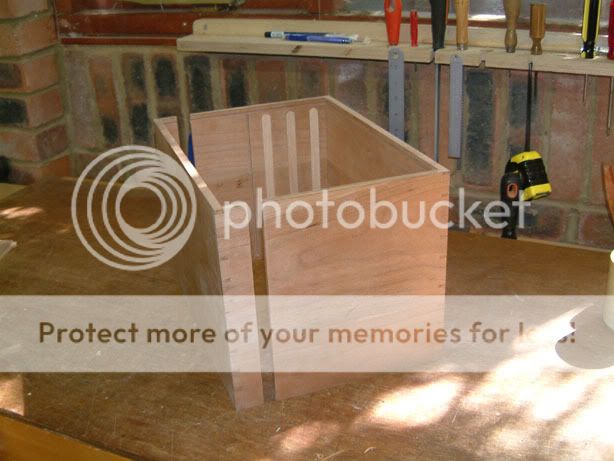
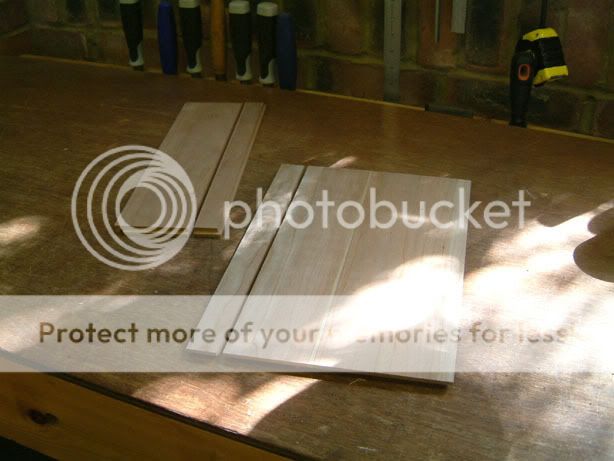
The floating panels for the back and front were then cut in two.
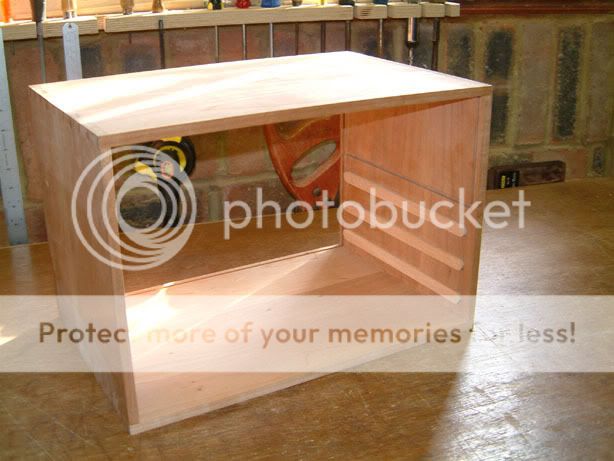
And then secured in place with a dab of glue. I was able to ease in the base of the box-section as the sides had some flex. I had to add a partition to the top box as the sides had bowed.
I also added some “guides” for the lid to prevent it from racking.

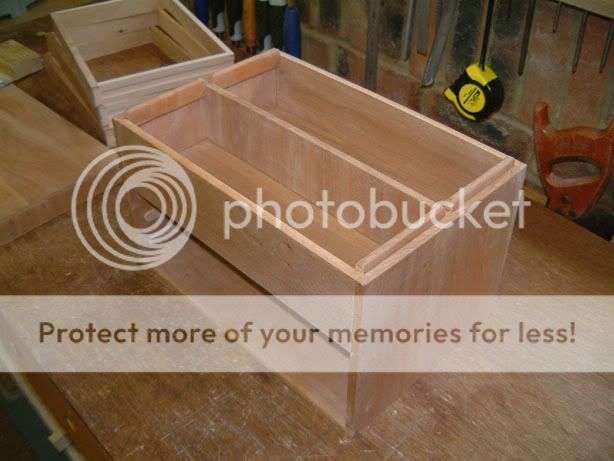
The dovetailed drawers followed. The sides and back are beech.
A ½” slot was then routed in the drawer sides to slide in the runners. This slot is open at the back.
The plywood bottoms are just let into a rebate and glued. They carry very little weight. The corners were squared off with a chisel.
It was finished with a couple of coats of Danish Oil followed by beeswax. The hardware was from a local shop. The brass bits to hold the drawers shut I fashioned myself. The drawers are partitioned with 2mm MDF and lined with a polystyrene packing material. The piece of wood inside the lid was added to give the handle screws some more wood to grip to.
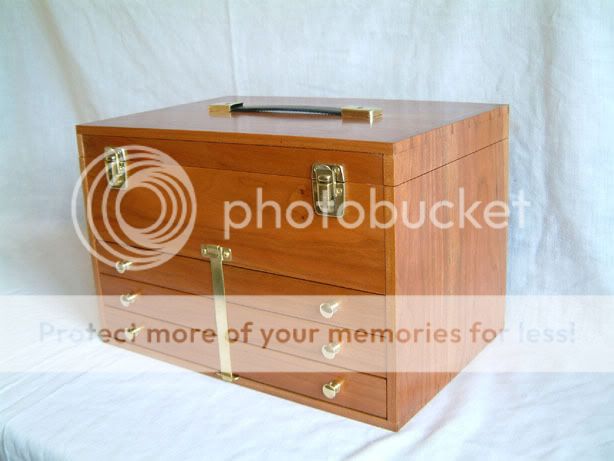
The final result has turned out looking a lot nicer than I feared. Especially after the big mistakes when I felt like ditching the whole project. If anyone out there has experience in making boxes, I’d be interested to know other approaches to the design.
Wanting to try something completely different I thought I’d build a box for my 2mm scale railway models. I’ve spent many years building up a small collection of models many of which are built from scratch. This box had to do them justice!
I decided on Cherry as I’ve not used it before. I started with a drawing made on SketchUp. Not having built a box before I was a bit unsure of how best to go about it but I settled on the following.
The box is 14” by 9” by 9”. Most of the wood is finished to 3/8”.
Three drawers for the stock and a box-section for the buildings.
The sides are dovetailed to the top and bottom.
The front, back, and base of the box-section have tongues that slot into grooves and are held with a spot of glue in one place only. This allows for the different rates of wood movement where cross grain meets straight grain.
I dovetailed the sides to the top and bottom first. First the tails were cut after routing a 1/16” rebate along the inside edge. This rebate makes it easier to position the boards when marking out the pins.
I prefer to cut tails first as they are more awkward than pins and any variation in angle (through poor cutting) is transferred to the pins when marking the pins out. Clamping the pin board in the vice at the height of a plane and then pressing the rebated edge onto the pin board really produces a solid set-up allowing the pins to be marked out easily.
The grooves to accept tongues on the front, back and base of the box-section were then routed using a ¼” straight bit.
The rounded ends of any rebates were squared with a small chisel.
I next routed the tongues on the back, front, and base of the box-section. I tend to do most of my routing on the table as I feel I have more control. On the left in this picture is the back panel prior to the tongue being formed; the groove is to accept the box-section base.
Next, the slots in the sides to take the drawer runners were routed. I set up stops to control where the slots started and finished.
Now for the glue up (or should I say screw up!). The master plan was to glue up the four sets of dovetails with the loose back, front and box-section base panels floating in place. I would then cut through, about an inch from the top, to separate the lid and box parts. The floating panels would then be held in place with a dab of glue. But during the process I could see that the glue was setting too fast so I thought a two stage process would be better – glue the sets of dovetails diagonally opposite each other first and the other two later. Only when I came to glue the other two I realised I had reversed the boards of one (already glued) pair and force fitted them together!! I had no alternative but to cut through the botched set. Basically, this re-sized the whole box and a lot of my work had to be re-cut to the new size and new joints made. Stupid mistake!!
To top it, when I then re-glued, I forgot to put the floating panels in!!
I managed to remember to glue in the beech drawer runners! Only a dab of glue in the middle and the runners cut a bit under-length to allow for movement.
I then cut the lid on the table saw.
The floating panels for the back and front were then cut in two.
And then secured in place with a dab of glue. I was able to ease in the base of the box-section as the sides had some flex. I had to add a partition to the top box as the sides had bowed.
I also added some “guides” for the lid to prevent it from racking.
The dovetailed drawers followed. The sides and back are beech.
A ½” slot was then routed in the drawer sides to slide in the runners. This slot is open at the back.
The plywood bottoms are just let into a rebate and glued. They carry very little weight. The corners were squared off with a chisel.
It was finished with a couple of coats of Danish Oil followed by beeswax. The hardware was from a local shop. The brass bits to hold the drawers shut I fashioned myself. The drawers are partitioned with 2mm MDF and lined with a polystyrene packing material. The piece of wood inside the lid was added to give the handle screws some more wood to grip to.
The final result has turned out looking a lot nicer than I feared. Especially after the big mistakes when I felt like ditching the whole project. If anyone out there has experience in making boxes, I’d be interested to know other approaches to the design.
