speed an ease finishes.

UKworkshop.co.uk

Help Support UKworkshop.co.uk:

This site may earn a commission from merchant affiliate links, including eBay, Amazon, and others.

CYNNYC

Member
Joined
12 Oct 2011
Messages
9
Reaction score
0
Location
Clackmannanshire
Very recently watched a pro wood turner at a demonstration doing some fantastic apples and bits and bobs.
His finish was hard glossy and smooth and dry.
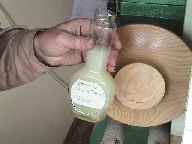
He applied a mix of 40% sand sealer and 60% thinners both cellulose based by chestnut.
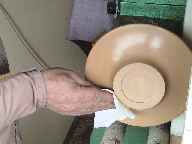
Then removed excess with 0000 wire wool and left for a few mins to dry.
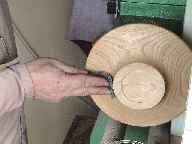
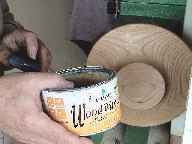
He then applied record speed and ease friction polish thinly with increasing pressure.
After just a few seconds the result was amazing.

I was so impressed I spent £30 on the same finishes by same manufacturers and carried out exactly the same procedures.
Im disgusted with my attempts to reproduce his finish, I cannot get even close, I have persisted and tried many variants and methods
with no degree of success.
I am working with very small pieces ie ringboxes. Problems = lines of polish, bare areas of wood, satin finish instead of gloss.
Any / all usefull comments appreciated.
Thank you all in advance.
CYNNYC
 
I think you have been the subject of the classic demonstrator rhetoric.
I bet he did not tell you how many hours he had spent before he came up with a method and procedure that worked for him.

In my experience Friction polish (shellac) is one of the finishes, whether it be french polishing or friction polishing on a lathe that is an acquired skill that needs considerable practice by most people before mastered on anything with a substantial surface area with any consistency.

Try this:

If it's a small piece brush on neat cellulose sealer.
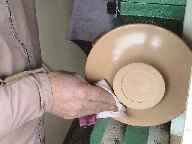
Immediately wipe off surplus with a clean lint free cloth, spin up immediately and gradually increase pressure, moving cloth rapidly about the surface as it hardens, thus avoiding build up streaks. This should give you an in depth gloss finish as is, just needing a wipe of wax to protect.

If you want to add friction polish, treat in a similar fashion.

If a larger item then thin down the sealer as you have been doing between 20-50% and carry out same procedure, this gives you more time on the larger surface to wipe off the surplus before it dries too far and friction buff.
If you are getting steaks you have too much sealer or polish applied.
Blend out streaks or strip completely with thinners/meths and start again

If you take the cellulose sealed and hand burnished finish and then further burnish with buffing mops through the system you will have a very high gloss surface without the need to build up with friction polish before you ever apply any protective wax.
 
I would agree with Chas but just a couple of extra thoughts...

If you have bare patches after sealing then you need to apply more SS. Try brushing the sealer on generously before wiping it off.

I use a large coffee jar with a cut-down 1" paint brush inside and just 1 to 2" of diluted cellulose SS in the bottom of the jar. Unscrew jar lid, stir SS and then brush on SS and then wipe off excess with paper towel. Replace lid.

DAMHIKT but only use bare wooden handled natural bristle paint brushes with cellulose SS. No plastic or paint! Although any paint/varnish on wooden handles can be wiped off after the brush has been in the jar for while ;-)

How close-grained is the timber for your small ring boxes and how good is your sanding prior to finishing? If you are using something coarse grained (ash or oak) or if you stop at too low a grit you may not get the gloss finish you are looking for without a bit more work. IMHO open grained timbers benefit from more layers of SS applied after each grit acting like a grain filler (with acknowledgement to the late great Bert Marsh) or add some melamine lacquer to your SS or brush it on neat. For small stuff I'd try to sand to 600 grit if you can.

I use grey Webrax (Toolstation) rather than wirewool because it doesn't catch fire so easily and you can use it on wood with high tannin content (oak, chestnut etc) without black staining.

HTH
Jon
 
echo the others comments and add...

1. my SS pot has the brush loose inside - cut down to fit :)
2. if the item doesn't already look glossy after sanding and burnishing with a handfull of shavings then it's not going to sparkle after finishing.
3. friction polish remains a risk in my hands; it's easy to end up with a worse finish after than I had before adding anything! This is one of those material that a competent user can make look foolproof...but makes a fool out of an incompetent one. Pressure, speed, cloth, volume, timing - a lot of variables and they do matter.
 
Now this is what the forums all about :) - the instructions that didnt come on the tin :D
thinners ordered, coffee jar emptied, brush waiting , sunglasses on standby 8)
 
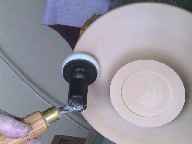
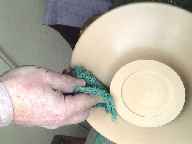
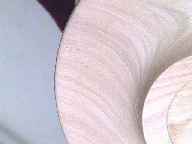
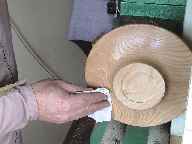
Not strictly relevant to the OP's post about fruit etc. but an indication of the level of gloss from sealer alone can be seen in in the middle images of this excerpt from an old WIP post:
Light sanding follows to remove any tool marks and or rogue grain, finishing with a polish through the grades with Nyweb, and with the lathe stationary the application of Cellulose Sanding Sealer using a circular motion.


In this instance diluted about 15%. this is then immediately buffed at high speed to a gloss with a dry cloth.


Again with the Lathe stationary, Wax is applied with a piece of fine Nyweb using a circular motion. This again is immediately buffed at high speed with a soft cloth.
 
I need to say im not a complete novice with record friction polish, have used it over years. however its been as a standalone finish or over the top of dried in and burnished danish oil.
Both of these methods work for me>BUT
The finish possible with this method does not take handling well the finish loses its lustre its a waxy soft finish.
The improvement i saught was to mimic the demonstrators very hard and durable finish without the loss of lustre.
CYNNYC
 
Chas, i notice in the first pic (eagle eyed, me) that you use the abrasive on a stick method. I use an arbor in a battery drill. does the stick method produce better/ different results or is it just personal preference?
 
Then I would say CYNNYC that your easiest option would be to use higher melting point Carnauba wax, or easier still use Microcrystalline wax, the latter being extremely resistant to handling and water marks and imparts a high gloss finish.
 
nev":zaaenbje said:
Chas, i notice in the first pic (eagle eyed, me) that you use the abrasive on a stick method. I use an arbor in a battery drill. does the stick method produce better/ different results or is it just personal preference?

Horses for courses really, for ease of use in similar applications then the friction driven discs I find very effective, especially on inner surfaces where the ability to angle the head gets in where a drill driver can't, just have to keep the work speed down else the friction disc can rotate at some ridiculously high speeds. If you go for one make sure the system has ball bearings not plain bronze, the plain bronze versions can deteriorate rapidly with grit etc. contamination.

I use a low speed battery drill driver driven head for a lot of work where there is difficult grain and there is a need for more localised application.
 
+1 for Microcrystalline wax but I find that, unlike conventional soft paste waxes, it really does seem to need leaving to dry longer before buffing.

I've tried both the Renaissance and Chestnut versions and they both seem to behave the same in this regard.
Jon
 
This may just be me being slow on the uptake and stating the bleeding obvious, but I've just started using a 5" buffing wheel in the lathe on Microcrystalline wax and it makes a hell of a difference. I let the wax dry for a bit, then buff lightly to start with, and it's my best glossy finish most easily achieved. I finally achieved the fresh wet conker effect I'd been aiming for.
 
MB, You'll see an even better final appearance if you go the whole hog and use a systematic three stage buffing system, the improved ground that you get from the blending of the sealed surface with tripoli grit cleaned up with white diamond will give you a high gloss before you ever apply a protective wax finish.
 
CHJ":jgudhacg said:
MB, You'll see an even better final appearance if you go the whole hog and use a systematic three stage buffing system, the improved ground that you get from the blending of the sealed surface with tripoli grit cleaned up with white diamond will give you a high gloss before you ever apply a protective wax finish.

Thanks for that Chas [if I may] just had a look on the Tool Post site re. Beal buffers etc., looks less complicated than I at first thought. I'd wondered if you needed a different wheel for different finishes. Hadn't considered the finish might first be applied to the wheel. Let's see what Santa brings :wink:
 
Thanks chipmunk, I can see I've got a bit of weighing up to do, and I'm always keen to try and save a quid or two by neccessity, mrs. mb is allergic to money and gets rid of it at any opportunity. :cry:
 
Back
Top