


CroppyBoy1798
Established Member
Howdy!
I'm afraid I dont have any images of what the finished article will look like, I dont tend to use computer software, but sketch things, and besides, a lot of this table is 'design as you go' :lol:
Anyway, what I was trying to do was make another table along the same lines as one I made recently, 'Brígid', the ash and slate table, using that same 'cross' configuration.
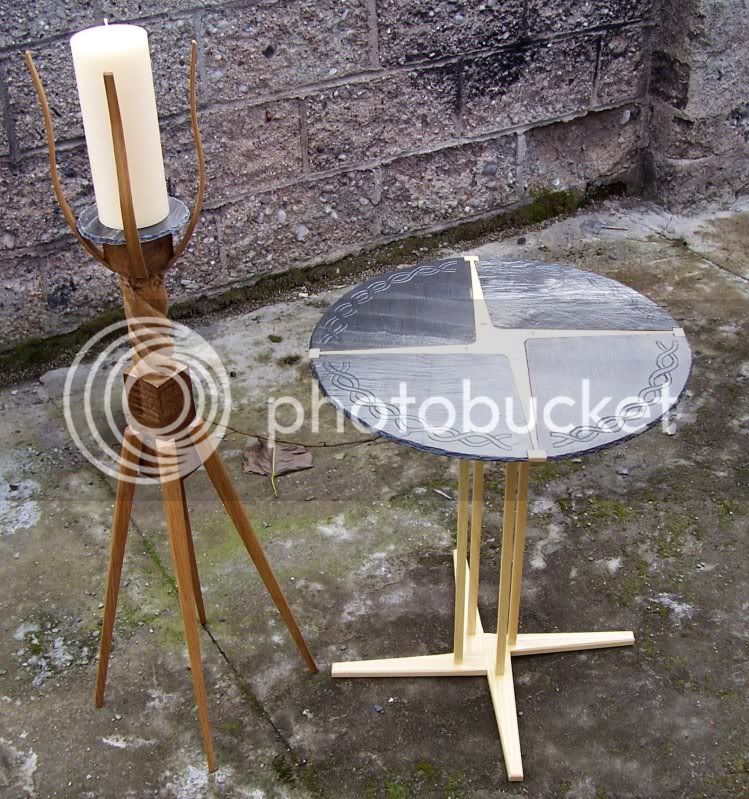
This table is made from oak, I'm trying to keep it relatively simple, clean, with plenty of joints and joints that can be seen! A sort of honest, 'crafty' piece?
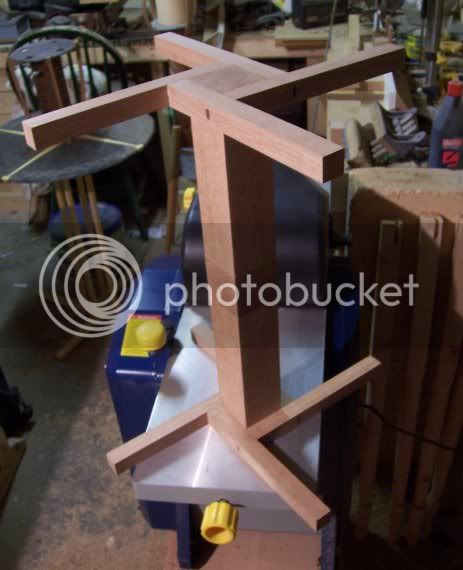
Anyway, to get one of these:
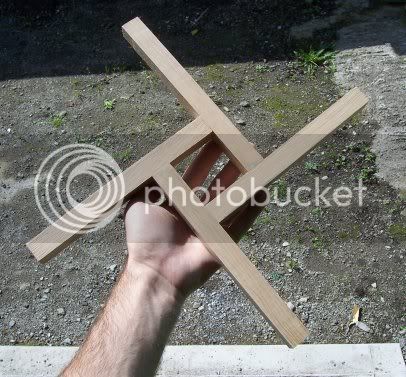
I had to:
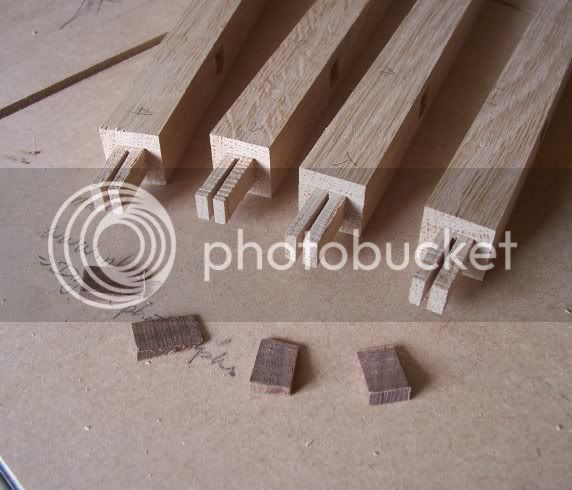
Cut and plane four lenghts of oak to the required dimensions (not pictured) and then mark out the M+T joints. These would be through joints with a wedge knocked in.
The tenons were cut on the table saw using a sliding carraige:
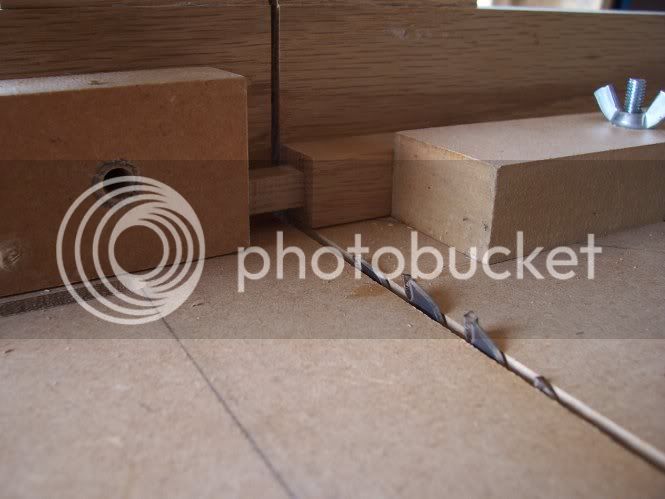
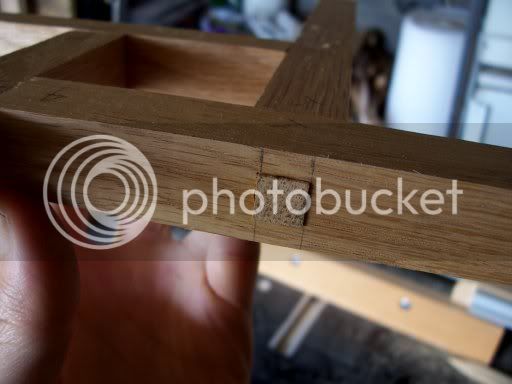
The 10mm mortices were then cut:

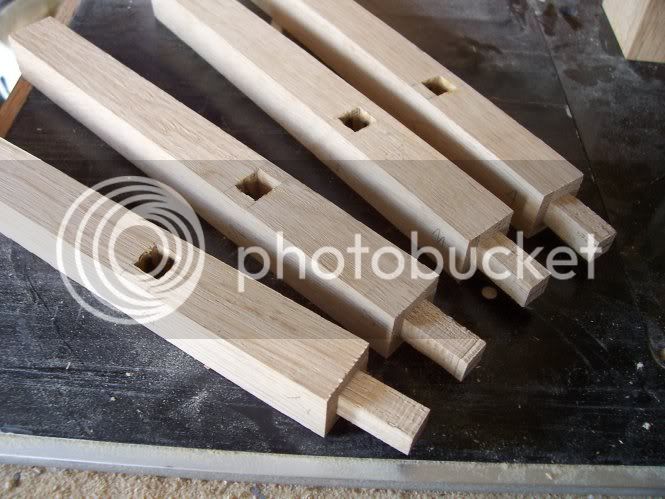
Which leaves me with:
A dry fit:
The tenons were then cut to accept a wedge. The wedges were more for appearance than strenght as the joints were pretty tight already:
Joint assembled and wedge knocked in:
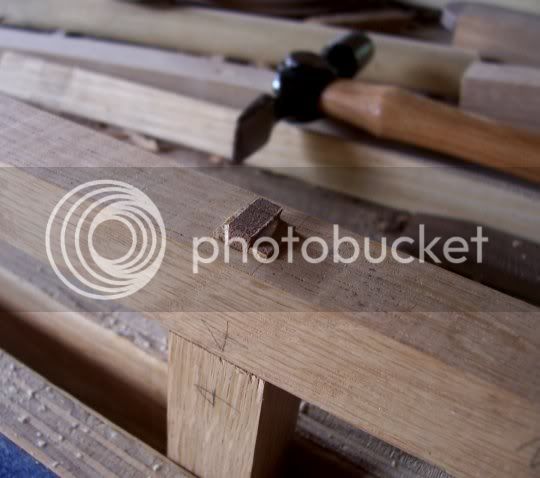
The joint pared and sanded down, nice!
I then had to repeat this so that I would have two of these 'Brigid' cross pieces, like so:
The inset in the middle of the centre column was done by cutting four 3mm slices off the end of the 50mm square oak. The recess to accept the sections was done on the table saw.

The recess cut in the centre column and the mitres added to the insets, the mitres were sanded to approx 45 degrees:

Clamped up and left to dry:

They were then sanded down and turned out pretty nice!") :
:

I probably should add now, but whilst all this was going on I was also steam bending four legs. They are 1" square and unfortunately, although they were steamed for an hour each, clmaped good and tight and left over night they didnt take the curve I wanted them too, but they'll do.

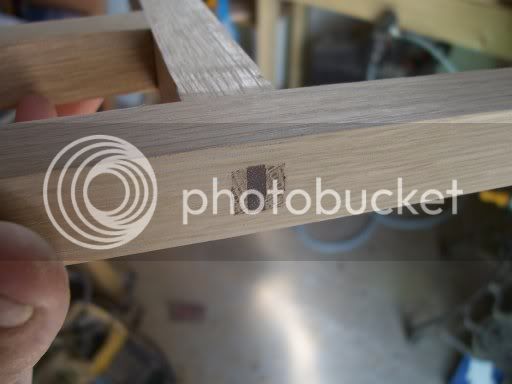
In order to attach the two 'crosses' to the centre post I wanted to cup oak dowels or pins. So, I secured each cross in place, drilled a 6mm hole right through the cross and into the post. This hole was then squared off, 6mm square pegs cut and knocked in, as can be seen below:

(the piece in the centre of the cross is just a scrap piece to stop the chisel making a mess on the backside when paring the hole down)


Again this was done for the other cross, I dont have any close ups of the finished peg pared and sanded down.
I had intended on fixing the legs via pegs aswell, but it would have been a heck of a lot of work, so, I chickened out and opted for screws :? . What I'll do is sink the screws and create a false wedged mortise joint, similar to that used in the cross construction.
Here she is so far with the legs fitted temp:


So there you have it! The legs have to have a shade planed off them and a good sanding, as well as being all cut equal and the tops planed/sanded to the same level as the cross arms. I'm thinking of getting a circular glass top for this, suspended off the cross arms via those stainless steel pads or little rods, cant think of the name of the things, any of know them? The reason for the glass is just so that you can see whats going on, see the joints, construction etc and keep it lite.
Thanks for looking!
I'm afraid I dont have any images of what the finished article will look like, I dont tend to use computer software, but sketch things, and besides, a lot of this table is 'design as you go' :lol:
Anyway, what I was trying to do was make another table along the same lines as one I made recently, 'Brígid', the ash and slate table, using that same 'cross' configuration.
This table is made from oak, I'm trying to keep it relatively simple, clean, with plenty of joints and joints that can be seen! A sort of honest, 'crafty' piece?
Anyway, to get one of these:
I had to:
Cut and plane four lenghts of oak to the required dimensions (not pictured) and then mark out the M+T joints. These would be through joints with a wedge knocked in.
The tenons were cut on the table saw using a sliding carraige:
The 10mm mortices were then cut:
Which leaves me with:
A dry fit:
The tenons were then cut to accept a wedge. The wedges were more for appearance than strenght as the joints were pretty tight already:
Joint assembled and wedge knocked in:
The joint pared and sanded down, nice!
I then had to repeat this so that I would have two of these 'Brigid' cross pieces, like so:
The inset in the middle of the centre column was done by cutting four 3mm slices off the end of the 50mm square oak. The recess to accept the sections was done on the table saw.
The recess cut in the centre column and the mitres added to the insets, the mitres were sanded to approx 45 degrees:
Clamped up and left to dry:
They were then sanded down and turned out pretty nice!
:
I probably should add now, but whilst all this was going on I was also steam bending four legs. They are 1" square and unfortunately, although they were steamed for an hour each, clmaped good and tight and left over night they didnt take the curve I wanted them too, but they'll do.
In order to attach the two 'crosses' to the centre post I wanted to cup oak dowels or pins. So, I secured each cross in place, drilled a 6mm hole right through the cross and into the post. This hole was then squared off, 6mm square pegs cut and knocked in, as can be seen below:
(the piece in the centre of the cross is just a scrap piece to stop the chisel making a mess on the backside when paring the hole down)
Again this was done for the other cross, I dont have any close ups of the finished peg pared and sanded down.
I had intended on fixing the legs via pegs aswell, but it would have been a heck of a lot of work, so, I chickened out and opted for screws :? . What I'll do is sink the screws and create a false wedged mortise joint, similar to that used in the cross construction.
Here she is so far with the legs fitted temp:
So there you have it! The legs have to have a shade planed off them and a good sanding, as well as being all cut equal and the tops planed/sanded to the same level as the cross arms. I'm thinking of getting a circular glass top for this, suspended off the cross arms via those stainless steel pads or little rods, cant think of the name of the things, any of know them? The reason for the glass is just so that you can see whats going on, see the joints, construction etc and keep it lite.
Thanks for looking!
