Shultzy's Router Table

UKworkshop.co.uk

Help Support UKworkshop.co.uk:

This site may earn a commission from merchant affiliate links, including eBay, Amazon, and others.

Shultzy

Established Member
Joined
10 Oct 2006
Messages
2,196
Reaction score
2
Location
Near Lichfield, Staffordshire
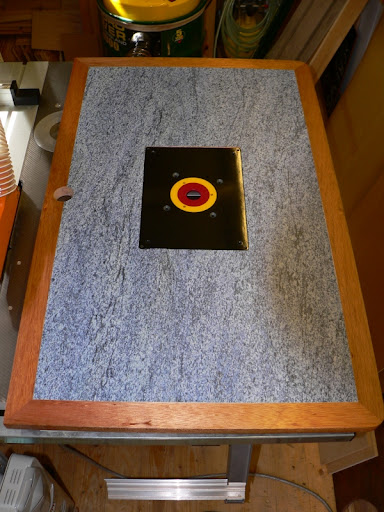
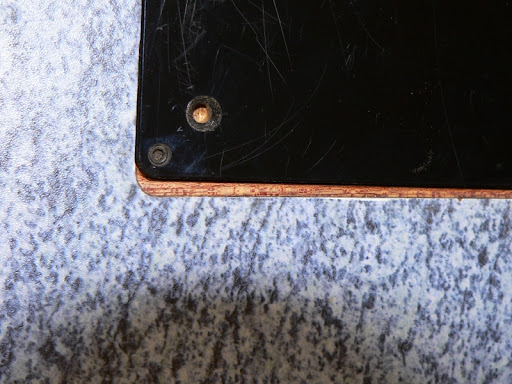
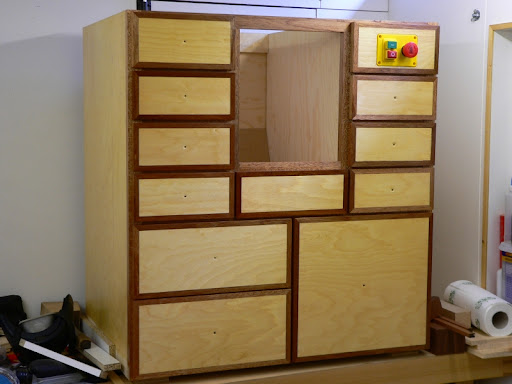
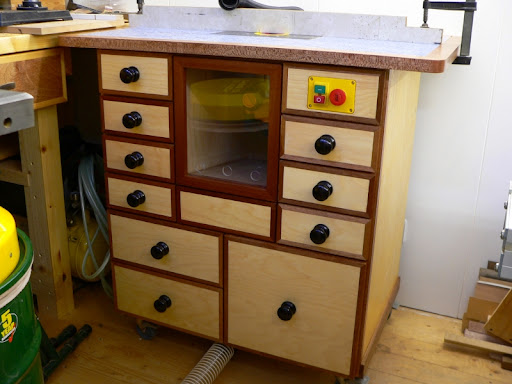
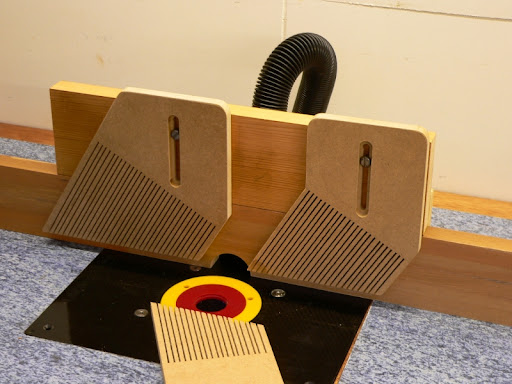
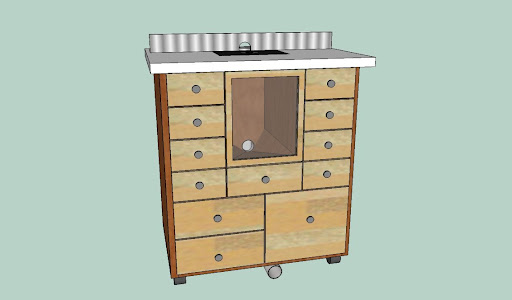
The next item on my workshop build is a router table. The design has been cribbed from Joe Johns efforts and those I've seen on the forum. I've adapted it fit my needs, height wise and the dust extraction. The top rh drawer will be false with the nvr switch attached. The drawer front under the router access door is also false to provide a slope for dust extraction.

MyRouterTable.jpg


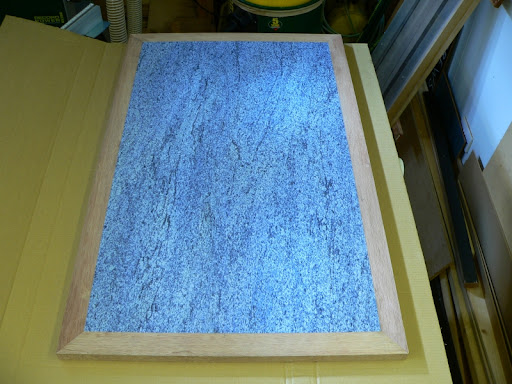
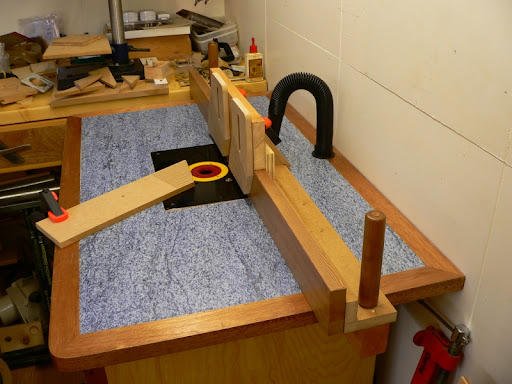
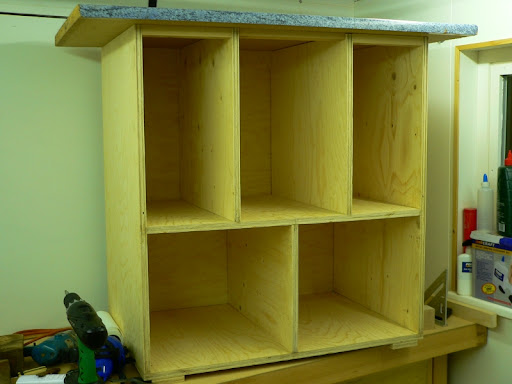
The basic shell is 18mm ply (which I had to buy :( ). The top is a piece of worktop I salvaged from Freecycle, it's just sitting on top to be out of the way.

RouterTable02.JPG


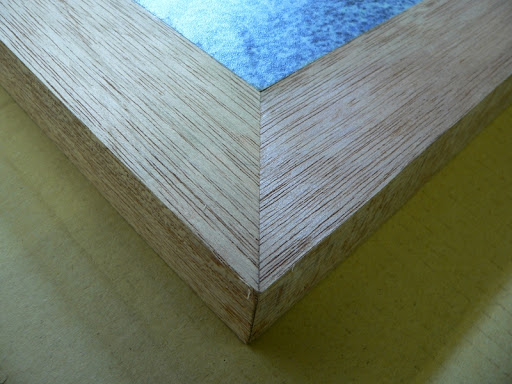
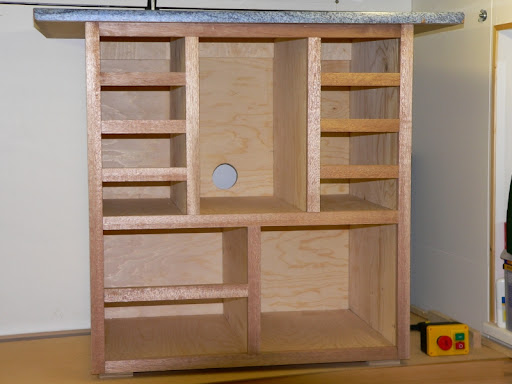
The face frame is meranti, I think, which was formally a threshold rescued from a double glazing skip. It's "pocket-holed" with the Kreg jig I had on offer from Axminster (thanks to the "head's-up" on the forum). A great piece of kit and easy to use.

RouterTable03.JPG
 
I've started on the "freecycle" top. I cut the rounded edge off, trimmed the other edges and lipped it with 3" meranti, its a bit soft but as it was free it'll do.

RouterTable04.JPG


The mitre is straight off the table saw (a la Dan Tovey, aka Alchemist) so it can be done. No shooting boards were used or abused in the making of this mitre. :D

RouterTable05.JPG


I'm going to radius the front two corners but leave the edges square.
 
Hi Shultzy,

Looking good! Question: did you biscuit joint and then glue the carcass since I can't see any screws/brads?

When I do similar carcasses I tend to get a bit carried away and router rebates to slot it together then glue and screw - I'm keen to know whether this is really necessary?

Cheers,
Chris
 
Chris, I did biscuit all the joints but mainly for alignment as the panels were slightly warped. If all the panels were flat you could just screw and glue. All the screw are put in from the back or the bottom. I screwed the inside dividers first, then the back, the two sides, then the bottom. This meant I only had to clamp the sides so didn't need any screws.
 
I've completed the top by rounding the front corners and routing out the hole for the plate. The hole on the left is for the dust hose outlet.

RouterTable06.JPG


Unfortunately the double sided tape on the right hand side of the jig moved and so the last pass cut about 1/8" out of line. As its an old worktop I couldn't cover it with the blue top so I put a plain piece in to remind me to be more vigilant and make sure jigs are clamped tight.

RouterTable07.JPG


Time now to start on the drawers and the dust extraction.
 
Just an update. I've finished the drawers with 1/2" lippings and cut the slot for the nvr switch. Next job is to cut out the holes for the wiring, wire up the switch, fit the top and sort out the dust extraction. Oh and fit the wheels, line the drawers and design and build the fence - I'm sure the end is in sight :D .

RouterTable08.JPG
 
Very nice shultzy - me thinks i'll rip the design off when i do mine - though i'm thinking of having the top lift up on gas struts like another i saw on here. , Where did you get the plate from ? ( if he says freecycle i'm going to cry :mrgreen: )
 
I'll be interested to see what ideas you have for dust extraction below the table. I built my latest benchtop table before Christmas and that's one area I'm still trying to figure out! :roll: :)
 
This may or maynot be a silly question but shouldn't you try to avoid dust from collecting in the router "home".

would it not be better trying to seal the router-bit cut out and extracting the dust from the back of the bit rather than letting it all fall (or even sucking it down) towards and possibly inside the router?

lovely table, may have to rip off some ideas soon........


Steve
 
Olly, I'll take pics of the dust extraction when I've put it together, as its in bits.

kityuser, I'm not sure how much, as a percentage, falls down below the table top. Perhaps someone with a table might be able to comment. I will be sucking dust from the fence as well as from underneath the table.
 
I always seem to end up with a small amount of dust below the table no matter what operation I'm performing. Having an insert ring as close to the cutter size as possible does help. It's really when you're cutting grooves and there's nowhere for the dust to escape that you really start to have problems.

Have a look at Digit's thread in the Jigs forum. I made my own 'dust shield' to deflect the waste away from the inside of the router and it does indeed work very well. With a bit of luck, it even falls in to the short length of 32mm pipe I have sticking through the back of my table. :wink:
 
I've finished off the main table and have only the fence to finish. The one visible is from my old saw table I've cut to fit.

This is the rear of table showing the 63mm dust extraction pipe. I've sealed it into the top with silicon. This allowed me to reduce the pipe to a vacuum adapter. There is a "Y" junction into the router section and the main pipe exits underneath to the front.

RouterTable09.JPG


Completed table, showing the stained drawer knobs (came out a bit too dark) and the router door. This is acrylic with vent holes at the bottom. It's held in by two dowels at the bottom and an earth magnet inset at the top.

RouterTable10.JPG


The dust extraction works well with very little dust remaining in the router section, but I may have to reduce the opening as I want more "suck" at the top hose.
 
Looks great, the hose coming out of the front is a bit of a trip hazard thou isn't it?
 
Looks very nice, Shultzy. Perhaps, a little too nice with those stained knobs and the hardwood lipping! :roll: :wink:

I went for a similar idea with the acrylic front panel; it keeps the noise down, the dust in and allows you 'see' how your router's doing... Wish I'd thought of the Earth magnet trick though, nice one. :)
 
Chems, the extraction pipe comes out the front as this is the least "trip hazard" position for the incoming hose. Its only temporary, as when I've fixed the extraction pipes locations I'll vent it out the left hand side.

Olly, the stained knobs and lipping are really practicing for when I come to make furniture that will be in the house. Better to make the mistakes (and there are a few :) ) on the workshop furniture when on the "real" thing.

I was going to hinge the front panel but it would have been expensive to find hinges to clear the side drawers.
 
This is the final part of the router table build, the fence. The front part is an offcut of solid worktop I cut off for a mate. The rear is 3/4" mdf from the scrap bin. The clamps were the rear rollers of my old mower, cut, a "T" nut fitted, re-glued and a dowel fitted into the end. A coach bolt is fitted to the "L" shaped piece underneath and screwed into the "T" nut.

RouterTable11.JPG


The feather boards are also from the scrap bin, held on with plastic "wing nuts" rescued from an old flymo found on the tip. The extraction hose is from an old vacuum pipe with fittings.

RouterTable12.JPG


I might make an adjustable fence later if the need arises.
 
Back
Top