Scottish Infill Smoother Restoration

UKworkshop.co.uk

Help Support UKworkshop.co.uk:

This site may earn a commission from merchant affiliate links, including eBay, Amazon, and others.
Richard T":2fdd57qv said:
Good grief Jim ... where did that lever appear from???

That's the original Richard...with a knob from a mitre (chopping mitre) plane I happen to have about.

Just using it now for testing...and I now have a flatter lever cap (standard shape) which I can now mill down to the right size....later!

I have had a few "issues" with the milling machine and so an X3 Super Tilt is arriving tomorrow...so now I have not 65kg just moveable but 165kg definitely not moveable!

We're getting there with that one...finally!

I haven't got a picture of the new lever cap as I have locked up for the night but will do so tomorrow.

Cheers mate

Jim
 
jimi43":3bvi5iok said:
DSCN0625.JPG

Wonderful, just wonderful! I'm convinced that this tool never before was allowed to look that beautiful and well done. No doubt here, that you will make it to perform excellently as well, Jim.

Many congrats on this fantastic rehab.

Klaus
 
Cheers Klaus...that's praise indeed!

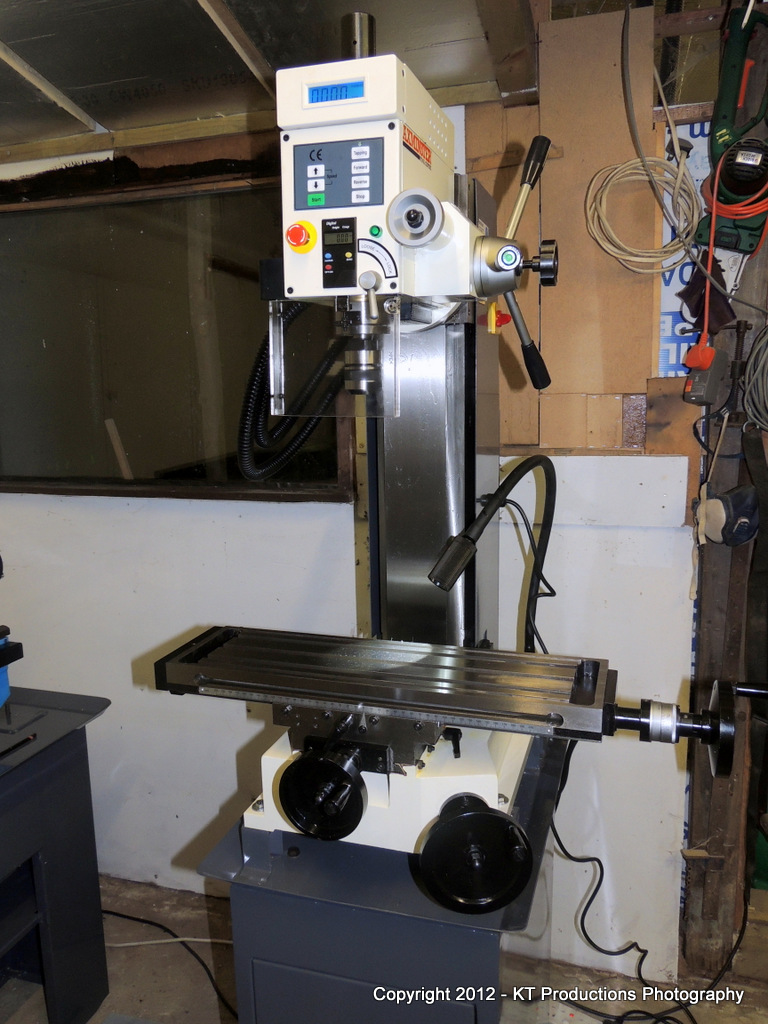
Ok the saga of the mill now being sorted...and the new lever cap having arrived via Andy...THANKS PROF!! from Bristol Designs...(isn't Charles a gem!)...I decided to take the raw casting to a rough shape with the mill and then finish by hand.

DSCN0657.JPG


Bit of an overkill for this job...but what the heck! (Hand Tool obsessives please look away now!!!! :mrgreen: )

ALFIE helped!

DSCN0645.JPG


Now before any black stuff whizzers out there criticises the setup and results....I have to point out that ALFIE has not actually done any milling before so please excuse him!

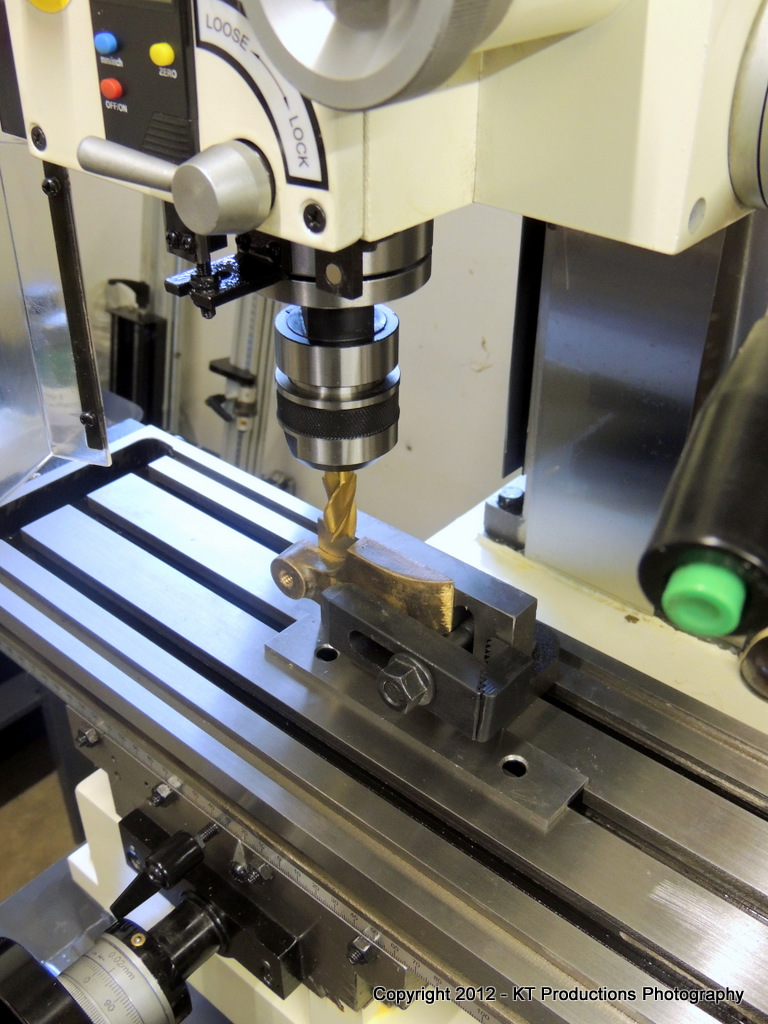
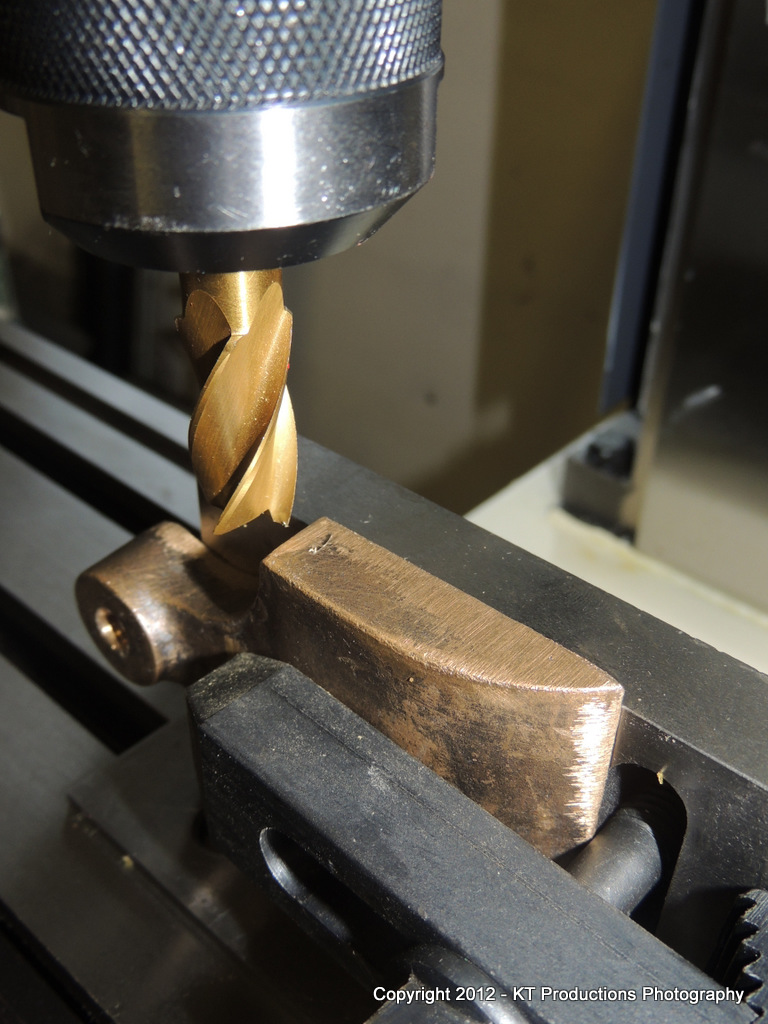
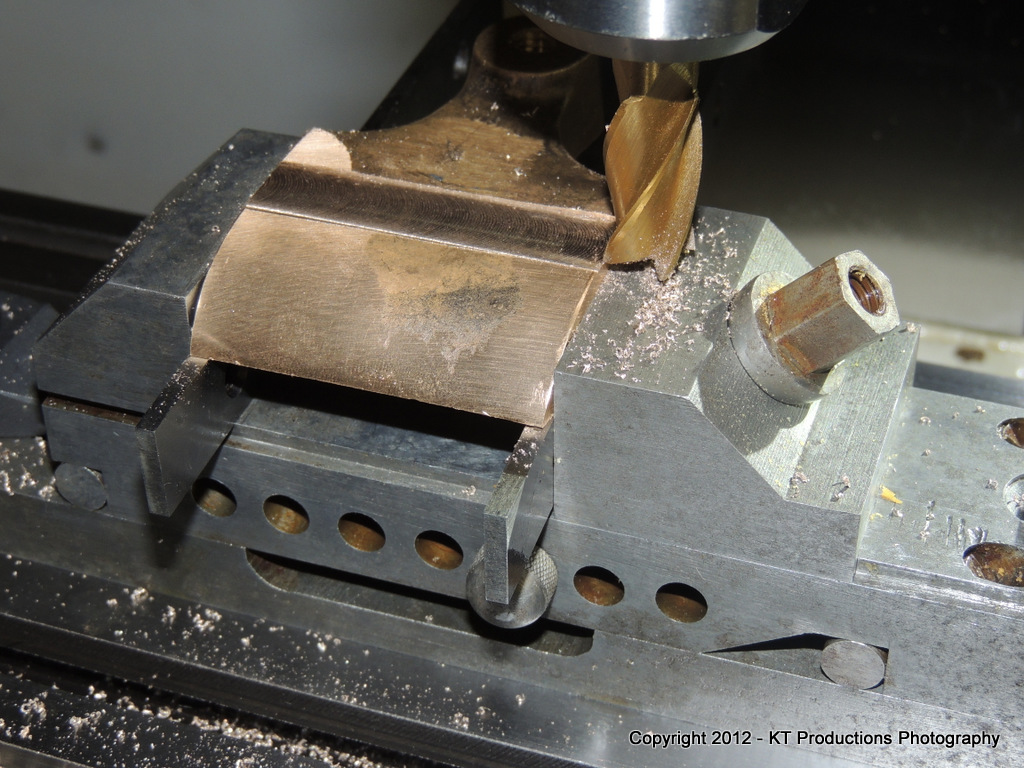
After removing most of the casting rough bits with a file...we clamped it tightly against an angle plate....

DSCN0695.JPG


...to square up the sides...

DSCN0692.JPG


...which worked nicely...

DSCN0702.JPG


...and meant it could then be fitted safely in a sine vise to finish the top...

DSCN0703.JPG


...as there was some quite deep casting pits.

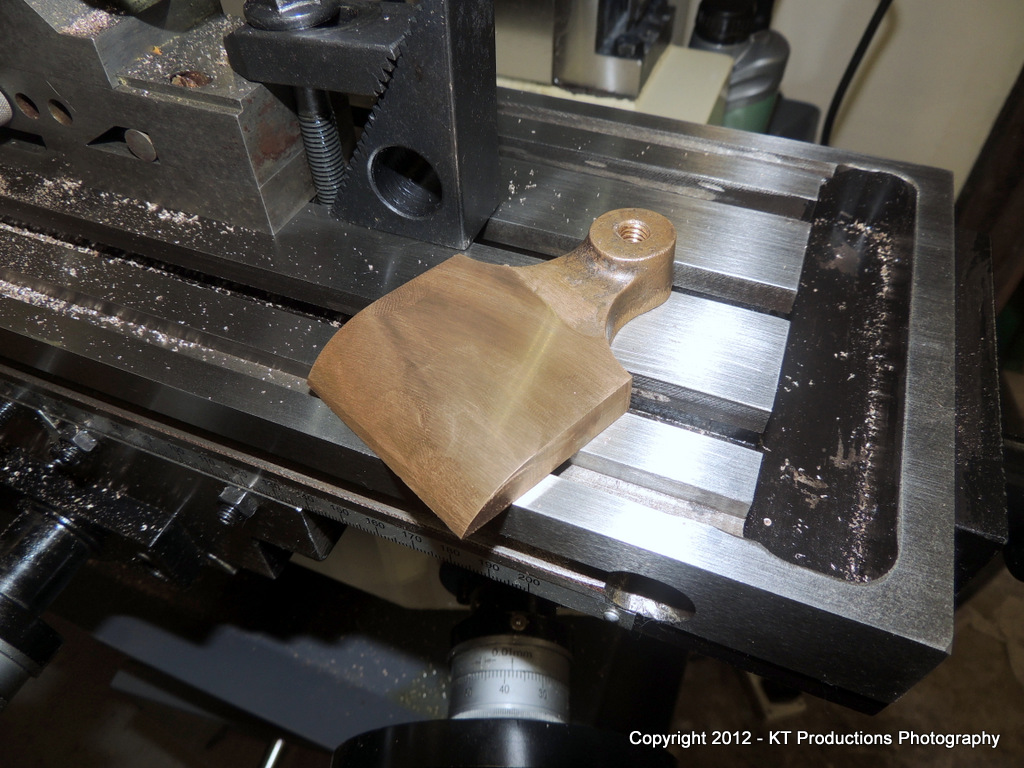
After most of this was removed a quick disc sand and we can see what we are doing...

DSCN0704.JPG


After finishing the top bits by hand (I haven't quite got used to the rotary table yet :oops: 
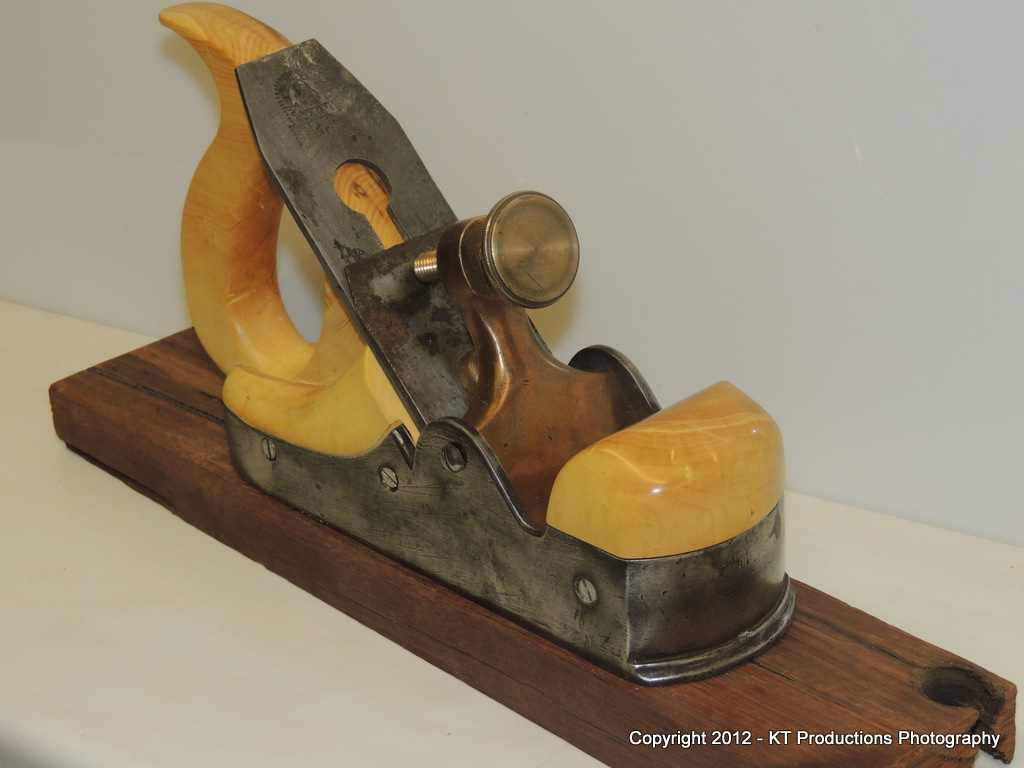
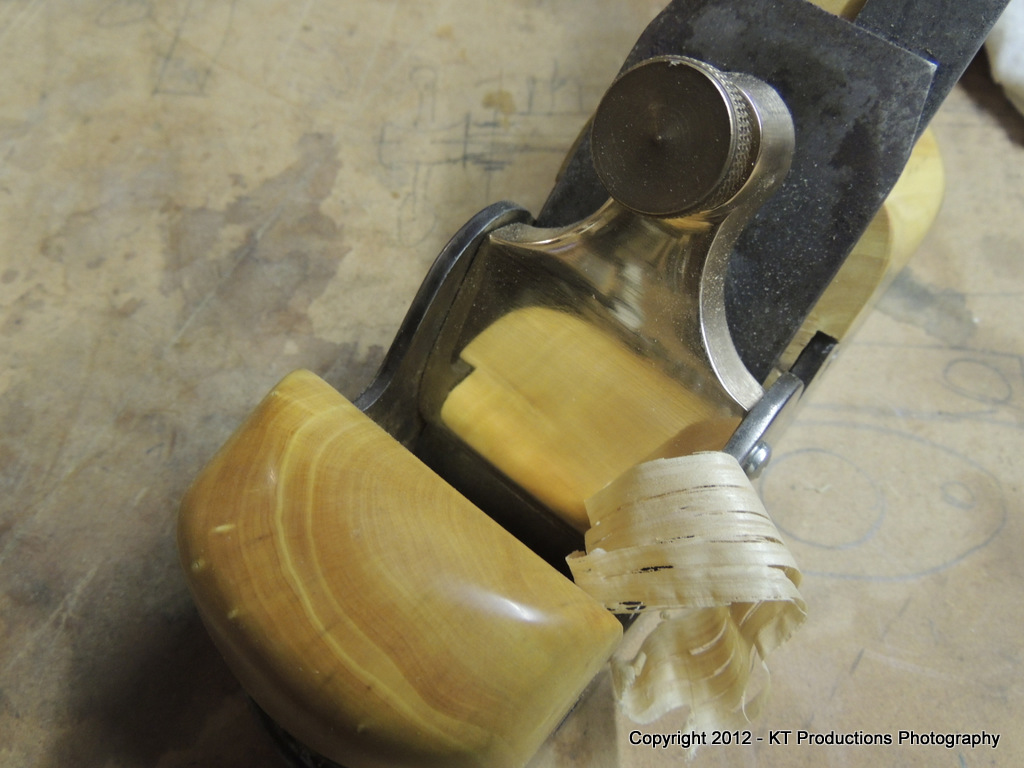
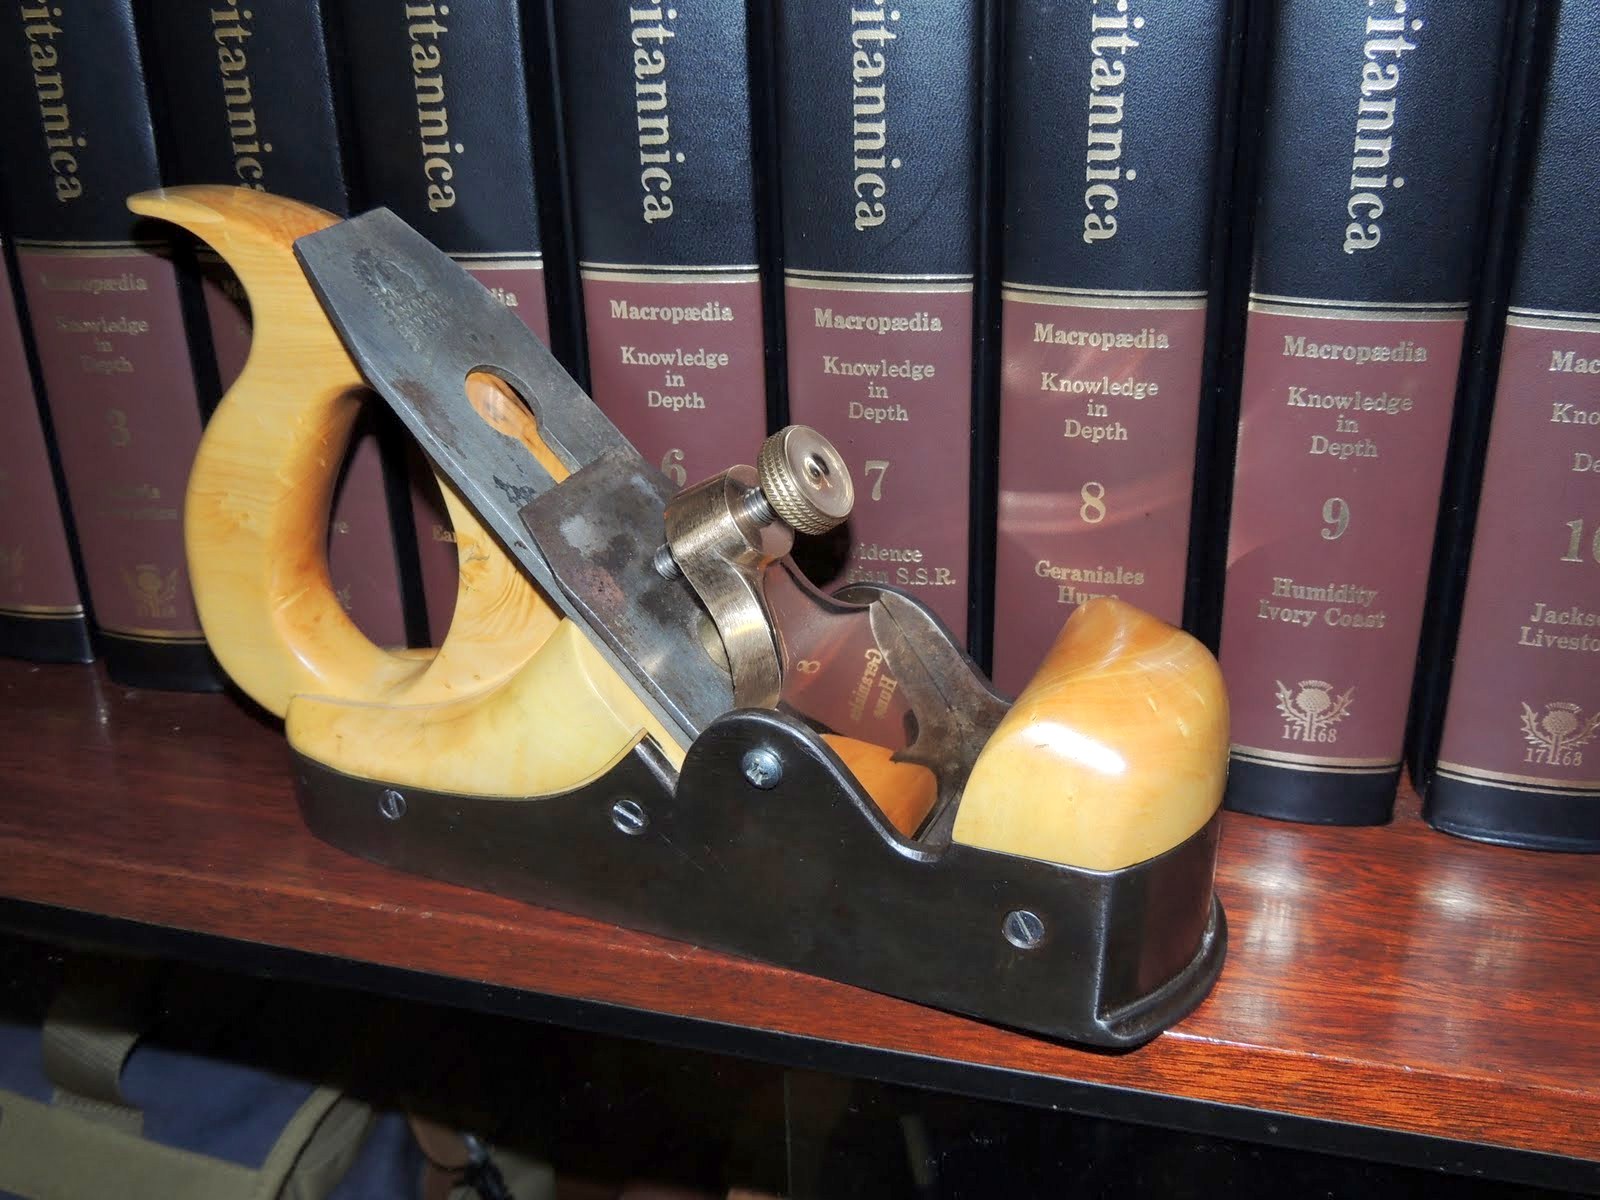
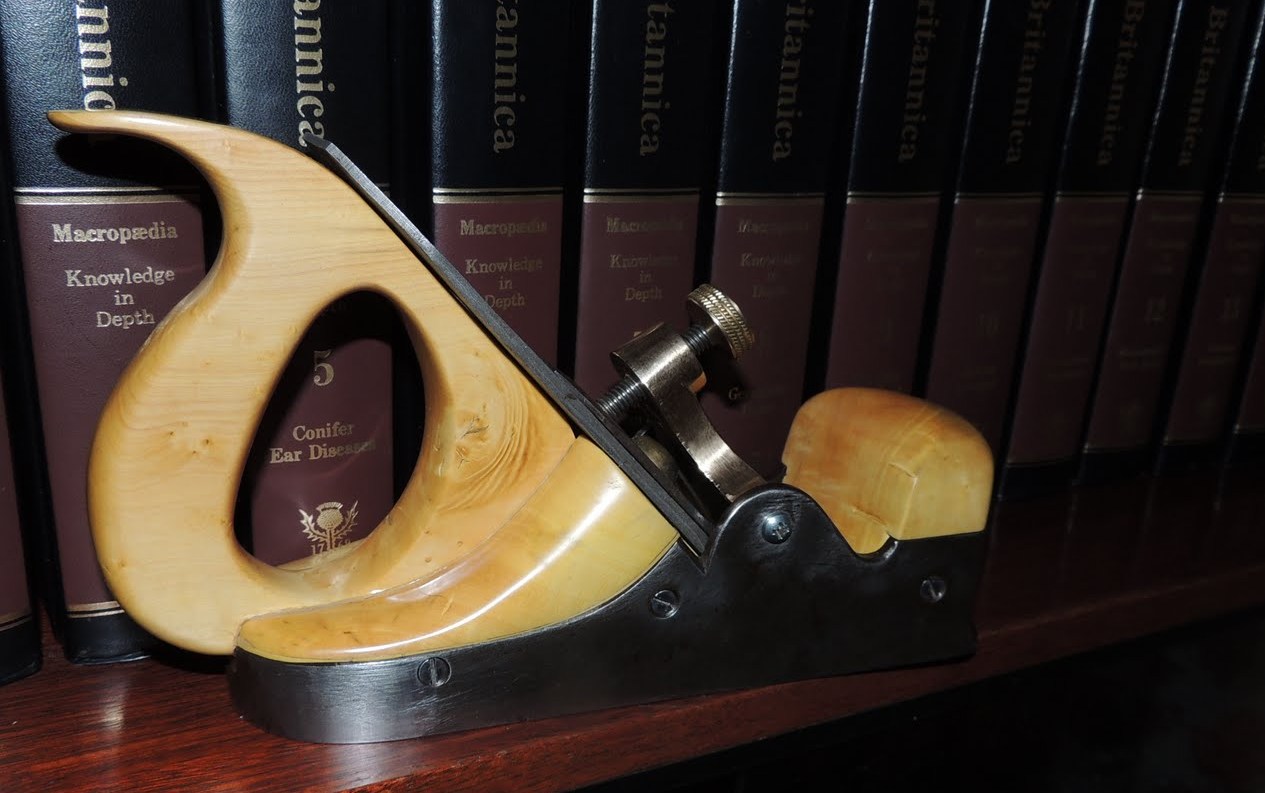
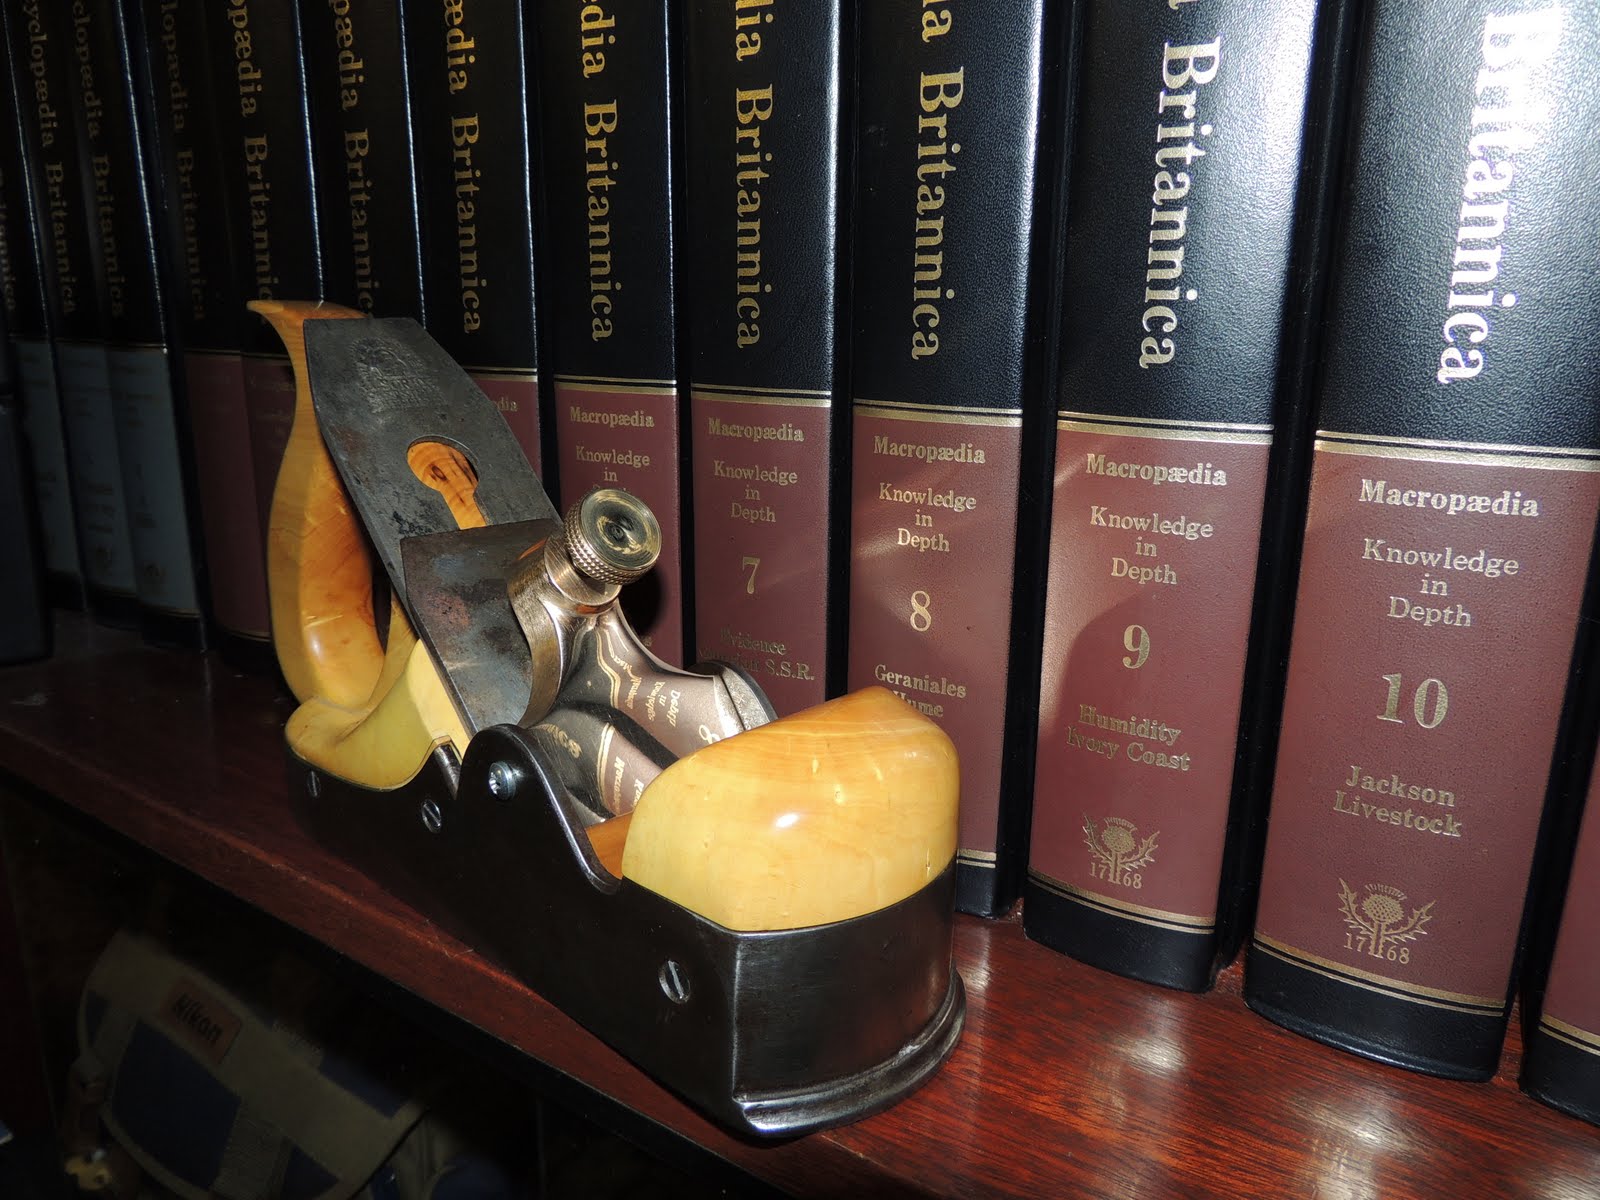
....I fitted it to the plane to see how it looked...

DSCN0732.JPG


A few scratches which I need to get out...a bit of "ageing" to do but it looks the part!!!

Sorry Richard...I could have done the whole thing with files in about half the time but I wanted to play with the new toy...

I promise to do your one by hand...or at least finish it by hand...WHEN I finally either get a larger casting or I get a suitable bit of bronze/gunmetal (still looking! #-o )

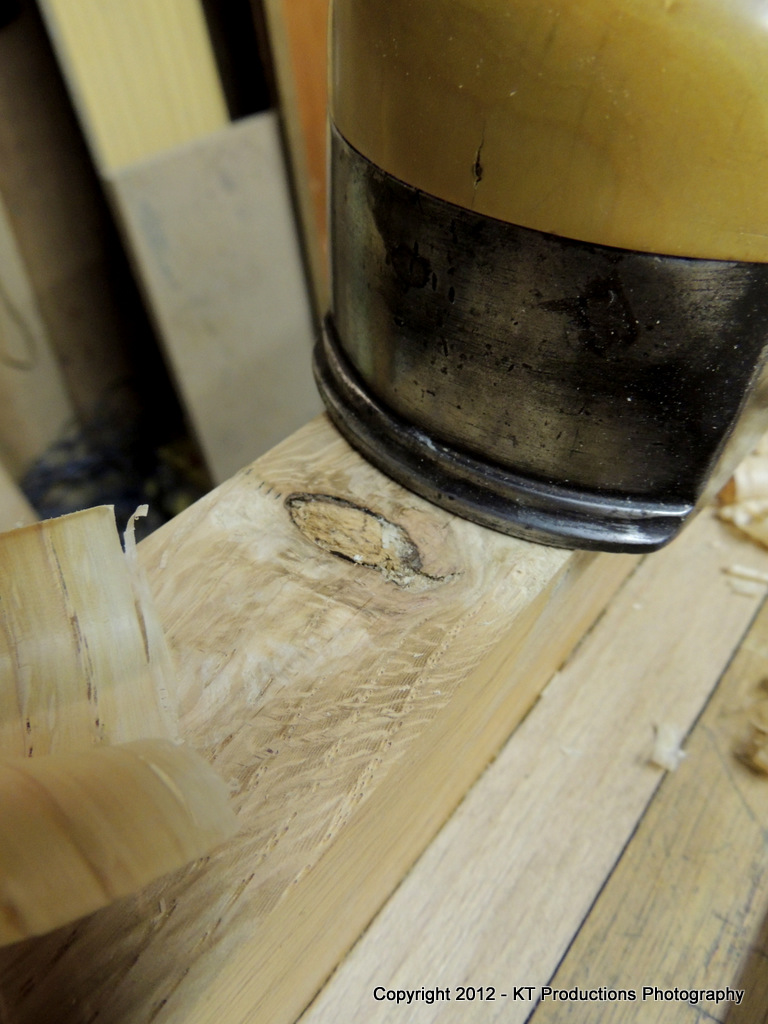
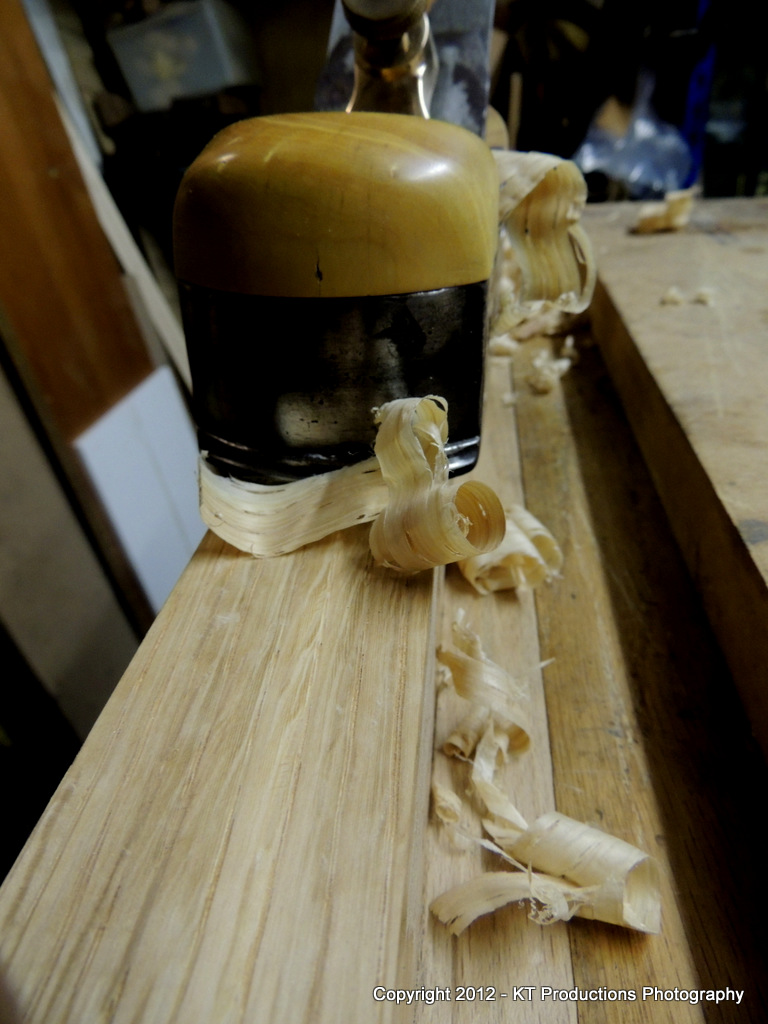
So...before I subject the whole thing to final finishing...a few shots of the plane in action on some particularly nasty oak...reversing grain...knots...the works...

DSCN0724.JPG


Boy...did that make a difference...!!

DSCN0726.JPG


Whizzed through this old oak...even the knot....

DSCN0730.JPG


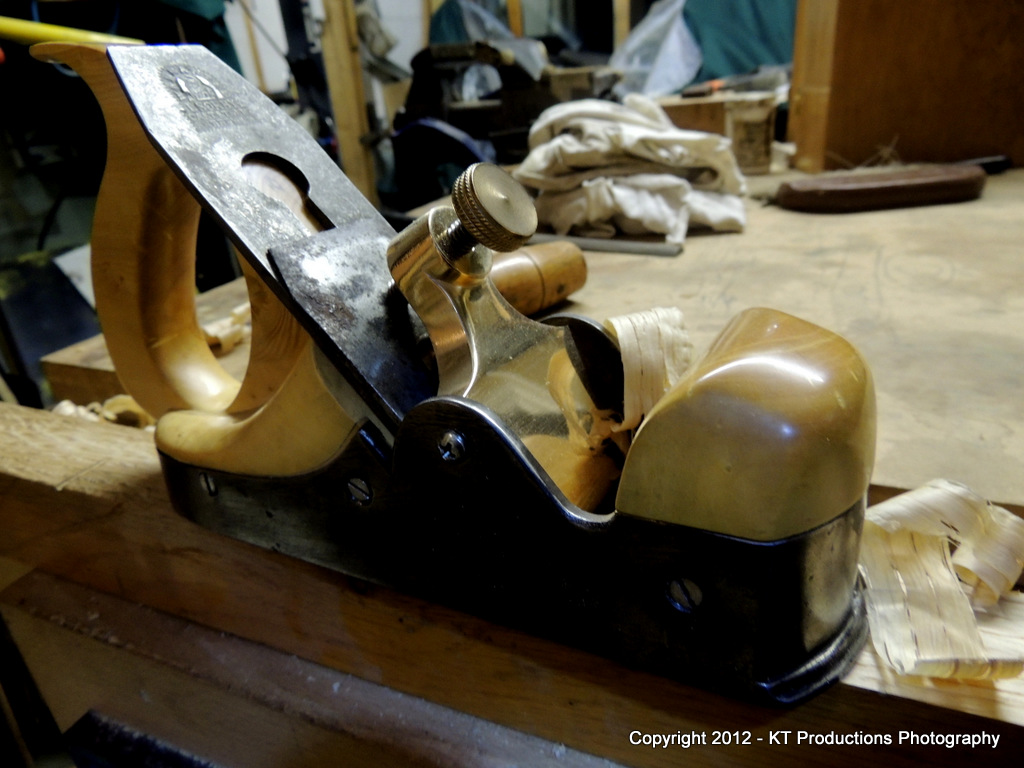
....leaving a mirror finish!

DSCN0728.JPG


...and that's just with a little old 100+ year old I.Sorby!

Ok....I will now hit it with the linseed oil find some old bolts for the lever cap to replace those temporary ones (you did noticed didn't you? :mrgreen: ) and then start looking seriously for some proper stock for the jointer.....

But in the meantime...why not make an iron blank on the mill first!

More on that in the other thread later!

Cheers for all the help Andy!!

Jim
 
Jimi wrote: Sorry Richard...I could have done the whole thing with files in about half the time but I wanted to play with the new toy...

Not at all matey - it's a thing and a half to do anyway. Spotting the holes on either side and squaring the sides to an exact fit so that it fits width wise and (essentially) it is square to the iron and applies an even pressure. It's the stuff of nightmares to do by hand and by eye.

Were the pivot holes in the plane already threaded or did you have to do them too?

I finally rang Keatley Metals in Brum the other day and priced up some brass and bronze bar .... the guy was very keen that for what I wanted, I should go in and see what offcuts they might have. I will try to get in on the train later this week and let you know how I get on. I may well have one arm longer than the other when I get back.
 
Crivens Jim

That looks nice, and the plane looks good as well.

Pete
 
Nice job but I see you sliding down the metal working slope - even deeper? :)
Did you find your first Mill too small - the X3 looks good?

Rod
 
Hi Richard

The casting just came raw...although there was not a lot of escaped bronze in the mold....they did a good job with the sand!

No holes as can be seen from the raw casting picture...so those were spotted on one side firmly clamped up and drilled on the mill which is an absolute breeze and then followed through on the other side.

I made and tapped out the holes to the nearest metric screw with a view to either putting in a bronze rod or making a larger imperial tapped hole once I get the right countersunk screws with slots.....not sure which way to go yet.

I was trying to find a place with "offcuts" so that I could get a suitable piece for your jointer by weight so if you have found a source then let me know...I think you have my mobile number..

It's a strange size to find....and casting may still be a cheaper option.

Yes...I did go a bit mad with the mill Pete/Rod....but there isn't a suitable size between the SX2 (65kg) and the SX3 (165kg)...which would have been my chosen option. The SX2 is a beautiful and capable machine Rod...with one flaw...the torsion bar. I couldn't find any way around it so I went with Axminster's recommendation of the larger machine and I don't think I will ever regret it. I can see why it's one of the most popular "small" (yeh right!) mills on the market today.

Jim
 
sorry been away and quiet, but have to say this looks really lovely. From the 40 quid starter (which showed great promise anyway) you have made a right treat. Feel proud you have brought a (once) fine plane back into the 'highly desirable' category. =D>
Was interested re Klaus's comments regarding the yellowing of box - I too like the cream natural tones... tru-oil then?? I wonder if just a hard clear wax may be enough, as the wood tends to look after itself and a bit of contact-discoloration is nice anyway.
 
Hi Jim,

that is very very good, but we need better pictures. I Know you can do!

Cheers
Pedder
 
pedder":31vfo5z3 said:
Hi Jim,

that is very very good, but we need better pictures. I Know you can do!

Cheers
Pedder

Hi Pedder

Thanks mate....but I need to explain...the sun has not shone on days when I was off since I started this project. It really gets so depressing I just feel like getting in the car with ALFIE and moving to the south of France for the Winter!!

Anyway....I tried my best to get artificial light sorted to show up the boxwood which is not an easy wood to show in a photo but here you go...

DSCN0961.JPG


I've finished the casting...all the grits and meshes again...which is what it's for really!

Just a few soaks in boiled linseed oil so far but it is already starting to patinate so I think it is going to mature quite well...

DSCN0965.JPG


You can clearly see the cock up here...the gap which has had to be filled with a slither...this is where one side was not the same height as the other and by the time I had noticed...it was too late!. I learned from this though! You will see I used this knowledge when I finished the first cuts to the UKW infill (see other thread) today. Which is what this project was for really! :oops:

DSCN0967.JPG


The brass will darken really quickly...it looks really bling at the moment but it's already started to oxidise.

The last thing I will be doing to this is to remove those Philips bolts and get some proper slot head ones in there...I've just got to dig through my old screw piles....there are a few! :mrgreen:

Giuliano...thanks mate...much appreciated.

Cheers

Jim
 
Brilliant job Jim. =D>

That must be the hardest infill job second only to a coffin over-stuff. I have my own one of those to keep at the back of my mind.

Box is gorgeous stuff. I saw a very big lump (slab) at MacTimbers the other week and it was the only piece I've ever seen there with "Ask Mike about price" written on it. I decided not to. :oops:

Paid great attention to your fitting methods and feel more inspired to have a bash at one of the straight sided smoothers that have been accumulating here.
 
Hi Jim,

I just can repeat myself: Great Job you did!

Thanks for the pictures. (Why do you use the flashlight?)

Cheers Pedder
 
pedder":3024ykjn said:
Hi Jim,

I just can repeat myself: Great Job you did!

Thanks for the pictures. (Why do you use the flashlight?)

Cheers Pedder

Thanks guys...and I promise when the sun comes out again Pedder...I will take some natural shots...today is equally as gloomy!

Cheers

Jimi
 
jimi43":10pnsneg said:
and I promise when the sun comes out again Pedder...I will take some natural shots...today is equally as gloomy!

Jimi my friend,

I don't know half as much as you regarding photography but I allways thought a cloudy sky as a big light tent.

Taken on a very cloudy day, lightened up a little with the camera:
IMG_0249.JPG


Cheers
Pedder
 
Agreed but I haven't seen natural light which would work for weeks now. There was a brief morning when the sun came out when I was out with ALFIE but apart from that it's been really miserable.

Apparently things are set to change tomorrow...we shall see! :wink:

Jim
 
Boxwood is proving a nightmare to photograph properly...I will probably have to resort to some trickery! :wink:

Anyway...here you go Pedder...the sun being out but diffused by slight cloud...

DSCN1071.JPG


DSCN1070.JPG


...and one especially for Klaus...to show of how well the Abranet/MicroMesh/linseed oil progression works...

DSCN1086.JPG


Other than that Pedder...we shall have to wait until the right day...but at the moment it is about as dull as Nigel Mansell when he's bored! :mrgreen:

Jim
 
jimi43":2kb9x2wo said:

I'm late on the party Jim.

As mentioned earlier, I love this plane. It's so well done and the wood choice will be hard to top. What really blows me away is the surface quality, that you were able to give to these pieces of Boxwood. That's nothing but amazing, clear like glass. You've set the bar very high with this plane. I'm more than curious to see the finished UKW plane but I guess that you will have to excel yourself if you want to beat the beauty of this one.

Cheers
Klaus
 
I'm constantly impressed by boxwood...from antique handles to new wood...particularly figured. I try to find pieces with as many knots and burrs that I can find...and Robert at Timberline like me I think as most people want perfect stock!

I thank you for your kind words...it is hard to show the finish then I had the brainwave of using something to reflect in it...and the lens cap was the first thing to hand....it worked better than I could have hoped.

Dense woods lend themselves more to higher finish gloss...and the more open grained ones....less so. But even this lilac wood....

DSC_2146.JPG


...still exhibits a higher gloss with the Abranet/MicroMesh process.

I still need to seep a bit more linseed oil into the boxwood but it is darkening by the day and I prefer the aged look to be honest. I know you and Douglas prefer the lighter fresh-cut look but it will never stay that way long no matter what you do. UV will do its work in time! :wink:

Cheer mate

Jimi
 
Jimi,

now can I see all the beauty of this plane, my friend! I don't have your talent in praising things,
but this is one of the best finished infills I've seen. And this statement includes some of the big maker of our days.

Cheers
Pedder
 

Latest posts

Back
Top