


Johnboy
Established Member
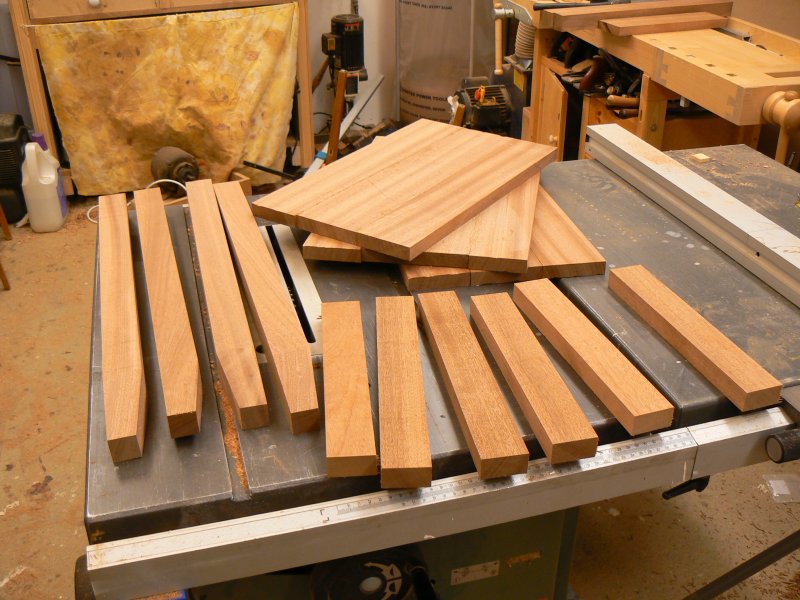
I recently made some exterior doors from Sapele and had a fair bit left over so decided to make a small cabinet. It is 24" tall, 16" wide and 15" deep. The size mainly dictated by what timber I had. After planing/thicknessing and edge jointing I had this pile of bits.
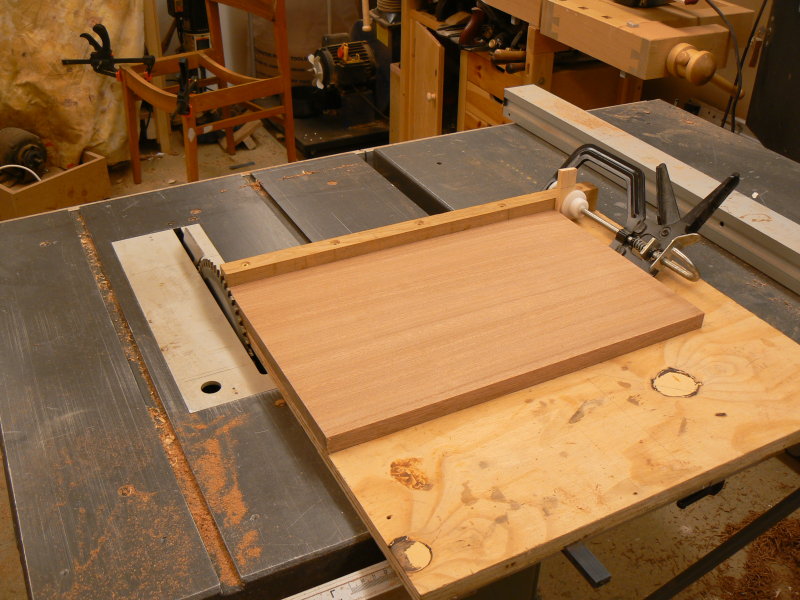
The panels were cut to width on the table saw and cut to length using a homemade panel cutter Norm style.
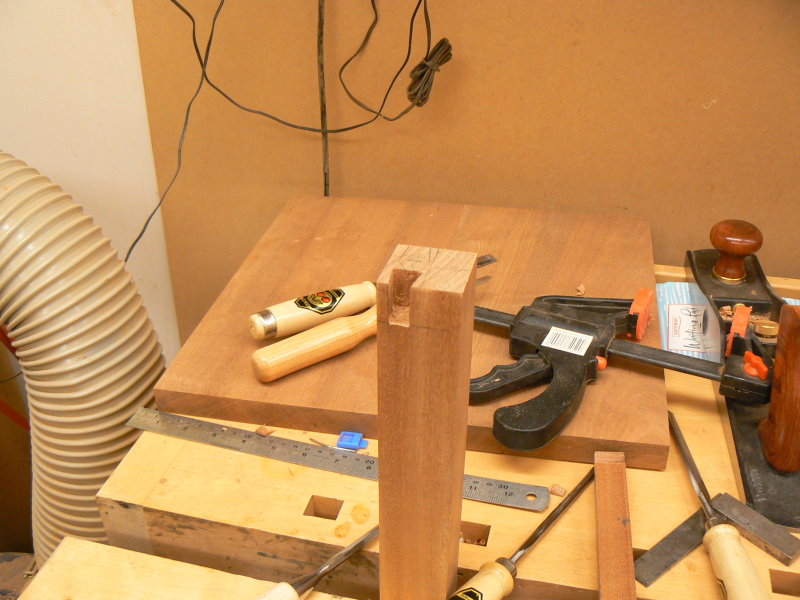
The front top rail is joined to the legs with a dovetail, the pin was cut on the 'Rat and the sockets in the legs by hand.
The mortices and slots for the panels were cut on the 'Rat. I find this easier and get better fitting joints cutting them this way rather than using a dedicated morticer.
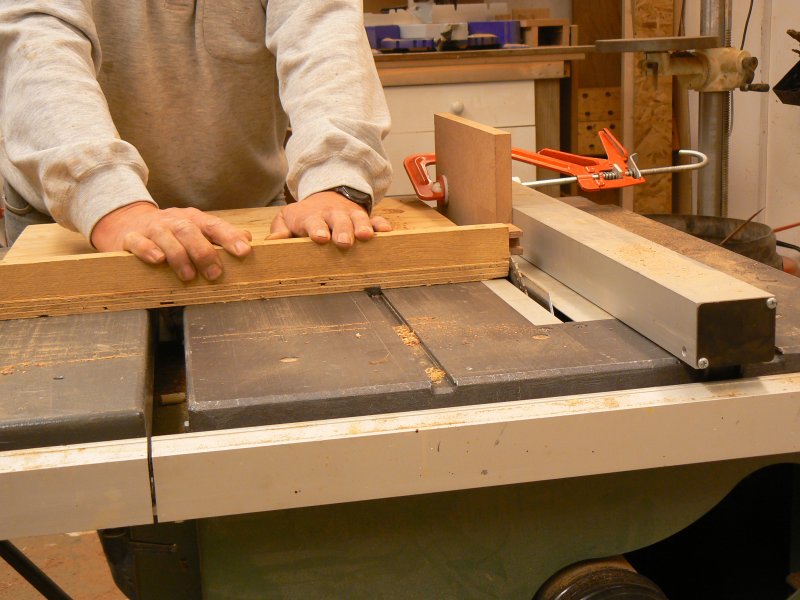
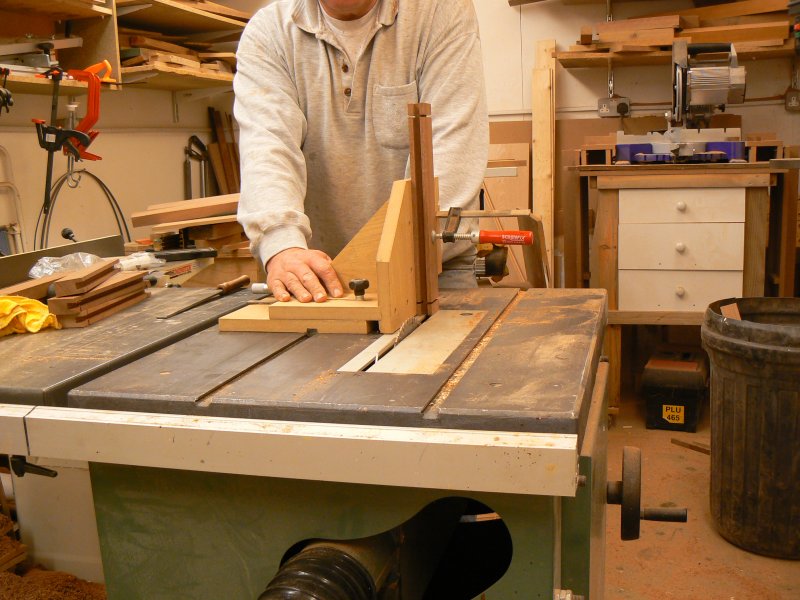
This is how I cut then tenons. First pic shows cutting the shoulders and the second cutting the cheeks using my homemade tenoning jig. If you look under my right hand you can just see a micrometer head that gives me very fine adjustment of the tenon thickness. Once set this produces very accurate tenons that neeed no tuning for a good fit providing all the mortices are the same size.
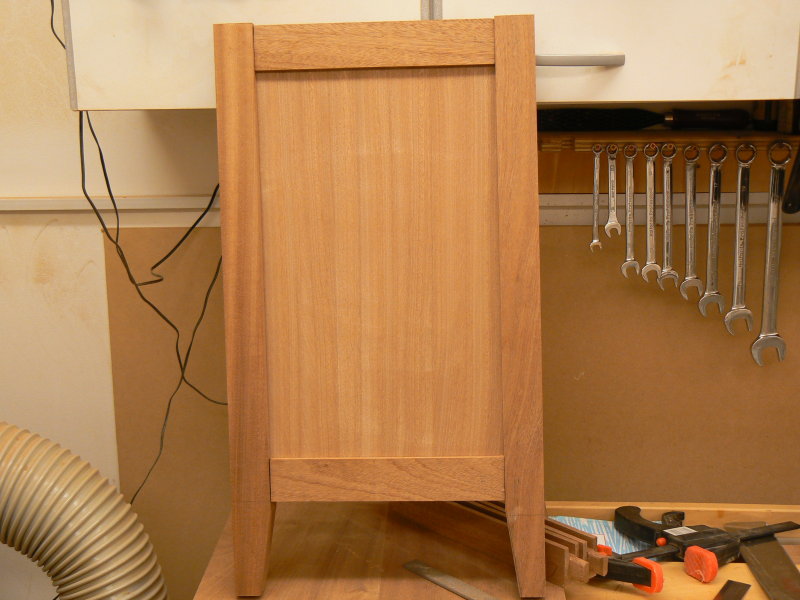
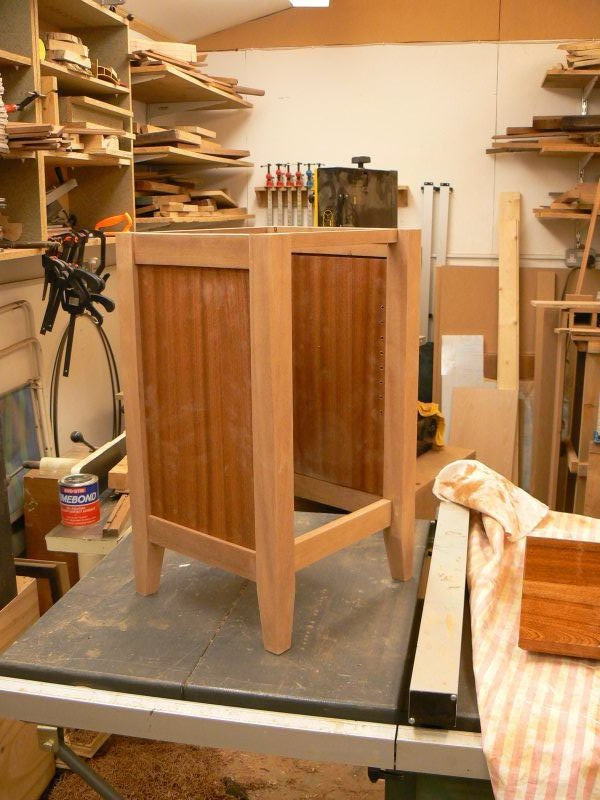
This is a dry fit of one of the sides.
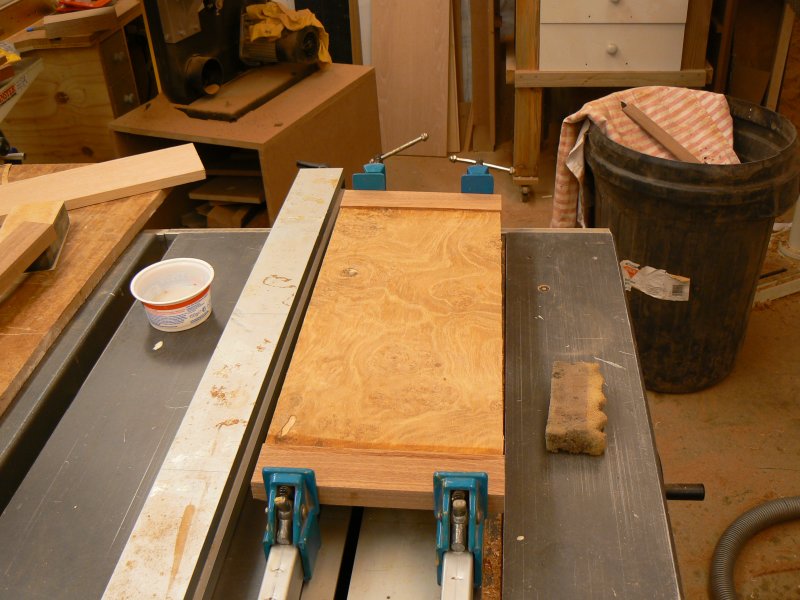
The door has an Oak burr veneer panel. I used 12mm MDF and glued the veneer on using contact adhesive. First time I have tried this and it went suprisingly well. time will tell if the glue bond is good enough. The balancing veneer on the back is iron on AWO. Using 12 mm MDF allows the door to be joined with biscuits with the back of the panel flush with the stiles and rails. This is the panel with the top and botton rails in position. Once this is dry I cut to width and join the stiles with more biscuits. The door is made slightly oversize to allow for fitting to the cabinet later.
First dry fit of all the parts. The panels have been given a coat of oil.
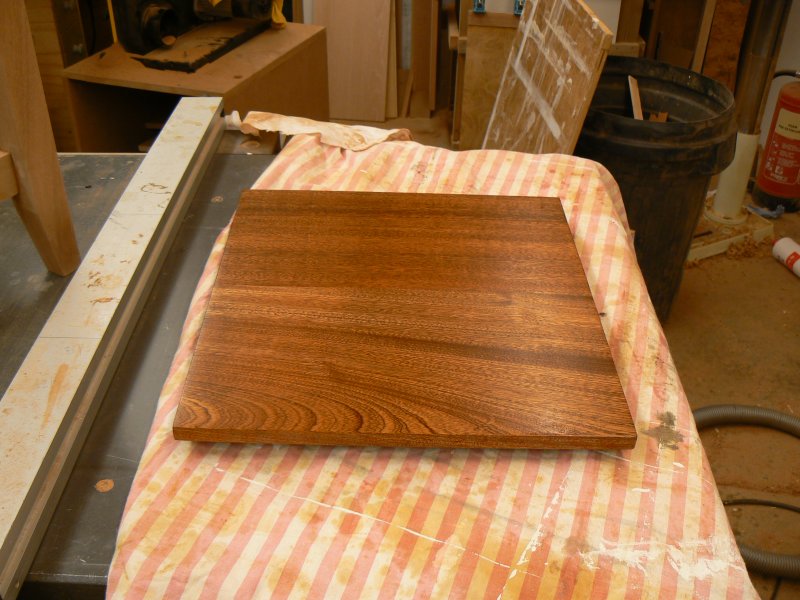
This is the top after 3 coats of Danish oil.
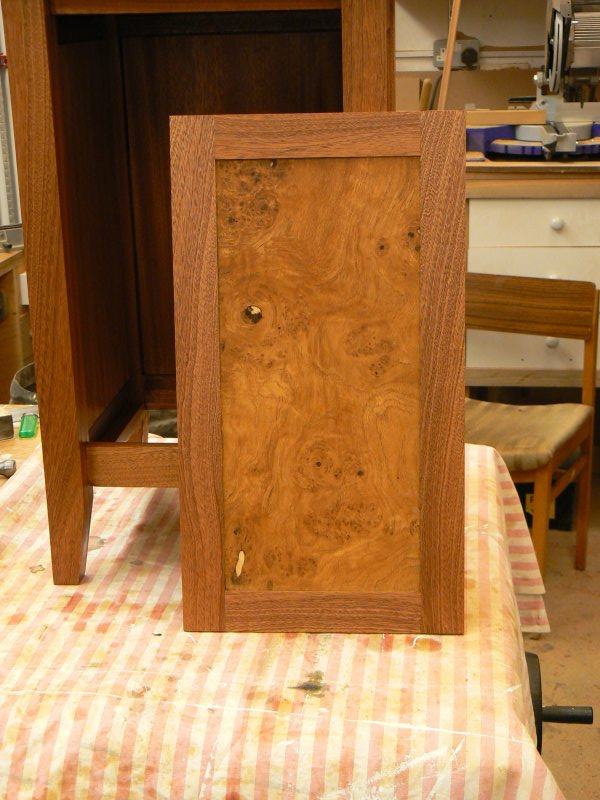
This is the door after one coat of oil. The holes in the veneer will be filled with coloured wax later.
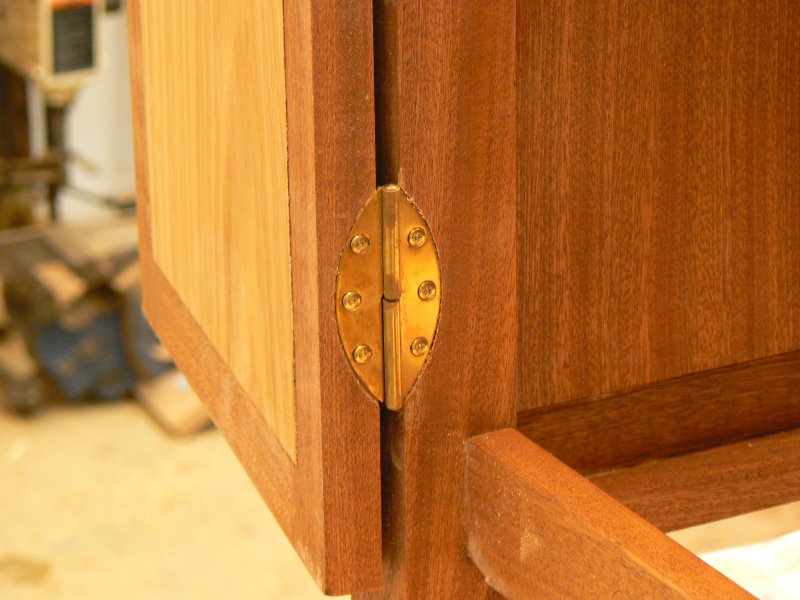
The door was hung using Lamello hinges with the mortices cut with a biscuit jointer. This is not as easy as it looks when Norm does it!! I found it difficult to hold the biscuit jointer still and in the correct position even with a fence clamped to the cabinet. The jointer moved slightly resulting in an oversize cut out. These hinges are very expensive and in future I will use normal hinges.
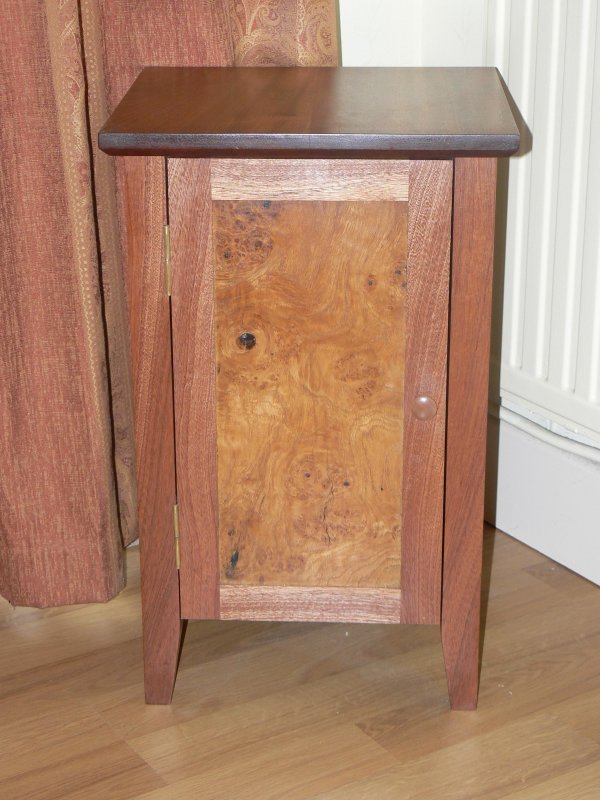
Here it is finished after 3 coats of oil and a polish with Black Bison wax. I turned the knob from a bit of sapele.
I only started this last Saturday so this is a record for me to complete a project in 8 days. It normally takes me longer than that to get the parts cut to size. I am very pleased with the result and so it the other half.
Hope this was of interest and not too long.
John
The panels were cut to width on the table saw and cut to length using a homemade panel cutter Norm style.
The front top rail is joined to the legs with a dovetail, the pin was cut on the 'Rat and the sockets in the legs by hand.
The mortices and slots for the panels were cut on the 'Rat. I find this easier and get better fitting joints cutting them this way rather than using a dedicated morticer.
This is how I cut then tenons. First pic shows cutting the shoulders and the second cutting the cheeks using my homemade tenoning jig. If you look under my right hand you can just see a micrometer head that gives me very fine adjustment of the tenon thickness. Once set this produces very accurate tenons that neeed no tuning for a good fit providing all the mortices are the same size.
This is a dry fit of one of the sides.
The door has an Oak burr veneer panel. I used 12mm MDF and glued the veneer on using contact adhesive. First time I have tried this and it went suprisingly well. time will tell if the glue bond is good enough. The balancing veneer on the back is iron on AWO. Using 12 mm MDF allows the door to be joined with biscuits with the back of the panel flush with the stiles and rails. This is the panel with the top and botton rails in position. Once this is dry I cut to width and join the stiles with more biscuits. The door is made slightly oversize to allow for fitting to the cabinet later.
First dry fit of all the parts. The panels have been given a coat of oil.
This is the top after 3 coats of Danish oil.
This is the door after one coat of oil. The holes in the veneer will be filled with coloured wax later.
The door was hung using Lamello hinges with the mortices cut with a biscuit jointer. This is not as easy as it looks when Norm does it!! I found it difficult to hold the biscuit jointer still and in the correct position even with a fence clamped to the cabinet. The jointer moved slightly resulting in an oversize cut out. These hinges are very expensive and in future I will use normal hinges.
Here it is finished after 3 coats of oil and a polish with Black Bison wax. I turned the knob from a bit of sapele.
I only started this last Saturday so this is a record for me to complete a project in 8 days. It normally takes me longer than that to get the parts cut to size. I am very pleased with the result and so it the other half.
Hope this was of interest and not too long.
John
