


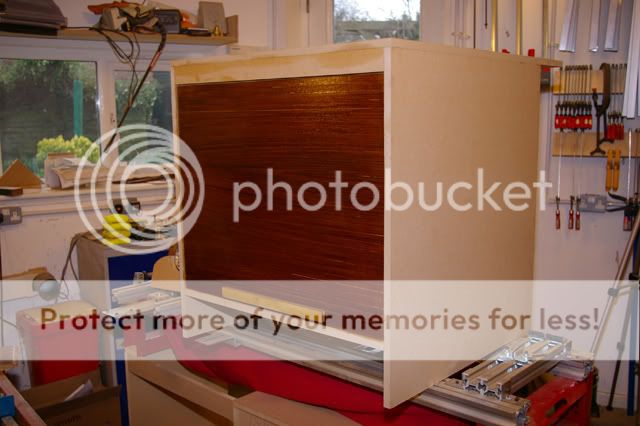
I have wanted to make a tambour door for some time, and the recent arrival of a new printer in the office mean I needed to make a stand for it PDQ. So I thought I'd kill two birds with one stone. The cabinet will stand against a radiator (must get a bigger office) so there is space at the back and bottom to allow for air circulation.
Warning to the purist-at-heart: This is a quick and dirty cabinet, and the tambour is experimental, so don't expect to see anything of saleable quality.
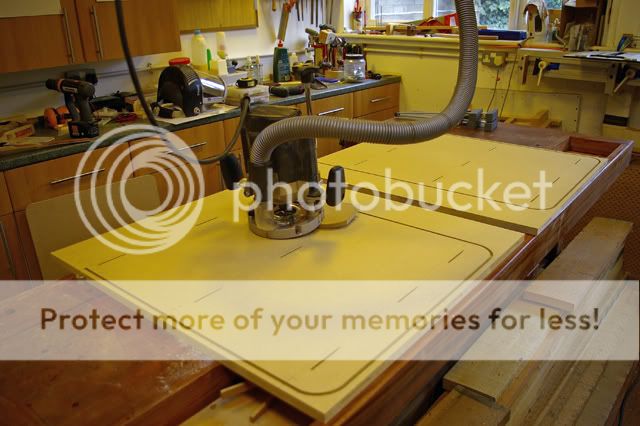
The carcase is made of 18mm MDF. The two sides have slots routed for the tambours to run in. These are mirror images of each other, and are cut using the same template, flipped over to ensure symmetry.
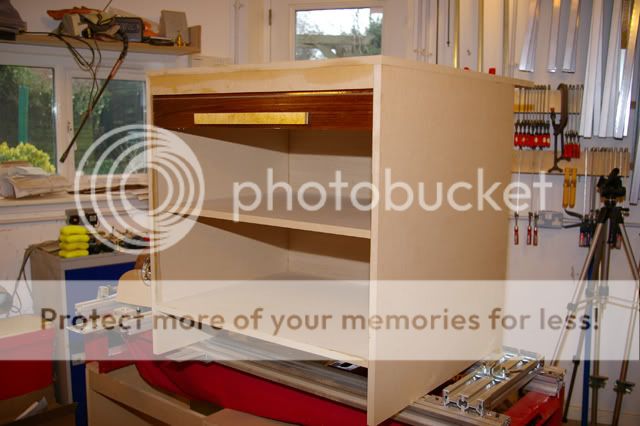
There are three internal shelves:
the bottom comes flush with the front of the carcase
the middle one is set back to clear the tambour and the batten on its back side (see later)
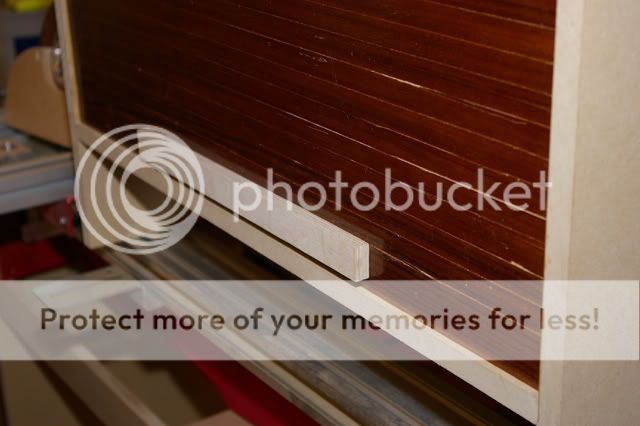
the top shelf is really a lid to stop stuff on the middle shelf getting tangled in the tambour, it is also set back, but far enough forward that it catches the batten on the back of the tambour and acts as a door stop.
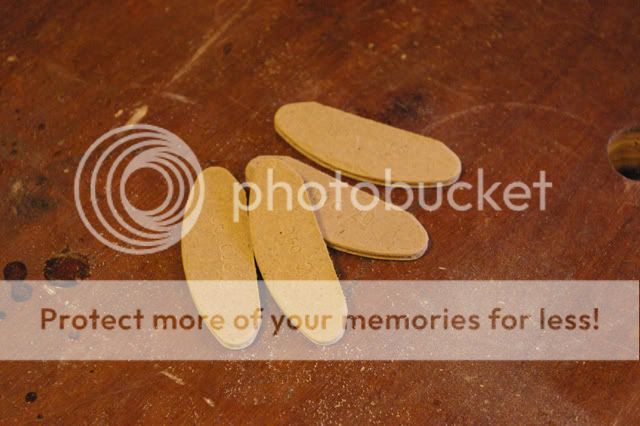
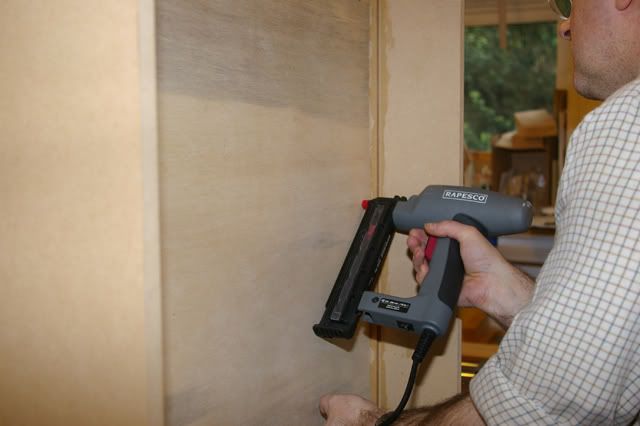
The first error is that the top groove is too high, with the result that the biscuit slots for the top break into it.

The solution is to cut down some biscuits. The sharp eyed will notice that I am using MDF biscuits. I bought a few (well 1,000 actually) to try them out. The good thing about them is that they don't swell if left out in a damp workshop. Everything else about them is bad, so don't you go buying any. I'm just trying to use them up on this, and other QandD, jobs.
Experiment 1. In an attempt to make the grooves harder wearing I soaked them in shellac. I did the same to the tongues on the slats later. Time will tell if that was a good idea.
Assemble the carcase
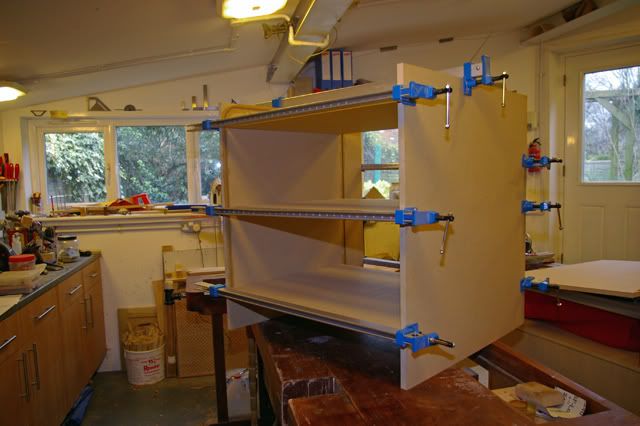
attach the top, and add a 6mm ply back to the shelves.
The tambour itself is made from slats of 12mm MDF. Cut a piece of the correct width (including the tenons that will run in the slots in the cabinet sides), and long enough that you can rip enough 18mm slats off it allowing for several extra - just in case. One extra double width slat is needed as the leading one; it will have the handle attached.
The front of the tambours are going to be veneered, and traditional wisdom states that the back should be veneered too. However, the back is also going to be 'veneered' with canvas. Does that count? I don't know. So.
Experiment 2: I veneered half of one side of the MDF. (The show veneer is applied later.) Time will tell which of these parts lasts better.
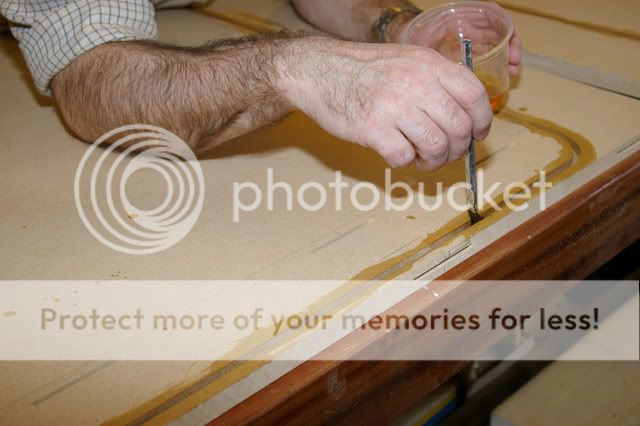
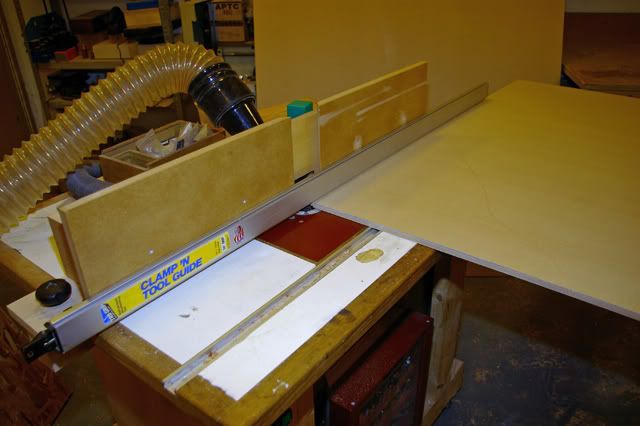
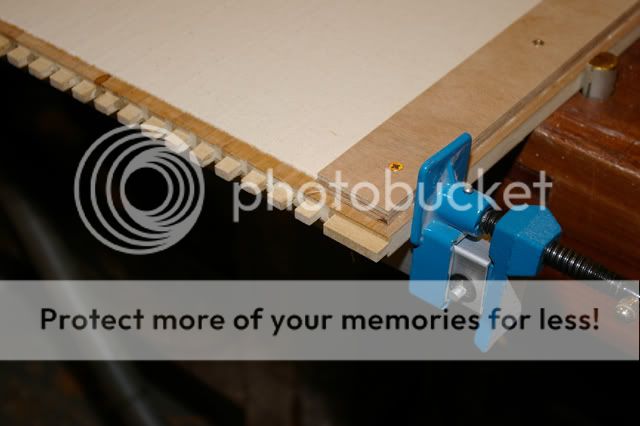
Form tenons on the sides of the MDF before ripping the slats from it. Note the use of the Clamp'n'Guide to hold the sheet down firmly, great when most of the sheet is hanging off the front of the router table. It also serves as a guard.
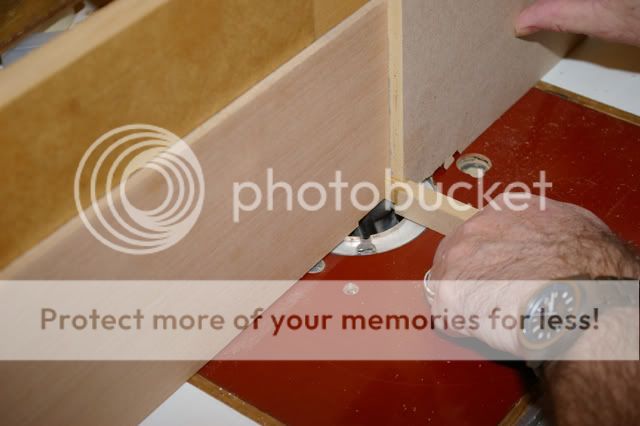
Because the slats are 18mm wide there is no way that the tenons you now have will go round the corners in the grooves so you will need to cut them back. Give them plenty of support as they go past the router cutter or they will be torn to pieces.
Soak the tenons liberally in shellac and leave to dry.
To veneer the face, you will now need to make a jig in which the slats can be aligned with each other and held tightly together. This is just a baseboard with battens attached to its face forming three sides of a rectangle. The battens must, of course be perpendicular to each other and straight or you will end up with a wonky tambour. The slats are placed in the jig, face side up, perpendicular to the open side, and should nearly, but not quite, fill the gap between the two opposing battens. Because we are going to be slopping glue around, and adding veneer, it is a good idea to add extra battens at either end of the pack. Oh, and don't forget to put the handle slat in the proper place. Insert folding wedges in the space at one and and tighten loosely - if you catch my drift.
Go over them with a flat piece of wood and mallet to get them all seated properly. Also ensure that they are all pushed against the non-opposed side.

Tighten the folding wedges fully.
Prepare your face veneers, shooting their edges, and taping the together. Make them only slightly larger in both dimensions, than the tambour proper. Apply glue to the slats in the jig. Don't be too generous because the glue will run into the gaps between the slats, and make them very hard to separate later. Lay the veneer on top and shove the lot into the vacuum press.
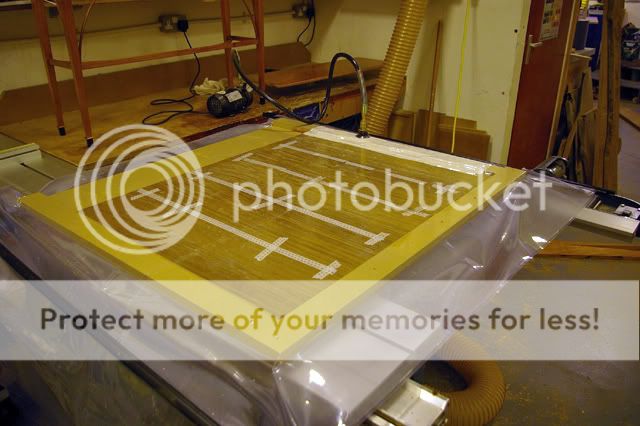
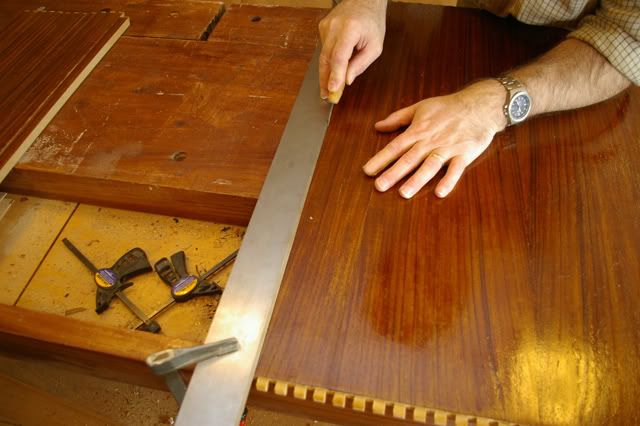
When that has dried, trim the veneer back to the slats' shoulders. A scalpel and straight edge, finishing off with a shoulder plane, worked well for me.
Unless you like finishing lots of individual sticks, I would suggest that you finish the face veneer now. I used Shellac - hope that's alright with you.
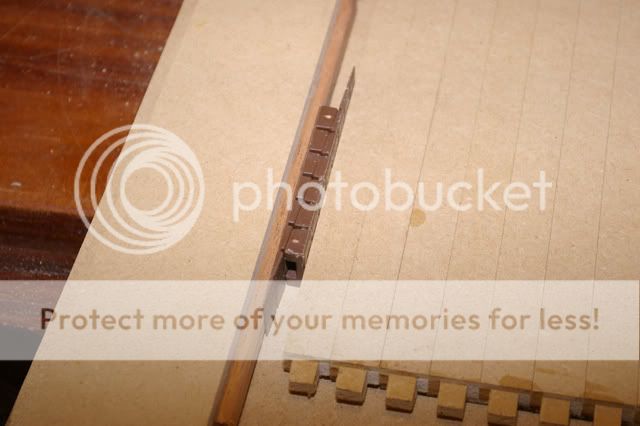
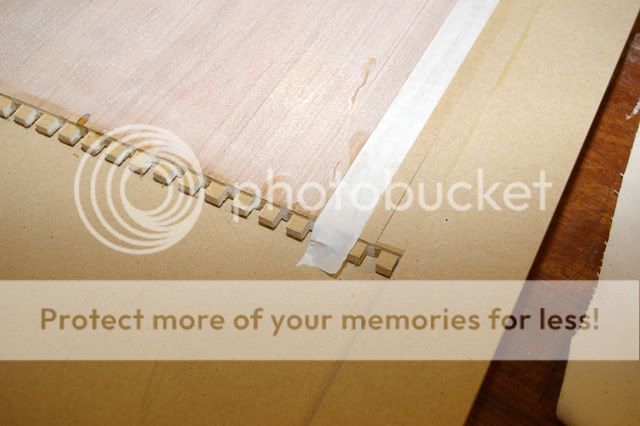
The next stage is to separate the slats, but first mark a large triangle on the back so that the slats can be re-assembled in the correct order.
I set up my straight edge across the bench, supported on two gash slats, and overhanging by the width of one slat. The left supporting slat was veneered, that on the right not. This meant that the gap under the straight edge tapered from its open end towards the inside, and made it easier to insert the tambour.
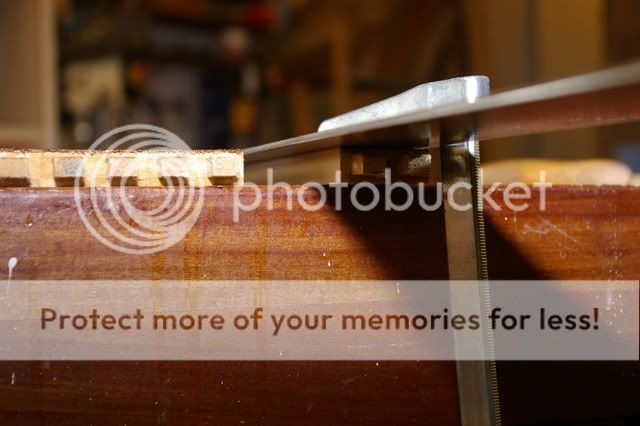
The slats can now be separated from each other by inserting the end slat under the straight edge, running a knife along that, and then twisting the remaining pack upwards.
Reassemble the pack, in the correct order but minus the handle slat, face down in the jig. Again insert some spare slats at the ends. Wedge lightly, pack down, and tighten the wedges. Cut a piece of canvas, slightly narrower than the face of the tambour, and a good bit longer. Apply glue to the face of the tambour, again not too much, but do ensure that the glue goes right to the edge where the missing handle isn't. If any glue has got onto the spare slats cover it with masking tape; we don't want them stuck to the canvas.
Put the canvas over the glue, ensuring that the exrta length is all at the handle end. Stick the lot in the vacuum press.
Once set, break the slats apart by folding them over a sharp edge.
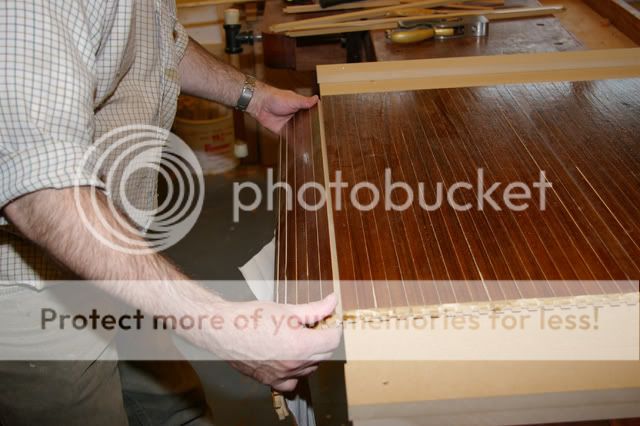
Attempt to fit the tambour into the slots, threading it in from the bottom back end.

almost inevitably it won't fit, so plane the faces of the tenons

and keep trying until you can get the tambour to appear at the front
Remove the tambour and wax the tenons liberally.
Clamp the handle slat, in the correct place and orientation, to the rest of the tambour.
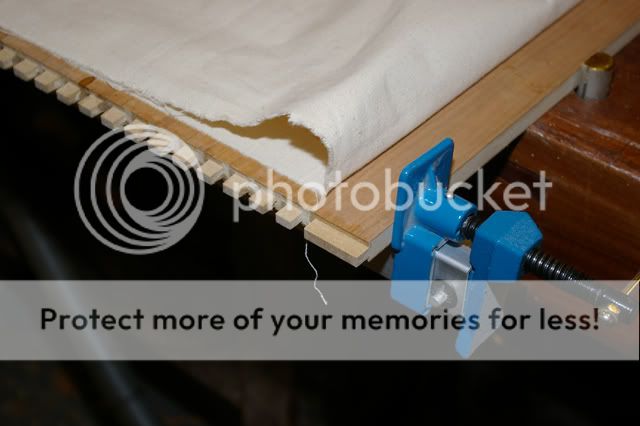
Make a batten from ply. It should be slightly narrower than the slat faces, and cover most of the handle slat and the first narrow slat. Screw it into position, clamping the canvas in place.
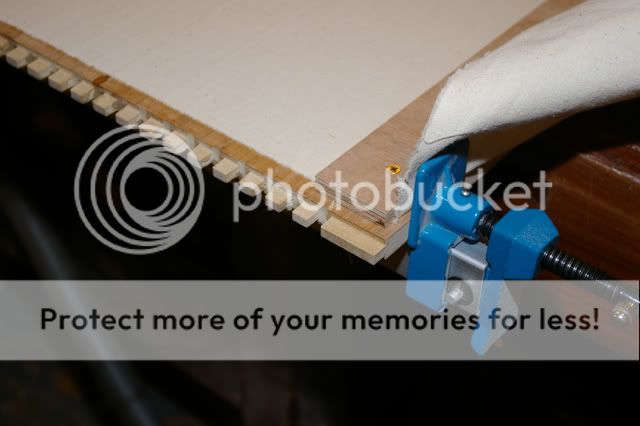
and trim the canvas back to the lower edge of the batten
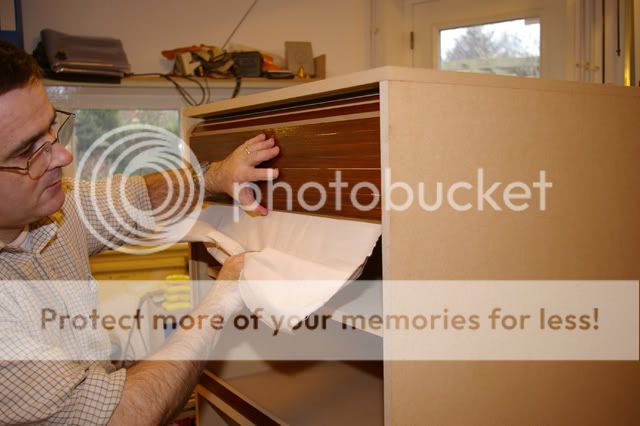
Remove the handle slat and batten, and thread the main body of the tambour back into place in the carcase. Slide the handle slat into the slots at the front and re-attach it to the rest of the tambour using the batten and its screws. Attach a stylish handle to the handle slat.
The final bit of making is a cover for the gap at the top of the carcase where the tambour dissappears into Room 101. This will need to be shaped on its rear face. Attach it with biscuits and....
she opens
she closes
Apologies for typos, mis-ordering, omissions etc.
Oh, and Alf,
Nah nah na nah nah \ /
/
Warning to the purist-at-heart: This is a quick and dirty cabinet, and the tambour is experimental, so don't expect to see anything of saleable quality.
The carcase is made of 18mm MDF. The two sides have slots routed for the tambours to run in. These are mirror images of each other, and are cut using the same template, flipped over to ensure symmetry.
There are three internal shelves:
the bottom comes flush with the front of the carcase
the middle one is set back to clear the tambour and the batten on its back side (see later)
the top shelf is really a lid to stop stuff on the middle shelf getting tangled in the tambour, it is also set back, but far enough forward that it catches the batten on the back of the tambour and acts as a door stop.
The first error is that the top groove is too high, with the result that the biscuit slots for the top break into it.
The solution is to cut down some biscuits. The sharp eyed will notice that I am using MDF biscuits. I bought a few (well 1,000 actually) to try them out. The good thing about them is that they don't swell if left out in a damp workshop. Everything else about them is bad, so don't you go buying any. I'm just trying to use them up on this, and other QandD, jobs.
Experiment 1. In an attempt to make the grooves harder wearing I soaked them in shellac. I did the same to the tongues on the slats later. Time will tell if that was a good idea.
Assemble the carcase
attach the top, and add a 6mm ply back to the shelves.
The tambour itself is made from slats of 12mm MDF. Cut a piece of the correct width (including the tenons that will run in the slots in the cabinet sides), and long enough that you can rip enough 18mm slats off it allowing for several extra - just in case. One extra double width slat is needed as the leading one; it will have the handle attached.
The front of the tambours are going to be veneered, and traditional wisdom states that the back should be veneered too. However, the back is also going to be 'veneered' with canvas. Does that count? I don't know. So.
Experiment 2: I veneered half of one side of the MDF. (The show veneer is applied later.) Time will tell which of these parts lasts better.
Form tenons on the sides of the MDF before ripping the slats from it. Note the use of the Clamp'n'Guide to hold the sheet down firmly, great when most of the sheet is hanging off the front of the router table. It also serves as a guard.
Because the slats are 18mm wide there is no way that the tenons you now have will go round the corners in the grooves so you will need to cut them back. Give them plenty of support as they go past the router cutter or they will be torn to pieces.
Soak the tenons liberally in shellac and leave to dry.
To veneer the face, you will now need to make a jig in which the slats can be aligned with each other and held tightly together. This is just a baseboard with battens attached to its face forming three sides of a rectangle. The battens must, of course be perpendicular to each other and straight or you will end up with a wonky tambour. The slats are placed in the jig, face side up, perpendicular to the open side, and should nearly, but not quite, fill the gap between the two opposing battens. Because we are going to be slopping glue around, and adding veneer, it is a good idea to add extra battens at either end of the pack. Oh, and don't forget to put the handle slat in the proper place. Insert folding wedges in the space at one and and tighten loosely - if you catch my drift.
Go over them with a flat piece of wood and mallet to get them all seated properly. Also ensure that they are all pushed against the non-opposed side.
Tighten the folding wedges fully.
Prepare your face veneers, shooting their edges, and taping the together. Make them only slightly larger in both dimensions, than the tambour proper. Apply glue to the slats in the jig. Don't be too generous because the glue will run into the gaps between the slats, and make them very hard to separate later. Lay the veneer on top and shove the lot into the vacuum press.
When that has dried, trim the veneer back to the slats' shoulders. A scalpel and straight edge, finishing off with a shoulder plane, worked well for me.
Unless you like finishing lots of individual sticks, I would suggest that you finish the face veneer now. I used Shellac - hope that's alright with you.
The next stage is to separate the slats, but first mark a large triangle on the back so that the slats can be re-assembled in the correct order.
I set up my straight edge across the bench, supported on two gash slats, and overhanging by the width of one slat. The left supporting slat was veneered, that on the right not. This meant that the gap under the straight edge tapered from its open end towards the inside, and made it easier to insert the tambour.
The slats can now be separated from each other by inserting the end slat under the straight edge, running a knife along that, and then twisting the remaining pack upwards.
Reassemble the pack, in the correct order but minus the handle slat, face down in the jig. Again insert some spare slats at the ends. Wedge lightly, pack down, and tighten the wedges. Cut a piece of canvas, slightly narrower than the face of the tambour, and a good bit longer. Apply glue to the face of the tambour, again not too much, but do ensure that the glue goes right to the edge where the missing handle isn't. If any glue has got onto the spare slats cover it with masking tape; we don't want them stuck to the canvas.
Put the canvas over the glue, ensuring that the exrta length is all at the handle end. Stick the lot in the vacuum press.
Once set, break the slats apart by folding them over a sharp edge.
Attempt to fit the tambour into the slots, threading it in from the bottom back end.
almost inevitably it won't fit, so plane the faces of the tenons
and keep trying until you can get the tambour to appear at the front
Remove the tambour and wax the tenons liberally.
Clamp the handle slat, in the correct place and orientation, to the rest of the tambour.
Make a batten from ply. It should be slightly narrower than the slat faces, and cover most of the handle slat and the first narrow slat. Screw it into position, clamping the canvas in place.
and trim the canvas back to the lower edge of the batten
Remove the handle slat and batten, and thread the main body of the tambour back into place in the carcase. Slide the handle slat into the slots at the front and re-attach it to the rest of the tambour using the batten and its screws. Attach a stylish handle to the handle slat.
The final bit of making is a cover for the gap at the top of the carcase where the tambour dissappears into Room 101. This will need to be shaped on its rear face. Attach it with biscuits and....
she opens
she closes
Apologies for typos, mis-ordering, omissions etc.
Oh, and Alf,
Nah nah na nah nah \
/