You are using an out of date browser. It may not display this or other websites correctly.
You should upgrade or use an alternative browser.
You should upgrade or use an alternative browser.
Project Number two - Side table 1 & 2 - NEW PICTURES
- Thread starter LarryS.
- Start date


Help Support UKworkshop.co.uk:
This site may earn a commission from merchant affiliate
links, including eBay, Amazon, and others.
OPJ
Established Member
RAS? I was certain you meant Radial Arm Saw...! :roll: 
If you don't want to spend more money on a sander, Paul, you could trim back any exposed edges with a router. Clamp a scrap of MDF/ply/whatever next to the joint and put your router on top. Plunge the cutter down so it touches the finished service; this will give you your maximum plunge or depth of cut (make sure you lock it!).
Even then, if your looking to "plane" end-grain, you need to work inwards, especially with a router, so as to prevent breakout.
I guess you'll still need to sand the surface down before you finish it though... If you don't already have a belt sander then (I think you do?), maybe it is time to spend more money after all!
Planer thicknesser is also the way to go. :wink:
Olly,
When you talk about the router do you mean put the piece of MDF or whatever onto the surface I want to reference to, then plunge down so am touching that surface, then fire the router up on the bit I want to trim flush ?
and when you say 'work inwards' do you mean have the blade turning 'inwards' i.e. turning so its pushing whatever wood it is cutting into another piece of wood (so preventing chip-out)
I have got a belt sander, what grit/s will I need ? Its only got the belt which came with it which is very very coarse
apologies for all the questions but I am in new realms with this job
OPJ
Established Member
Yes Paul, it sounds like you've got it. Just be careful not to tip the router or else you could make a mess of things...
As for the belt sander, you want to be careful using any grit as they can quite easily 'dig in' if you don't hold them horizontally on the surface. With coarse grits, they can also remove material at an alarming rate - I wouldn't go for anything less than 120g, finishing with 240g minimum.
Just be careful not to tip the router or else you could make a mess of things...As for the belt sander, you want to be careful using any grit as they can quite easily 'dig in' if you don't hold them horizontally on the surface. With coarse grits, they can also remove material at an alarming rate - I wouldn't go for anything less than 120g, finishing with 240g minimum.
Ok so I made a lot of progress on this weekend....
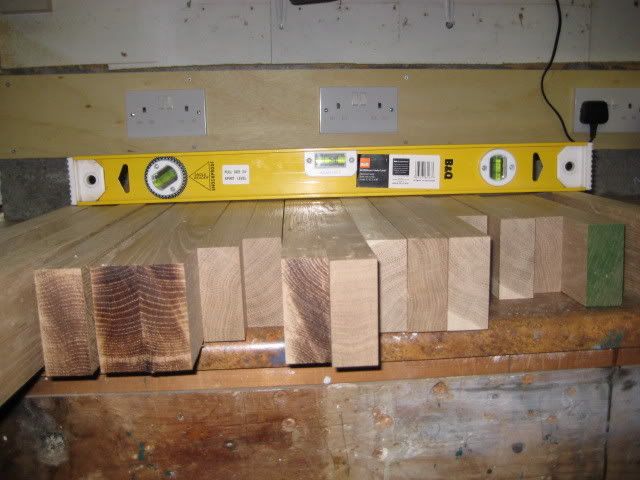
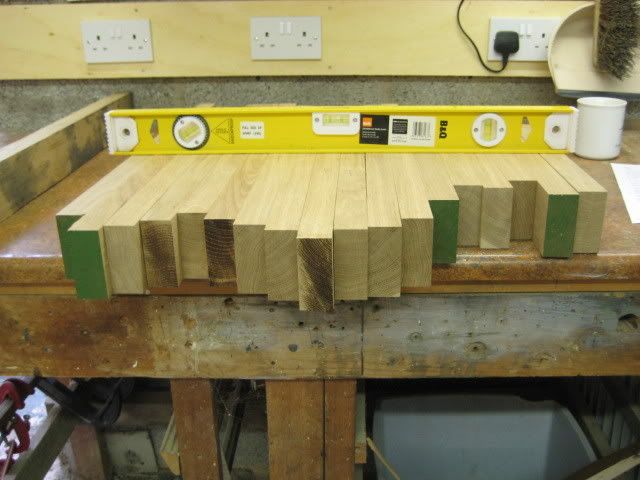
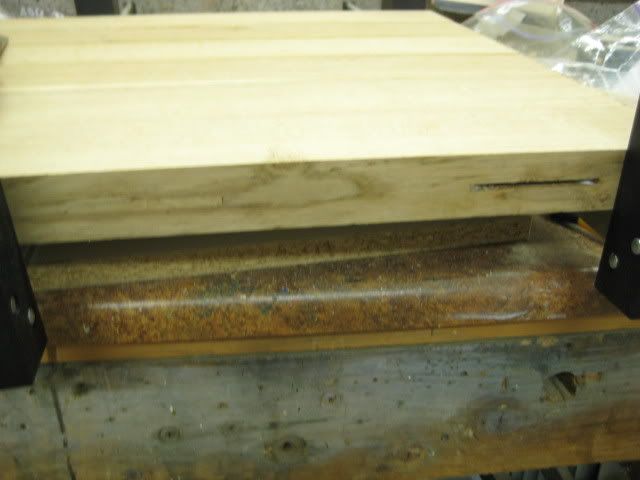
so the wood after 2 weeks seasoning in the sun room :
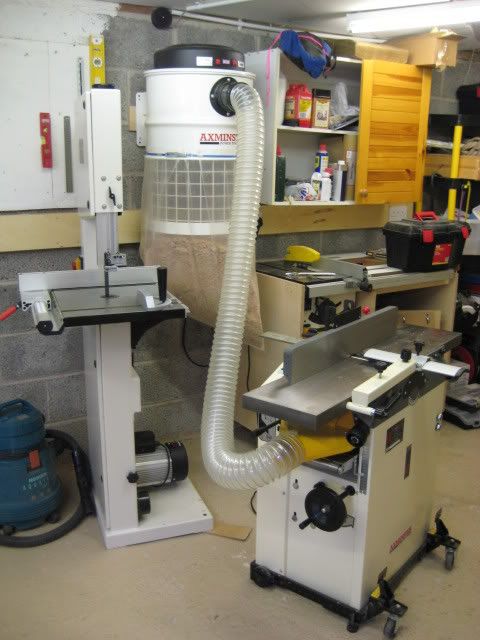
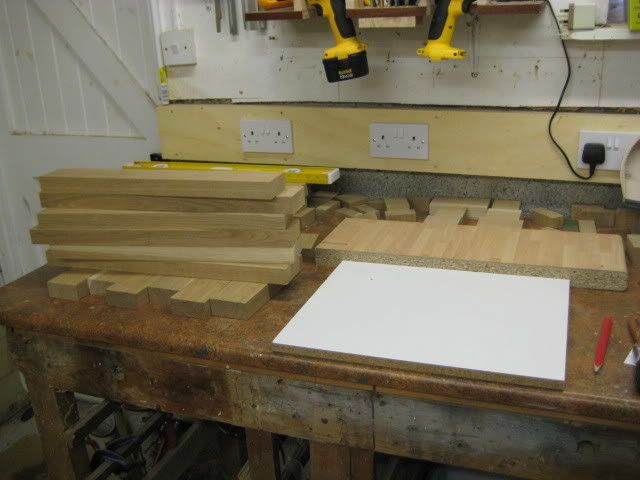
the set-up for working the wood :
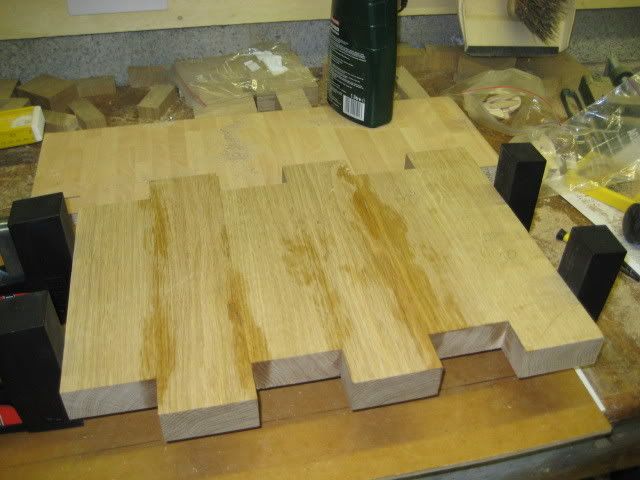
all the pieces planed and thicknessed on two sides to give me two reference edges, then thicknessed the lot down to the smallest pieces thickness
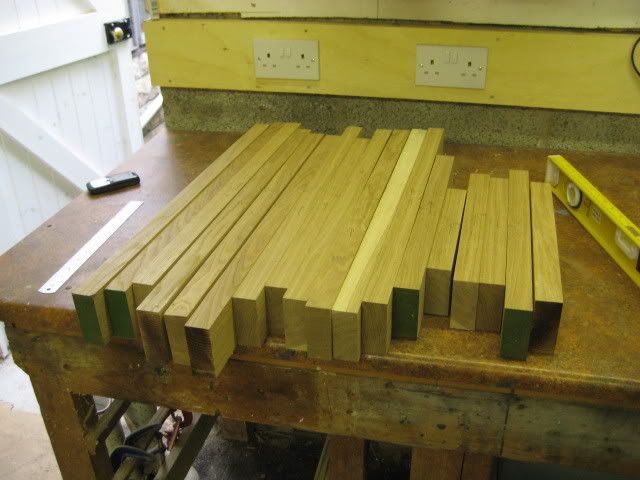
then left with one reference edge of varying sizes :
all done :
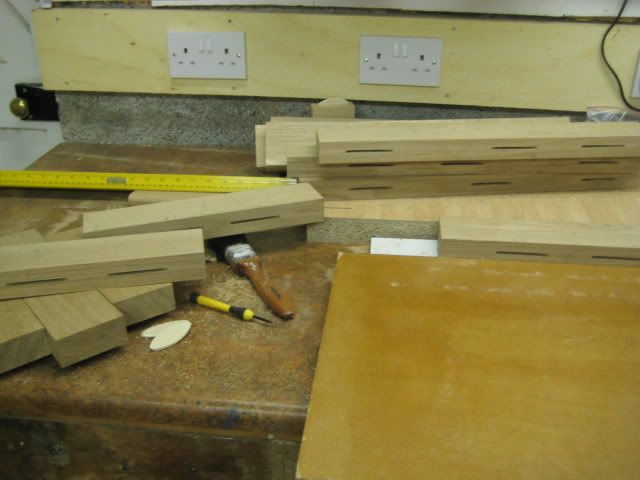
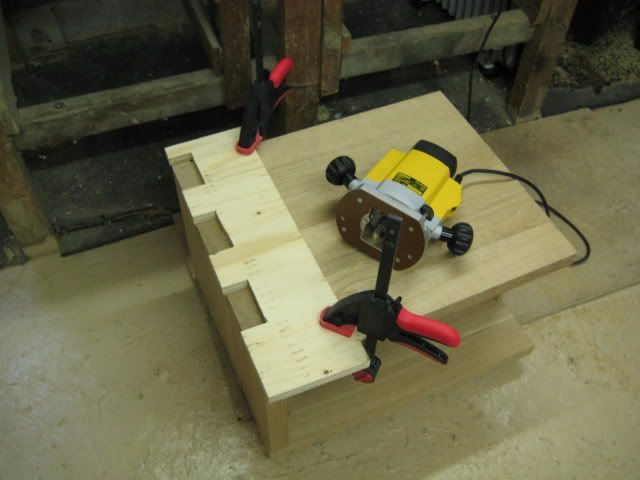
my heath robinson biscuiting set-up
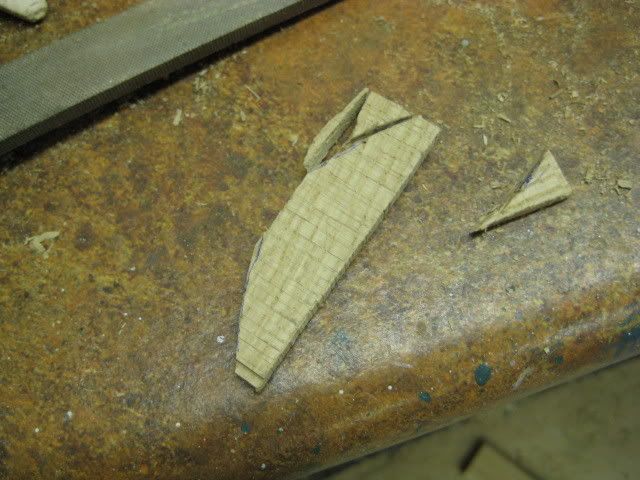
biscuits done, big learning point here was that my £30 wickes biscuit jointer is rubbish (very inconsistent and the adjusting screw doesn't adjust !) so a new one is required, recommendations appreciated, it took me 2 hours to do about 40 biscuits, not good :
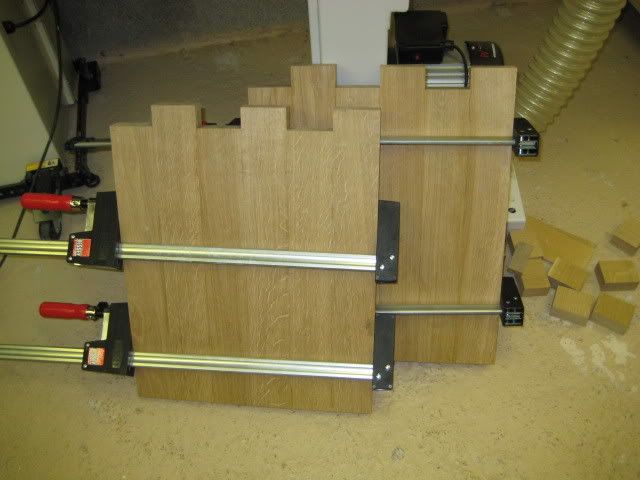
glueing up the sides first
Then AAAAGH, I had made sure that both sides had the nice wood facing out, but I'd made them identical ! So the best face of one of the sides would have been pointing inward, how come Norm never does that ?! So I quickly had to pull an end piece off, re-biscuit it onto the other side, then make some oak biscuits to fit in the holes were left.
started fixing them
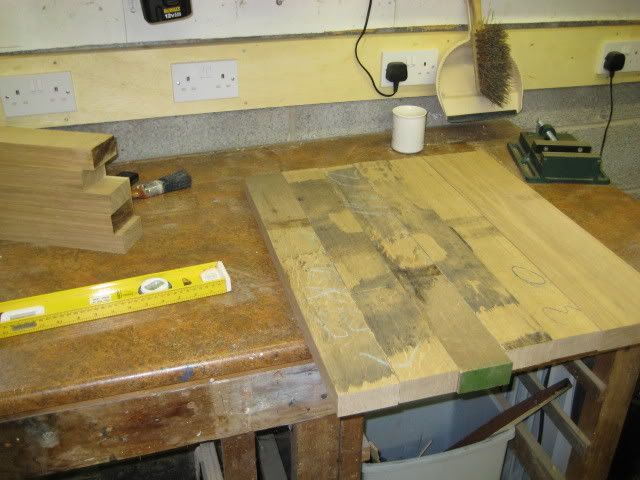
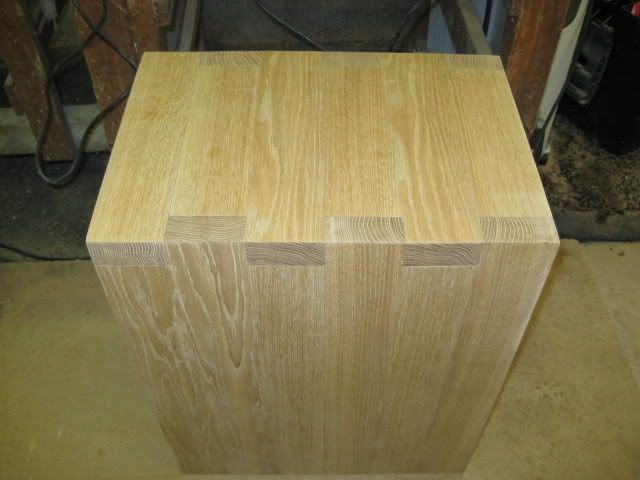
then the top
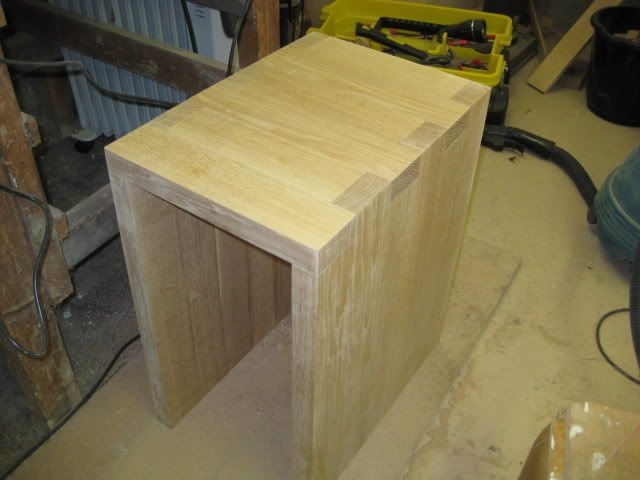
so glued up the unit for the first time. Big learning point here was that I didn't have anything to keep things at 90 degrees whilst clamping, so I am going to be on to Axminster in the next couple of days to order up so things to do just that. Spent so much time trying to get the clamps to hold everything square that it took ages
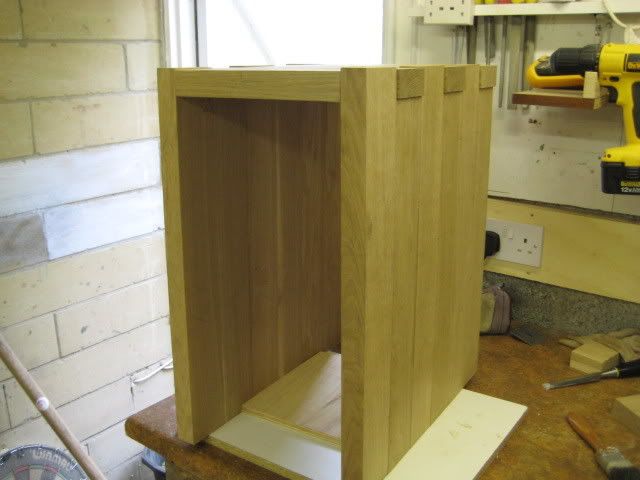
Have to admit here that after the clamping of one side it was splayed out by about 2 degrees, so when i did the other side I matched it, you can't see from looking at it though
second thing to admit which i couldn't fix, when doing the glue-up I was so concerned over getting the legs at 90 degrees to the top I didn't concentrate on whether the side of the sides (if you see what i mean) were parallel, this could have been simply done by glueing it up on its side and ensuring both legs were on the ground, so a learning point there (only about 5mm difference which you wouldn't hknow unless you look for it).
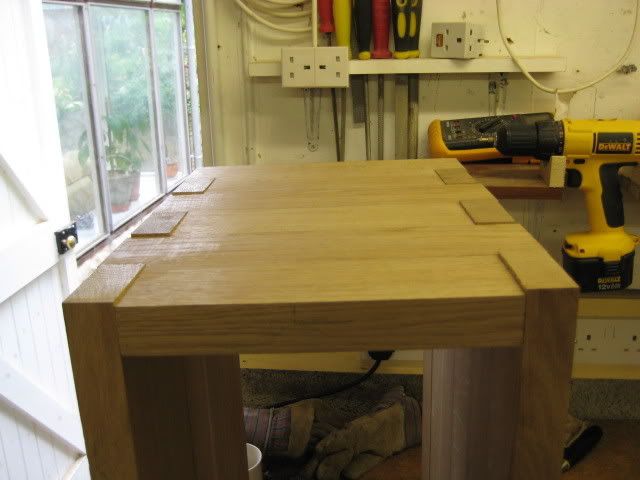
then used Ollys suggestion of routing off the excess :
after the routing
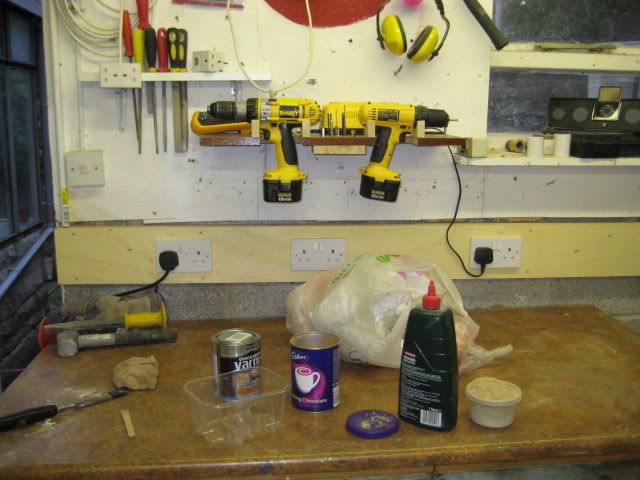
my new screwdriver stand that i knocked up to clear the table (it works a treat, saves space and keep my most used bits on hand)
so next jobs are to sand the inside paces, then varnish and finished.
In the meantime my plan is to head down to interesting timber in the next week to get the timber to make a matching unit. On the second one I think construction time will take about half the time because I know what I am doing now, plus everything should be square !
so the wood after 2 weeks seasoning in the sun room :
the set-up for working the wood :
all the pieces planed and thicknessed on two sides to give me two reference edges, then thicknessed the lot down to the smallest pieces thickness
then left with one reference edge of varying sizes :
all done :
my heath robinson biscuiting set-up
biscuits done, big learning point here was that my £30 wickes biscuit jointer is rubbish (very inconsistent and the adjusting screw doesn't adjust !) so a new one is required, recommendations appreciated, it took me 2 hours to do about 40 biscuits, not good :
glueing up the sides first
Then AAAAGH, I had made sure that both sides had the nice wood facing out, but I'd made them identical ! So the best face of one of the sides would have been pointing inward, how come Norm never does that ?!
So I quickly had to pull an end piece off, re-biscuit it onto the other side, then make some oak biscuits to fit in the holes were left.
started fixing them
then the top
so glued up the unit for the first time. Big learning point here was that I didn't have anything to keep things at 90 degrees whilst clamping, so I am going to be on to Axminster in the next couple of days to order up so things to do just that. Spent so much time trying to get the clamps to hold everything square that it took ages
Have to admit here that after the clamping of one side it was splayed out by about 2 degrees, so when i did the other side I matched it, you can't see from looking at it though
second thing to admit which i couldn't fix, when doing the glue-up I was so concerned over getting the legs at 90 degrees to the top I didn't concentrate on whether the side of the sides (if you see what i mean) were parallel, this could have been simply done by glueing it up on its side and ensuring both legs were on the ground, so a learning point there (only about 5mm difference which you wouldn't hknow unless you look for it).
then used Ollys suggestion of routing off the excess :
after the routing
my new screwdriver stand that i knocked up to clear the table (it works a treat, saves space and keep my most used bits on hand)
so next jobs are to sand the inside paces, then varnish and finished.
In the meantime my plan is to head down to interesting timber in the next week to get the timber to make a matching unit. On the second one I think construction time will take about half the time because I know what I am doing now, plus everything should be square !
looks good.
i wouldn't use varnish though? i finished mine with Liberon finishing oil which gives a nice satin finish (subject to number of coats) and is easily re-finished
let me know if you need any further information.
you can check what the finish looks like by looking at my photos
i wouldn't use varnish though? i finished mine with Liberon finishing oil which gives a nice satin finish (subject to number of coats) and is easily re-finished
let me know if you need any further information.
you can check what the finish looks like by looking at my photos
motownmartin
Established Member
I'll second thatpryally":38m5h39o said:looks good.
i wouldn't use varnish though? i finished mine with Liberon finishing oil which gives a nice satin finish (subject to number of coats) and is easily re-finished
let me know if you need any further information.
you can check what the finish looks like by looking at my photos
Chems
Established Member
A good job there paul, looks very nice is oak nice to work with then?
floorman
Established Member
nice work , i would use osmo hard wax oil to finish it paul. if you would like some pm me your address and i will send you some.
gary
gary
wizer
Established Member
- Joined
- 3 Mar 2005
- Messages
- 15,589
- Reaction score
- 1
Wow Paul, that's come on a treat, I like it. May even nick the idea
What you could have done to keep everything square is made a 'former' i.e make a ply box which is prefectly square and then build the table over it. Just and idea. Do a search for niki's triangles too. They where good for setting things up square.
Also I'd agree with Osmo Polyx. Very easy to apply and great finish.
OPJ
Established Member
Looking good so far, Paul. There is one problem though... Your workshop looks very clean and you appear to have a lot of space!! :x :wink:
What is the problem you are having with your cheap biscuit jointer? Is it the fence? You may still be able to get good results by working off the base only. Better yet, use a router with a 4mm (5/32") slot cutter! :wink: Or you could rout grooves and fit plywood tongues.
I like the jig you made for routing away the excess, no danger of the router tipping there.
I personally prefer an oil finish over any varnish when it comes to hardwoods; they seem to enhance the true beauty of the grain. Although both finishes will darken or 'yellow' the timber slightly. I used Osmo Polyx on my coffee table, it really is good stuff and it's done with only two coats. It's not a heat-resistant finish, so you'll have to ensure that coasters are in place. As far as I know, Danish Oil and Finishing Oil are also the same.
looks like osmo is the weapon of choice, question is where can I get it ? Ideally I wanted to order from axminster and get free postage (need a few other things) but doesn't look like they stock it ?
thanks for the offer gary, its greatly appreciated. However I am going to make another table and then hopefully some more pieces after that so am going to order up a stock
floorman":1i9moioa said:nice work , i would use osmo hard wax oil to finish it paul. if you would like some pm me your address and i will send you some.
gary
thanks for the offer gary, its greatly appreciated. However I am going to make another table and then hopefully some more pieces after that so am going to order up a stock
OPJ":19yu3iw7 said:Looking good so far, Paul. There is one problem though... Your workshop looks very clean and you appear to have a lot of space!! :x :wink: .
pictures can be deceiving, workshop is fairly small and covered in dust !
not the fence, to discount it i worked off the base and still have problems with the plunge mechanism, it isn't consistent and the adjuster screw for the depth doesn't seem to do anything :?OPJ":19yu3iw7 said:What is the problem you are having with your cheap biscuit jointer? Is it the fence? You may still be able to get good results by working off the base only. Better yet, use a router with a 4mm (5/32") slot cutter! :wink: Or you could rout grooves and fit plywood tongues.
OPJ
Established Member
Paul, I bought my Osmo Polyx oil from Rutlands. I was about you offer you some myself since you're not far away, but I've just started a couple of projects where I intend to use it! :roll:
Or, you could trying getting in touch with Osmo, who may be able to tell you of a stockist in your area, meaning you'd be able to get it at your leisure and save on the delivery charge. :wink:
Sounds like it's time to bin (recycle!) that biscuit jointer! You say the results are inconsistent... If you mean that it's not cutting to the same depth that do you think a new blade might help? Are you able to photograph the depth stop - perhaps it's possible to replace the screw thread?
Or, you could trying getting in touch with Osmo, who may be able to tell you of a stockist in your area, meaning you'd be able to get it at your leisure and save on the delivery charge. :wink:
Sounds like it's time to bin (recycle!) that biscuit jointer!
You say the results are inconsistent... If you mean that it's not cutting to the same depth that do you think a new blade might help? Are you able to photograph the depth stop - perhaps it's possible to replace the screw thread?So I've bought and had delivered some Osmo Plyx-Oil (Clear, Satin). On the back there is a warning message :
"For wood tending to attract a blue stain in moist surroundings (e.g. Pine, hardwoods) a pre-treatment with biocide-free wax impregnation Osmo Wood Protector is recommended"
I'm assuming that this wouldn't include Oak but want to check before I wreck all my hard word, anyone used this stuff on oak before without any other prep and had no problems ??
thanks
Paul
JonnyD
Established Member
Hi there is no need for the pre treatment just apply the osmo straight to the oak. I have used osmo for the last 5 years on many projects from staicases to furniture and it is a very good finish. Recently i have tried fiddes hardwax oil which is now available at axminster and i think it is better than the osmo oil.
Nice table by the way
jon
Nice table by the way
jon
LarryS":29vmqply said:So I've bought and had delivered some Osmo Plyx-Oil (Clear, Satin). On the back there is a warning message :
"For wood tending to attract a blue stain in moist surroundings (e.g. Pine, hardwoods) a pre-treatment with biocide-free wax impregnation Osmo Wood Protector is recommended"
I'm assuming that this wouldn't include Oak but want to check before I wreck all my hard word, anyone used this stuff on oak before without any other prep and had no problems ??
Hi Paul,
I have only ever used osmo on a walnut unit i made, the oil did indeed go a hazy blue when it dried out, I ended up sanding it back to bare wood and using danish oil. No problems at all. So just be carefull, the manufacturer would'nt go to the bother of puting this warning on their product for no reason
:wink:
Nice table, as regards keeping everything square and parallel, i always tack or clamp a few strips of ply or something across the bottom and diagonals to keep them in place while the glue drys.
HTH
Gary.
thanks John / Gary, what I've done now is apply some to a scrap piece so will see how that gets on
gutted to hear fiddes is better, as I orderde the osmo from rutlands and have made another order to axminster for some other bits (as they didn't sell osmo !)
never mind
paul
gutted to hear fiddes is better, as I orderde the osmo from rutlands and have made another order to axminster for some other bits (as they didn't sell osmo !)
never mind
paul
woodbloke
Established Member
Paul - Osmo is very good stuff. I've used it on a couple of projects and am using it to finish off the current one, which ought to be done soon. The trick is to apply two thin coats. I then use some soft teak wax (I use the matt Osmo) over the top to give a hint of lustre.
Project is looking good BTW - Rob
Project is looking good BTW - Rob
Similar threads
- Replies
- 13
- Views
- 1K
- Replies
- 68
- Views
- 6K
- Replies
- 80
- Views
- 7K