Picture framing tactics

UKworkshop.co.uk

Help Support UKworkshop.co.uk:

This site may earn a commission from merchant affiliate links, including eBay, Amazon, and others.

wcndave

Established Member
Joined
5 Oct 2008
Messages
1,130
Reaction score
7
Location
Truden, Italy
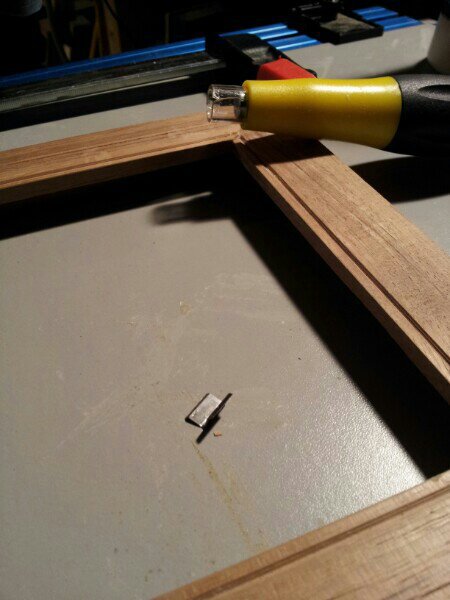
I have these picture framing"clamps"

I tried to drive them into the corners and they only succeeded in spreading the joint.

Turned them around and they spread it even more...

Any tips appreciated dc
8ybuvezy.jpg


Sent from my GT-I9100 using Tapatalk
 
If you're referring to the small metal piece in the middle of the photo, they look like they maybe something to do with canvas stretcher bars and not clamps but I maybe wrong. Hopefully someone with a bit more knowledge will be along soon to give you a proper answer.

regards

Brian
 
I altered the pusher thing I got so it would hold in the pillar drill. This stopped it from going wibbly wobbly when trying to push it in. I usually cascamite the joints first and let the glue cure, then just put those metal things in for good measure ;)
Coley

Sent from my GT-I9300 using Tapatalk
 
Yes, using the pillar drill or a proper press for controlled insertion of those "nails" is the way to go. And glueing first certainly makes it easier - the glue keeps things stable and the nail thingy provides most of the strength.
If you have some sort of assembly board which will hold the frame together tightly (Marples used to make corner clamps for this, didn't they?) it might be possible to glue and pin at the same time, but if you don't mind the wait, glueing first is easier.

But watch out if the frame is very hard wood, or only has a narrow land into which to insert the nail - they can split the wood all too easily.
 
Thanks. I thought these things were designed so they drew the pieces together to tighten the joint, but i will just use the band clamp and put these in at the end.

Cheers.
 
Those are underpinner nails, designed to be driven in upwards from below in an underpinning machine. When you try to use them from above downwards they work OK if the moulding is flat but if it is curved then the joint can rock apart.. The only good way of using them I've found is to lay the frame face down then use bits of card (I use visiting cards) to pack the space between the moulding and the bench so the moulding can't rock when the nail is pressed in.
 
Well I've got one and never had a problem!
As said they are just re-inforcing connectors not clamps and as long as the frames are glued and clamped tightly they do their job. I push them in whilst the glue is still wet and use the tool by hand on all but the hardest of wood which need a gentle tap with a mallet.

Needless to say, they won't pull together a mitre and it needs to be perfect.

Bob
 
Thanks for the replies. I have a corner clamp, but this frame is only 6 by 9".

I had thought the pins were shaped to draw the parts together when gluing, and my parts were fairly square, no fancy mouldings.

Next time i think i'll focus a bit more on the clamping whilst gluing, and deal with supporting hardware after. Obviously the end grain glue is weak, so these inserts provide quite a bit of the strength.

I mostly used splines in the past but as this was a small frame, and i've seen these used in the back of almost every wooden frame I've looked at I thought I'd give them a go.

Thanks again!
 
Back
Top