OPJ
Established Member
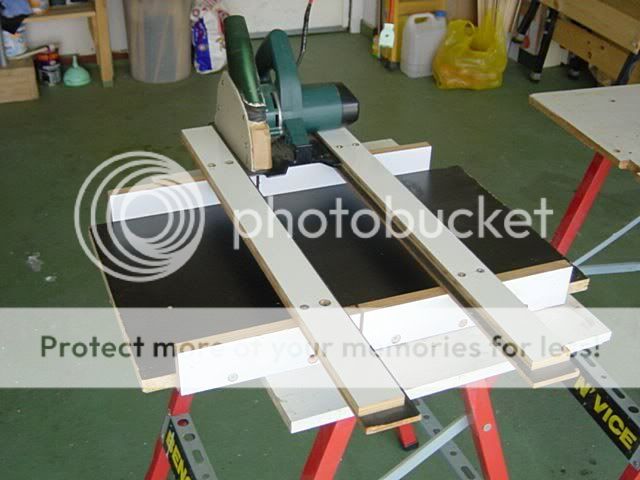
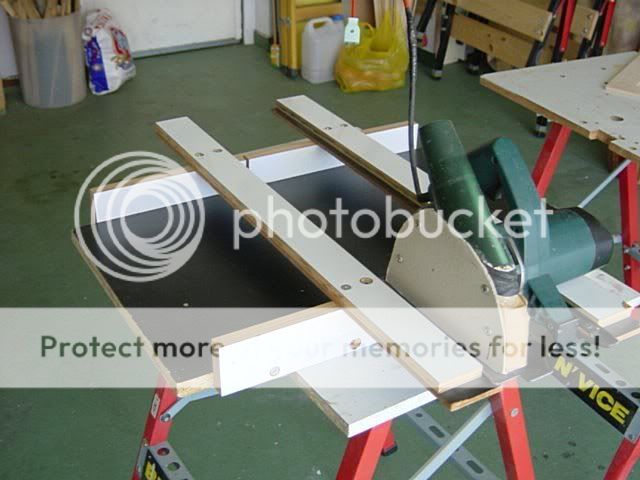
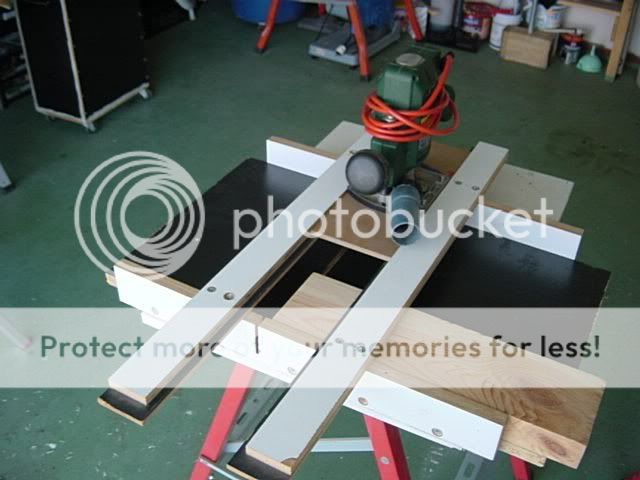
Right then. The idea for this tenon-cutting jig for my router came about some time ago when I came across a very similar idea for cross-cutting with a handheld portable circular saw (from a Stanley book on Storage and Shelving).
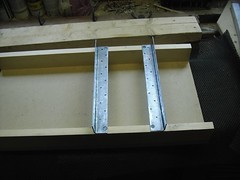
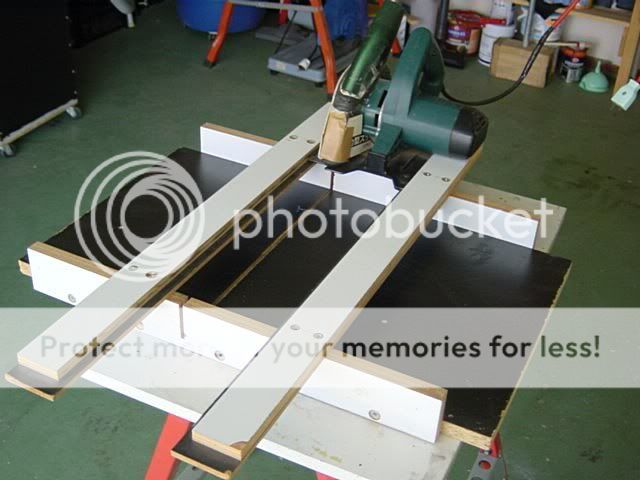
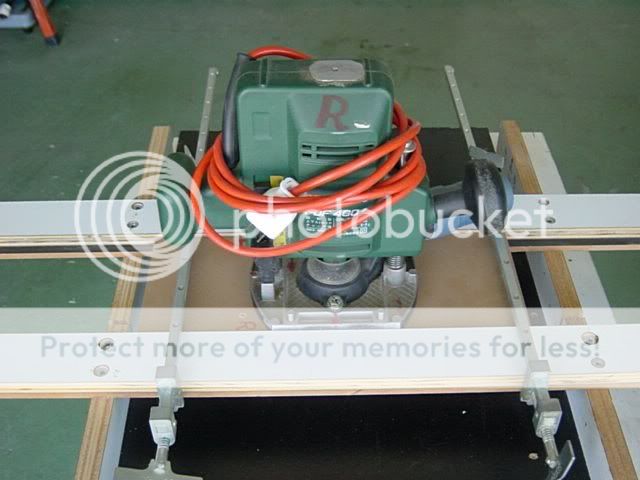
The idea is that the router (in traditional overhead position) runs along these two guide rails (in this case, made of 2mm thick angle iron) and will cross-cut one face of a tenon, nibbling away from the end grain (feeding timber from left to right) until you reach your marked line (a stop can then be fixed to the right of the rails). Then, flip the timber over for the other face and repeat, working your way towards the stop.
It is very important that the timber is positioned against the rear timber fence, due to the direction of which the router cutter rotates. Otherwise, you know, the cutter might suddenly catch the timber and try to fly away! Unless, of course, you find it easier to pull the router towards you; in which case, you would only then have the timber against the fence nearest you. But in my situation anyway, I have used the rear fence only as a reference for setting the guide rails at 90 degrees.
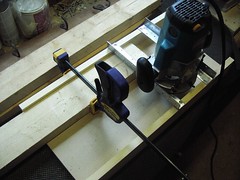
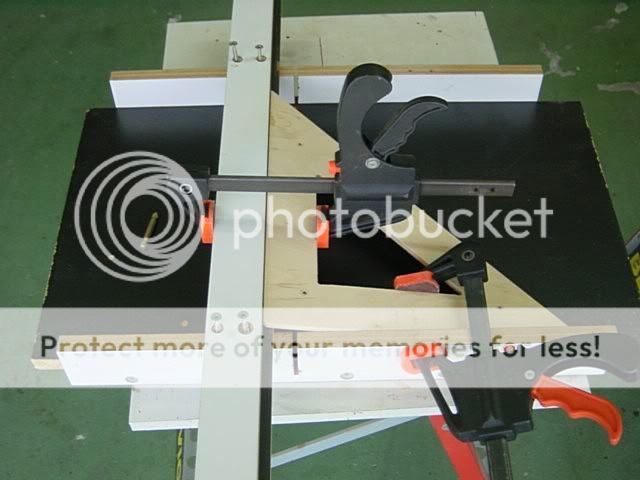
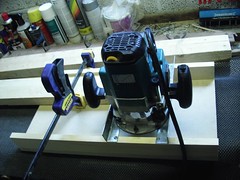
As you can see, I am using a quick-grip clamp to hold the timber - although I plan to replace this with a couple of toggle clamps fixed on top of the rear fence.
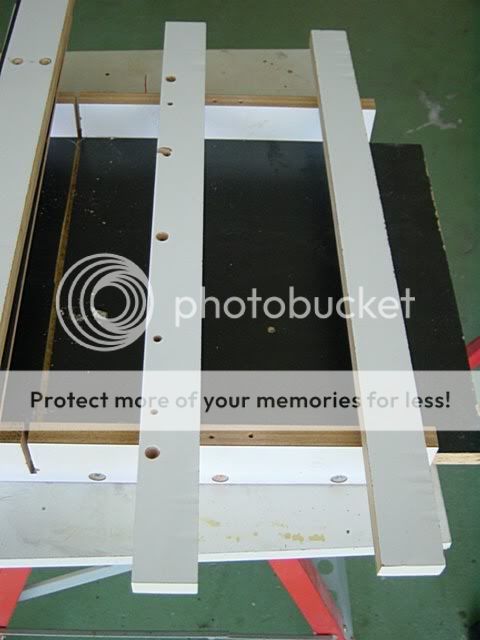
The overall dimensions of the base (18mm MDF - chipboard, ply, etc. will also do) are 600mm long x 300mm wide. This gives me a comfortable 260mm working space between the front and back fence (58mmx19mm) - which matches the maximum capacity of my planer-thicknesser, just incase. It also allows me to rout several tenons at once (depending on the width of the rails to be cut, of course). :wink:
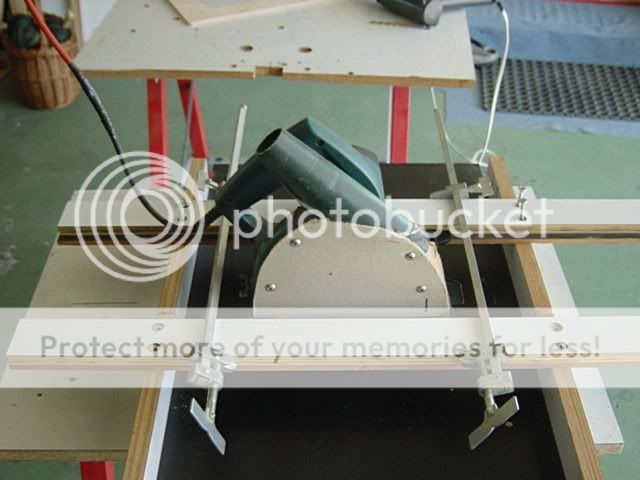
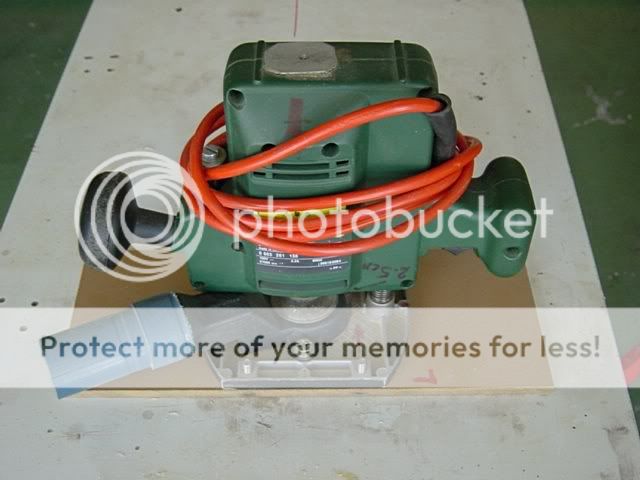
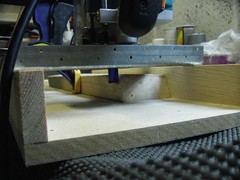
In order to get the correct working height below the guide rails, I took the maximum given plunge depth of my router (60mm) and subtracted the thickness of the angle iron (2mm), which left me with 58mm - plenty, as I haven't yet come across a job with rails any thicker than 2".")
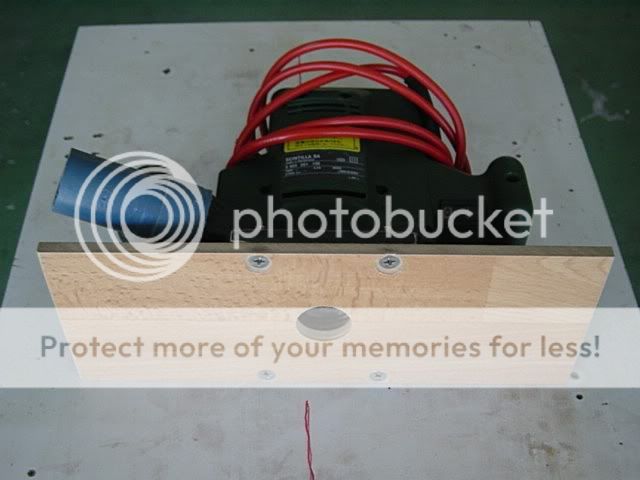
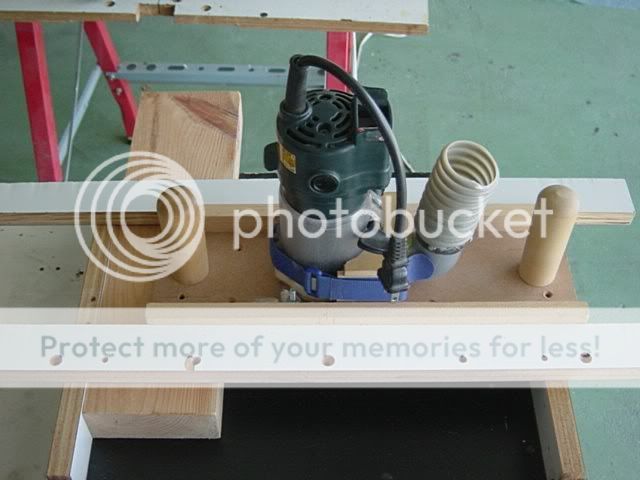
I'm not sure about the angle iron though. I've cleaned it up and even waxed it to ensure it doesn't make a mess of my router's base (I may also make a spare one from acrylic), but they aren't terribly true along their short length - although, arguably, it's not something I cannot clean up with a shoulder plane.
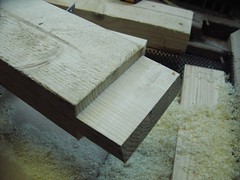
I made these test cuts with one of Rutlands Tornado 3/4" twin-flute straight cutters, which leave a very clean finish, but they are only 1-1/4" long and therefore stands just over an inch above the base of this jig.
It may well be okay for the tasks I have ahead of me, but I'd like a longer cutter (2"+) and I'm looking for suggestions please?
Trend and Tornado seem to do them but they're only 1/2" in diameter. Silverline do a 3/4" one (Toolstation) but I'm unsure of the quality. You can understand my desire to have a wider cutter when you think of the number of passes it would otherwise take to rout a 4" tenon! :roll:
I hope you have all enjoyed reading this and I'd like to think that some of you will find this idea very interesting indeed - hopefully, some of you will go away and develop on it! But I'm equally open to criticism all the same.! :wink:
Thanks for looking.
The idea is that the router (in traditional overhead position) runs along these two guide rails (in this case, made of 2mm thick angle iron) and will cross-cut one face of a tenon, nibbling away from the end grain (feeding timber from left to right) until you reach your marked line (a stop can then be fixed to the right of the rails). Then, flip the timber over for the other face and repeat, working your way towards the stop.
It is very important that the timber is positioned against the rear timber fence, due to the direction of which the router cutter rotates. Otherwise, you know, the cutter might suddenly catch the timber and try to fly away! Unless, of course, you find it easier to pull the router towards you; in which case, you would only then have the timber against the fence nearest you. But in my situation anyway, I have used the rear fence only as a reference for setting the guide rails at 90 degrees.
As you can see, I am using a quick-grip clamp to hold the timber - although I plan to replace this with a couple of toggle clamps fixed on top of the rear fence.
The overall dimensions of the base (18mm MDF - chipboard, ply, etc. will also do) are 600mm long x 300mm wide. This gives me a comfortable 260mm working space between the front and back fence (58mmx19mm) - which matches the maximum capacity of my planer-thicknesser, just incase. It also allows me to rout several tenons at once (depending on the width of the rails to be cut, of course). :wink:
In order to get the correct working height below the guide rails, I took the maximum given plunge depth of my router (60mm) and subtracted the thickness of the angle iron (2mm), which left me with 58mm - plenty, as I haven't yet come across a job with rails any thicker than 2".
I'm not sure about the angle iron though. I've cleaned it up and even waxed it to ensure it doesn't make a mess of my router's base (I may also make a spare one from acrylic), but they aren't terribly true along their short length - although, arguably, it's not something I cannot clean up with a shoulder plane.
I made these test cuts with one of Rutlands Tornado 3/4" twin-flute straight cutters, which leave a very clean finish, but they are only 1-1/4" long and therefore stands just over an inch above the base of this jig.
It may well be okay for the tasks I have ahead of me, but I'd like a longer cutter (2"+) and I'm looking for suggestions please?
Trend and Tornado seem to do them but they're only 1/2" in diameter. Silverline do a 3/4" one (Toolstation) but I'm unsure of the quality. You can understand my desire to have a wider cutter when you think of the number of passes it would otherwise take to rout a 4" tenon! :roll:
I hope you have all enjoyed reading this and I'd like to think that some of you will find this idea very interesting indeed - hopefully, some of you will go away and develop on it! But I'm equally open to criticism all the same.! :wink:
Thanks for looking.