


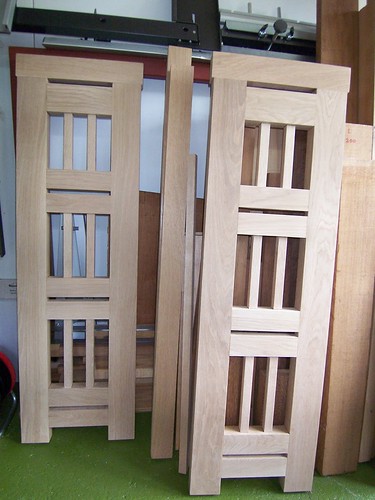
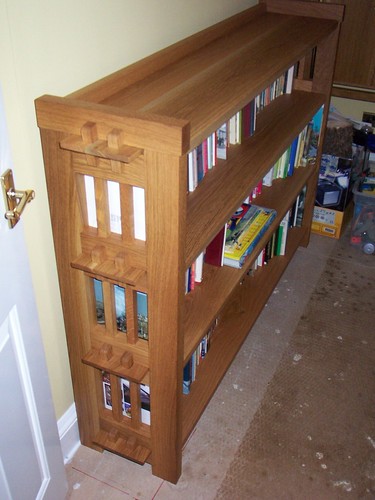
This is an open framed Arts and Crafts style bookcase, reworking a design by maker C. Michael Vogt (In the Craftsman style ISBN 1-56158-398-7 ; Taunton). Vogt’s bookcase was conceived as a router based project & this was one reason for choosing it – I’ve always disliked working with the router & this project was designed to make me if not like the machine at least reach an accommodation with it. This was a mistake ! By half way through the project I was even more convinced why I don’t like using this (admittedly) useful machine, principal being I don’t get any satisfaction from its use. Being in the lucky position of not having to charge for the item, I returned to mostly hand tool use & started to enjoy the work again.
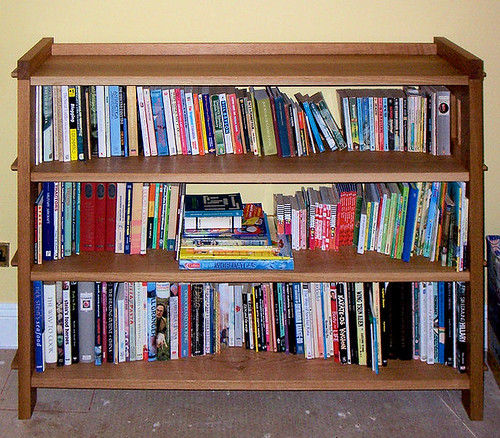
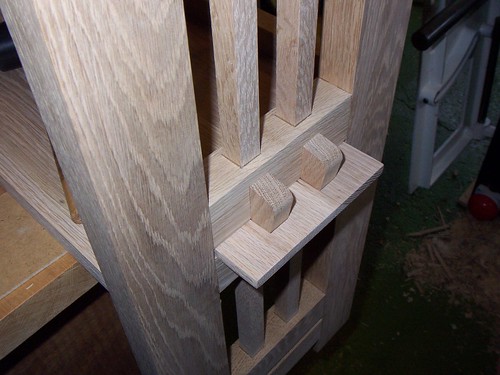
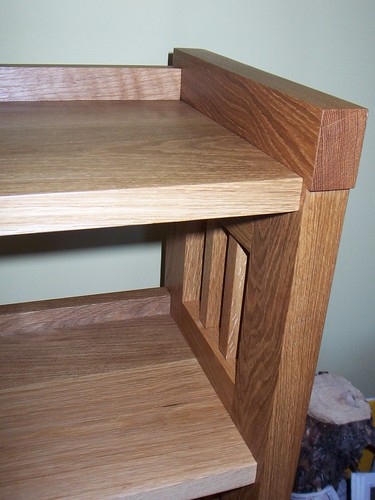
The bookcase ends provide mortices for the shelves and top, which are supported in housings on the inner surfaces of the sides ; the shelves & top are then held in place with a pair of pegs at the end of each shelf. Thus disassembly for moving is easy.
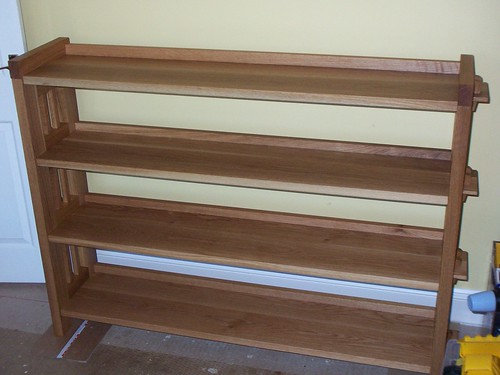
The shelves & top are about 6 feet long. An upstand at the back of each shelf stops books falling off the back, and provides enough stiffness to alleviate the need for additional support in the middle of the shelf span.
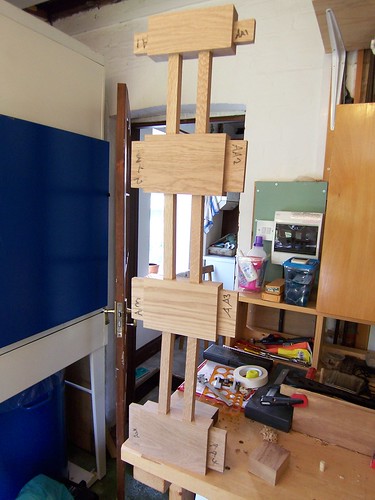
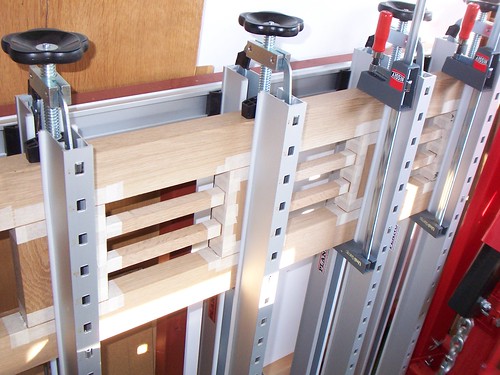
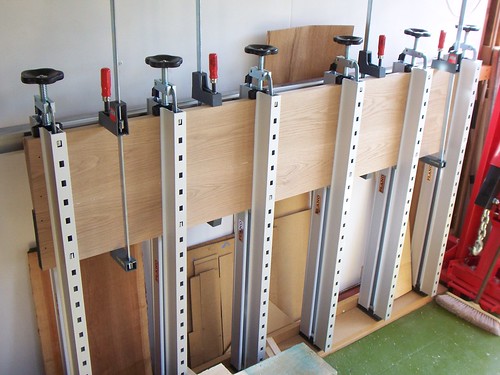
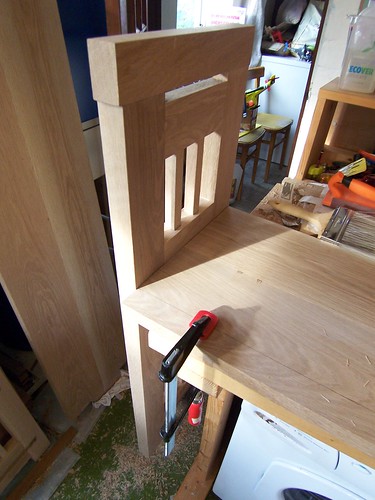
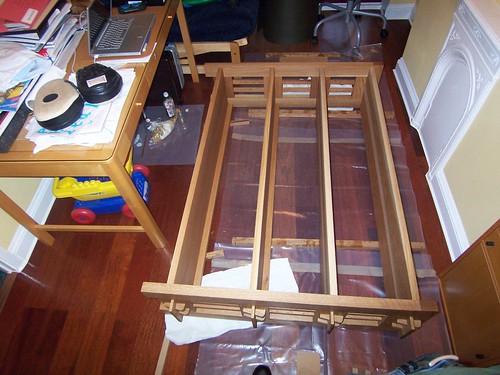
The ends were produced with mortice & tenon construction, the main members first ; then the smaller bars were cut in & glue up done in the Plano press to ensure flatness across all members :
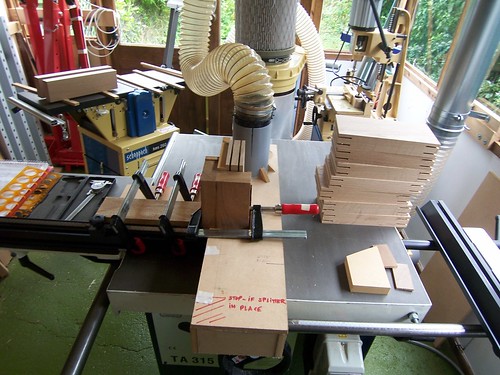

Then the through mortices were routed : the housings were not routed until the shelves were made, the shelves being used to mark the housings.
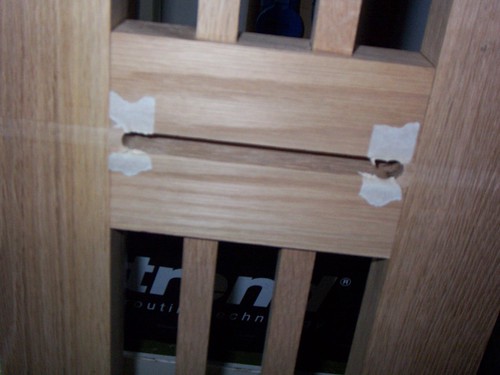
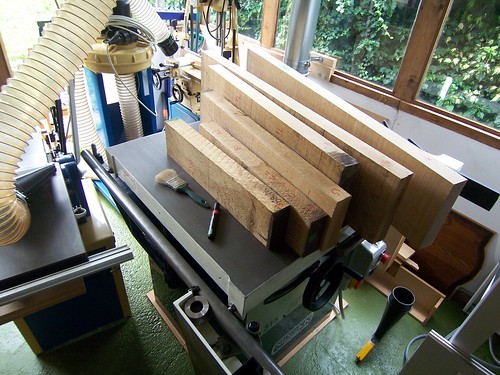
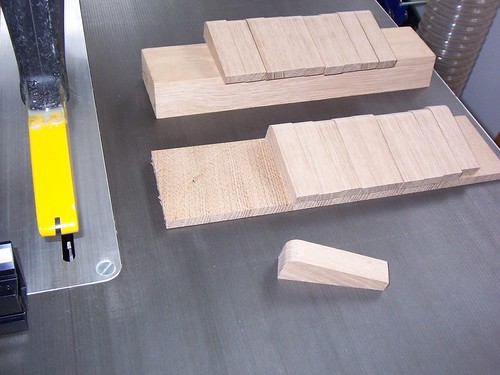
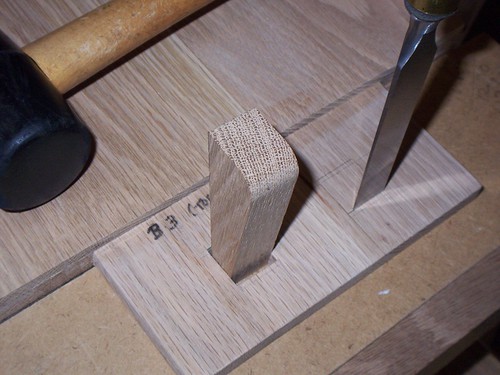
Blocks were glued up to give the correct grain direction for making the wedges :

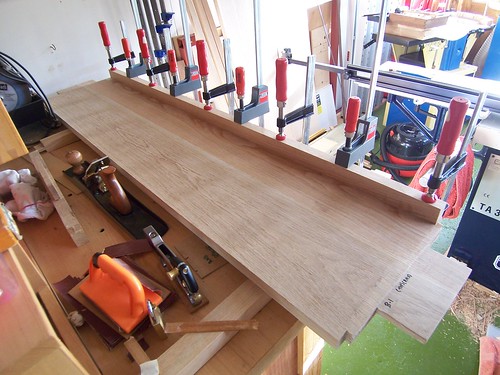
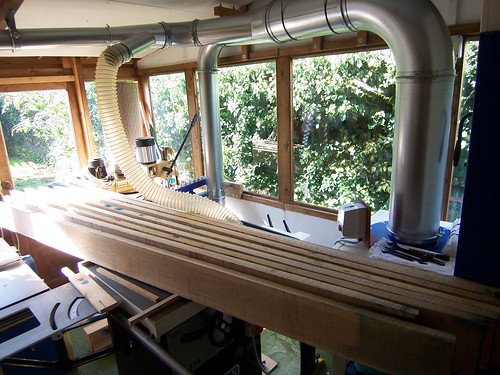
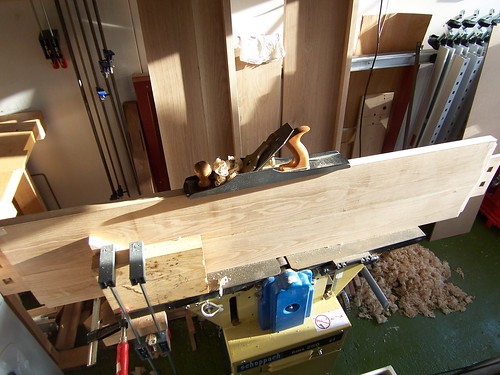
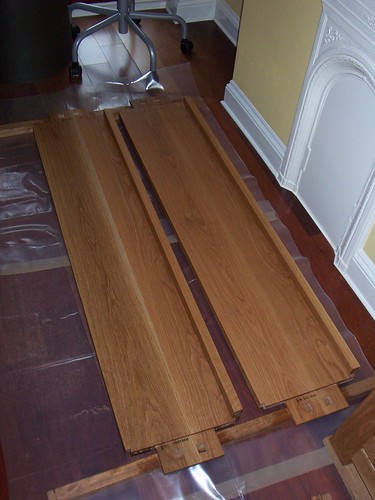
The wood for the shelves was LONG (help, I need more space !)
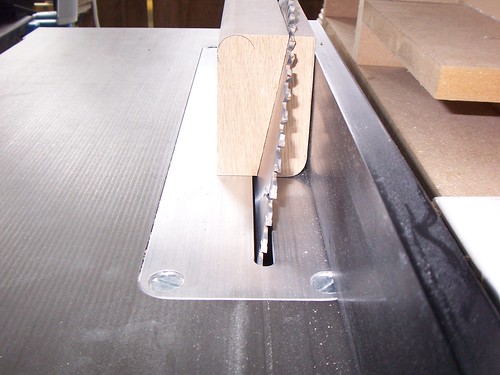
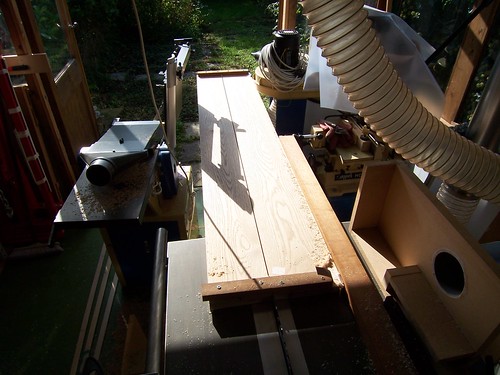
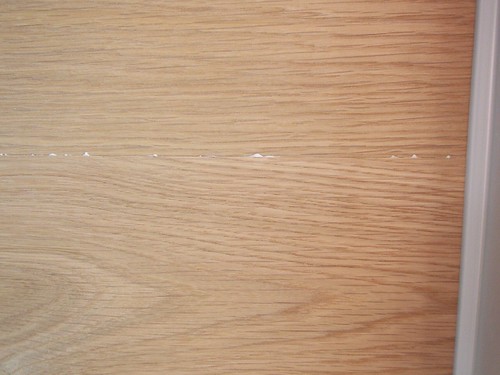
Each shelf is made from two planks. To ensure a good straight glue line, these were put through the table saw in pairs, the ends of each board being screwed to the other. Once straight edged the result is accurate enough to require no further trimming before glueing up. The boards are left a few inches over long, allowing the screw holed parts to be cut off when finishing the shelves to length.
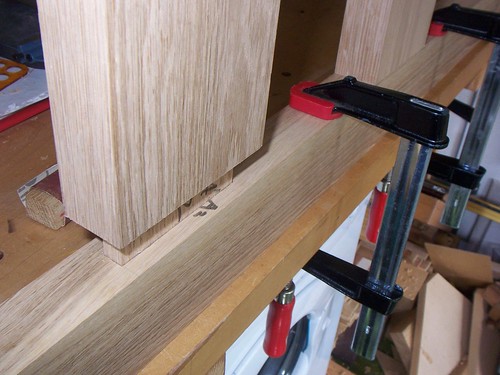
The tenons on the shelf ends were roughed out on the tablesaw, and finished to size by hand :
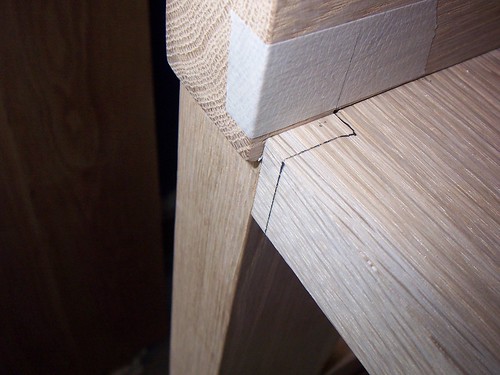
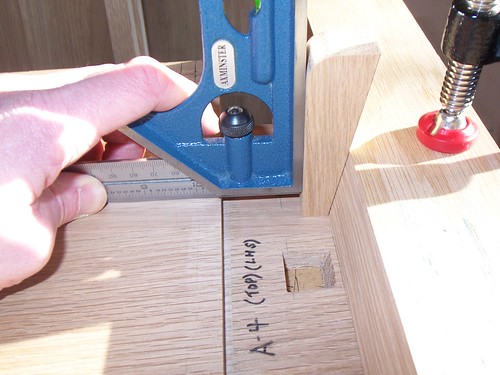
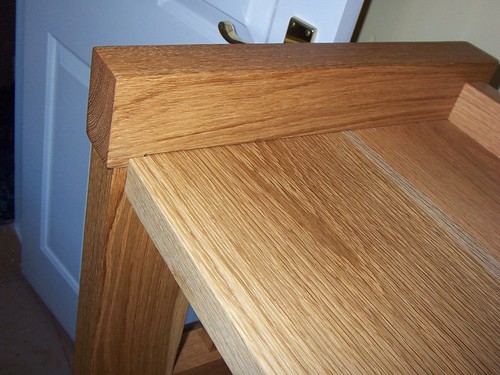
The haunches were marked & cut, the housings too ; then the wedges fitted :
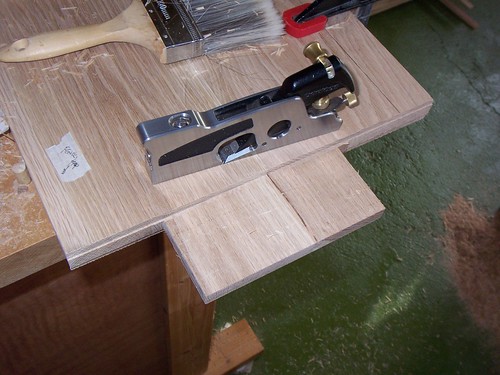
Finally the remaining rough edges were hand planed :
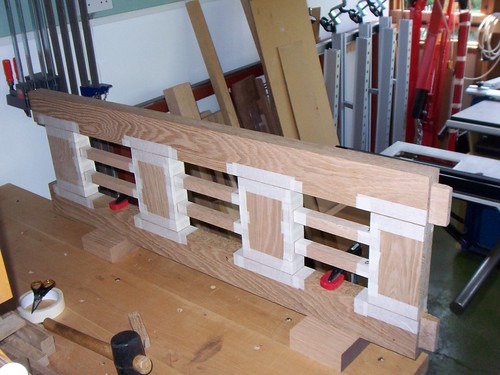
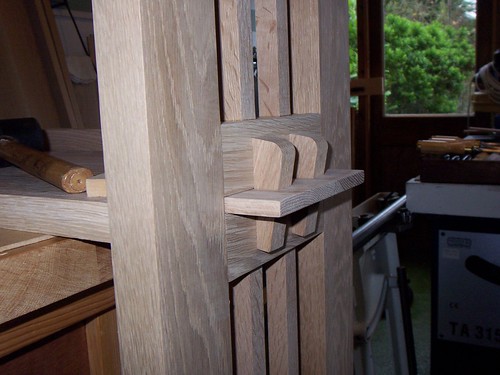
First dry assembly showed one haunch needed trimming as correction. This done all lined up & fitted OK :
Finish was by light sanding with 220 grit, then oil finish : first coat 50/50 Rustin's Danish oil and linseed ; second and third coats pure linseed. Leave to dry one week & take off any oil spots sweating out with a tiny amount of spirits on a rag. Finishing –
Finished ! The fits are looser than for glued up pieces, but this has to be done to allow assembly and disassembly :
Hope you’re still awake at the back there !
regards,
Catface
The bookcase ends provide mortices for the shelves and top, which are supported in housings on the inner surfaces of the sides ; the shelves & top are then held in place with a pair of pegs at the end of each shelf. Thus disassembly for moving is easy.
The shelves & top are about 6 feet long. An upstand at the back of each shelf stops books falling off the back, and provides enough stiffness to alleviate the need for additional support in the middle of the shelf span.
The ends were produced with mortice & tenon construction, the main members first ; then the smaller bars were cut in & glue up done in the Plano press to ensure flatness across all members :
Then the through mortices were routed : the housings were not routed until the shelves were made, the shelves being used to mark the housings.
Blocks were glued up to give the correct grain direction for making the wedges :
The wood for the shelves was LONG (help, I need more space !)
Each shelf is made from two planks. To ensure a good straight glue line, these were put through the table saw in pairs, the ends of each board being screwed to the other. Once straight edged the result is accurate enough to require no further trimming before glueing up. The boards are left a few inches over long, allowing the screw holed parts to be cut off when finishing the shelves to length.
The tenons on the shelf ends were roughed out on the tablesaw, and finished to size by hand :
The haunches were marked & cut, the housings too ; then the wedges fitted :
Finally the remaining rough edges were hand planed :
First dry assembly showed one haunch needed trimming as correction. This done all lined up & fitted OK :
Finish was by light sanding with 220 grit, then oil finish : first coat 50/50 Rustin's Danish oil and linseed ; second and third coats pure linseed. Leave to dry one week & take off any oil spots sweating out with a tiny amount of spirits on a rag. Finishing –
Finished ! The fits are looser than for glued up pieces, but this has to be done to allow assembly and disassembly :
Hope you’re still awake at the back there !
regards,
Catface
 (at least partly due to the great pictures - almost feel like I was there watching.. :lol: )