Chems
Established Member
Been working on this one for the last few days, its veneered MDF for the carcase, drawer sides and solid face frame and top. As always its been hard to match the types of oak from my supplier, its always a mix of quater sawn and rift sawn, no one but us nerds will notice thou ")
I got fed up of buying the small pots of glue so got a huge one which should last for a while and worked out in the long run a lot cheaper.

All MDF parts cut:
Lipping a shelf for the smaller side unit:
Then use the BradNaylor lipping techinic, stick a bit to the fence, then align the fence to that the extra bit is inline with the bearing and cut away. Very quick and easy for smaller parts.
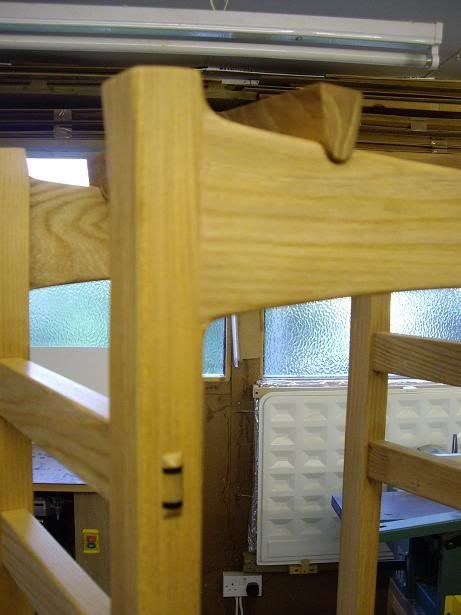
Heres one unit been domino'ed together, this is for the tower unit of the PC with a small top drawer.
Drawers fitted:
Fully Extension runners from the supplier that 9fingers posted about a few weeks back. Paid for the 5 sets what one set of blum costs! But a lot harder to install than blum.
Face frame for tower unit:
I've double depth cut the hinges in so the barrel lines up with the bead:
Door for tower unit dry fit:
I'll get some better pics of the top when its in place, some nice 1 inch stock used. One board was a little darker for the main top so I embraced that and layed it central with the two lighter flanking, a bit devon woody and people who have seen it seem to really like that so been lucky there.
I got fed up of buying the small pots of glue so got a huge one which should last for a while and worked out in the long run a lot cheaper.
All MDF parts cut:
Lipping a shelf for the smaller side unit:
Then use the BradNaylor lipping techinic, stick a bit to the fence, then align the fence to that the extra bit is inline with the bearing and cut away. Very quick and easy for smaller parts.
Heres one unit been domino'ed together, this is for the tower unit of the PC with a small top drawer.
Drawers fitted:
Fully Extension runners from the supplier that 9fingers posted about a few weeks back. Paid for the 5 sets what one set of blum costs! But a lot harder to install than blum.
Face frame for tower unit:
I've double depth cut the hinges in so the barrel lines up with the bead:
Door for tower unit dry fit:
I'll get some better pics of the top when its in place, some nice 1 inch stock used. One board was a little darker for the main top so I embraced that and layed it central with the two lighter flanking, a bit devon woody and people who have seen it seem to really like that so been lucky there.