Norris smoother

UKworkshop.co.uk

Help Support UKworkshop.co.uk:

This site may earn a commission from merchant affiliate links, including eBay, Amazon, and others.

twothumbs

Established Member
Joined
13 May 2011
Messages
394
Reaction score
0
Location
Edinburgh
I would like some advice please on the sense of stripping down and restoring a plane given to me nearly 30 years ago. I know there are many experienced renovators here and I don’t want to throw it away as it is a nice object in its own right.

I thought I would drill out the rivets (about 5), knock them out as I am presuming the rust will not have penetrated the tight wood holes, and so get at the casting (?) and Beech infills. De-rust it somehow, rub up the wood and refinish it. New rivets peined over and rubbed up.

What’s left of the present varnish has a greenish colour to it. The sole is badly pitted to the front and the rear handle has a large (repair) screw up into which doesn’t appear to do anything, but a pain to remove without damaging around it. The iron and blade would probably clean up with a lot of levelling to them. The reverse adjuster threads look as if they will loosen with diesel. I can’t soak it to derust it without getting the wood out first.

Otherwise it is perfect of course. Comments much appreciated.

I have not managed to place pics yet but will try again, but cannot get my head around a public site for my pics. Will try again.. Any idea of age/date when pics uploaded?
 
That does sound a bit alarming - let's help with some pictures before you start drilling!!

Although you can post pictures as 'attachments' using the controls at the bottom of the editing screen, an 'external' site is far more flexible. All you need is to put your picture somewhere on the web where it can be publicly accessible and will stay available. I use Photobucket which I have found reliable, but you can use Google/Picasa, Flickr, Facebook and many others. They generally help you organise your pictures and also edit them, all for free. You upload your pictures from your PC etc to the site that you have signed up to.

You then write your message on here and when you want to put a picture in

1 Go to where your picture is and copy its url
2 Swap back to your message in the editor, click on the Img button and then Paste the url you copied in step 1.

(If using Photobucket you have the option of copying an 'image code' which saves you using the Img button in the editor - just copy and paste.)

If you want a look at a very gentle Norris smoother restoration job, I did one recently here.

EDIT: 2017 - Do not use Photobucket! Their arbitrary change to not allowing "third party hosting" has wrecked many many posts in this and other forums worldwide.
 
Hi TT,

Are the positions of the rivets easily seeable? And .... does anyone know what the diameter of late Norris rivets is likely to be - ie; drill size?

I think that the very best person to ask would be Bill Carter. I'm sure he wouldn't mind you emailing for advice.
 
Thanks guys. Still mastering the upload but will continue tomorrow afternoon with a bit of luck. Have uploaded onto P/bucket so got that far.
 
Hi,

I think the safest way would be to destroy the infills and cut the rivets, but thats possibly not what you want to do.
We could do with seeing it, if you can't get your hear round posting pics send them to me and I will sick them up.

Pete
 
They are now....

DSCN3495_zps39df39cf.jpg


DSCN3493_zpseed5a3e7.jpg


DSCN3494_zps61d4e292.jpg


Nothing a good clean wouldn't solve.

Have to go to work now but will comment later....

Cheers

Jimi
 
Hi, twothumbs

It looks not bad, from your discription it sounded a lot worse. I wouldn't strip it.
If you place your mouse over the thumbnails you will get a drop down list click on the IMG code and past it into the message, do it in full editor and you can prevue your message.

Pics removed as Jim got their first.

A think it should clean up well, the blade is the worse part, some citric acid should sort it out.

Pete
 
Looking at those photos, and assuming that the infill wood is sound, I would leave all the wood in place. Unless you are amazingly skilled you are unlikely to do a better job on your first attempt!

The weakest point on these beech Norrises was the brown varnish used on the beech. On the one I showed earlier, if you look at where the owner stamped his name, you can see that it has flaked away quite badly; the same has happened on the corners. This is the sort of finish yours would have had.

IMG_0978.jpg


As it has all been removed already, you could either do something to make the wood dark again, or finish it in its natural colours. If it was mine, I would use Vandyke crystals, made up quite strong, and brush the solution on. You may need to do this two or three times to build up the colour and you will want to knock back the raised grain between coats. When you have got the colour right, I would suggest using Tru-oil. This is sold for finishing gunstocks and gives a very good natural sheen. Again, you can build up as many layers as you think it needs and go for a glossy finish or use fine steel wool to go back to satin.

The steel parts should respond to Micromesh, though you might prefer to dip the blade in citric acid or Corrodip.

In theory you could remove the adjuster, but I'd try cleaning what you can reach and lubricating the rest first.
 
I think the advise Andy has given is spot on with one possible change if I were doing it.

As you are trying to emulate rosewood...I would mix my own powdered dye...but that is another road entirely. Vandyke crystals will give you a flatter (less red) result but once you have applied the Tru-Oil you will probably never tell the difference.

I would again go for Corro-Dip on the iron simply because I have used it before on these old Norris irons and the finish was remarkable...

Before:

DSC_0181.jpg


After:

DSC_0280.JPG


This is powder stain...

Before:

DSC_0352.JPG


...and after:

DSC_0363.JPG


Your Norris looks like a nice mid age one...dovetailed sole..rather nice condition...it's cracks to the metalwork you can't really fix well...everything else is possible.

Good luck and post some WIP pictures

Cheers

Jimi
 
Yup TT, it looks like that is all there and sound.

If it were me, I wouldn't worry about the "making Beech look like something it isn't" bit - it's so far naturally stripped already, I'd get it back to fully nude, smooth sanded on the important bits and slather in raw or boiled Linseed.

The sides, I would rub with fine Emery ... coarser if nessersarryy, then finer ... whatever works; but approached gently.

The adjuster I would soak in paraffin for a bit. When free and moving, gently wire brush the threads with a soft wire brush before oiling with good oil; - 3 in 1 would do.

But that's just me ...
 
Thank you everyone for your help and thoughts. I will make a start next week......everything is happening at the moment. The adjuster is rusted hard and I wasn't susre about covering it is an oil, easing oil, WD40, parrifin, etc, as it will soak into the adjacent wood fills. Will start with the iron. Best wishes to you all.
 
Well found Andy - the relevant bit on adjuster removal:

"Firstly remove the adjuster from the plane - note: some think it is not possible to remove the adjuster on its base plate without removing the lever cap by drilling or knocking out the cross pin. However it is possible to remove the upper screw with a screwdriver through the banjo ring and with the banjo wound back the lower screw with a cranked turnscrew. Patience is required but in my opinion worth it to avoid unnecessary damage."

Also WD40 is not a good penetrating oil at all, merely a moisture driver - offer. Paraffin will work much better.
 
Haven't been able to find it for a while, but there used to be some stuff called "Ease-off" (or it might have been "Eaze-off) which seemed to be magic for shifting rusted threads. Definitely better than paraffin or diesel, the other standbyes.
 
dickm":3bqqom02 said:
Haven't been able to find it for a while, but there used to be some stuff called "Ease-off" (or it might have been "Eaze-off) which seemed to be magic for shifting rusted threads. Definitely better than paraffin or diesel, the other standbyes.

And Plus Gas...remember that?

Jim
 
Well here it is back after taking most of the thoughts and advice into account many, many weeks later....so thank you everyone. I would have been hard put to do it alone.
repair 018.jpg
[/img]
Answers first....
AndyT- Thanks on instructions re. pics. We will see if I can do it or not!
RichardT- Rivets were not easy to find but did see some when rubbing up the sides. The dia for the lever was 5.27mm or between a 13/64 in. and 7/32 in. Hence a drill size of No. 4. I say drill size if it is a pre 1960ish product. I drilled out with a 5mm drill. The new dowel was 3/16in. because I had it. and it fitted. It gave a little play which I wanted. The cap was very tight and so I was happy to see it eased off a little one way or another. Steel sizes I suspect would vary between roller companies then, not standardised quite so much.
Peter Maddox – Used citric acid to clean iron and cap iron. Left them in the solution for about 11/2 – 2 days and they came up OK. Acid was quite cheap from local wine making shop.
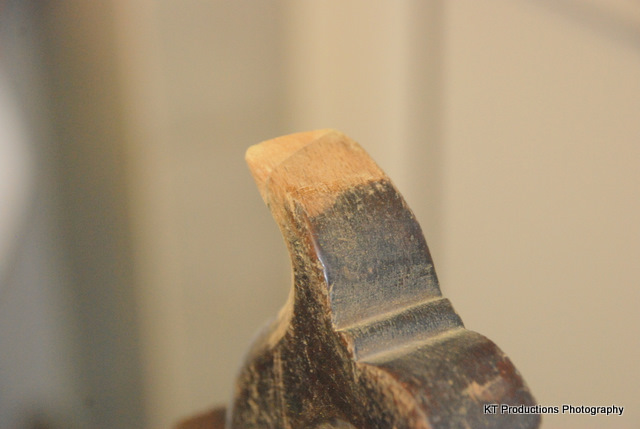
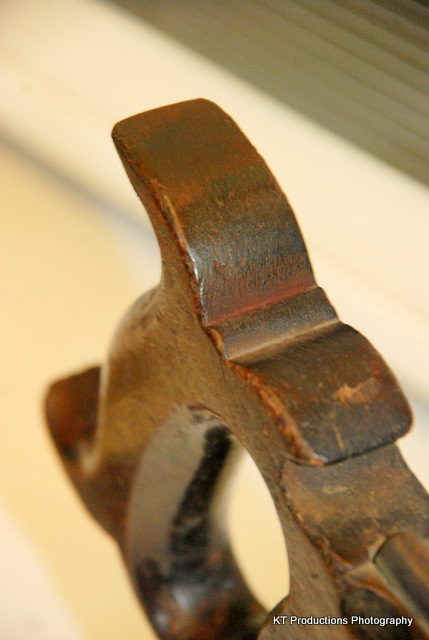
AndyT - I left the wood in place; it would have been a big mistake to do otherwise. The wood was quite weathered and grey in places so took a bit of rubbing down. (sat in front of a broken hut window for years). Used Vandyke crystals to build up colour...3 coats I think it was. Yes, I used Tru-oil from a local gun shop. Quite liked it and it dried quickly...within an hour or so, so not waiting days between coats. I did about 6 or 7. It dried like a sponge into end grain as you looked at it. I left most of the cracks, but filled one in the handle which could have been a pest in use, with Beech dust and glue and it stained OK. I like the end grain best.
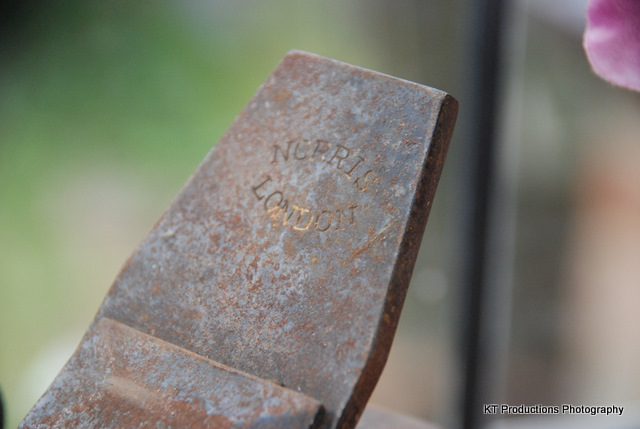
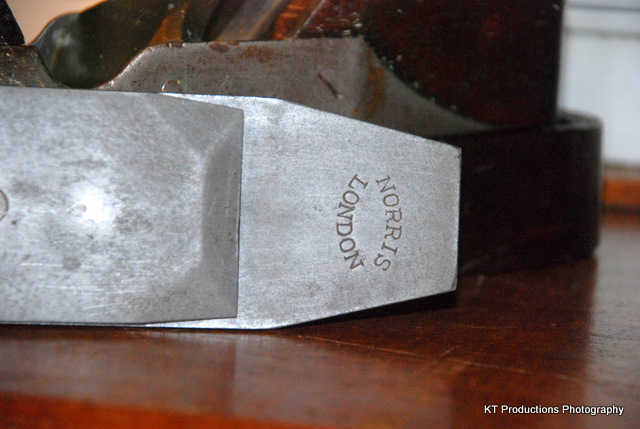
Jimi43- Found out as I cleaned it up.... it is not dovetailed. Cheeks riveted to the sole which has a heavy plate single riveted onto .. acc. Hard to see the rivets on the sole infill pale .. Only one big rivet. It was easier to see the straight line of the sole running along the cheeks.
RichardT – Adjuster was locked solid and was going to be a devil to move, so I bored out the eddowels to the Cap to get at the screws. Once off I dunked in citric acid for a couple of days and came out remarkably clean. I think the steel may have been an alloy. It was tight due to rust of the iron above it and so blocked up with Ferruginous deposits!
AndyT – Looked up your link to Tony M. site and most useful. I went to his shop many years ago....didn’t buy anything. The adjuster plate had two steel screws (I later tried Brass but of course it was too soft to pull the plate in tight and I reverted to steel; a modern No4 I think it was.). I recently saw a Norris with a 4 screw plate. The lower screw was OK to turn out but the uppermost one was bad. The rust was down the length of the screw so I had to drill it out and glue a beech plug before refixing.

The following shots show how it turned out. I am happy as I intend to use it. The iron had been nicely ground to 20 degs. I rubbed up the back and clean up bits and pieces. The cap iron wasn’t too good but in its original state I suspect. So a bit of rubbing it up. I sharpen to about 30 degas but it isn’t too good. I will have to dress up the back a bit more to remove all tiny rust holes I didn’t see then it should be OK. I rubbed up the sole and wonder if I will need to open up the neck a bit. I am not sure if I should restore to 20 degs. Never knew what I should do with my No220 Stanley block plane. I think it is aged post-war perhaps late 40’s or early 50’s. Would have cost an arm and a leg then, so very much a gentleman’s plane...... well for the rich anyway. At least several weeks wages. The war years must have all but killed off that sort of thing. The handle is right handed. I know it sounds like a left-handed tea cup but the handle horn has just a slight bias to the right. Don’t think it has been altered since made. Makes holding a bit easier than usual. Worth doing the same to other saws, etc. I used Hammerite rust remover Gel for inside the mouth when it was difficult to get into. I quite liked it. By mistake I left the gel to dry and found it was better to scrape off with a blunt screwdriver. Did it over several days. This way I managed to get around the button spacers. The original rivets were not so much peined over but simply pressed into shape. Perhaps by a hydraulic press, as seen bit the ring mark on one. I almost over countersunk my holes. They only need to stop falling out... no side loads.

Where there you are. Hope I did it OK. Happy for comments.......good or bad. I had to remember I was doing it use it. not to put it in a case so it will get rubbed etc in use. A big thank you to all who helped and best wishes to you all. It’s taken ages to type this! More Picas to follow !!
 

Attachments

  • repair 018.jpg
    repair 018.jpg
    63.5 KB · Views: 744
next one
repair 011.jpg


repair 007.jpg


repair 006.jpg


Hope thesed are of interest.
Best wishes
 

Attachments

  • repair 011.jpg
    repair 011.jpg
    35.3 KB · Views: 743
  • repair 007.jpg
    repair 007.jpg
    34.3 KB · Views: 743
  • repair 006.jpg
    repair 006.jpg
    30.5 KB · Views: 743
Back
Top