You are using an out of date browser. It may not display this or other websites correctly.
You should upgrade or use an alternative browser.
You should upgrade or use an alternative browser.
New Mallet for Ironballs - Part 2 - handle manuf wip shots
- Thread starter SVB
- Start date


Help Support UKworkshop.co.uk:
This site may earn a commission from merchant affiliate
links, including eBay, Amazon, and others.
SVB
Established Member
Thanks for all the great comments above - onward!
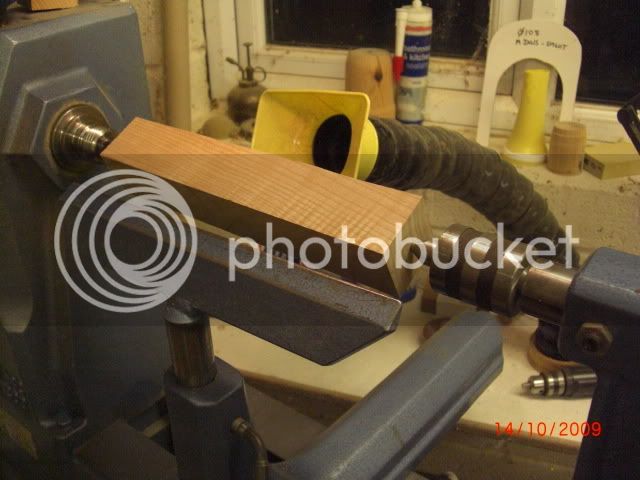
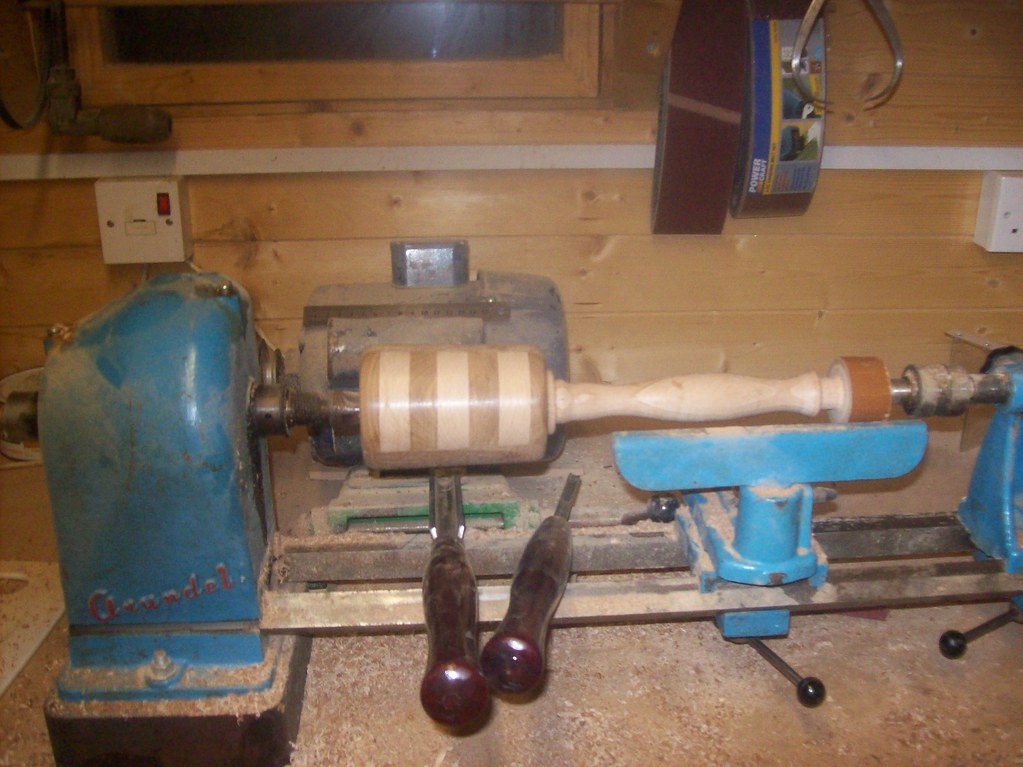
So, selecting the really nice piece of Ash IB sent, I mounted it in the lathe with the rippled end to the tailstock to be the 'grip'
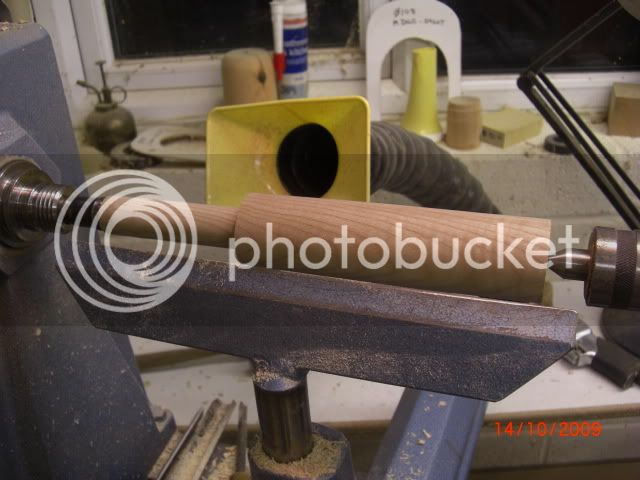
Next job was to turn down the bit to go inside the head. I undercut the shoulder so it would sit well against the head.
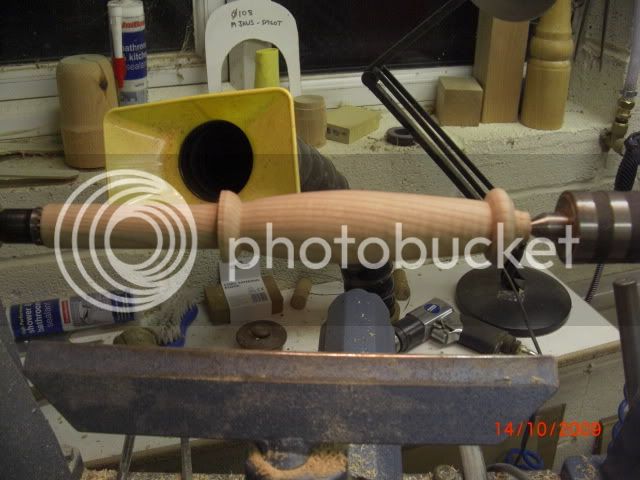
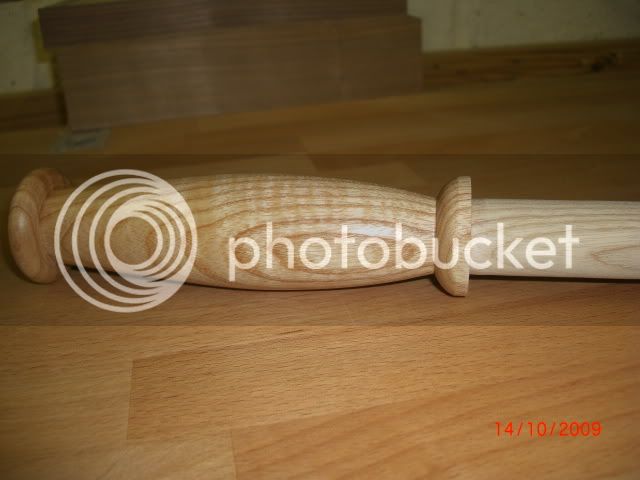
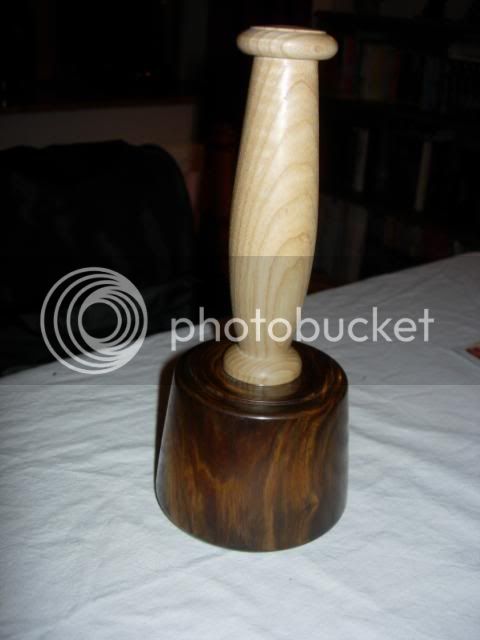
And then to shape the grip. I was tempted to make this quite ornate as a nice turning show piece but as this really is a functional item I let common sense win and opted for a more useful but less interesting shape.
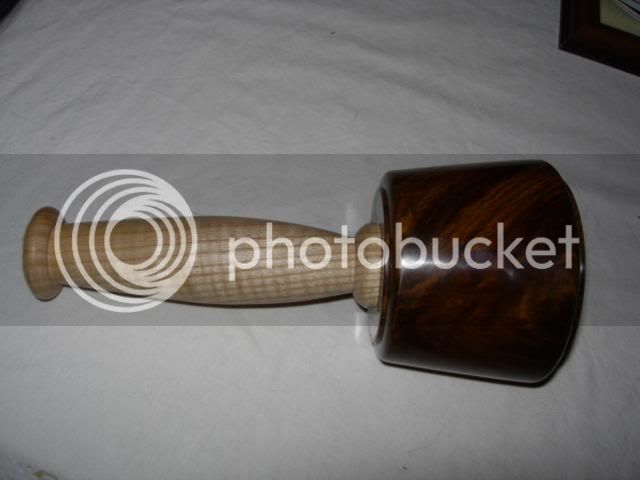
So, a quick sand, 90 secs on the band saw for a wedge and that gives us the finished parts:
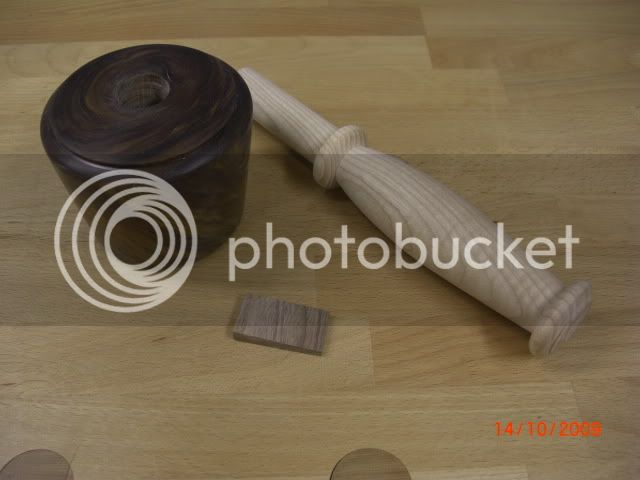
I gave the grip end of the handle a quick wipe over with some danish oil - seemed a good finish for the job - another 2 or 3 coats over the next couple of nights and we should be done. It is really a nice piece of ash and when put with the lig head and walnut wedge it seems too nice to hit things with!! :lol:
So, the only job left is the glue up and trim the top / wedge. Does anyone have experience gluing to lignum? Is normal woodwork glue ok or would epoxy be better? The internal bore is quite smooth owing to the burnishing of effect of the forstner bit so I have a right angles scriber that I will use to key the surface up a bit. Any thoughts out there?
BRgds for now,
Simon
So, selecting the really nice piece of Ash IB sent, I mounted it in the lathe with the rippled end to the tailstock to be the 'grip'
Next job was to turn down the bit to go inside the head. I undercut the shoulder so it would sit well against the head.
And then to shape the grip. I was tempted to make this quite ornate as a nice turning show piece but as this really is a functional item I let common sense win and opted for a more useful but less interesting shape.
So, a quick sand, 90 secs on the band saw for a wedge and that gives us the finished parts:
I gave the grip end of the handle a quick wipe over with some danish oil - seemed a good finish for the job - another 2 or 3 coats over the next couple of nights and we should be done. It is really a nice piece of ash and when put with the lig head and walnut wedge it seems too nice to hit things with!! :lol:
So, the only job left is the glue up and trim the top / wedge. Does anyone have experience gluing to lignum? Is normal woodwork glue ok or would epoxy be better? The internal bore is quite smooth owing to the burnishing of effect of the forstner bit so I have a right angles scriber that I will use to key the surface up a bit. Any thoughts out there?
BRgds for now,
Simon
Ironballs
Established Member
Tom - sent you the link for the shop, like I said if you get no joy with them posting out I'll traipse over to Holmfirth at the weekend, go and stare at Nora Batty's front door with all the tourists...
I sent Simon some ash for use as a handle, one piece had a nice ripple to it, should come out nice
I sent Simon some ash for use as a handle, one piece had a nice ripple to it, should come out nice
Ironballs
Established Member
Hey that handle has come out nice Simon.
Did I chuck an offcut of ripple maple in the box? Would be interested to see what it looks like turned if you decide to make something for yourself with it. Just idle curiousity
Did I chuck an offcut of ripple maple in the box? Would be interested to see what it looks like turned if you decide to make something for yourself with it. Just idle curiousity
OPJ
Established Member
Wow, that's looking really nice! I'll let you off on the hole-drilling-thing, as you did already have two flats to work with... :wink:
As lignum vitae is naturally oily, I'd be inclined to try run a soaked rag through the hole before gluing. Norm always referred to the use of 'acetone' before gluing teak... I reckon you could get a similar result with some thinners or white spirit or similar...?
Then again, if you're adding a wedge, does it really matter that much?")
As lignum vitae is naturally oily, I'd be inclined to try run a soaked rag through the hole before gluing. Norm always referred to the use of 'acetone' before gluing teak... I reckon you could get a similar result with some thinners or white spirit or similar...?
Then again, if you're adding a wedge, does it really matter that much?
Paul Chapman
Established Member
SVB":2r9pa3b0 said:So, the only job left is the glue up and trim the top / wedge. Does anyone have experience gluing to lignum? Is normal woodwork glue ok or would epoxy be better? The internal bore is quite smooth owing to the burnishing of effect of the forstner bit so I have a right angles scriber that I will use to key the surface up a bit. Any thoughts out there?
Hi Simon,
I made mine in paulm's workshop so I can't remember what make of glue I used but it was PVA. Seemed to work OK.
It's looking very nice
Cheers :wink:
Paul
paulm
IG paulm_outdoors
It was just the usual titebond stuff Paul, seemed to work fine, especially with the wedge as well, but no harm in degreasing first as well as suggested.
Like has been said, almost too nice to hit things with :lol:
Cheers, Paul
Like has been said, almost too nice to hit things with :lol:
Cheers, Paul
MikeG.
Established Member
Simon (SVB),
non-turner's comment here, you understand.....
Why did you start turning that handle from the headstock end? Wouldn't the whole thing be more stable and less likely to judder if you started at the other end? Or is it that the piece is so chunky that there is no danger of that happening anyway?
Mike
non-turner's comment here, you understand.....
Why did you start turning that handle from the headstock end? Wouldn't the whole thing be more stable and less likely to judder if you started at the other end? Or is it that the piece is so chunky that there is no danger of that happening anyway?
Mike
SVB
Established Member
Mike,
Good question.
The head end was 25mm dia and the remainder 40mm prior to shaping so there is not a great difference.
However, the main reason for doing it that way was the head end was always going to be trimmed and was larger than the 7/8 steb drive I was using. I knew I was going to end the grip with a bead so leaving that at the tailstock gave a little more room to make that cut as I could easily remove waste down to 5mm for a 10mm length at the revolving centre.
So, there was a little logic in the madness but it could of equally be done the other way which you are right, would have been more appropriate if there was a larger mis-match in diameter or the timber was out of balance due to a large amount of sap wood on a bigger item etc.
Well, the above is my story anyway!
Simon.
wobblycogs
Established Member
Tiny bit off topic but I've always wondered why carvers mallets have a round head rather than square. The best I've been able to come up with is that a round head would be more likely to give a clean blow to the chisel. I imagine a flat faced mallet would be more likely to cause the chisel to move sideways if it wasn't struck squarely. Anyone know the real reason?
Great looking mallet by the way. Makes me want to get back to the lathe.
Great looking mallet by the way. Makes me want to get back to the lathe.
Chems
Established Member
I think its so you don't have to orient the mallet in your hand each blow to make sure your hitting with the face of the head?
Shultzy
Established Member
SVB, did you enlarge the hole in the top of the head to accommodate the wedge?
CroppyBoy1798
Established Member
That puts my homemade mallet to shame! Seriously nice work there!
As for the mallet being round I've always assumed it was for a couple of reasons, the first being that, (as already mentioned) there was only a small section of the curved mallet head striking the end of the chisel which in turn gave a more direct blow and prevented the end of the carvers chisels from splitting. And also, so that whenever you picked it up it was always the right way round :lol: no flipping or turning.
Seriously nice work there!As for the mallet being round I've always assumed it was for a couple of reasons, the first being that, (as already mentioned) there was only a small section of the curved mallet head striking the end of the chisel which in turn gave a more direct blow and prevented the end of the carvers chisels from splitting. And also, so that whenever you picked it up it was always the right way round :lol: no flipping or turning.
SVB
Established Member
Shultzy,
I opened it a little but only to the extent course abrasive allowed.
I will bond the head to the handle with 2-part epoxy so the wedge is really back-up.
I have some acetone to clean the bore also as the lig is very oily wood and this should help adhesion.
BRgds
Simon
I opened it a little but only to the extent course abrasive allowed.
I will bond the head to the handle with 2-part epoxy so the wedge is really back-up.
I have some acetone to clean the bore also as the lig is very oily wood and this should help adhesion.
BRgds
Simon
Shultzy
Established Member
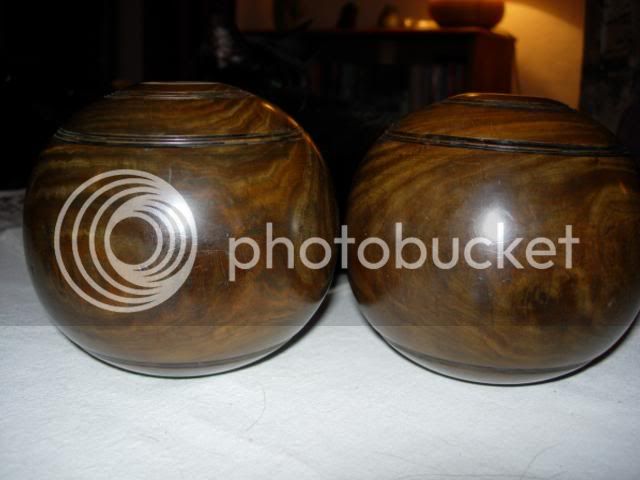
Thanks Simon, I have a couple of bowling balls and I think I will have a go at making a mallet.
PS I'm sure Wizer has an article on turning mallets, if I could prise it out of his grasp . :lol:
PS I'm sure Wizer has an article on turning mallets, if I could prise it out of his grasp . :lol:
I was most inspired by what I have seen as I am a keen bowler myself, however, not possessing any stock large enough, I decided to make my own effort from beech and mahogany offcuts, which I glued and laminated together, unfortunately, I did not get my camera back until late yesterday evening, so you will only see the latter half of the project.

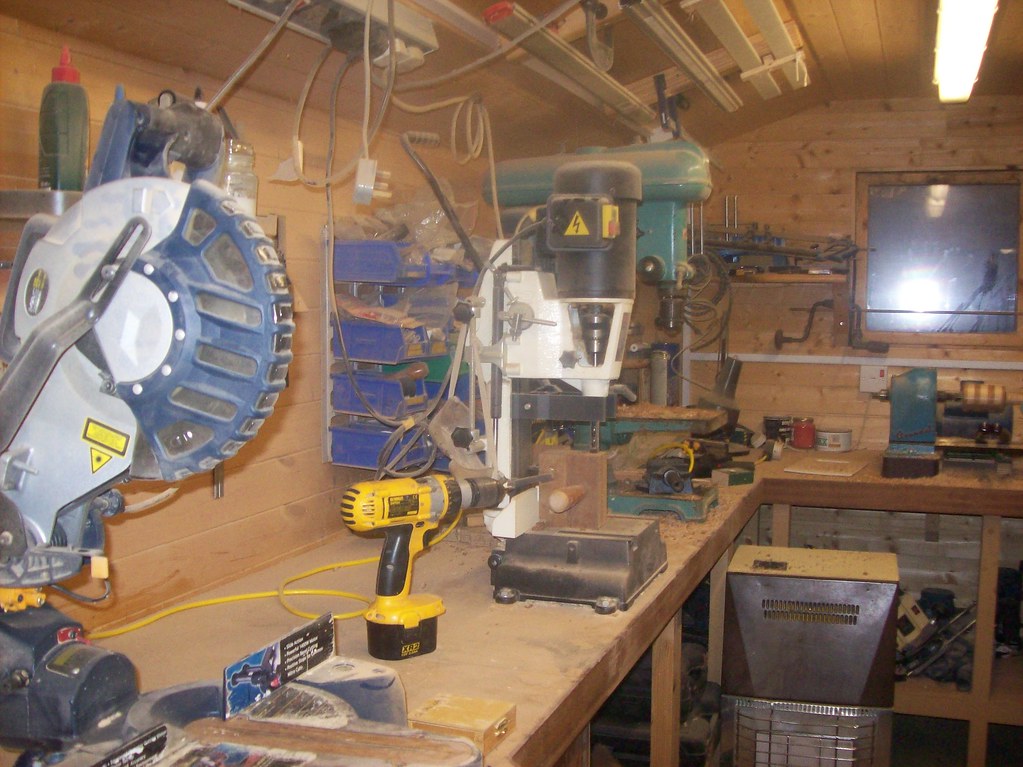
Whilst the 25mm tenon on the handle (araldited) dries in the head, a quick whistlestop tour of my small workshop, which is easy to heat and keep clean, I have no trouble with sheet goods, these are dealt with by a circular saw and sized on the table saw.


Not a bad temp for the time of year.

I had to make an extra collar for the base of the handle and araldite that on too.

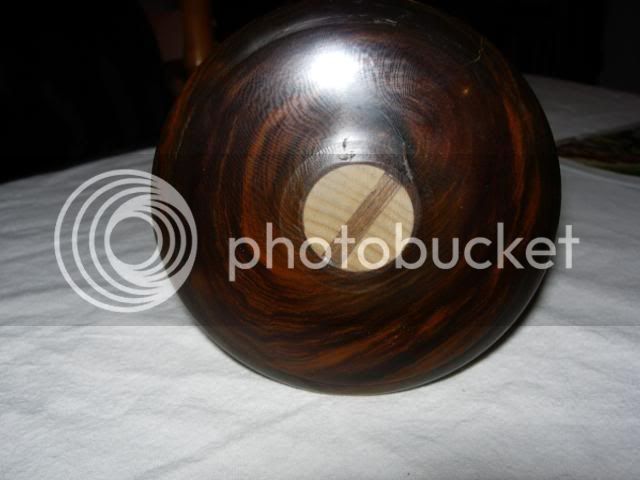
Where the 4 pronged spur had left it's mark, I drilled a 20 mm hole with a forstner bit, (from Aldi) and turned a slightly tapered plug to suit, this too was araldited in.

Horn cut off and sanded smooth.

A few coats of beeswax and some elbow grease, produces a nice satin finish.


Yet another nice day.


The finished article, the head is 3" tapering down to 2 ,3/4", the handle is 6" long
The carpenters mallet is an effort from last year, made from beech offcuts, I even customised the handle to suit my paw, for those who are interested, I recieved a caudal injection in my spine last thursday and will return to work tomorrow morning, 8 months off work for a 10 minute injection, good old NHS and new labour, sorry, but you know I just can't let a political opportunity pass me by, nonetheless, let's get me back earning some dosh and get back on track.
Rich.
SVB
Established Member
Hi Rich,
Looks like you have made a really nice job of the segmented mallet head. They are a really nice project aren't they.
In my excitement to send IB his mallet off I forgot to take a picture of the finished item but IB has promised to do one when he can.
Thanks for the workshop photos also, you are lucky to have a metal lathe also - one day maybe :wink:
Simon
Ironballs
Established Member
...and here we are, been a bit busy over the past few days so not had chance to post up the pictures. Simon is a talented chap indeed and has done a great job with this mallet, if you think it looks good in the pictures it's much better in the flesh/wood. Thanks mate, good job well done =D>
Just as a reminder, this is where we started
And this is where we ended up, superb. Can just see that slight ripple in the ash too

Feels great in the hand too, plenty of weight in the normal position and an accurate, gentle tool when held near the head, almost too good to use...
Reckon it would see off any unwanted intruders too
Just as a reminder, this is where we started
And this is where we ended up, superb. Can just see that slight ripple in the ash too
Feels great in the hand too, plenty of weight in the normal position and an accurate, gentle tool when held near the head, almost too good to use...
Reckon it would see off any unwanted intruders too
Similar threads
- Replies
- 20
- Views
- 2K
- Replies
- 42
- Views
- 12K
- Replies
- 80
- Views
- 6K