


Finally - glad to see the back of them - quick catch up:
1 - copied a design off Chems (with permission!)
2 - made a carcass
3 - made some drawers
so all I need to do is put the top on and it's done right? wrong!
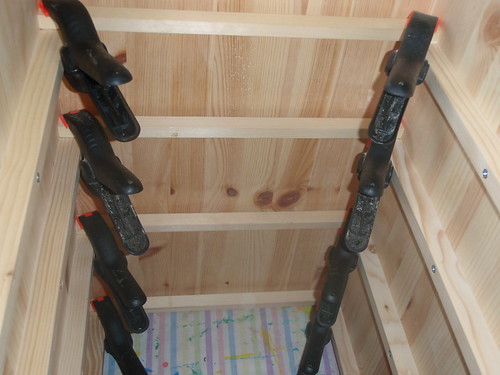
First I realise that my drawers are all sloppy when they go in and out even though they're tight at the front. It becomes apparent that drawers need supporting at the sides all the way back to keep them smooth not just at the front (well I didn't know). So I made some thin ash inserts that sort of squeezed them so they didn't wobble. here they are gluing in - I didn't have enough clamps so I used 'sprung' strips of wood to pin them against the sides while the glue dried

Which would have been alright if the sides wern't curved (I mentioned this in an earlier post)
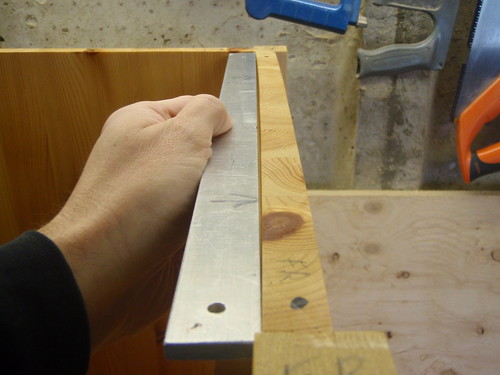
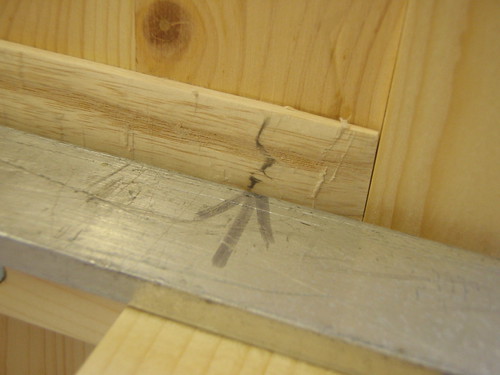
so they stuck out too much at the front and not enough in the middle - nightmare. I used my patented 'fing the high spot' tool to detect the bits that needed taking back - it's a grubby bit of ali and when you rub it on the wood the grubbyness comes off on the high spot - very handy - better not to have the high spots of course but there you go - this is a learning experience
it does look a bit butchered - and it was - but it sanded down ok - PHEW
So then I realised that drawers need something to get them to all line up neatly when they are closed - seriously none of this had occurred to me before now. I glued in some battens at the back - I've since seen a MUCH neater way to do it in a magazine - never mind here they are
imagine trying to put the finish on behind them and not get drips - well I don't need to imagine it - I've lived it!! If it occurs to you that I was making this up as I went you'd be right and it took bl00dy ages.
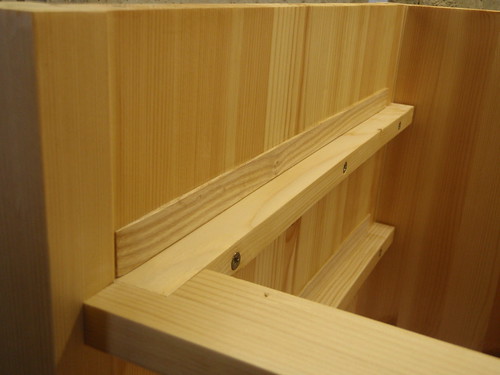
This is what the side slips looked like in the end
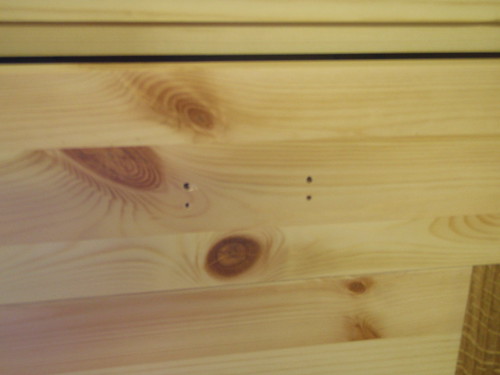
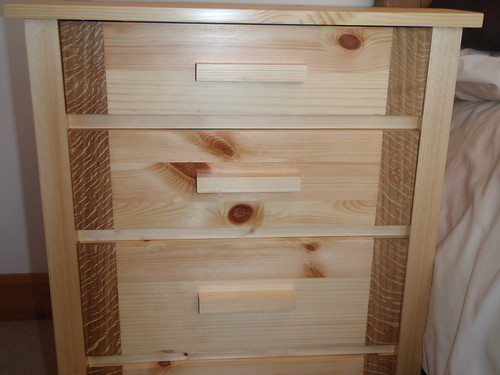
Next some handles - no pictures of them being made they are plain square section sawn to length - i'd run out of energy to think of anything more clever and the missus said she liked them (I suspect she just wanted me to finish the things so would agree to anything) But of course if you're going to drill the holes do it in the right place - that saves drilling them twice - Doh!
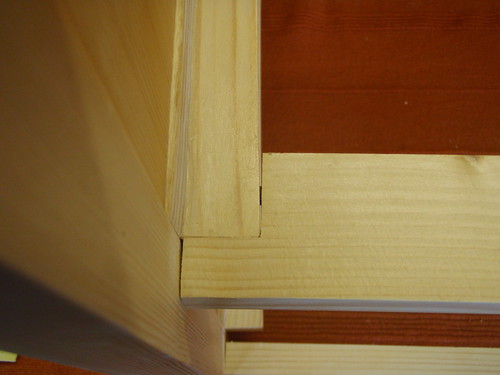
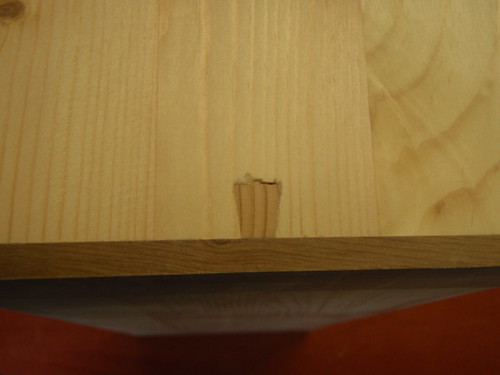
I'm loosing the will to live here but luckily the top went on ok - even though I had to use those horrible metal brackets as I hadn't left enough room for proper buttons. even the metal ones were tight I thought i'd have to take a bit off the top of the top drawer but it just went in. so while were at it heres a joint that could have been tighter (spot the dowel)
and I got some lovely comments about my dovetails last time - time to 'fess up they wern't all that good..
but most of them were..honest.
so the finished article..
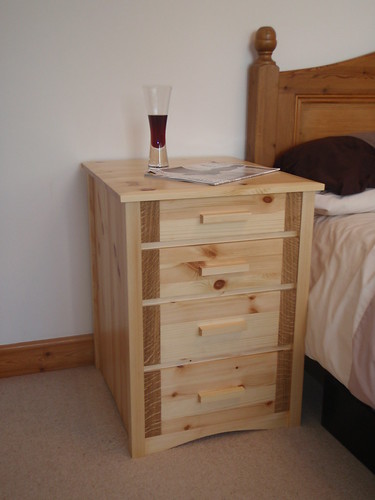
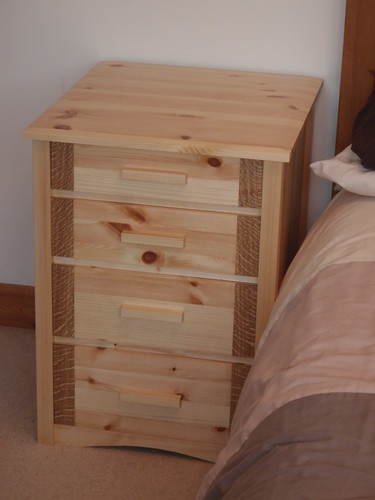
The finish was fiddes hard wax oil as it had been recommended here sanded down to 240 grit first and inbetween - two coats three on the top.
Thanks for looking and thanks for the help during the build despite the whinging i've enjoyed it mostly
key lesson learnt - bedside cabinets are complicated if the last thing you built before was a coffee table with 12 components - jumping to a PAIR of these with 70 components each is going to stretch you - do something in between first!!
cheers
1 - copied a design off Chems (with permission!)
2 - made a carcass
3 - made some drawers
so all I need to do is put the top on and it's done right? wrong!
First I realise that my drawers are all sloppy when they go in and out even though they're tight at the front. It becomes apparent that drawers need supporting at the sides all the way back to keep them smooth not just at the front (well I didn't know). So I made some thin ash inserts that sort of squeezed them so they didn't wobble. here they are gluing in - I didn't have enough clamps so I used 'sprung' strips of wood to pin them against the sides while the glue dried
Which would have been alright if the sides wern't curved (I mentioned this in an earlier post)
so they stuck out too much at the front and not enough in the middle - nightmare. I used my patented 'fing the high spot' tool to detect the bits that needed taking back - it's a grubby bit of ali and when you rub it on the wood the grubbyness comes off on the high spot - very handy - better not to have the high spots of course but there you go - this is a learning experience
it does look a bit butchered - and it was - but it sanded down ok - PHEW
So then I realised that drawers need something to get them to all line up neatly when they are closed - seriously none of this had occurred to me before now. I glued in some battens at the back - I've since seen a MUCH neater way to do it in a magazine - never mind here they are
imagine trying to put the finish on behind them and not get drips - well I don't need to imagine it - I've lived it!! If it occurs to you that I was making this up as I went you'd be right and it took bl00dy ages.
This is what the side slips looked like in the end
Next some handles - no pictures of them being made they are plain square section sawn to length - i'd run out of energy to think of anything more clever and the missus said she liked them (I suspect she just wanted me to finish the things so would agree to anything) But of course if you're going to drill the holes do it in the right place - that saves drilling them twice - Doh!
I'm loosing the will to live here but luckily the top went on ok - even though I had to use those horrible metal brackets as I hadn't left enough room for proper buttons. even the metal ones were tight I thought i'd have to take a bit off the top of the top drawer but it just went in. so while were at it heres a joint that could have been tighter (spot the dowel)
and I got some lovely comments about my dovetails last time - time to 'fess up they wern't all that good..
but most of them were..honest.
so the finished article..
The finish was fiddes hard wax oil as it had been recommended here sanded down to 240 grit first and inbetween - two coats three on the top.
Thanks for looking and thanks for the help during the build despite the whinging i've enjoyed it mostly
key lesson learnt - bedside cabinets are complicated if the last thing you built before was a coffee table with 12 components - jumping to a PAIR of these with 70 components each is going to stretch you - do something in between first!!
cheers
