My next step in chair-making

UKworkshop.co.uk

Help Support UKworkshop.co.uk:

This site may earn a commission from merchant affiliate links, including eBay, Amazon, and others.

Good Surname or what ?

Established Member
Joined
11 Mar 2005
Messages
403
Reaction score
0
Location
Reading, Berks
I'm very excited \:D/.

I'm going to make a version of this chair - with a crinoline stretcher - at the Windsor Workshop. Bad news is the course isn't until May.

Englishcomb-backarmchair.jpg


image courtesy of: http://www.antique-english-windsor-chairs.com/showitem.asp?item=16660&title=Current Stock
 
Great stuff,Phil

Can we have a step-by-step account again? [-o<
Thoroughly enjoyed the last one.

Andrew
 
Look forward to reading (and seeing the pictures) about your adventure, Phil - the last one was compelling stuff :D

Cheers :wink:

Paul
 
Andrew, Paul, Rob,

Thanks for the encouragement to post pictures. As if I needed it :wink:

We have been asked to prepare some parts in advance because it will be tough to make this chair in a week. So, I hope to have a leg template to copy in the next month or so. I want to use elm for the seat which will also increase the workload significantly, but I may be able to partially shape that before the course too.

Roll on May 21st!
 
I now have a pattern for the legs and hope to have them prepared in the next couple of weeks.

Sourcing green round timber, in the Reading area, is not proving easy. I hope to visit this guy http://www.trees2timber.com/Butt catalogue.htm
later this week. He's charging £21/cuFt for round green oak/sweet chestnut. I will report back on quality/price. Does anyone in the area know of alternative quality suppliers?
 
No offense mate but that timber "merchant" is ripping folk off with his silly price's I mean 50 notes for a builders sack of firewood?? :shock: I pay that for a lorry load of ash/oak/birch/chestnut etc logs and quite a lot of it is too ggood to burn if you know what I mean. What speceis are you wanting to use? I'd ring firewood merchants (low profile low overhead type bloke's) and tell them what you want. It saves them having to cut to length and split it up. If a good ash or oak log comes up they might just be persuaded to keep it to one side for you :wink:

cheers Mr S :D
 
Well I'm back with James Mursell again. There are 5 of us on this course rather than the 2 I'm used to, but 'm really looking forward to this week.

I'll keep you posted on progress and will try not to repeat too much of my earlier posts. I hope you'll find something interesting in the next few days.

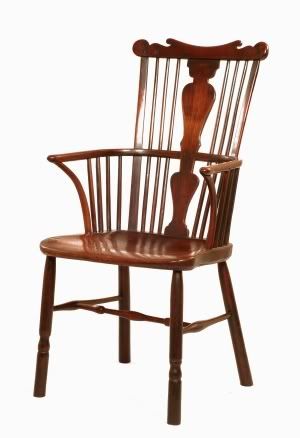
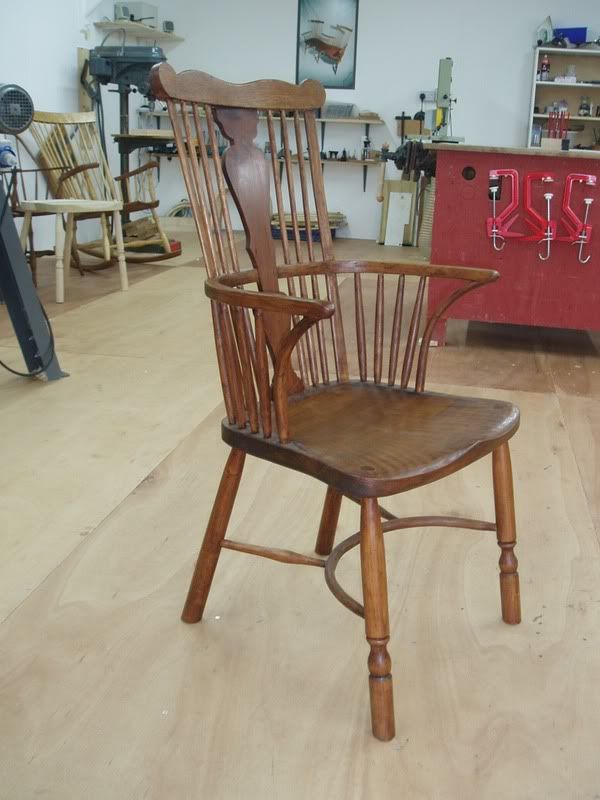
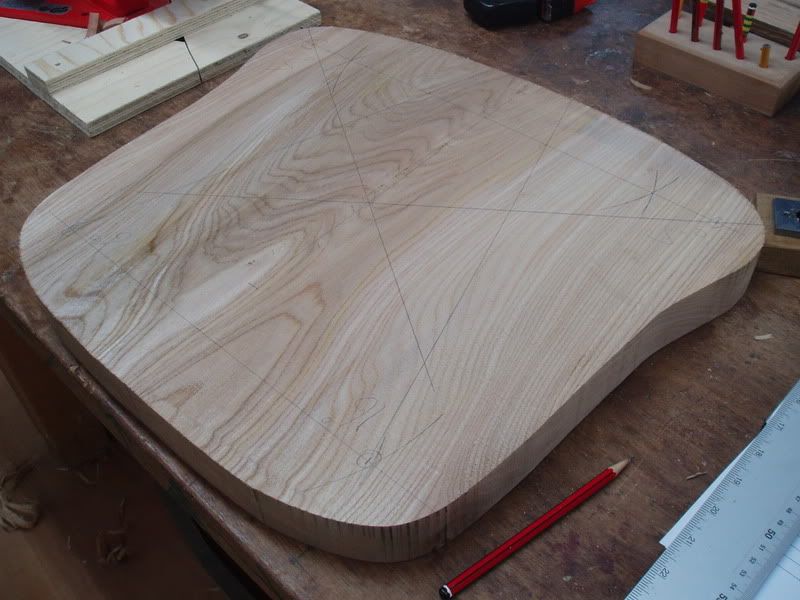
Here's the chair I'm making...

P5210110.jpg


It's slightly different to the one at the top of this thread - note the crinoline stretcher. I'm also going to make the back legs similar to the front.

I say similar not the 
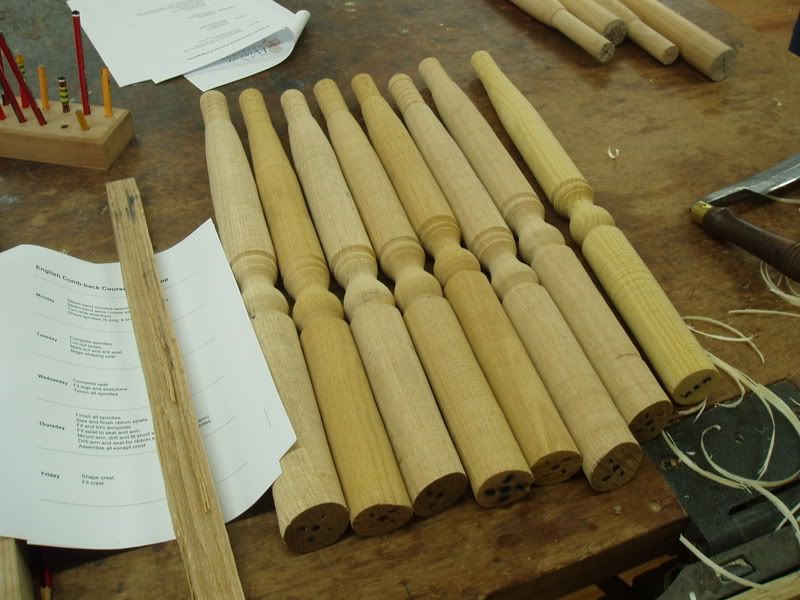
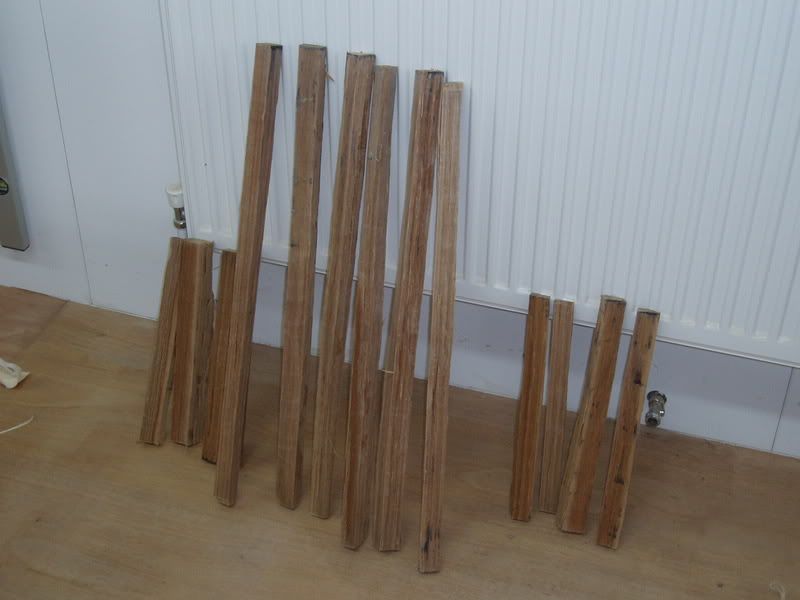
same for good reason. James sent me a leg to copy some months ago. My turning isn't great, so I've made 7 ( plus the pattern) - hopefully I'll find 4 that are a good match :wink:

P5210118.jpg


Specification:-

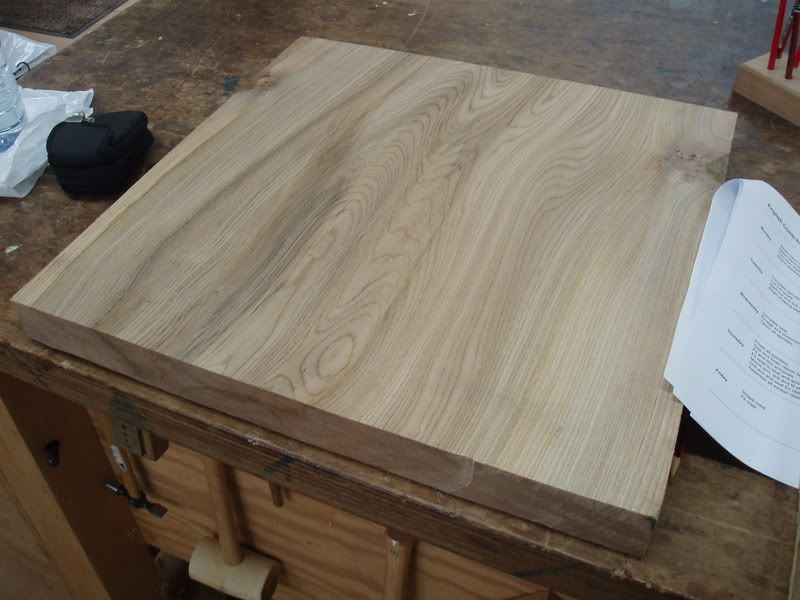
  • Elm seat (20" by 17 1/2").
    P5210117.jpg

    Turned legs of green sweet chestnut.
    Crinoline stretcher of steamed green ash connected to legs by stub stretchers turned from green oak.
    The back will have a central splat of seasoned cherry, flanked on each side by 3 hand shaved oak spindles and a lath.
    The arm bow is supported on each side by 4 short oak spindles and a steam-bent green ash arm bow.
    The whole back is finished off with a steam-bent crest.
Not sure how I'm going to fill the empty hours over the next 5 days :shock:

Day 1
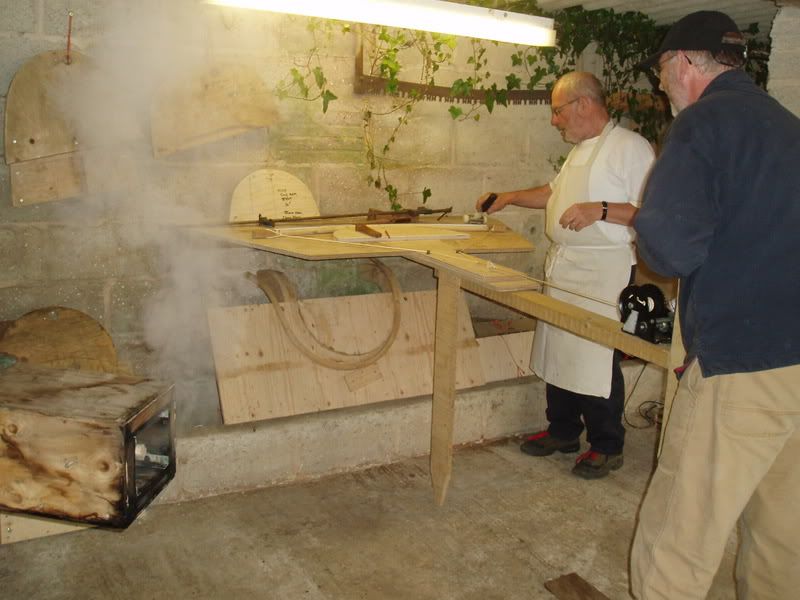
We started by steam bending the crinoline stretcher and the arm posts. James has prepared the arm bow for us - there's just too much to do otherwise. Anyway, I'm told the real skill in chair making comes at the assembly stage 8)

P5210113.jpg


You can see the steam box on the left ot the picture above.

P5210115.jpg


These arms posts are made as one and sawn apart later.

Day 1 - post coffee

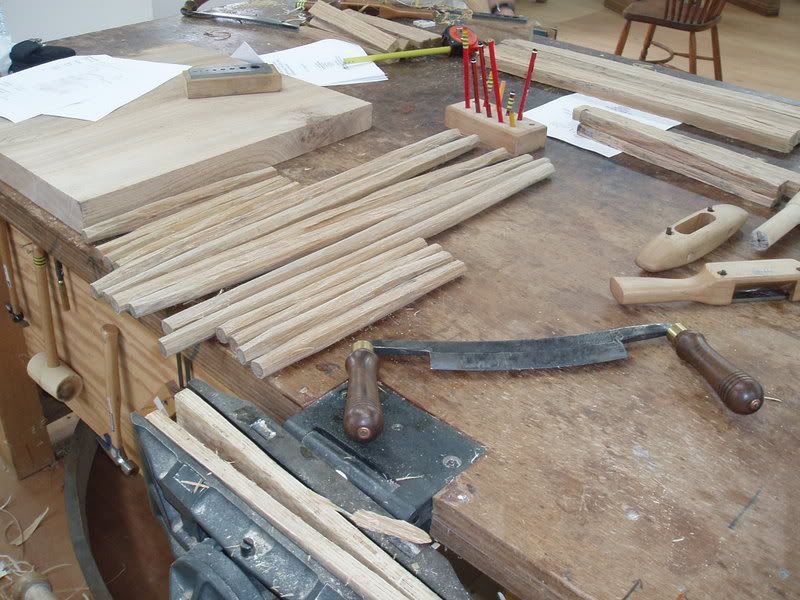
Well it's back to spindle making - 6 long and 8 short today. I've decided on a different approach this time. Previously I've made a spindle from start to finish - employing the drawknife and various spokeshaves - before moving on to the next one. Today I shaped all 14 spindles with each tool before moving on to the next. I figure I'll be better at handling each tool and produce a result where the differences are fewer. Well that's the theory anyway :wink:

Here are the clefts green oak blanks.

P5210119.jpg


P5210120.jpg


I'm done with the drawknife ... and ready for the spokeshaves and dowel plate. I'ts clear that a bit of confidence with the coarse tools saves a mass of time.

P5210126.jpg


This took most of the day - but I did have time to turn the stub stretchers, mark out the central splat and layout the sightlines for drilling the seat blank. Here's the underside...

P5210130.jpg


Time for a beer.

Day 1 - addendum

Ok, I know some of you are groaning. Same old views - nothing new here. Well how about....

P5210125.jpg


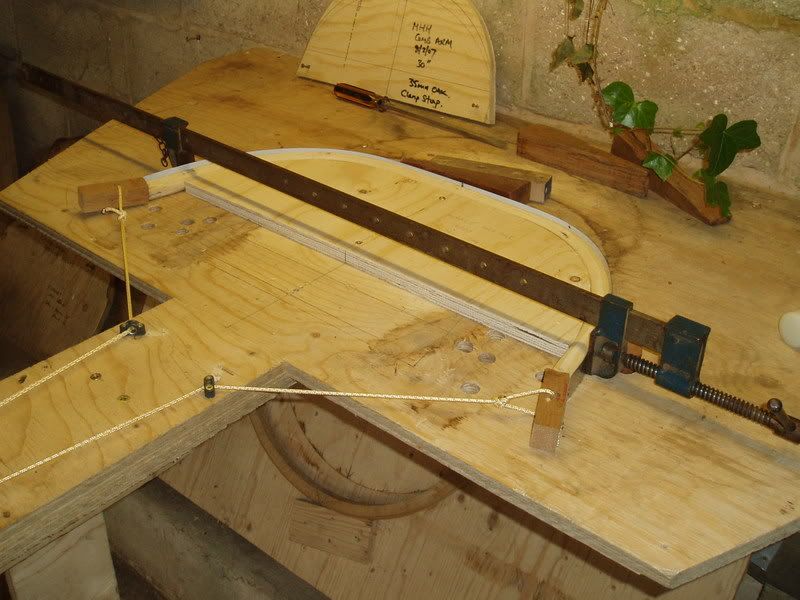
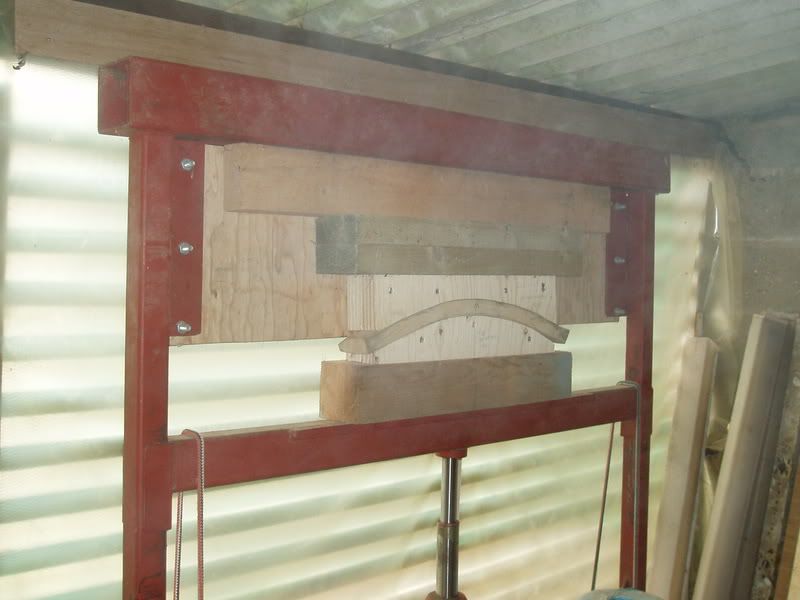
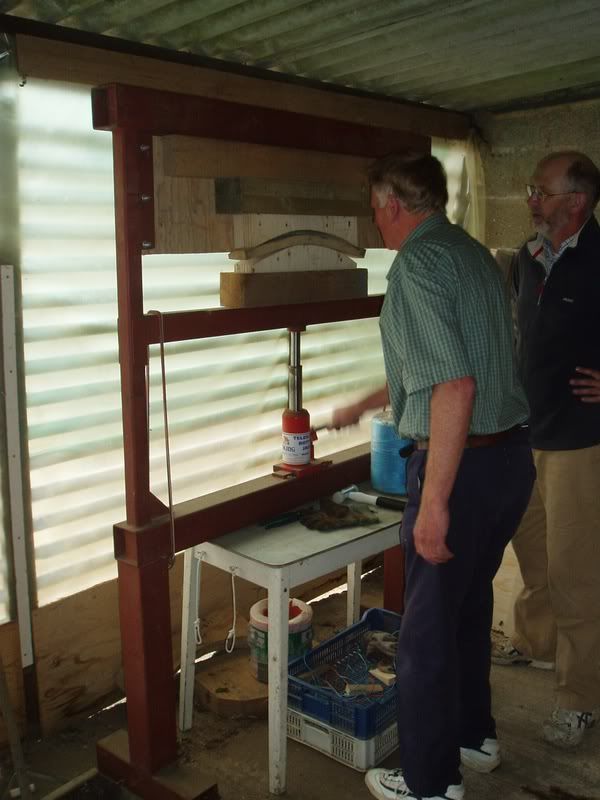
Bending a crest. Now even James admits this hydraulic device he had custom built is a little over-engineered.

P5210124.jpg


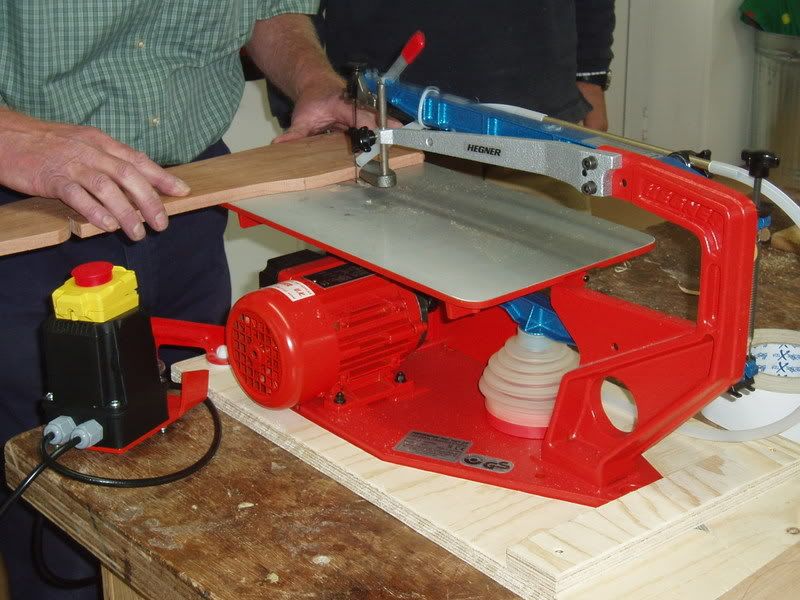
...and one for the scrollers - I have to get to grips with this beastie tomorrow to cut the central splat.

P5210127.jpg


P5210128.jpg
 
Hi Phil

The chair is looking really good. Can I ask what might be a stupid question? Lots of the pieces, not just the bent ones, are made from green wood, why? Will this not cause problems later?

Bob
 
Day 4.

A very hard day. When you see the current position you can have no idea how much work went on to get here. This is so much more work than teh other chairs I've made.

P5240160.jpg


I'll post some more detail at the weekend - I'm completely knackered now.
 
Back
Top