Thought it was about time that I posted something that I've been working on for a while, a new bedroom unit for my eldest daughter. At the mo her room is well and truly "ikea'd"  it's a not a big room by any means and the addition of the swedish menace really cuts down on space, so a glib comment to swmbo along the lines of " I could knock something up that'll be better" was immediately seized upon by the skirt wearers in the house and I now find myself with no room in the shop while I build (or knock up) the promised improvement.
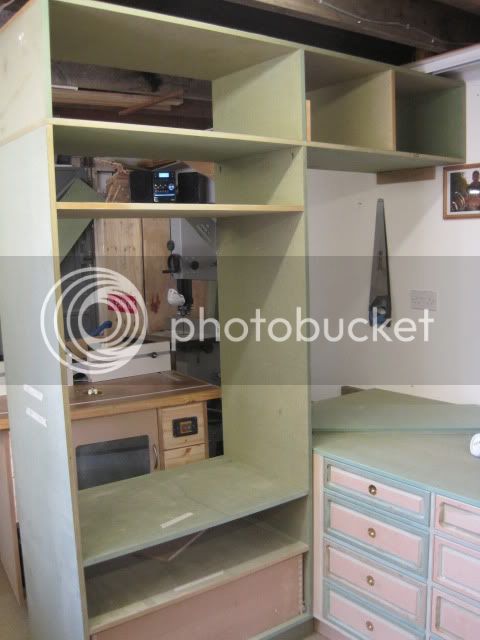
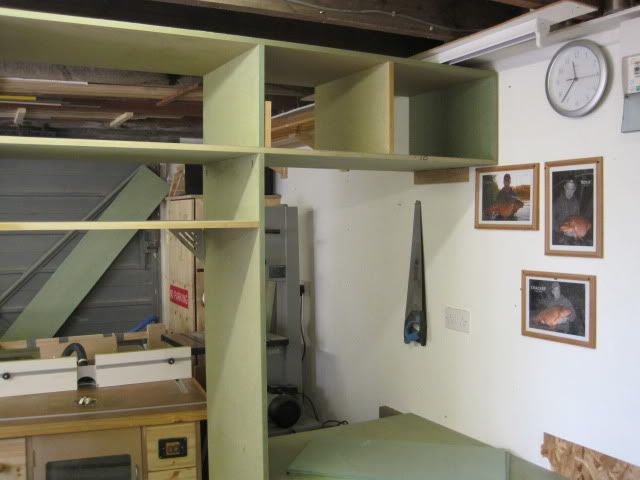
I thought about doing a WIP from the outset but it slipped my mind, initial planning was done on sketchup so that I had and idea of what would fit in, the design changed significantly as the job progressed. So heres a look at whats been accomplished thus far.
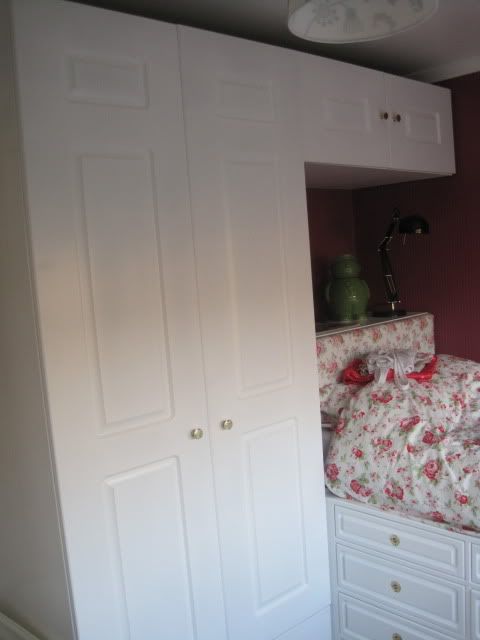
Mattress goes on top.
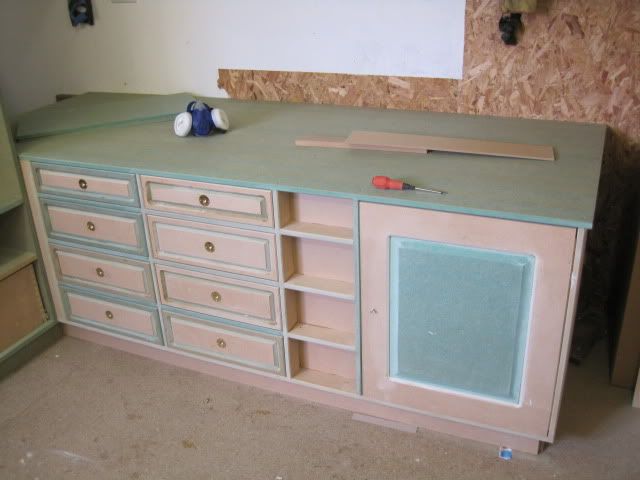
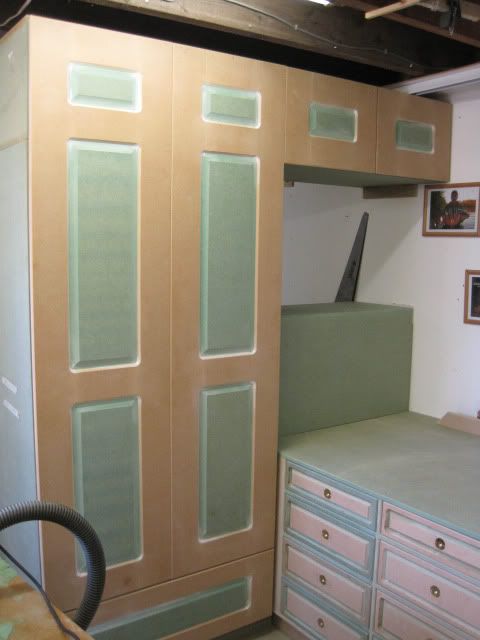
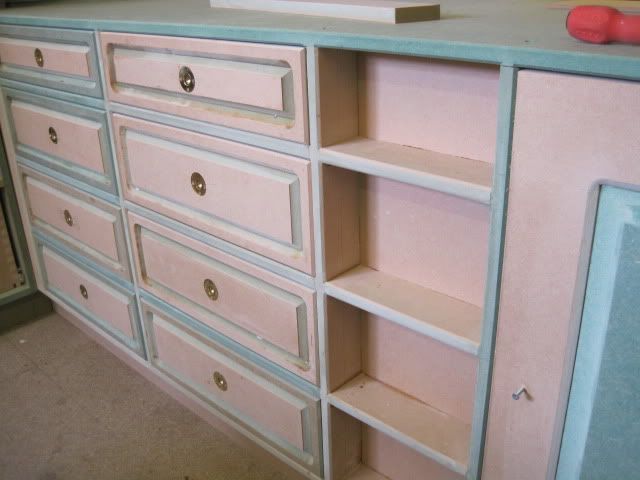
Everything bar the drawer boxes is MR MDF, biscuited, glued (TB III) and pocket holed. the drawer boxes are normal MDF with all the finger joints cut using Steve M's excellent router jig.
First attempt at using a panel raising cutter on the drawer and cupboard fronts, think it went OK but wow, how much dust. Slight flaw in the design meant that if the drawer fronts had knobs then the bottom drawer in the wardrobe unit would foul on the knobs when opened. Flush fitting openers required. Shocked at the prices from the main ironmongery sites but kept my eye open and eventually found some on ebay for 1.37 ea, far better than the lowest price of @£5 that I found elsewhere.
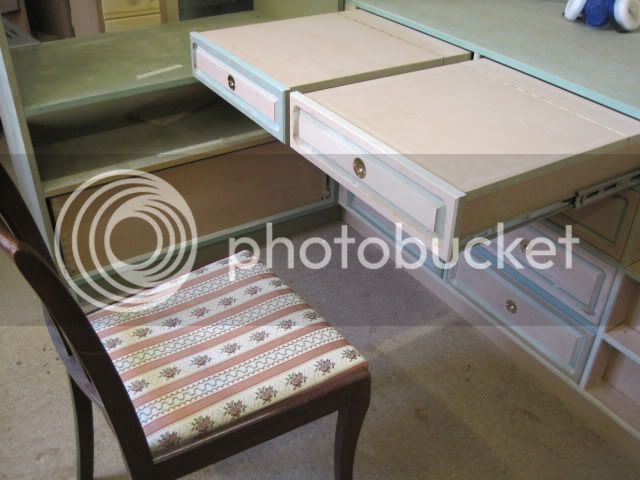
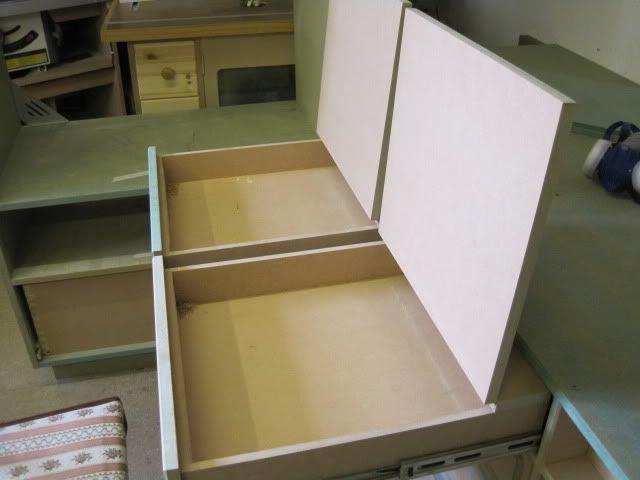
The two top drawers open to become a desk area and the hinged lids open to provide laptop and stationary storage.
The plan for finishing is to use this (present to myself for Christmas) and morrels mdf primer and finish coat.

Questions (probably for Brad but everyone please feel free to jump in):
How well does the morrels paint "fill" slight imperfections on the joints ? there aren't many and those that exist are in awkward places that would prove tricky to sand if I were to use filler.
For a project such as this should I be looking at pre-cat or acid cat. I believe pre-cat takes longer to dry. The morrels man in the Bristol shop said that all the customers that he's dealt with that changed from pre-cat to acid cat have not looked back.
I'm not a novice sprayer but this will be the first time using a HVLP system and the first time spraying anything other than a motorbike!
I plan to spray the primer in situ in the workshop, move and install the main units (it breaks down into 3 seperate units) in the room, mask everything up and spray the finish once its all in place. The drawers and doors will be primed and finished in the workshop.
Next step is the wardrobe and overhead unit doors, I'll let you see how they go...........maybe
Cheers for looking
Vinny
it's a not a big room by any means and the addition of the swedish menace really cuts down on space, so a glib comment to swmbo along the lines of " I could knock something up that'll be better" was immediately seized upon by the skirt wearers in the house and I now find myself with no room in the shop while I build (or knock up) the promised improvement.I thought about doing a WIP from the outset but it slipped my mind, initial planning was done on sketchup so that I had and idea of what would fit in, the design changed significantly as the job progressed. So heres a look at whats been accomplished thus far.
Mattress goes on top.
Everything bar the drawer boxes is MR MDF, biscuited, glued (TB III) and pocket holed. the drawer boxes are normal MDF with all the finger joints cut using Steve M's excellent router jig.
First attempt at using a panel raising cutter on the drawer and cupboard fronts, think it went OK but wow, how much dust. Slight flaw in the design meant that if the drawer fronts had knobs then the bottom drawer in the wardrobe unit would foul on the knobs when opened. Flush fitting openers required. Shocked at the prices from the main ironmongery sites but kept my eye open and eventually found some on ebay for 1.37 ea, far better than the lowest price of @£5 that I found elsewhere.
The two top drawers open to become a desk area and the hinged lids open to provide laptop and stationary storage.
The plan for finishing is to use this (present to myself for Christmas) and morrels mdf primer and finish coat.
Questions (probably for Brad but everyone please feel free to jump in):
How well does the morrels paint "fill" slight imperfections on the joints ? there aren't many and those that exist are in awkward places that would prove tricky to sand if I were to use filler.
For a project such as this should I be looking at pre-cat or acid cat. I believe pre-cat takes longer to dry. The morrels man in the Bristol shop said that all the customers that he's dealt with that changed from pre-cat to acid cat have not looked back.
I'm not a novice sprayer but this will be the first time using a HVLP system and the first time spraying anything other than a motorbike!
I plan to spray the primer in situ in the workshop, move and install the main units (it breaks down into 3 seperate units) in the room, mask everything up and spray the finish once its all in place. The drawers and doors will be primed and finished in the workshop.
Next step is the wardrobe and overhead unit doors, I'll let you see how they go...........maybe
Cheers for looking
Vinny