


Crooked Tree
Established Member
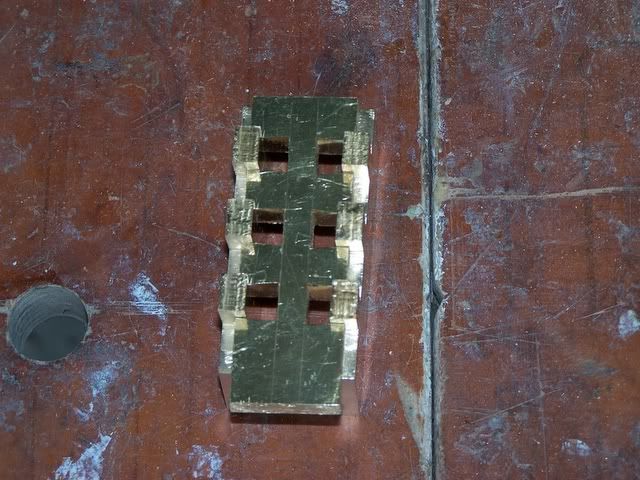
Some may recall my 1st attempt at making a plane a while back: the mk1 small bullnose plane. This was originally intended to be one of three, but these things take time and only one was made. Well, I have recently finished the 2nd one. AS before, construction is dovetailed brass with infill in wood. Here it is:
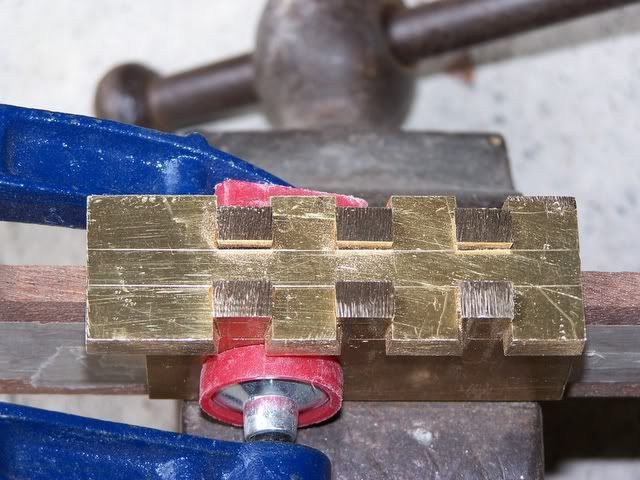
First cut the dovetails with a hacksaw and files
Press together in a vice around a former. This is an improvement over my previous method (read it somewhere). Veneer/tape were put at the top (none dovetail edge of the sides) to force the edges out; they tend to spring inwards during peining and this makes squaring the sides to the sole easier.
I had allowed too much extra material at the ends of the dovetails, so filed these down prior to peining
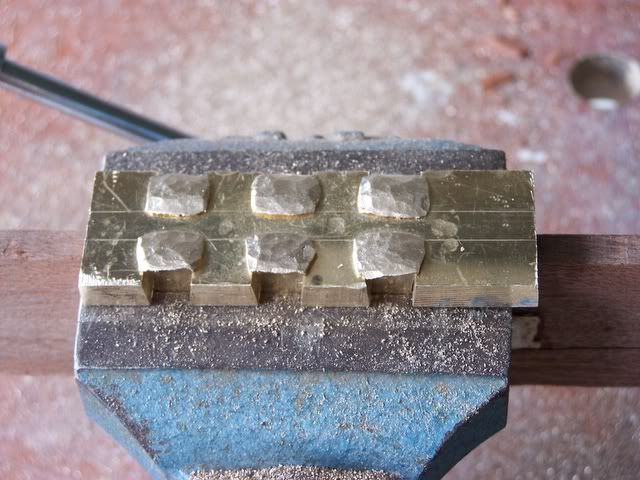
Then file flat (roughly - finer finishing comes last)
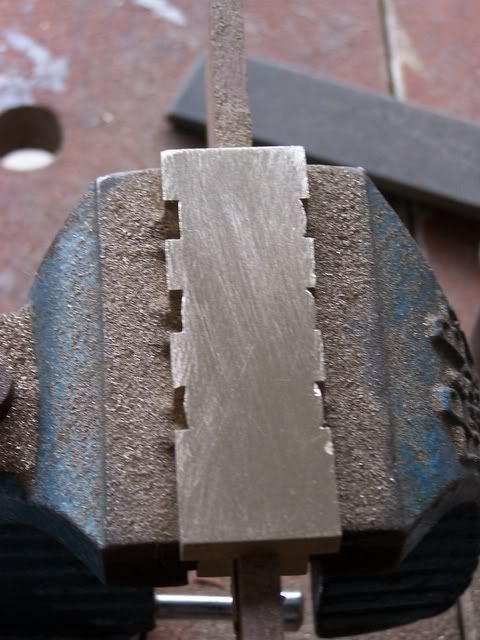
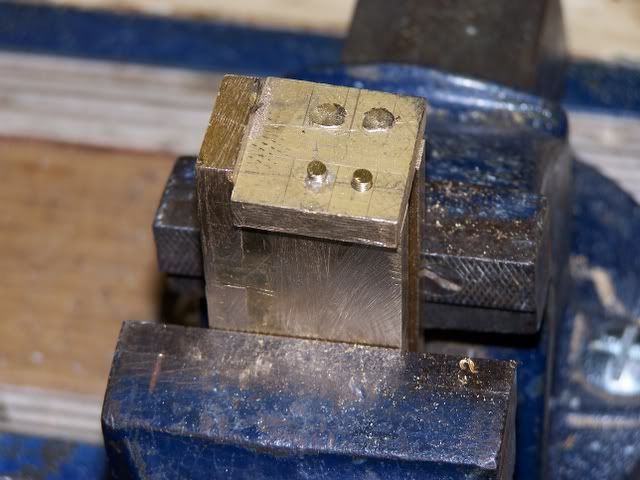
The sides were flattened in the same way. Here a design change was made. The original plan had been to modify the mk1 design to have a plate ata the front of the body to which the nose would attach with a single central screw (M6 stainless csk) rather than the 4 small ones into the sides used on the mk1. This would be much more convenient. Dovetails were cut in the front to attach this plate. However, I realised that there would be too little metal left around the hole for the screw which would attach the nose - it would probably fail. The design was therefore changed to attach the plate to the body using 4 screws. These were cut M3 from 3mm brass rod using a die, and the sides drilled at 2.5mm, tapped M3 and csk. The plate was clamped on and screwed in place with the brass screws, with a touch of superglue on the threads. Th tops were sawn off, peined and filed.
Almost finished. Infill (cocobolo) pressed into place using arrangements of clamps. Infill was thicknessed a little oversize and the excess was "planed" off by the sides as it was pressed into place. This makes for a tight fit. The infill was then riveted in place with 6mm brass rod.

Finally finished. Dodgy riveting filed flat (with the help of a very large new turnip cut file) and then surfaces taken through 2nd cut, needle file (I do not have a smooth cut file as yet) then wet-and-dry paper on glass. Chamfers added by hand.
Wedge from bocote. Blade cut from a 2nd hand Stanley 2". Wooden parts finished with french polish. Nose drilled 6mm and csk for the fixing screw, with a 3mm locating pin added by the "screw in and rivet the top" method.
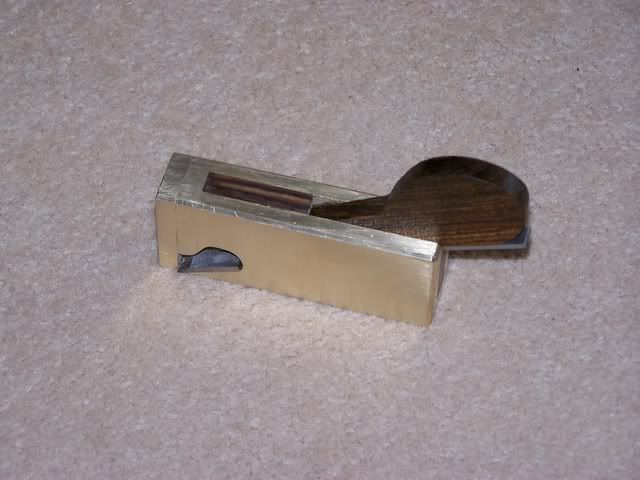
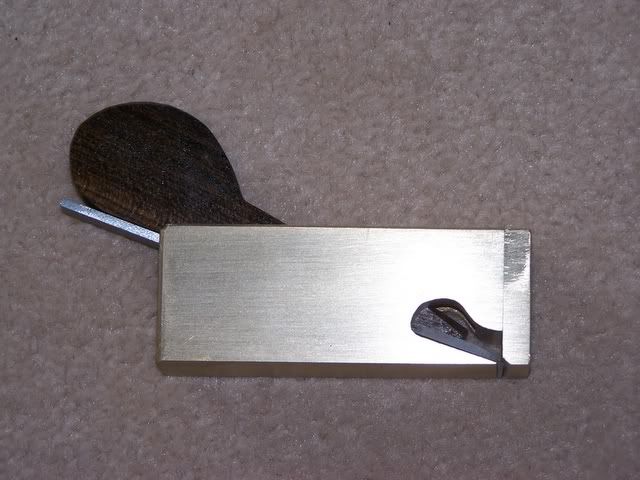
Overall, pleased with this one. Better design and finish than the mk1, although a couple of very slight voids did appear during finishing that were not apparent when filing flat. Probably need to leave less sticking out on the dovetails prior to peining.
More efficiently done that the last one, and all by hand with the exception of using a bench grinder on the blade. The final one (mine!) will be to this design but I have used a Dremmel-like tool with cutting discs to cut the blade, which is a lot easier!
First cut the dovetails with a hacksaw and files
Press together in a vice around a former. This is an improvement over my previous method (read it somewhere). Veneer/tape were put at the top (none dovetail edge of the sides) to force the edges out; they tend to spring inwards during peining and this makes squaring the sides to the sole easier.
I had allowed too much extra material at the ends of the dovetails, so filed these down prior to peining
Then file flat (roughly - finer finishing comes last)
The sides were flattened in the same way. Here a design change was made. The original plan had been to modify the mk1 design to have a plate ata the front of the body to which the nose would attach with a single central screw (M6 stainless csk) rather than the 4 small ones into the sides used on the mk1. This would be much more convenient. Dovetails were cut in the front to attach this plate. However, I realised that there would be too little metal left around the hole for the screw which would attach the nose - it would probably fail. The design was therefore changed to attach the plate to the body using 4 screws. These were cut M3 from 3mm brass rod using a die, and the sides drilled at 2.5mm, tapped M3 and csk. The plate was clamped on and screwed in place with the brass screws, with a touch of superglue on the threads. Th tops were sawn off, peined and filed.
Almost finished. Infill (cocobolo) pressed into place using arrangements of clamps. Infill was thicknessed a little oversize and the excess was "planed" off by the sides as it was pressed into place. This makes for a tight fit. The infill was then riveted in place with 6mm brass rod.
Finally finished. Dodgy riveting filed flat (with the help of a very large new turnip cut file) and then surfaces taken through 2nd cut, needle file (I do not have a smooth cut file as yet) then wet-and-dry paper on glass. Chamfers added by hand.
Wedge from bocote. Blade cut from a 2nd hand Stanley 2". Wooden parts finished with french polish. Nose drilled 6mm and csk for the fixing screw, with a 3mm locating pin added by the "screw in and rivet the top" method.
Overall, pleased with this one. Better design and finish than the mk1, although a couple of very slight voids did appear during finishing that were not apparent when filing flat. Probably need to leave less sticking out on the dovetails prior to peining.
More efficiently done that the last one, and all by hand with the exception of using a bench grinder on the blade. The final one (mine!) will be to this design but I have used a Dremmel-like tool with cutting discs to cut the blade, which is a lot easier!
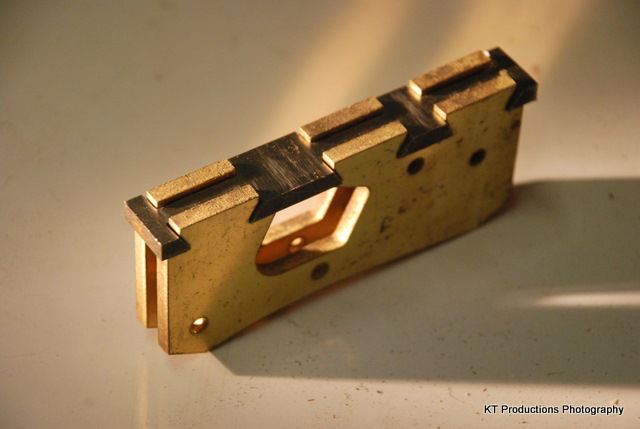
 but in the end I like the contrast of the dovetailing with steel against brass...