delaney001
Established Member
So came across this guy on Youtube, and really like his style and design.
https://www.youtube.com/watch?v=uJbqA1B ... e=youtu.be
Not sure if the style of stools he makes have a name or are a common style, but I hadnt come across it before. Really liked it, and decided to have a go.
Took some pictures along the way, but forgot at other times - usually the important stressful points... :roll:
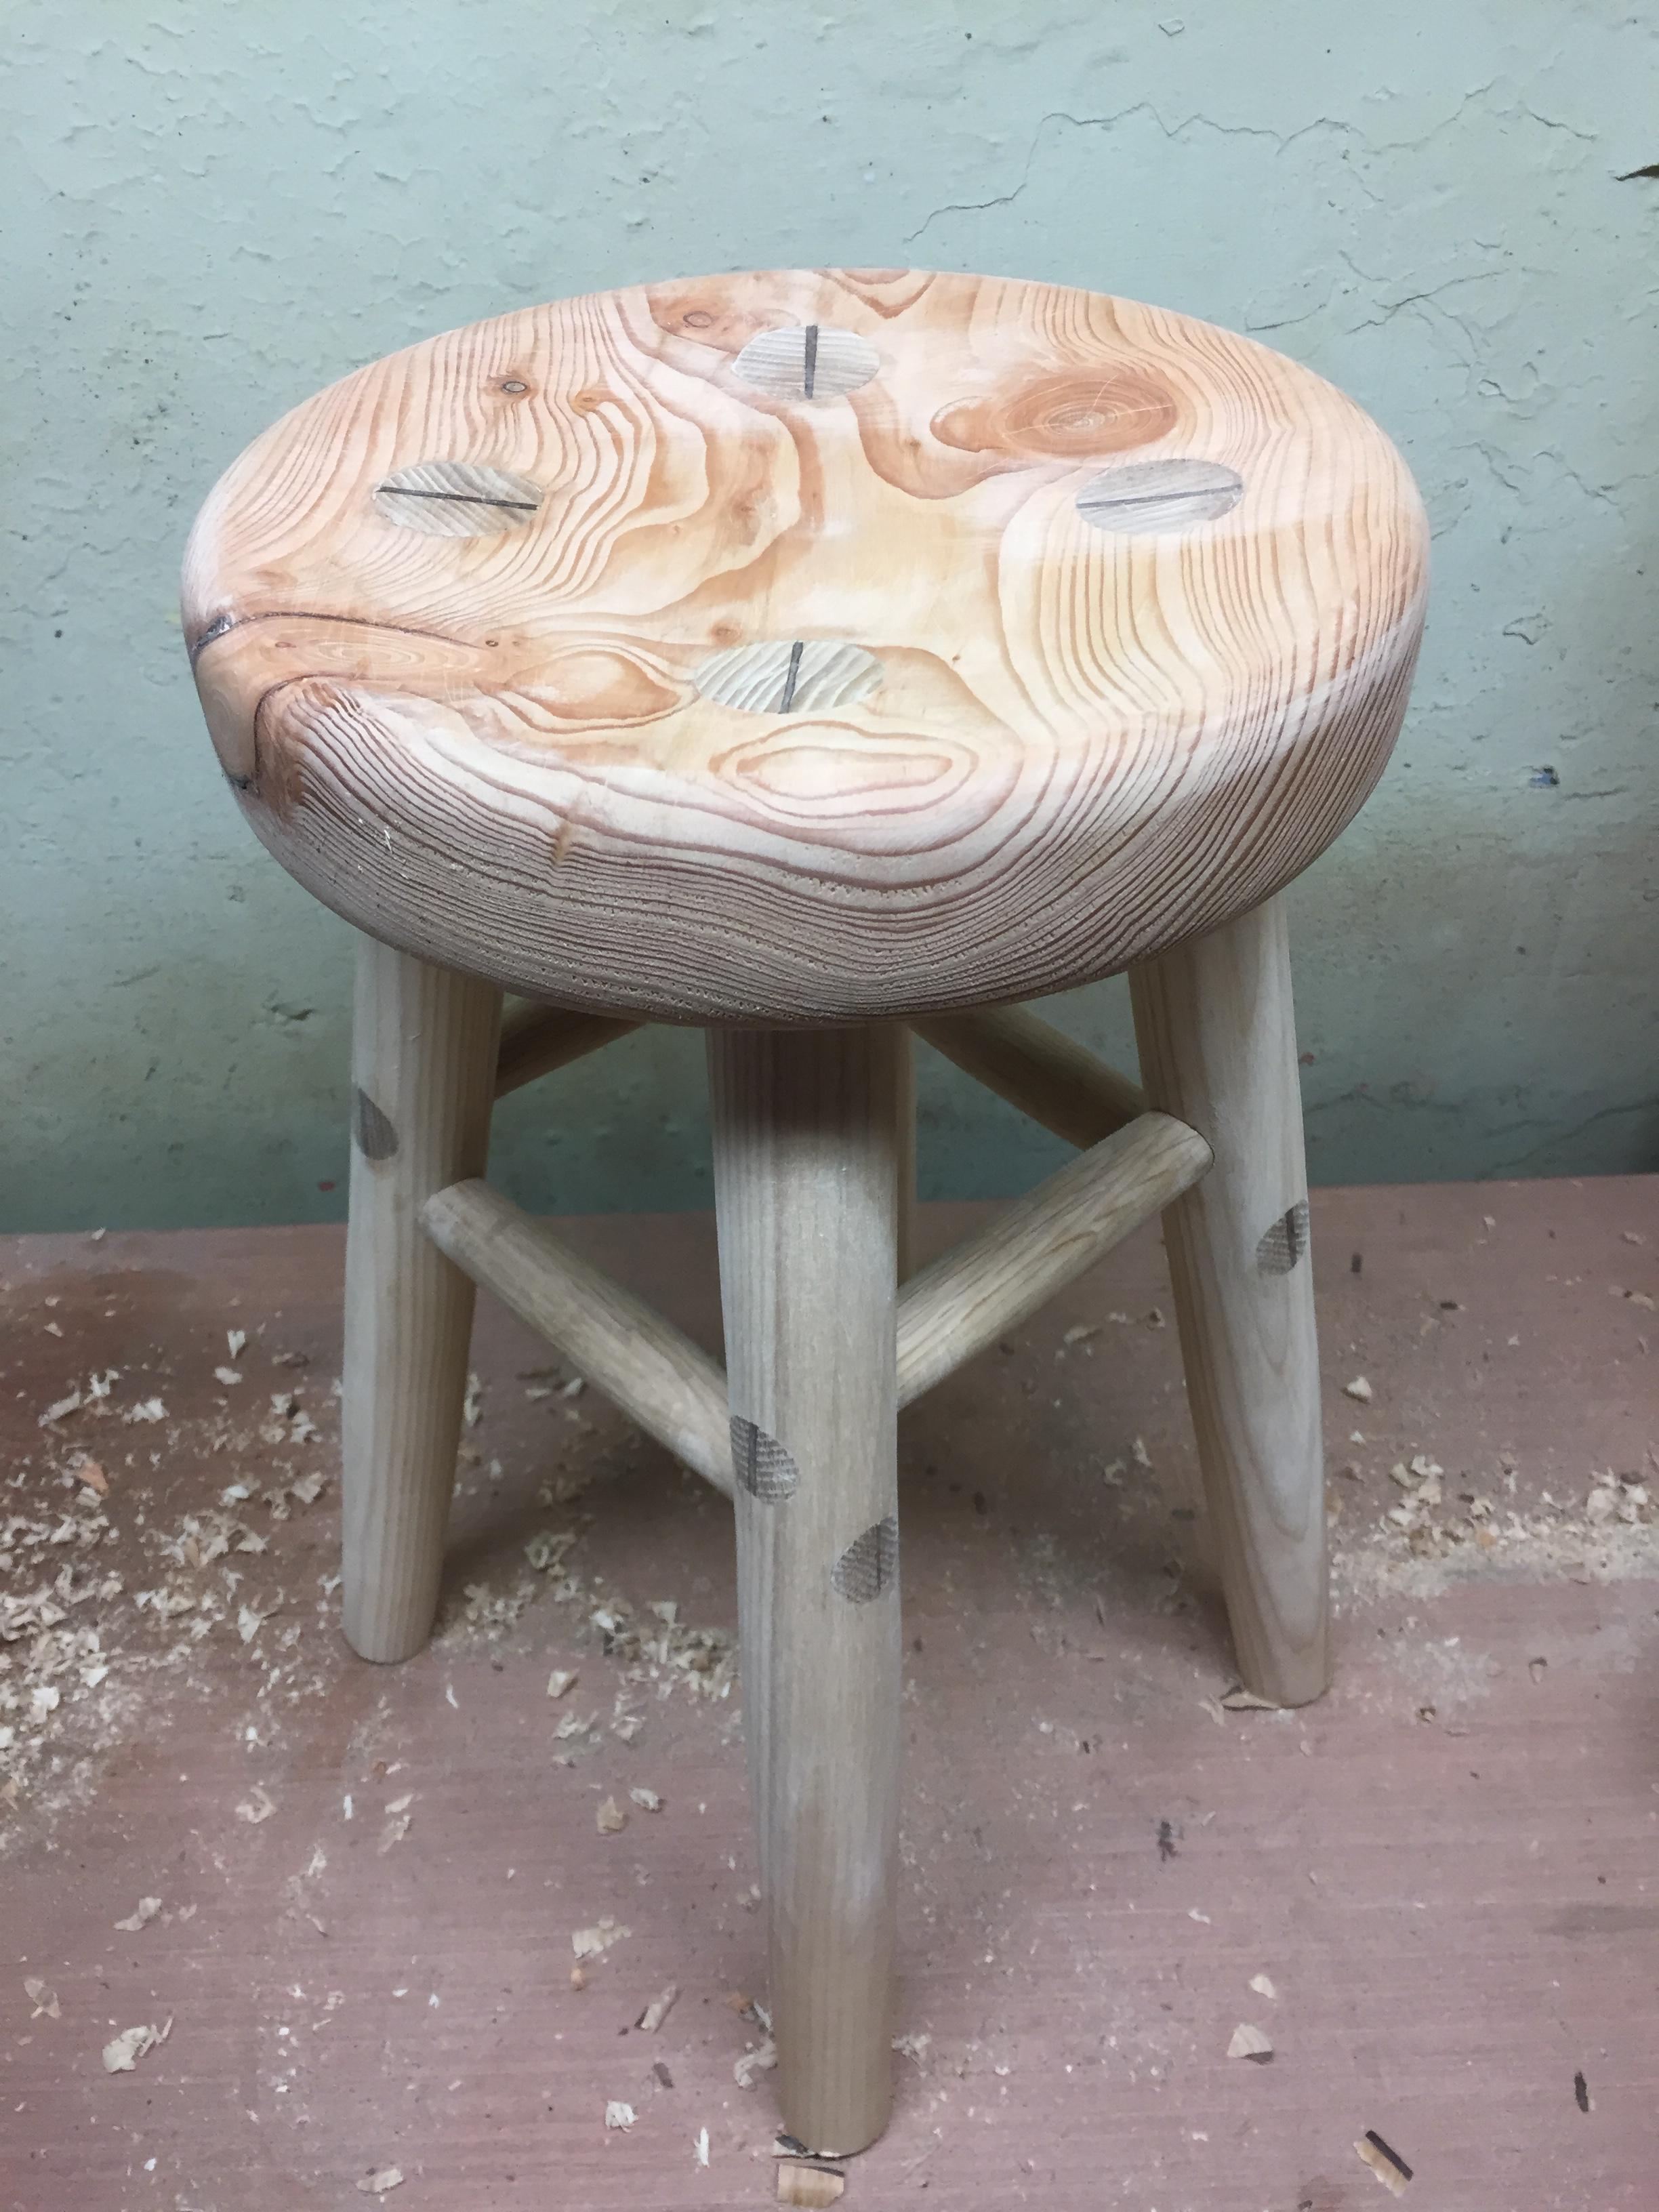
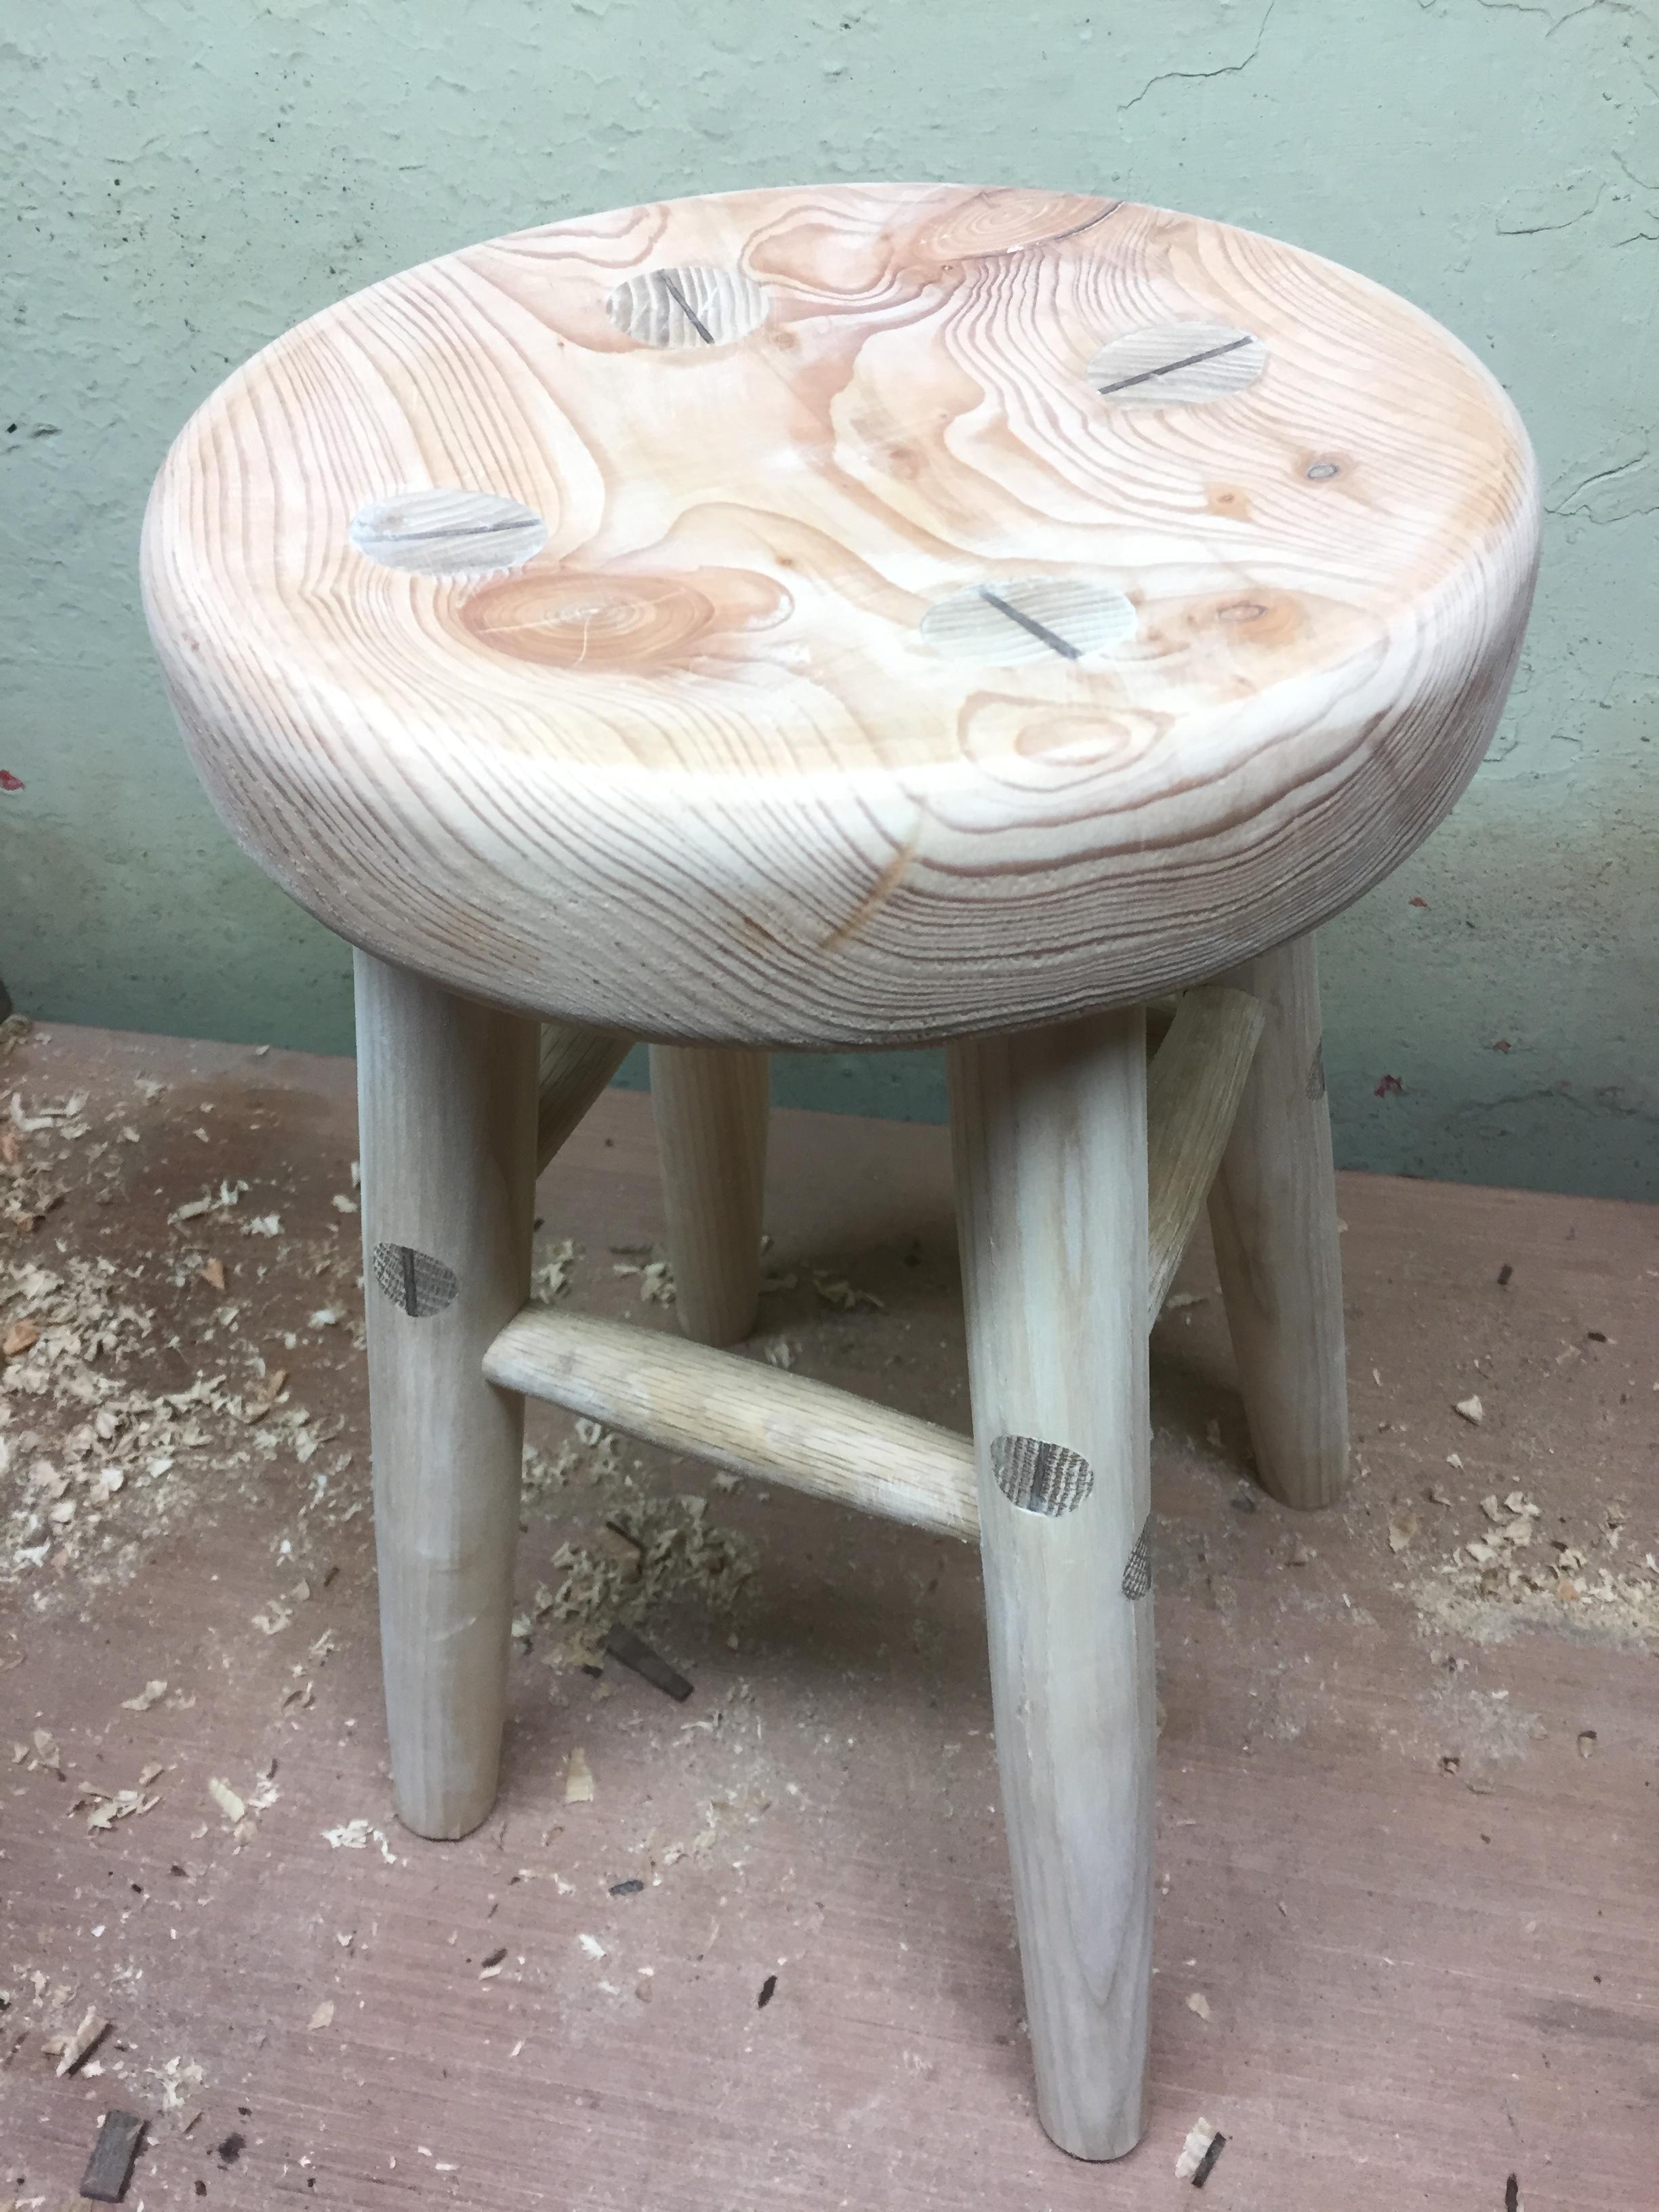
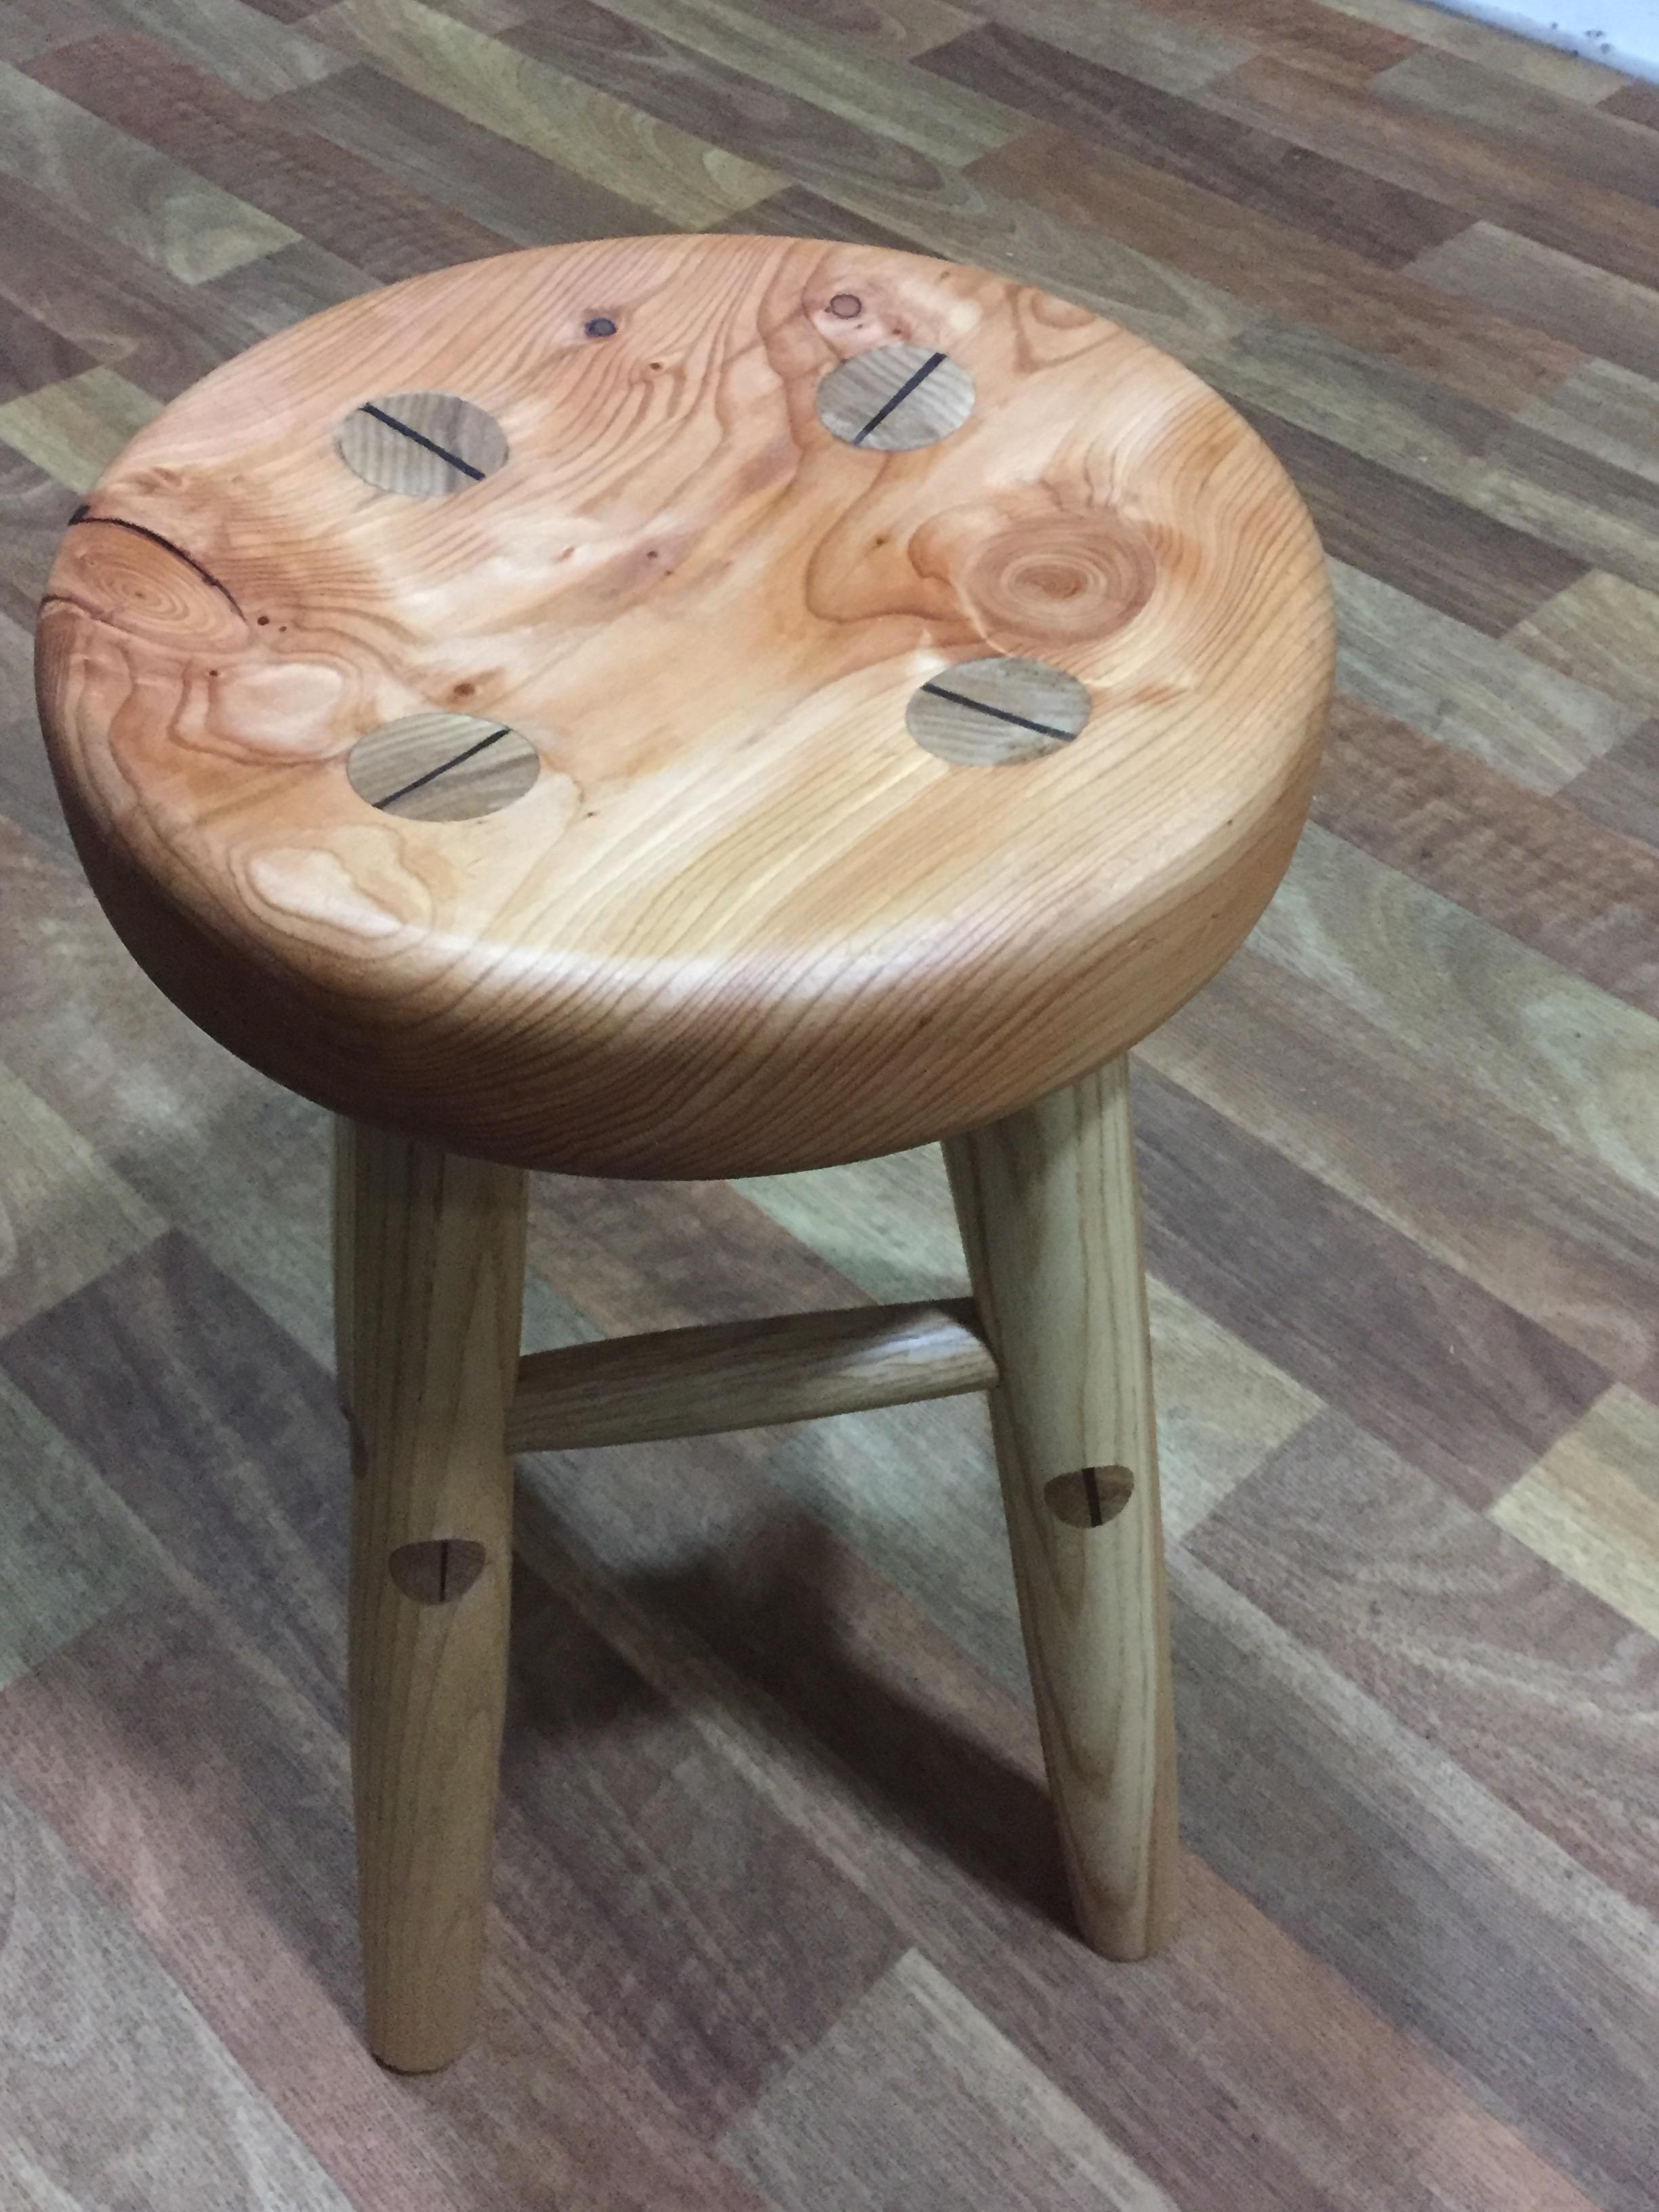
So started off with what I think is Oak (open to correction on that). Had two lengths about 900mm long, so that decided the legs on my stool were going to be around the 450mm mark, less the thickness of the stool-top that they were going to go through. My lathe is a 1221 Jet, so it doesnt take much more than 500mm max spindle anyway.
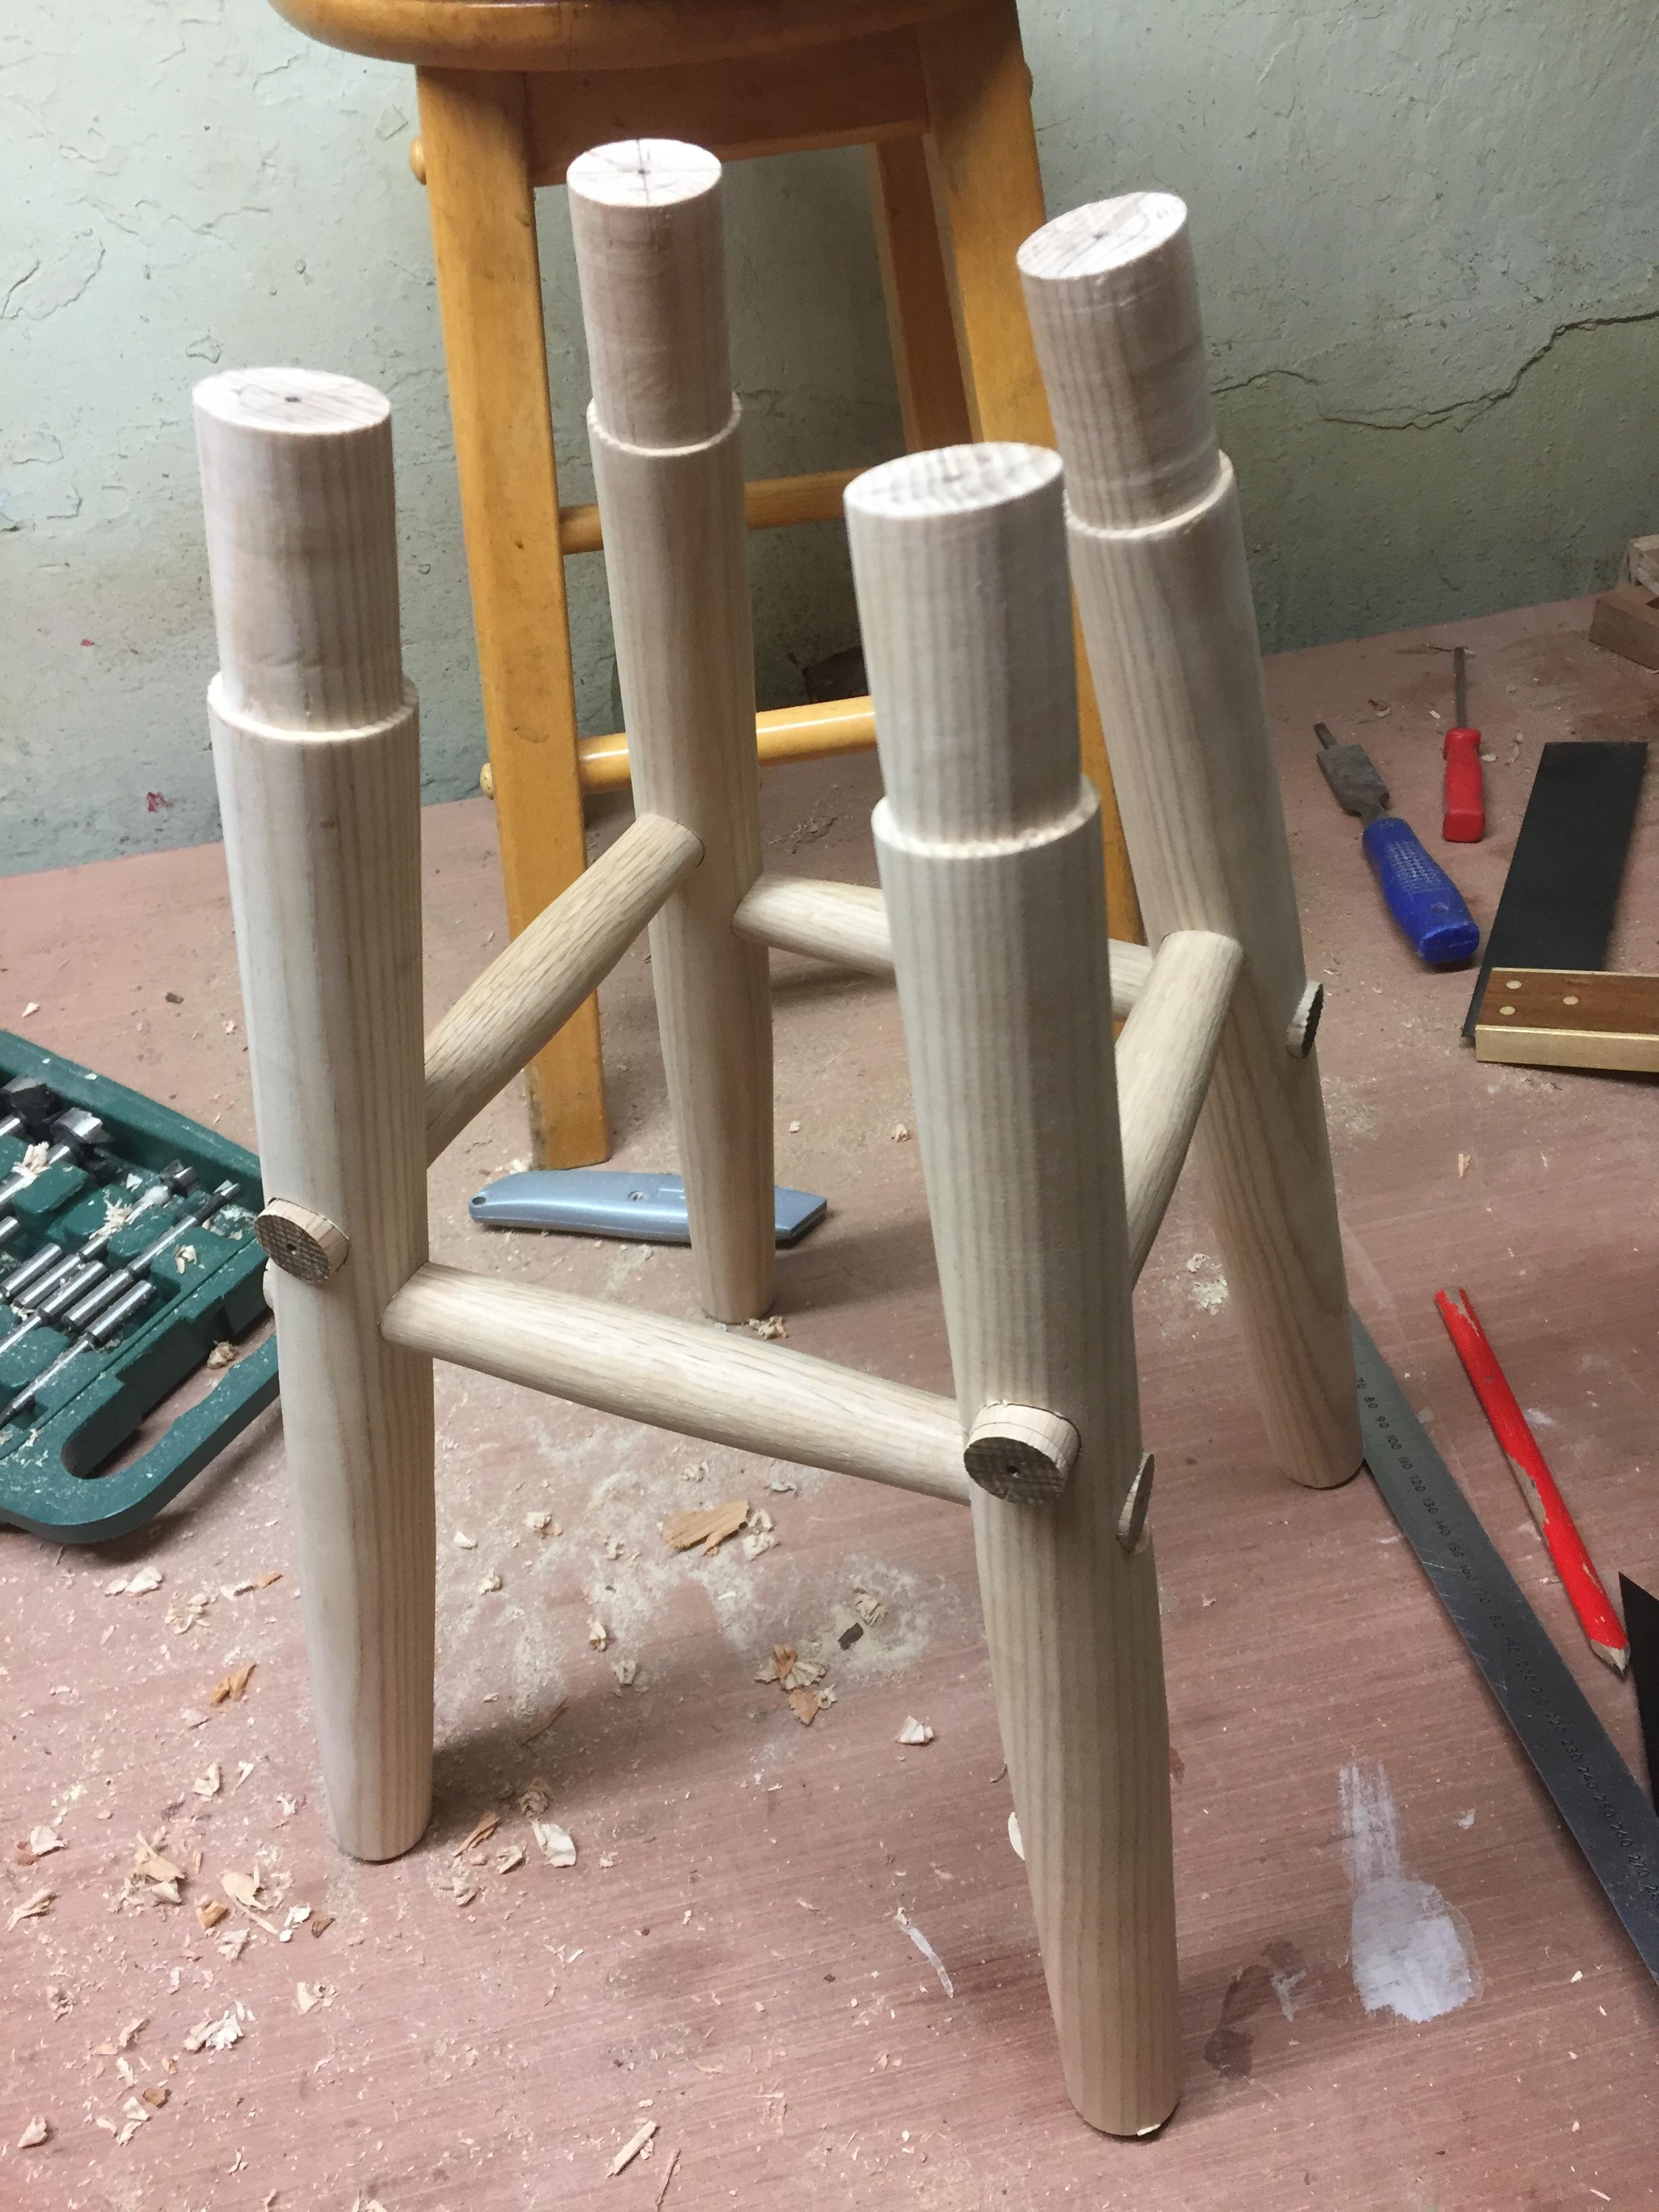
Turned the 4 legs with roughing gouge. Had a simple enough process, marked up 60mm from one end to mark the shoulders of the tennons. Drilled a scrap piece with the 3/4" fostner bit and did a practice run on a scrap piece. Once happy with the fit, used the scrap piece to set the calipers. At the other end of the leg (the bottom), measure up about 200mm and tapered it back to a diameter that looked right.
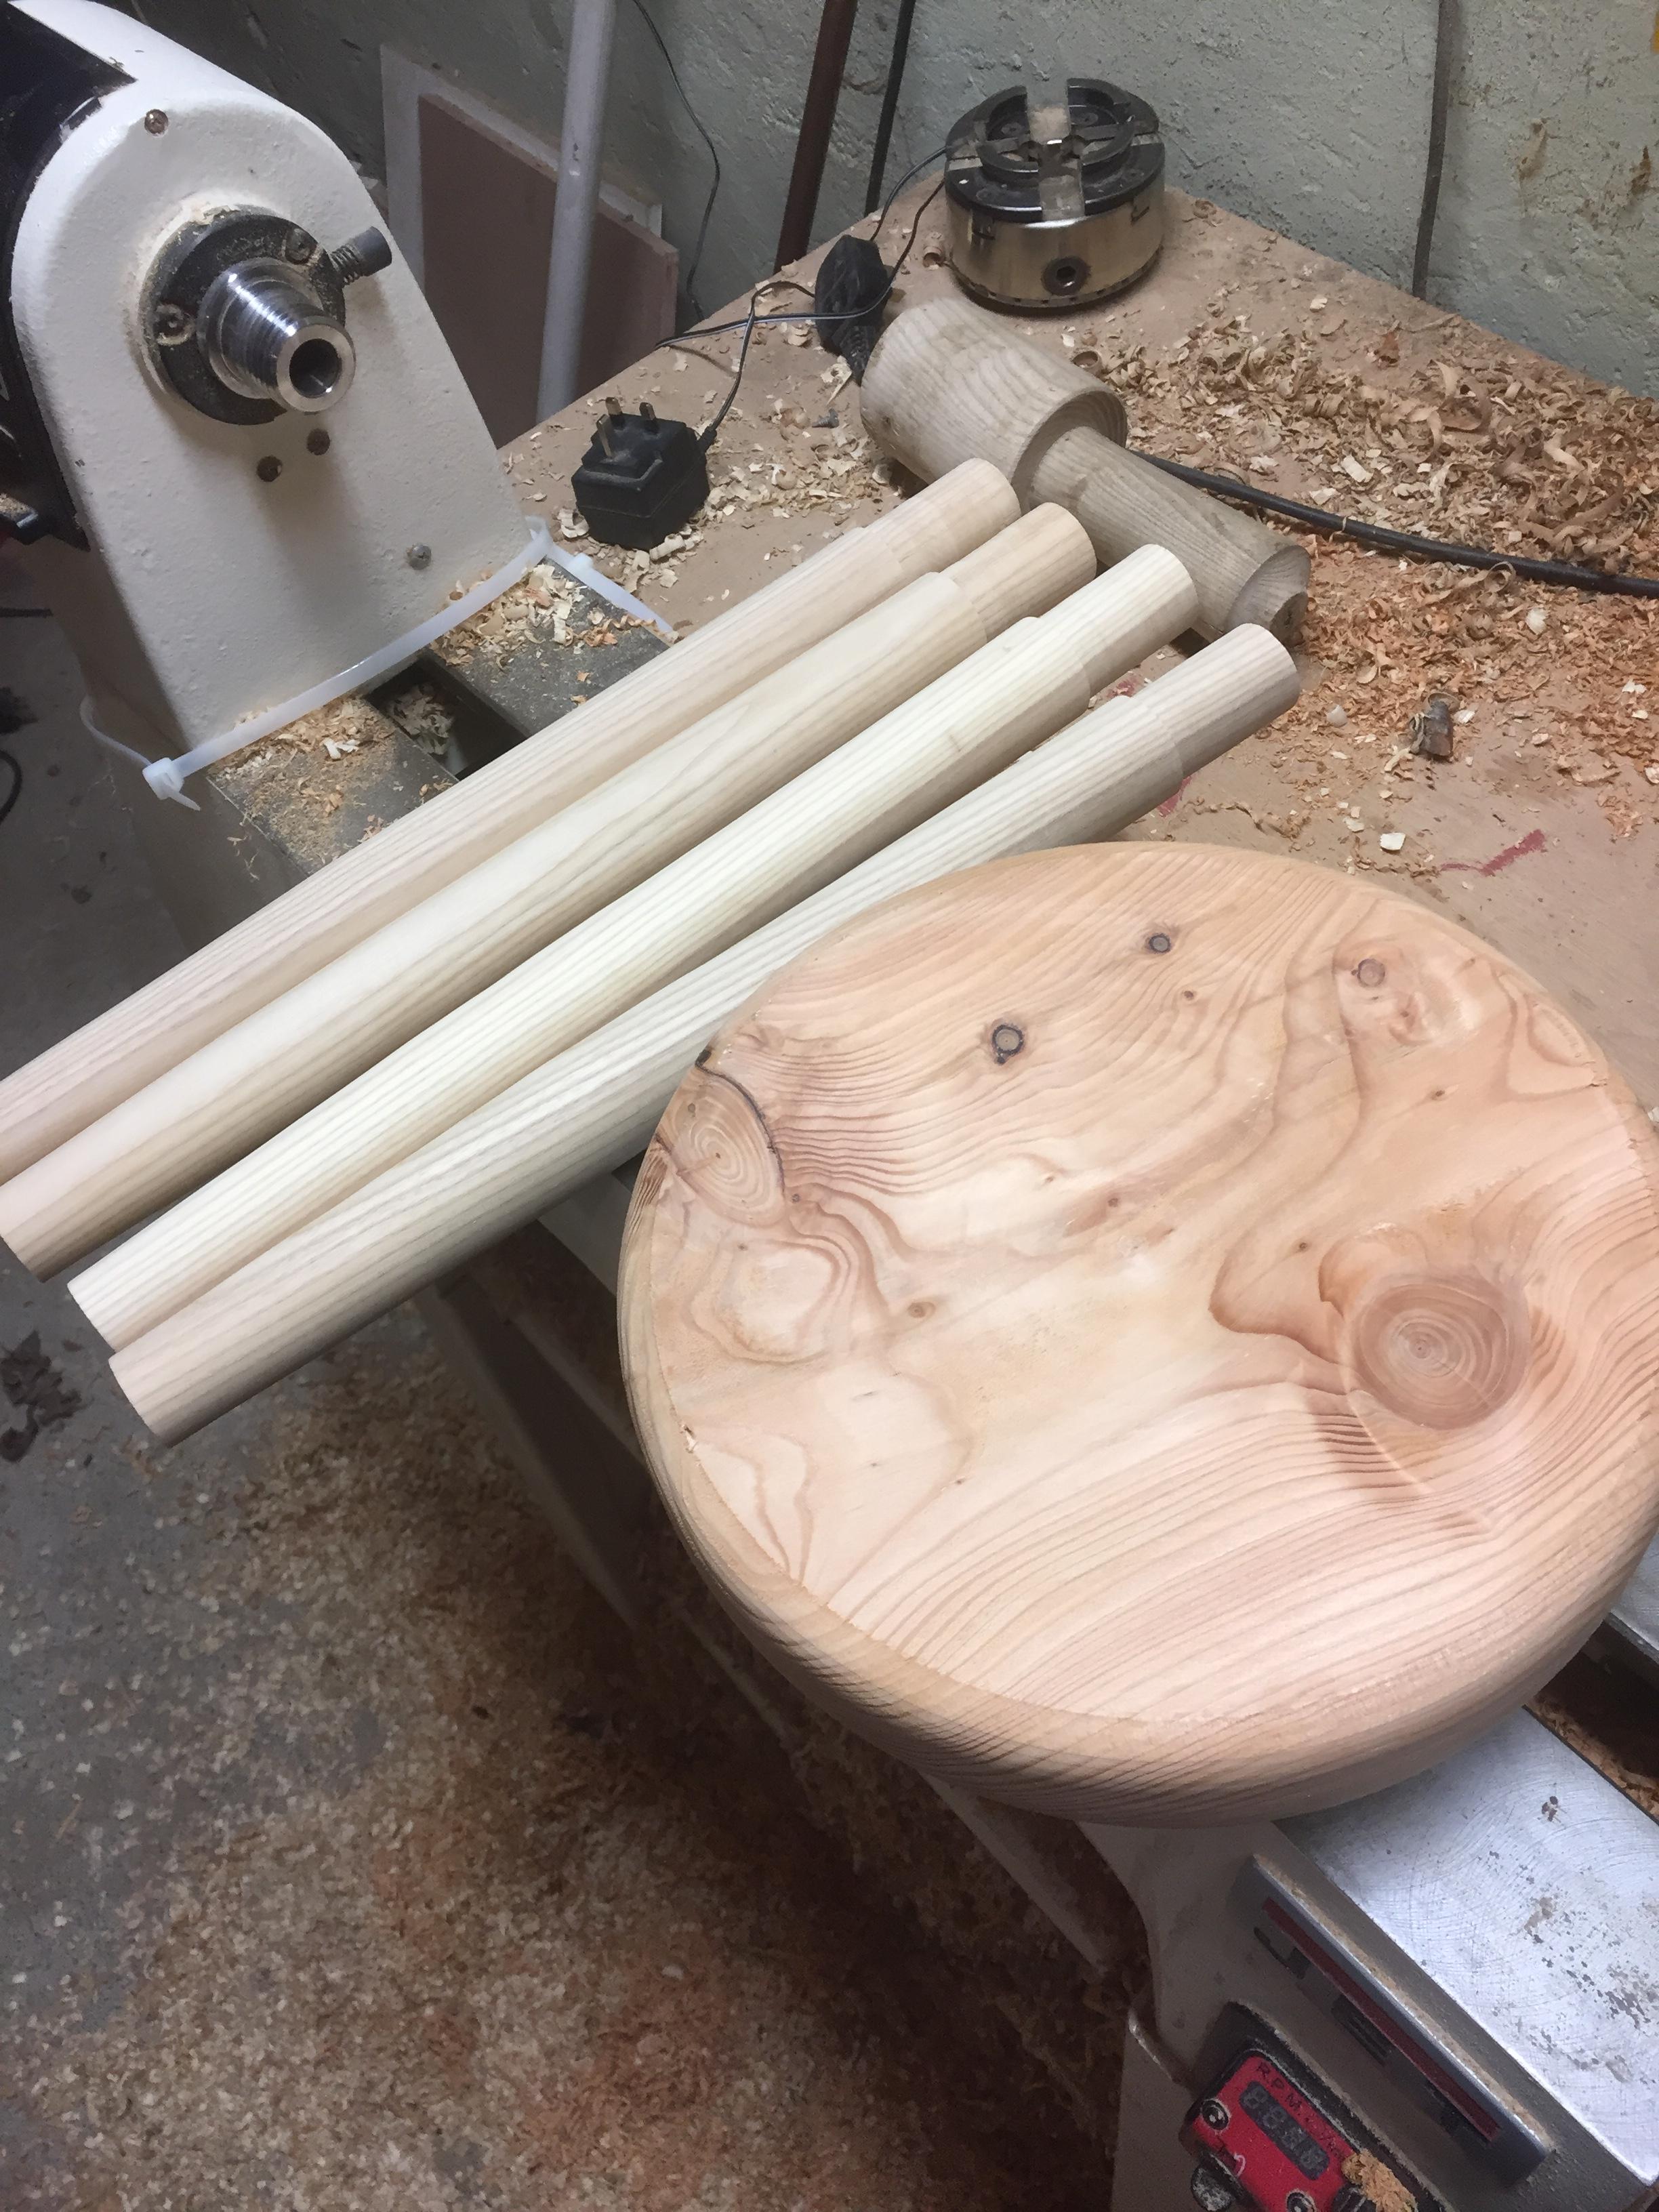
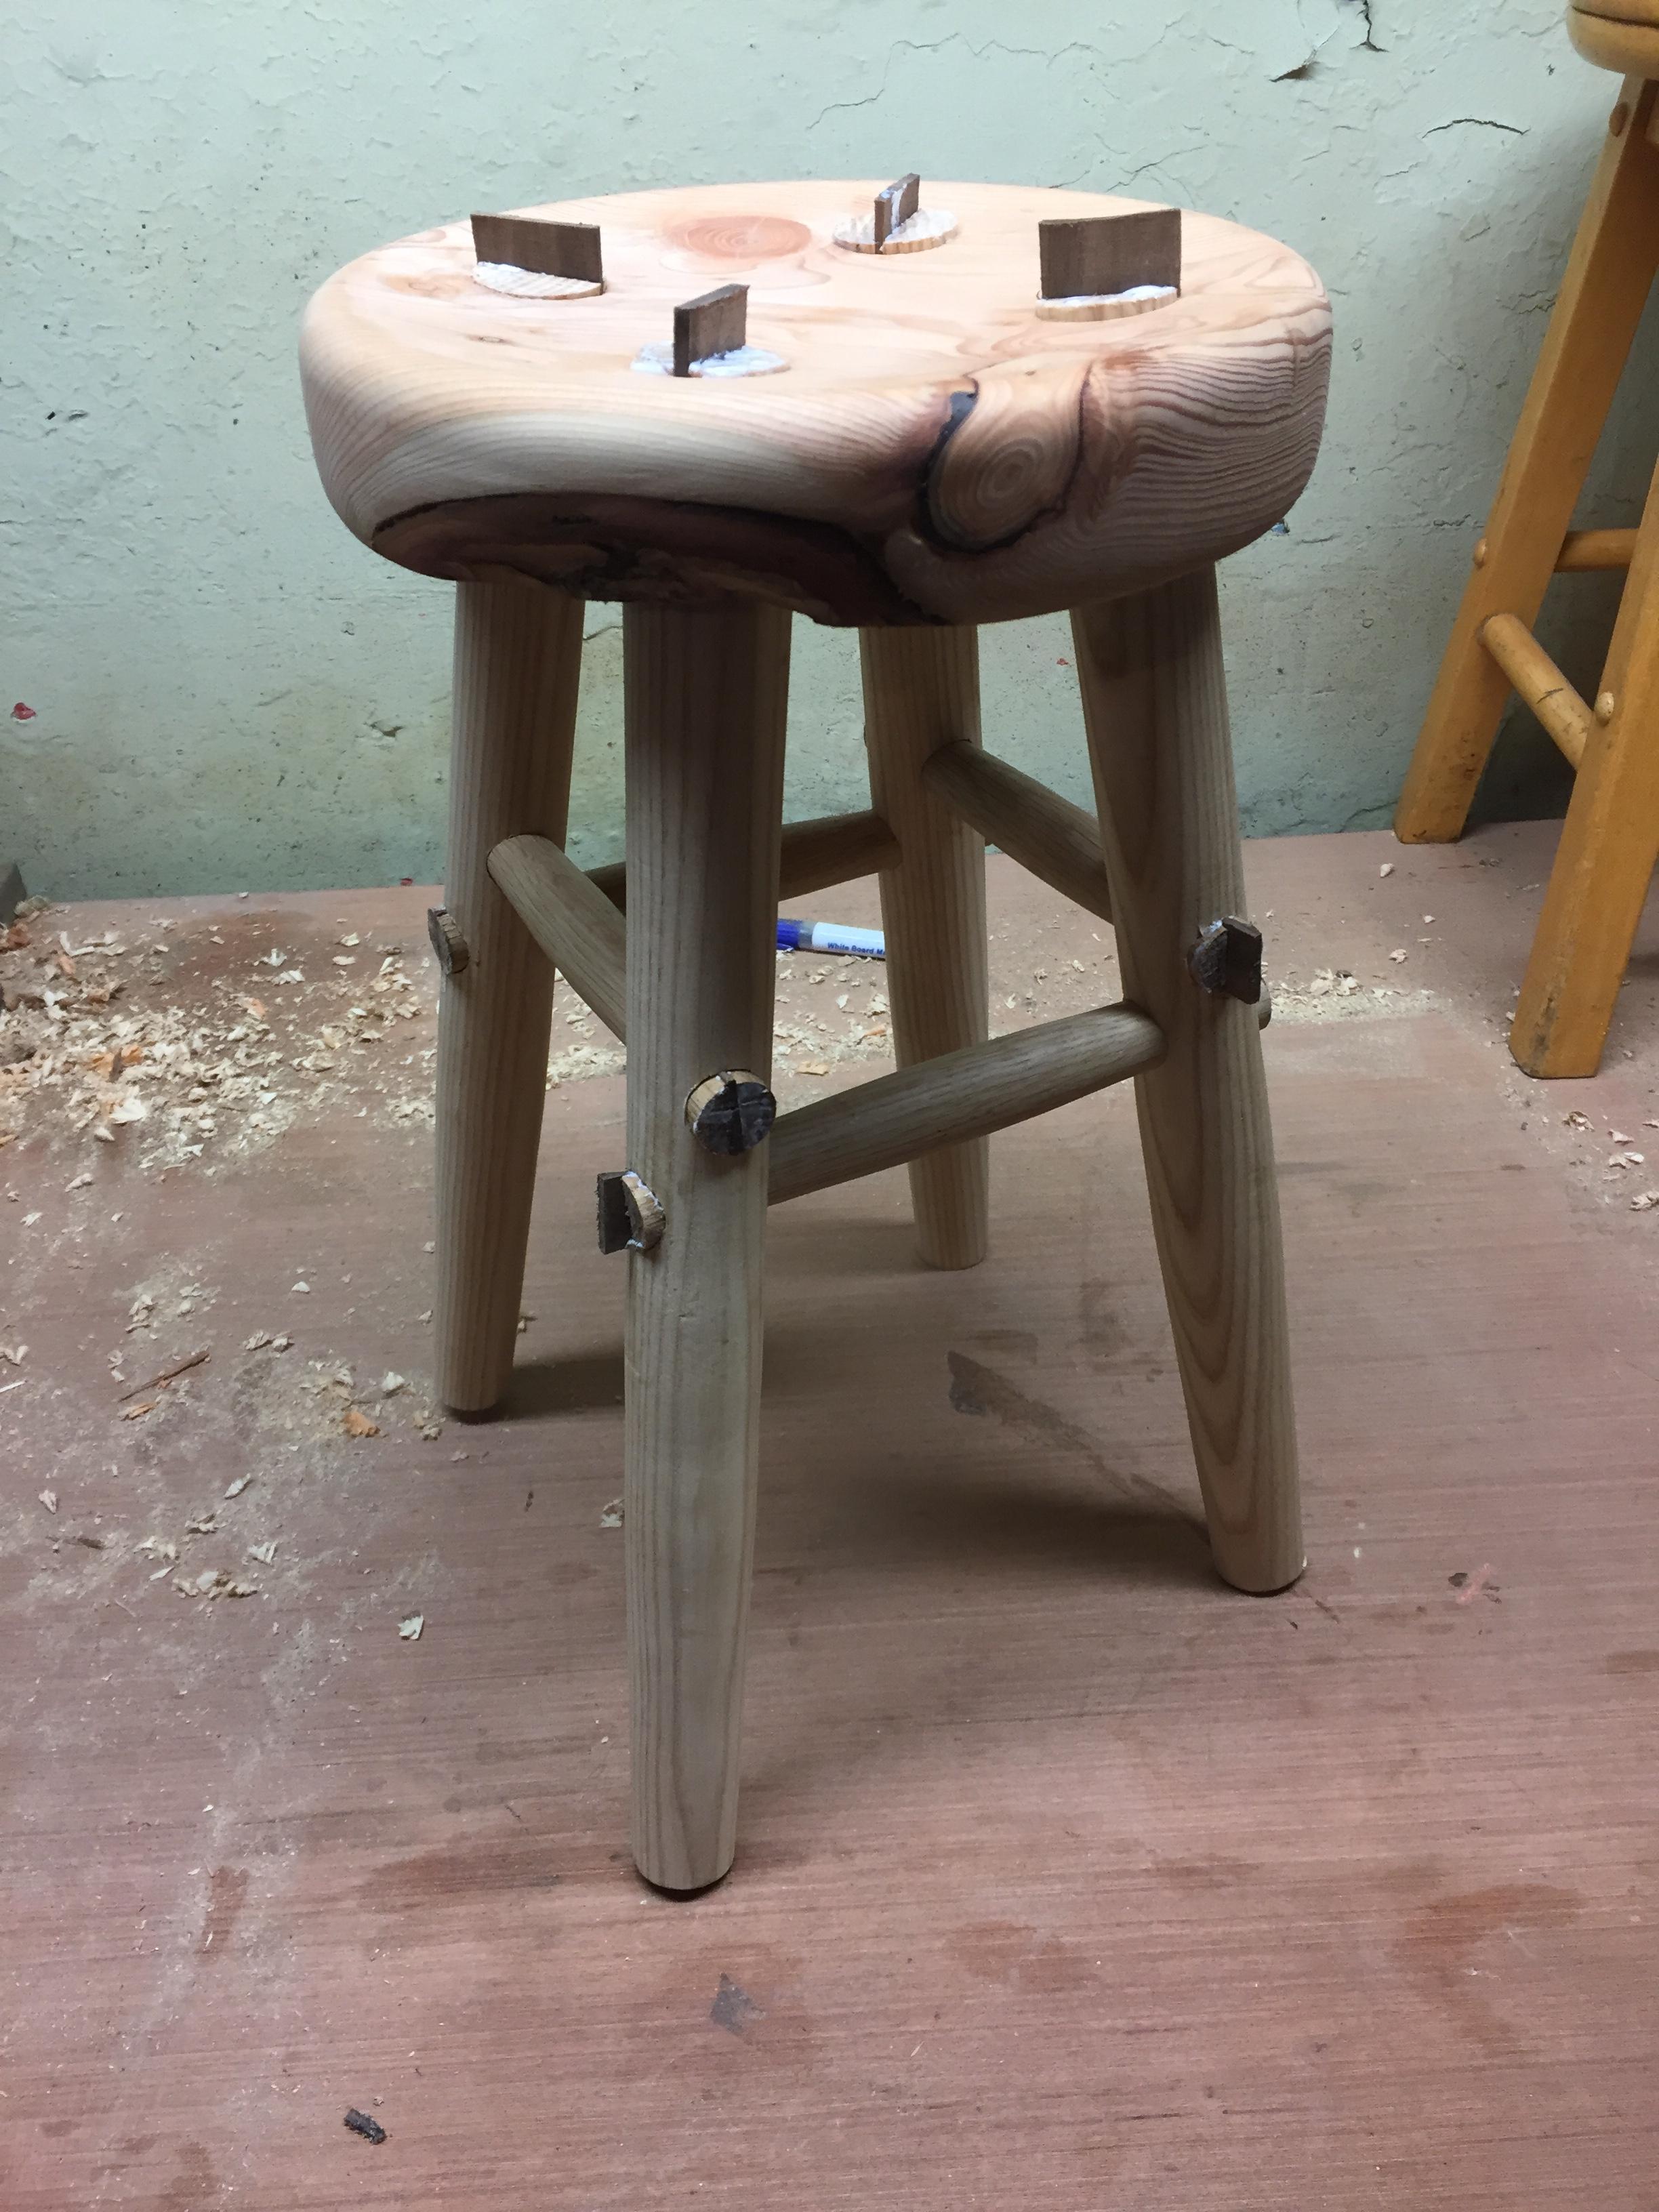
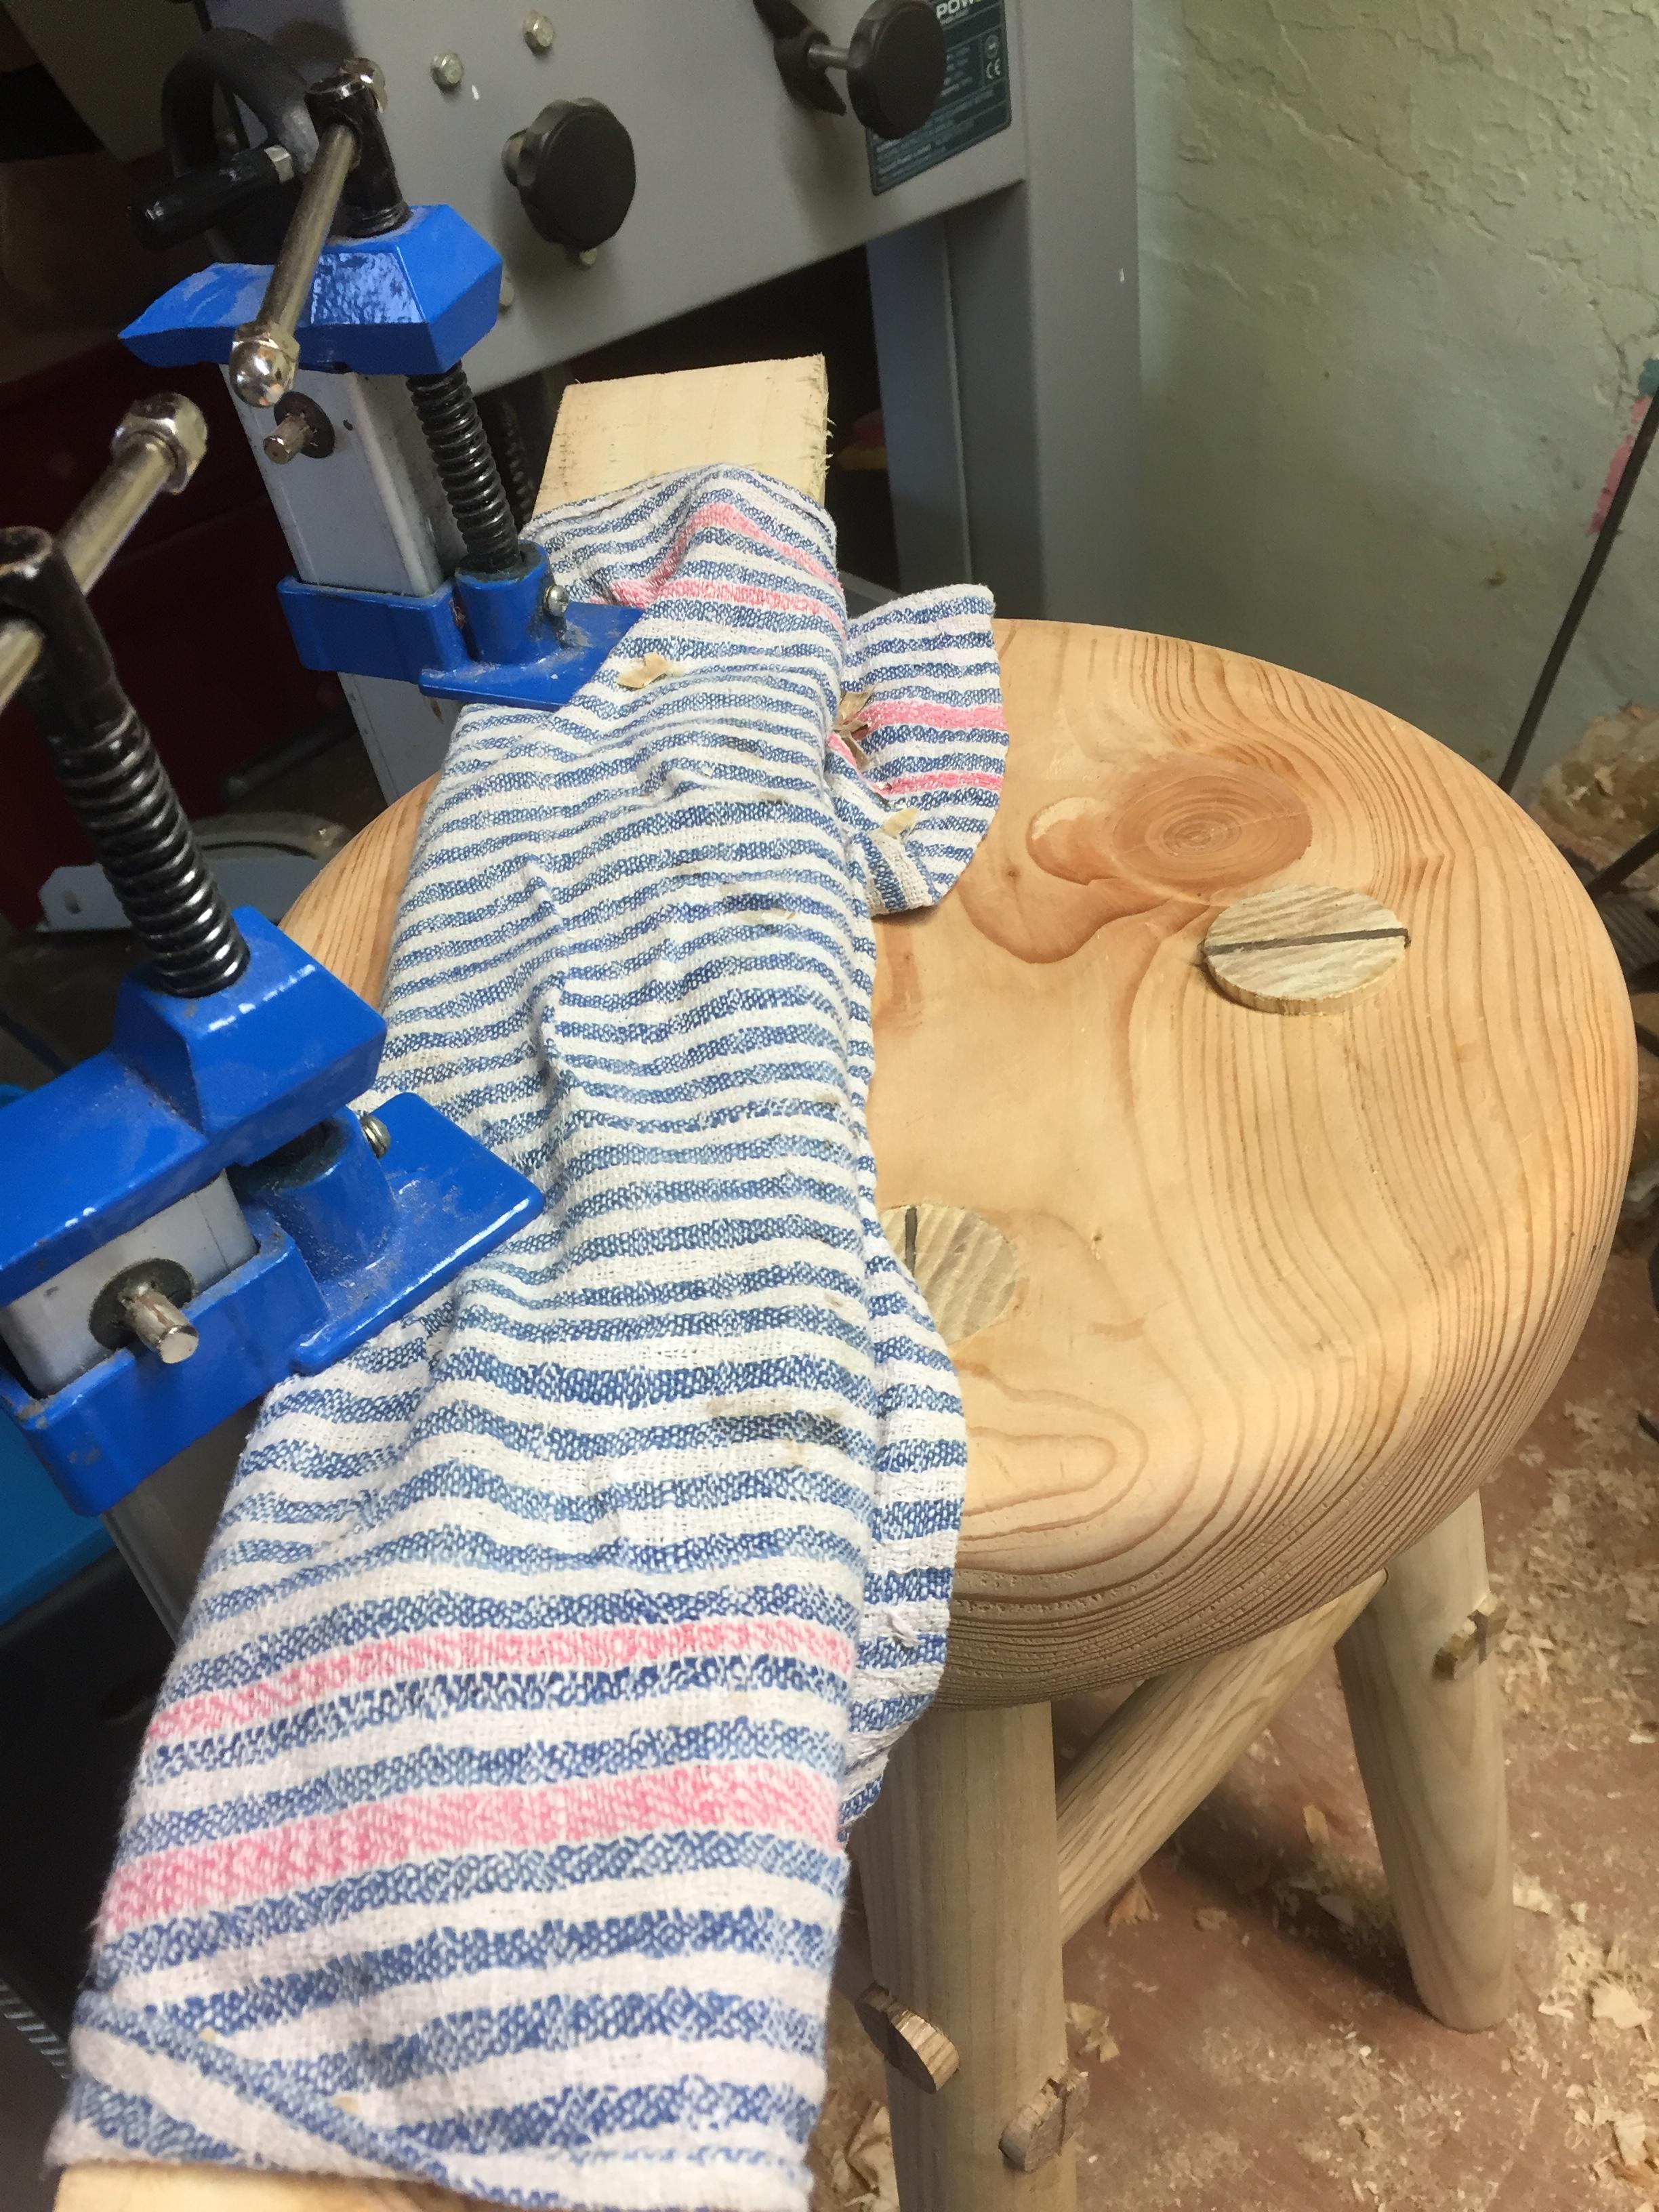
Turned the top on the lathe, used a faceplate to hold it. I screwed the faceplate on using 6 screws, didnt worry too much about the holes as the underside is so rarely going to be seen. Ive seen lads do the top with an adze, but I dont have one or the skills to use one, so turning on the lathe seemed the best bet. Straight forward enough, turned out the top edge of the seat to what looked like a nice concave. Sanded up to 320 and left it at that for the time being.
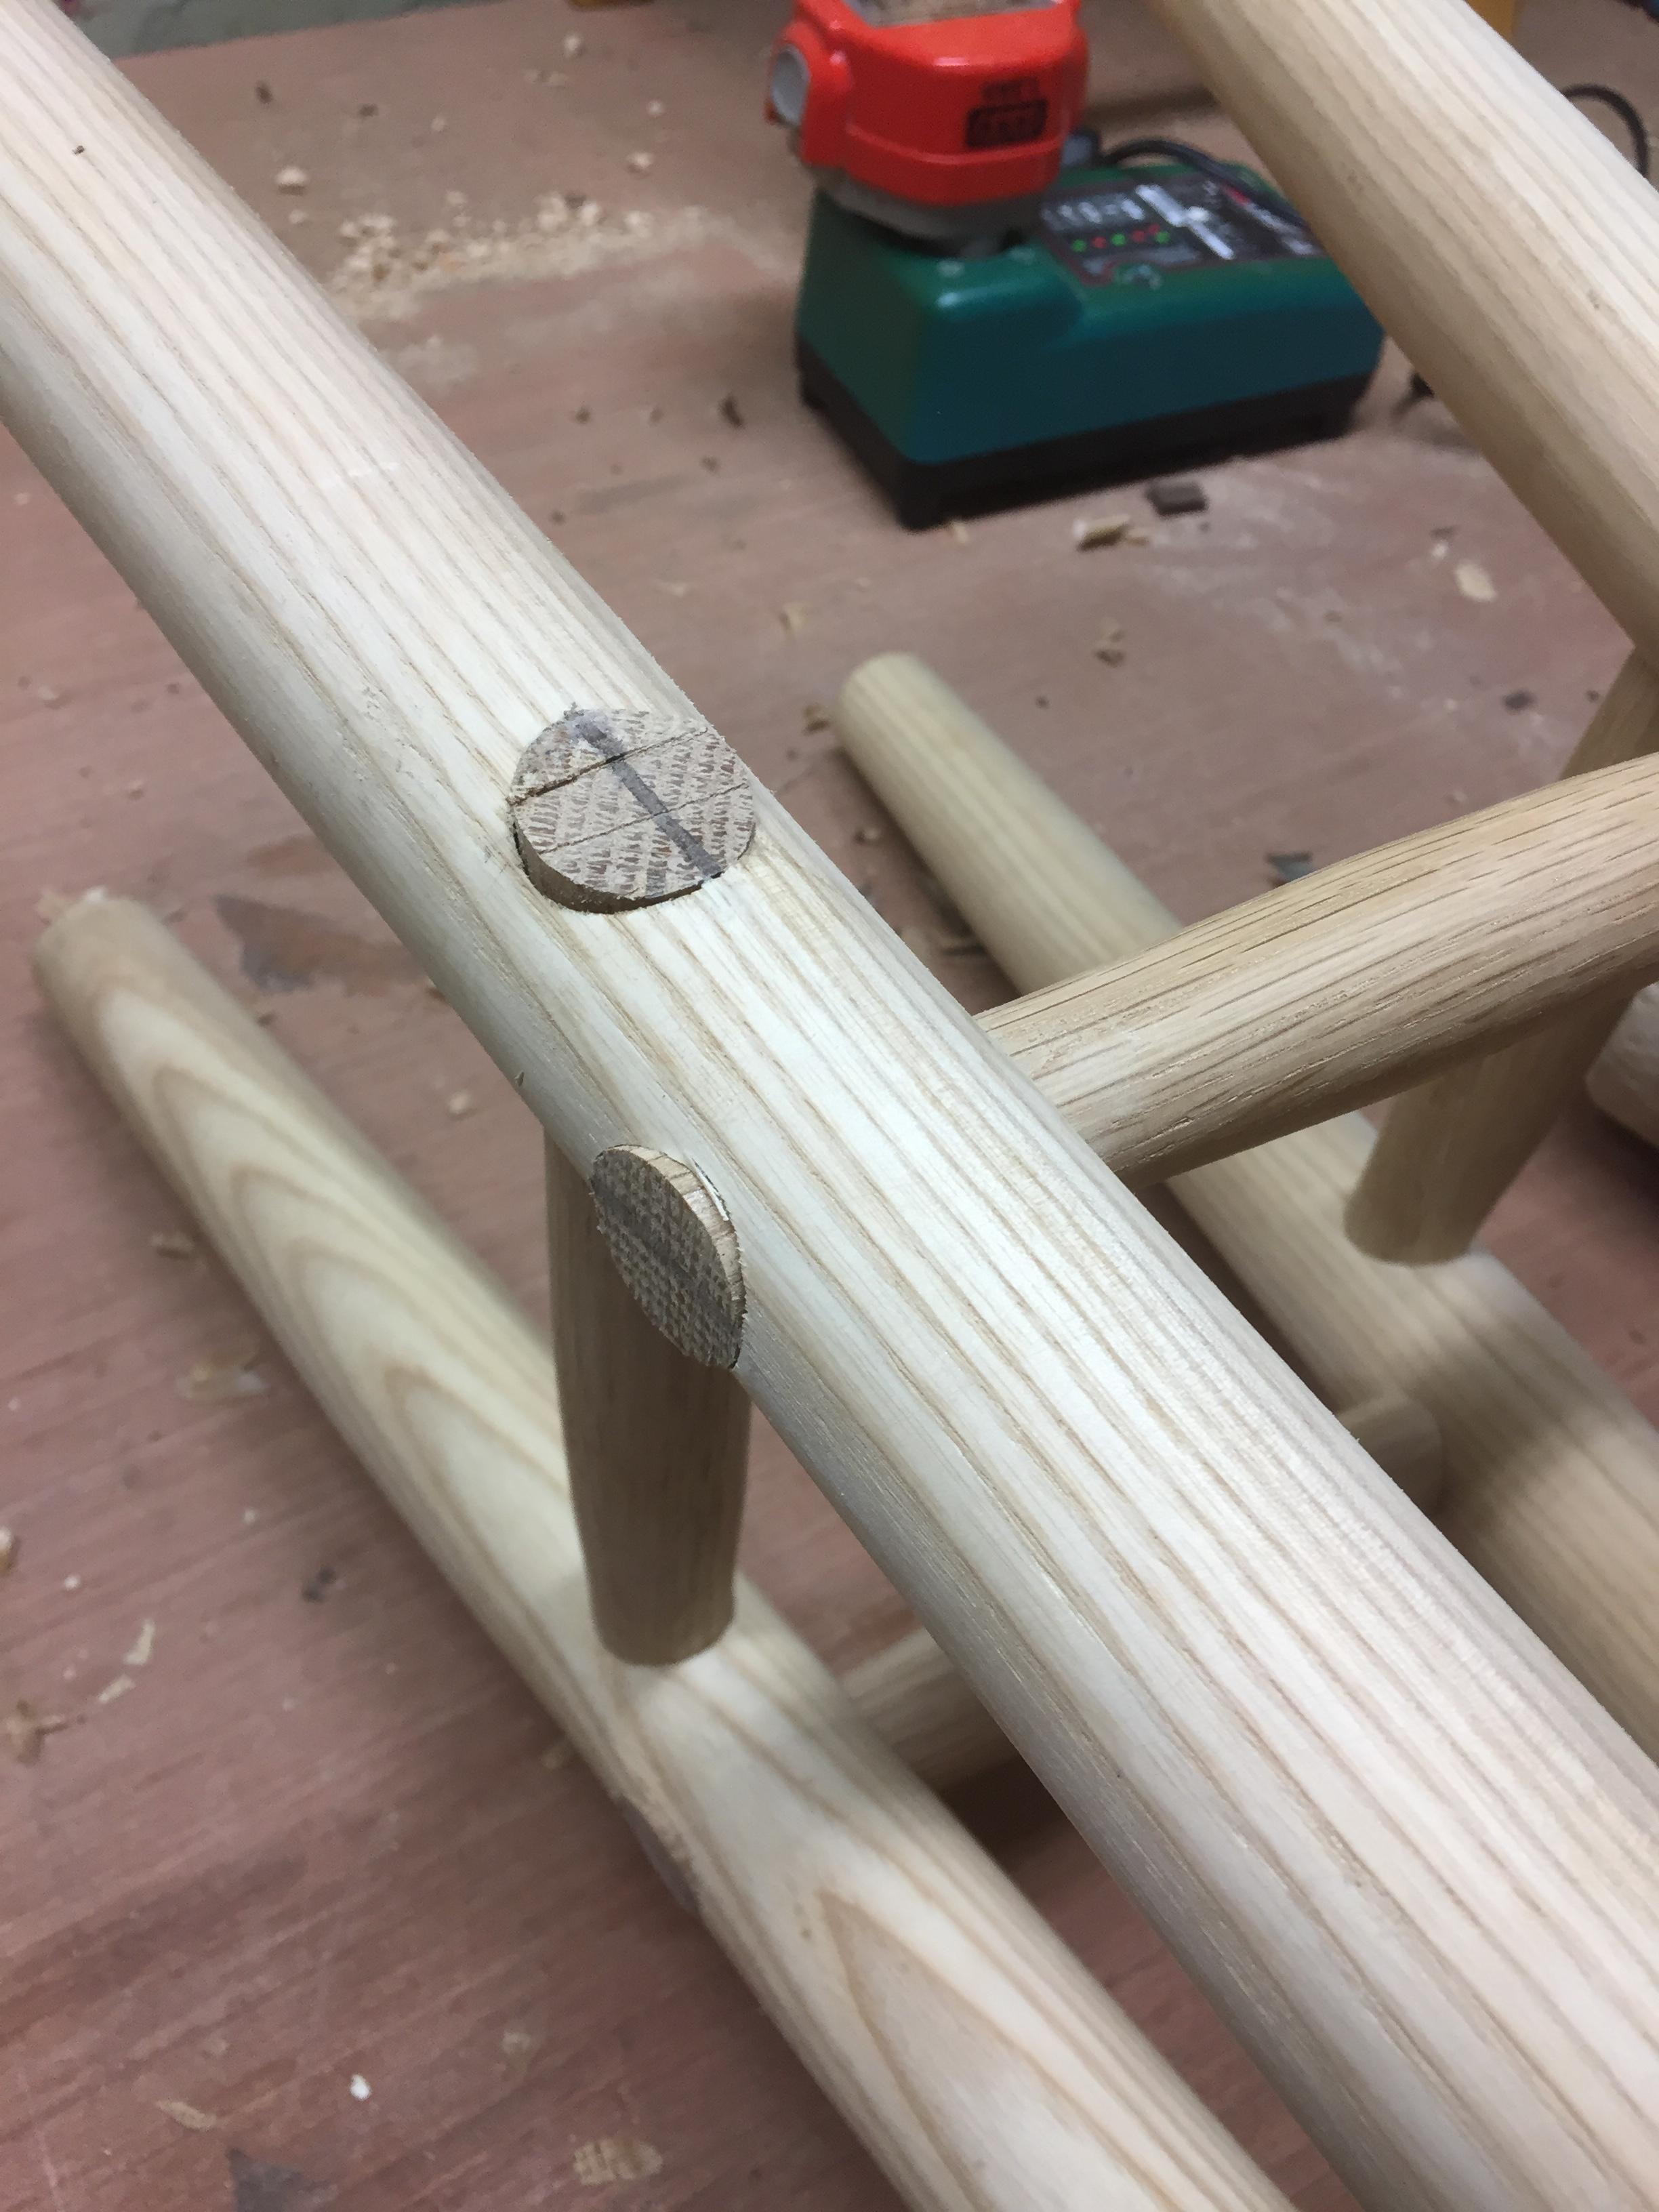
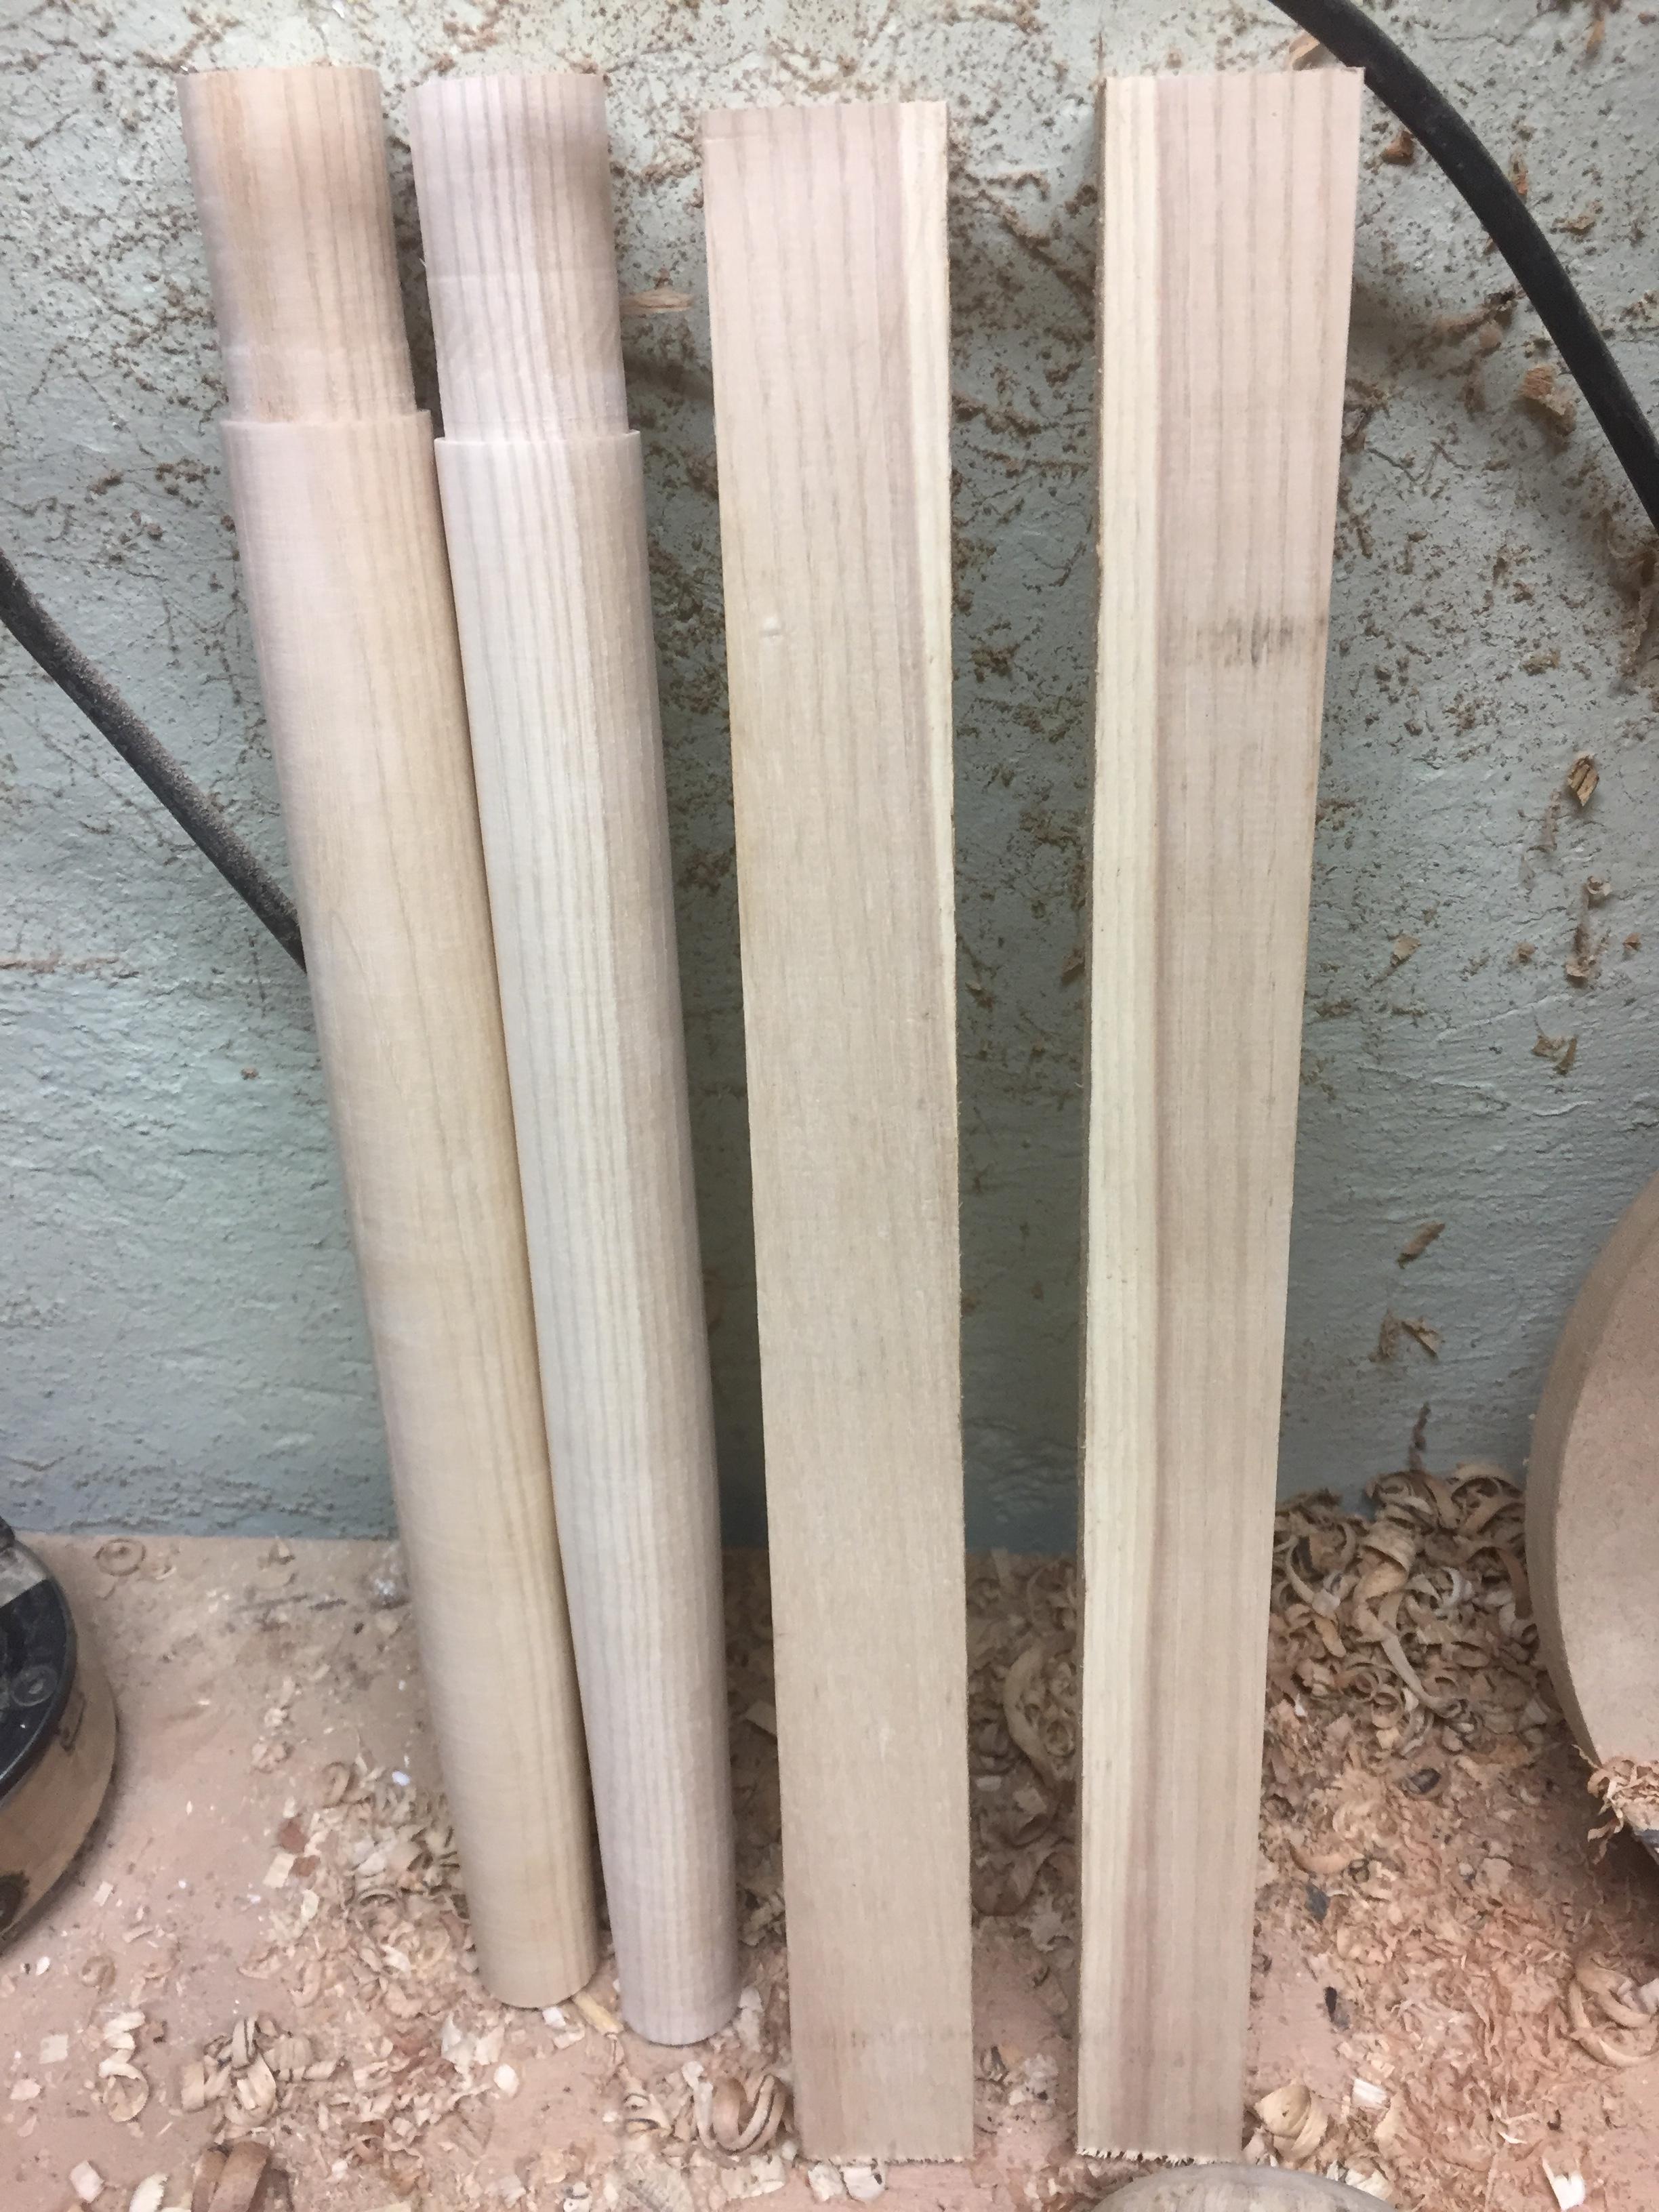
Then found some material for the stretchers. I wasnt confident to try and use an X type stretcher layout as Im not sure how you go about crossing the two pieces over each other. So instead I just ran 4 stretchers around the perimeter from leg to leg. Two above and two below, seemed the best way and I liked the look of it. I turned the 4 stretchers in a similar way to the legs. Drilled out a scrap piece with a 3/8s fostner bit and then once I had a scrap piece fitting nicely, used that for the calipers. I dont think I have any pictures of this process, but it was very straight forward. Roughed out with a roughing gouge and then sanded up to 320. Only important measurement was the two ends had the right diameter, and that the piece would be long enough. So made sure to make them plenty long.
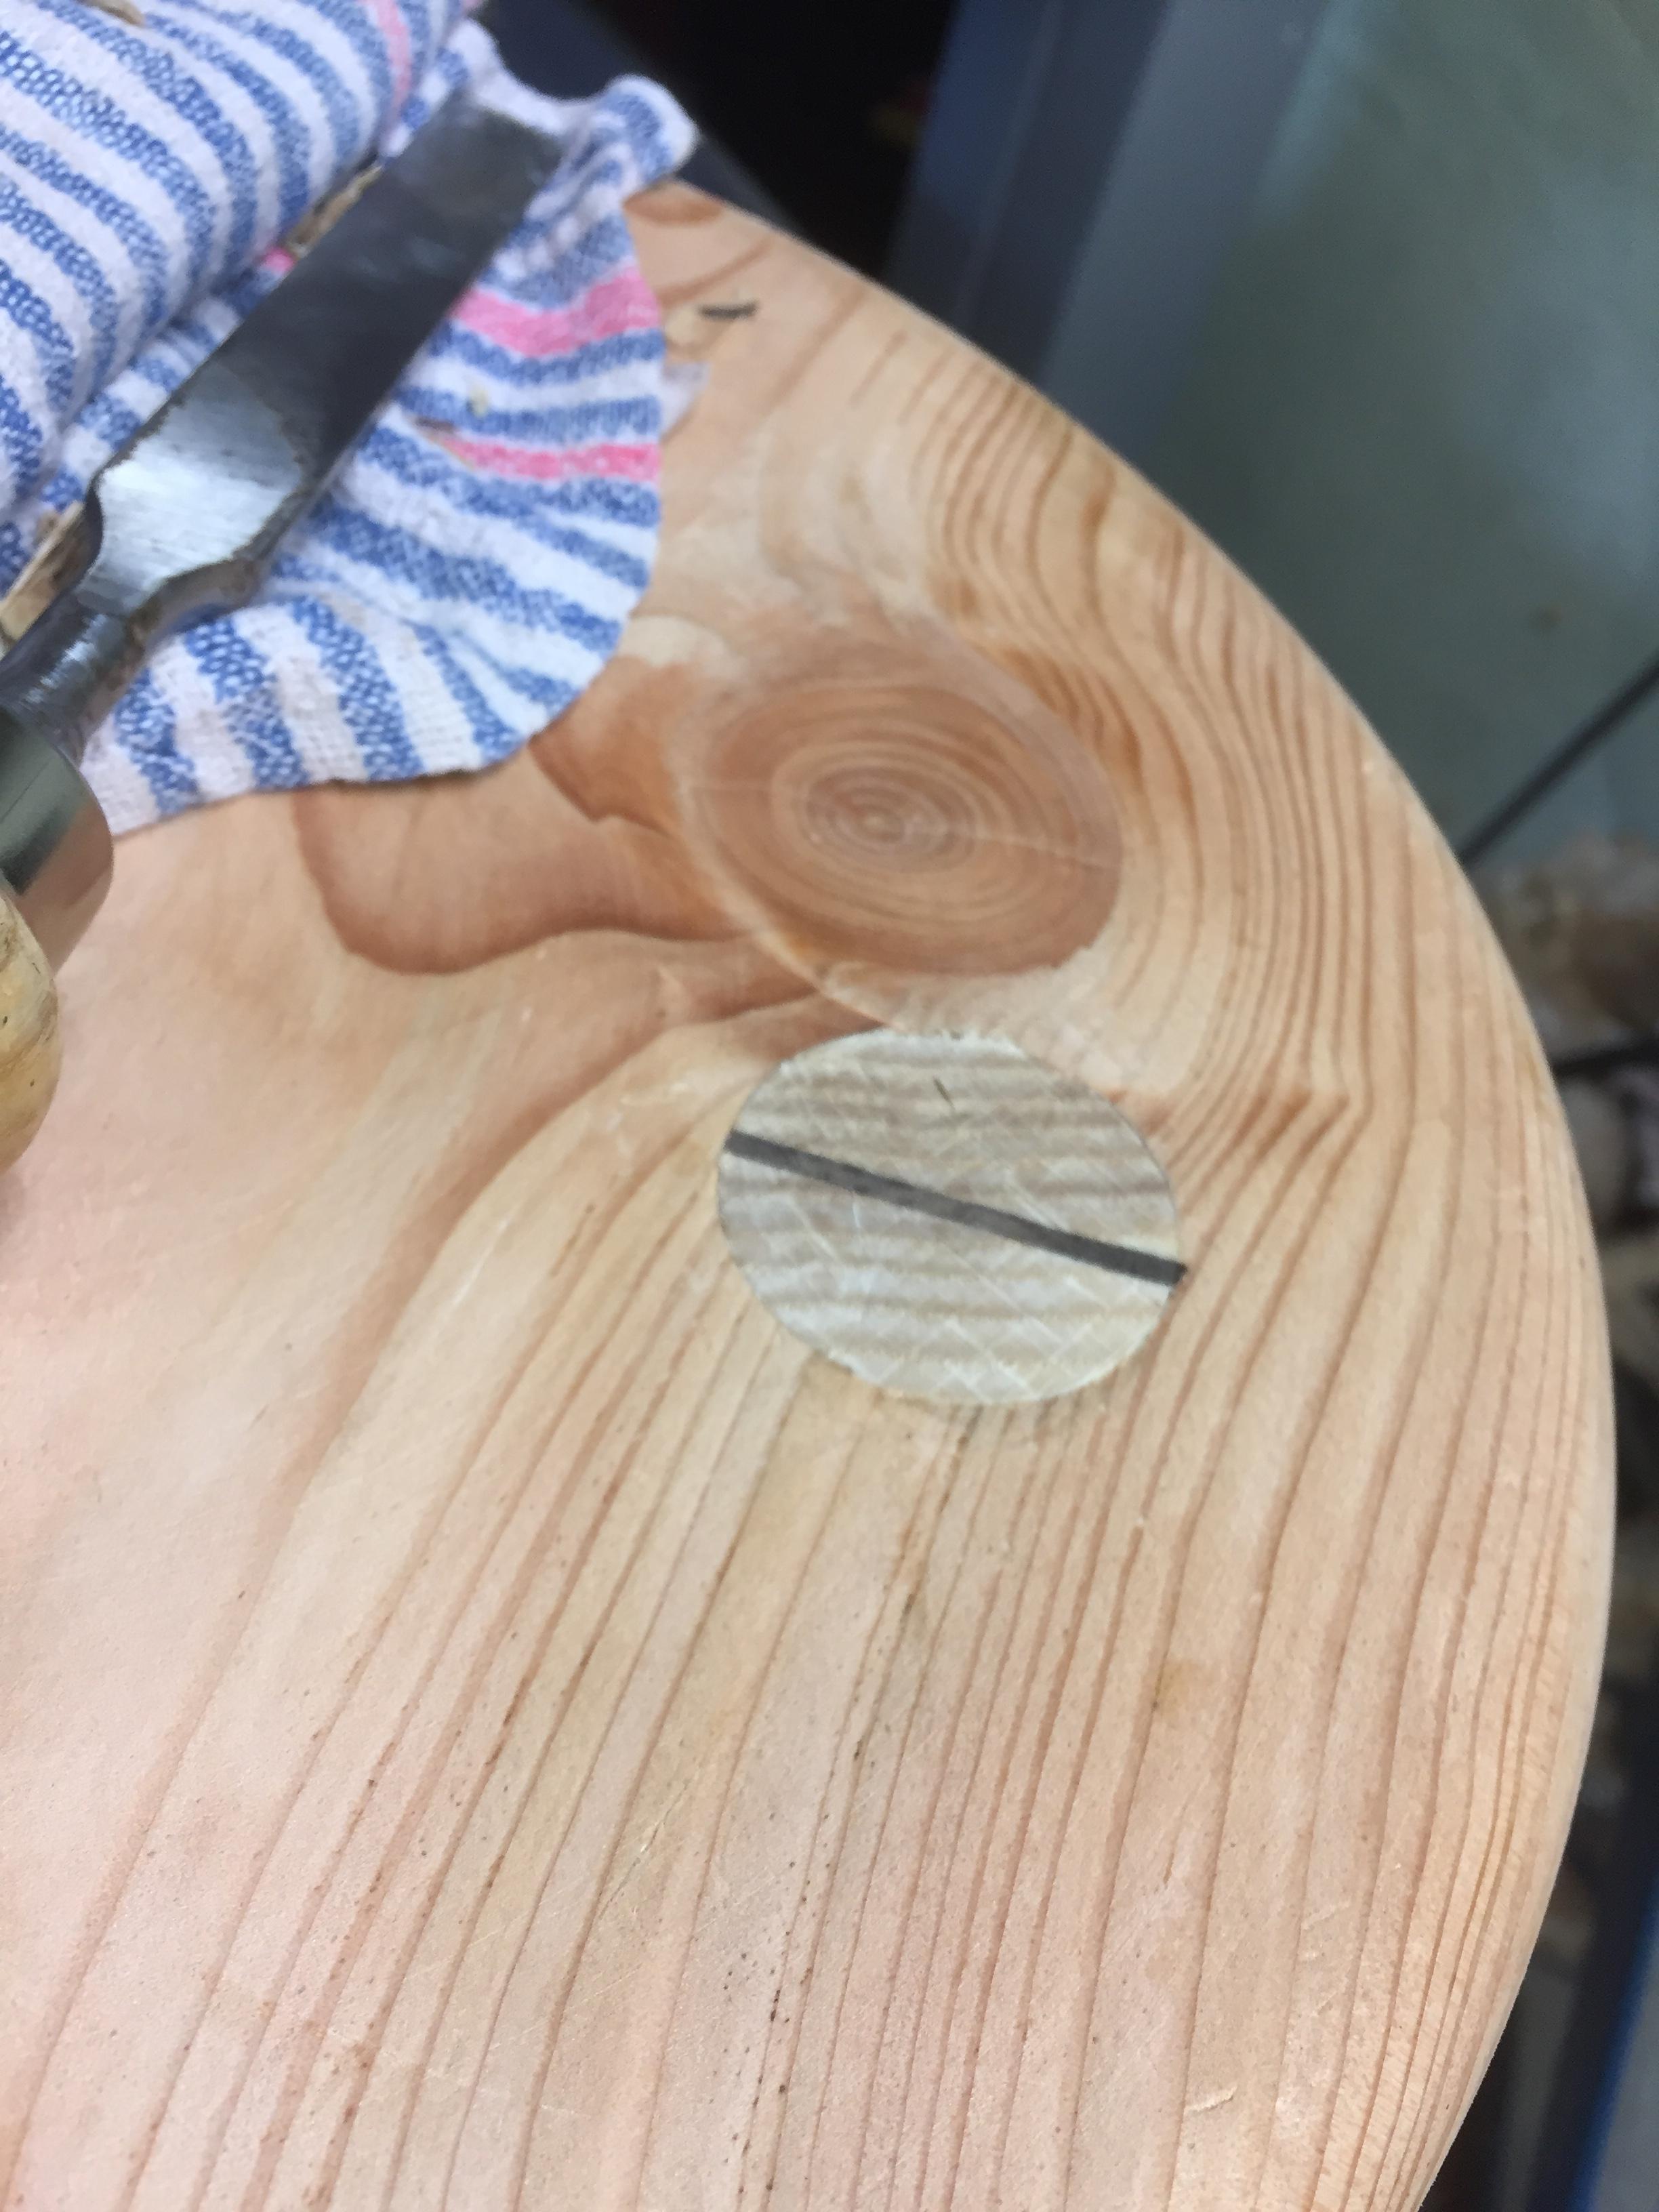
Next was the scary bit. I had to drill the seat top to take the legs. If you clicked the link to the youtube video, you'll have seen Ishitani drills his legs through the top and wedge-tennnons them, so not much room for error. The diameter wasnt too important as thats more about the eye and how it appears. It was all about the angle of drilling. To assist in this process, I marked out a cardboard piece to the same measurements of the seat top and drilled out where I thought it looked right. Drilled the cardboard with the fostner bit and then fit the legs into the cardboard piece. I stood the whole thing up and was then able to get an idea of what angle of lie I wanted on the legs. This was a great help in the process. Once I had the angle transferred to a sliding bevel, I used that to transfer the angle to the pillar drill bed.
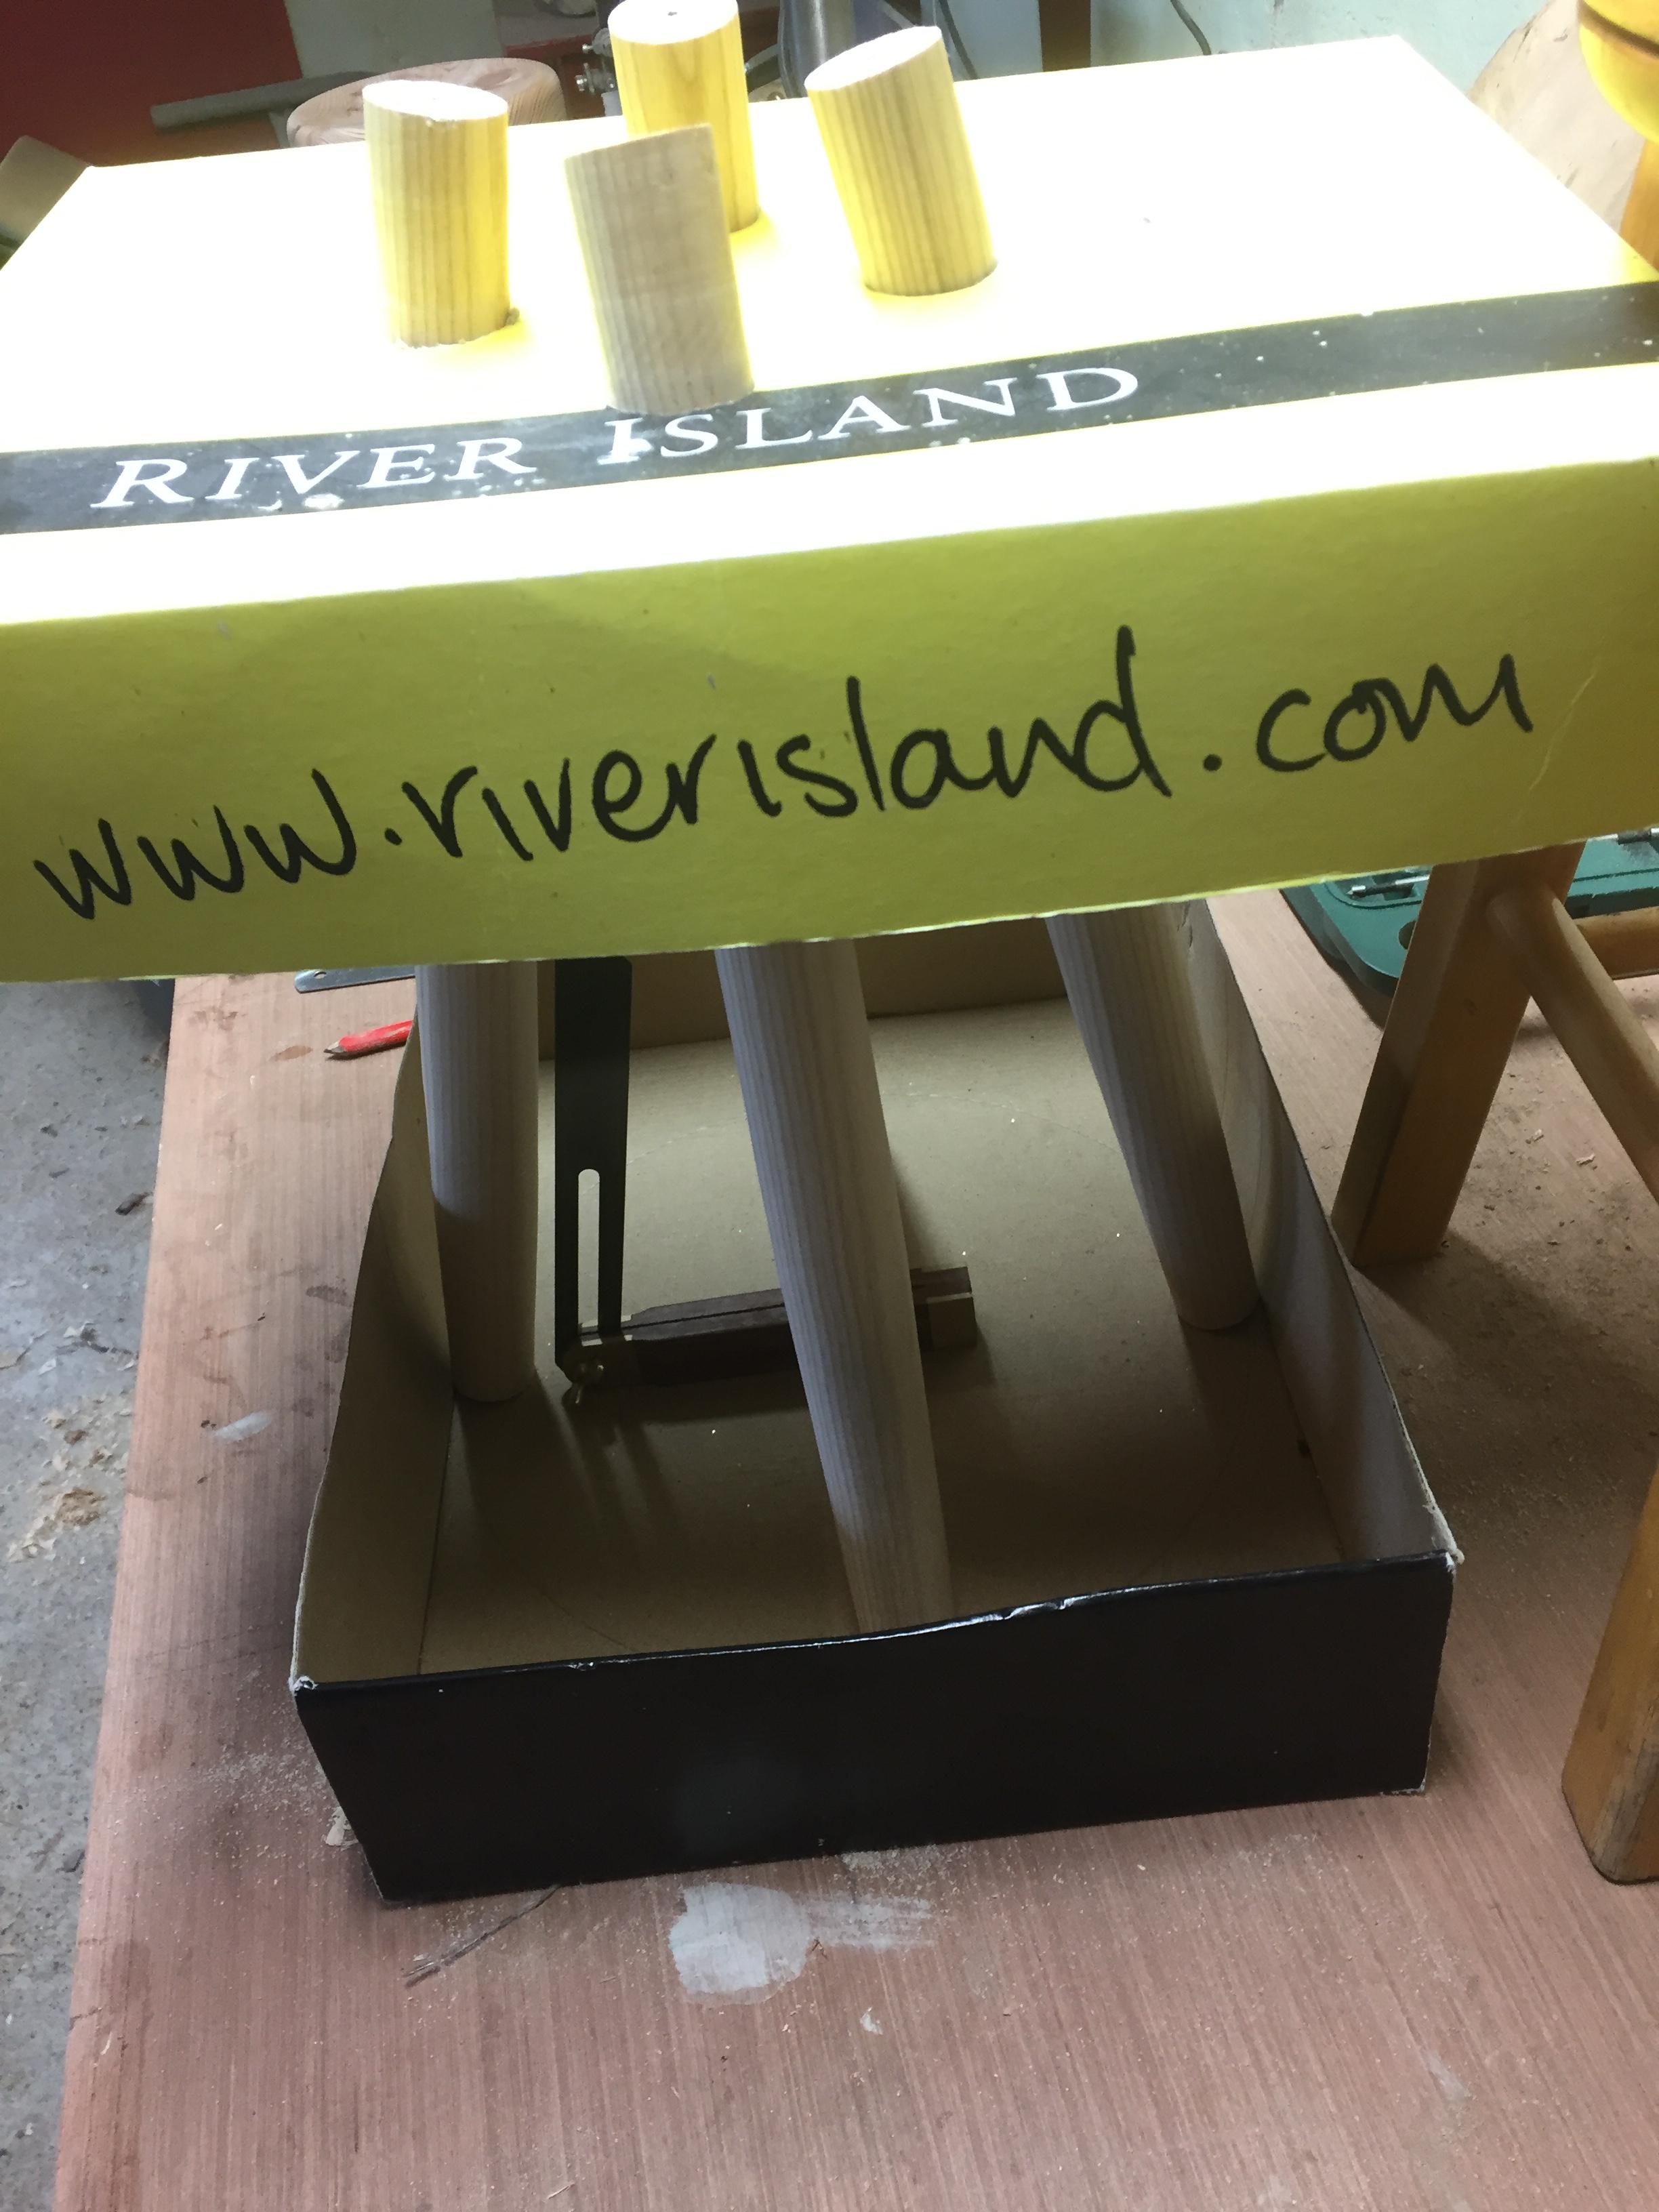
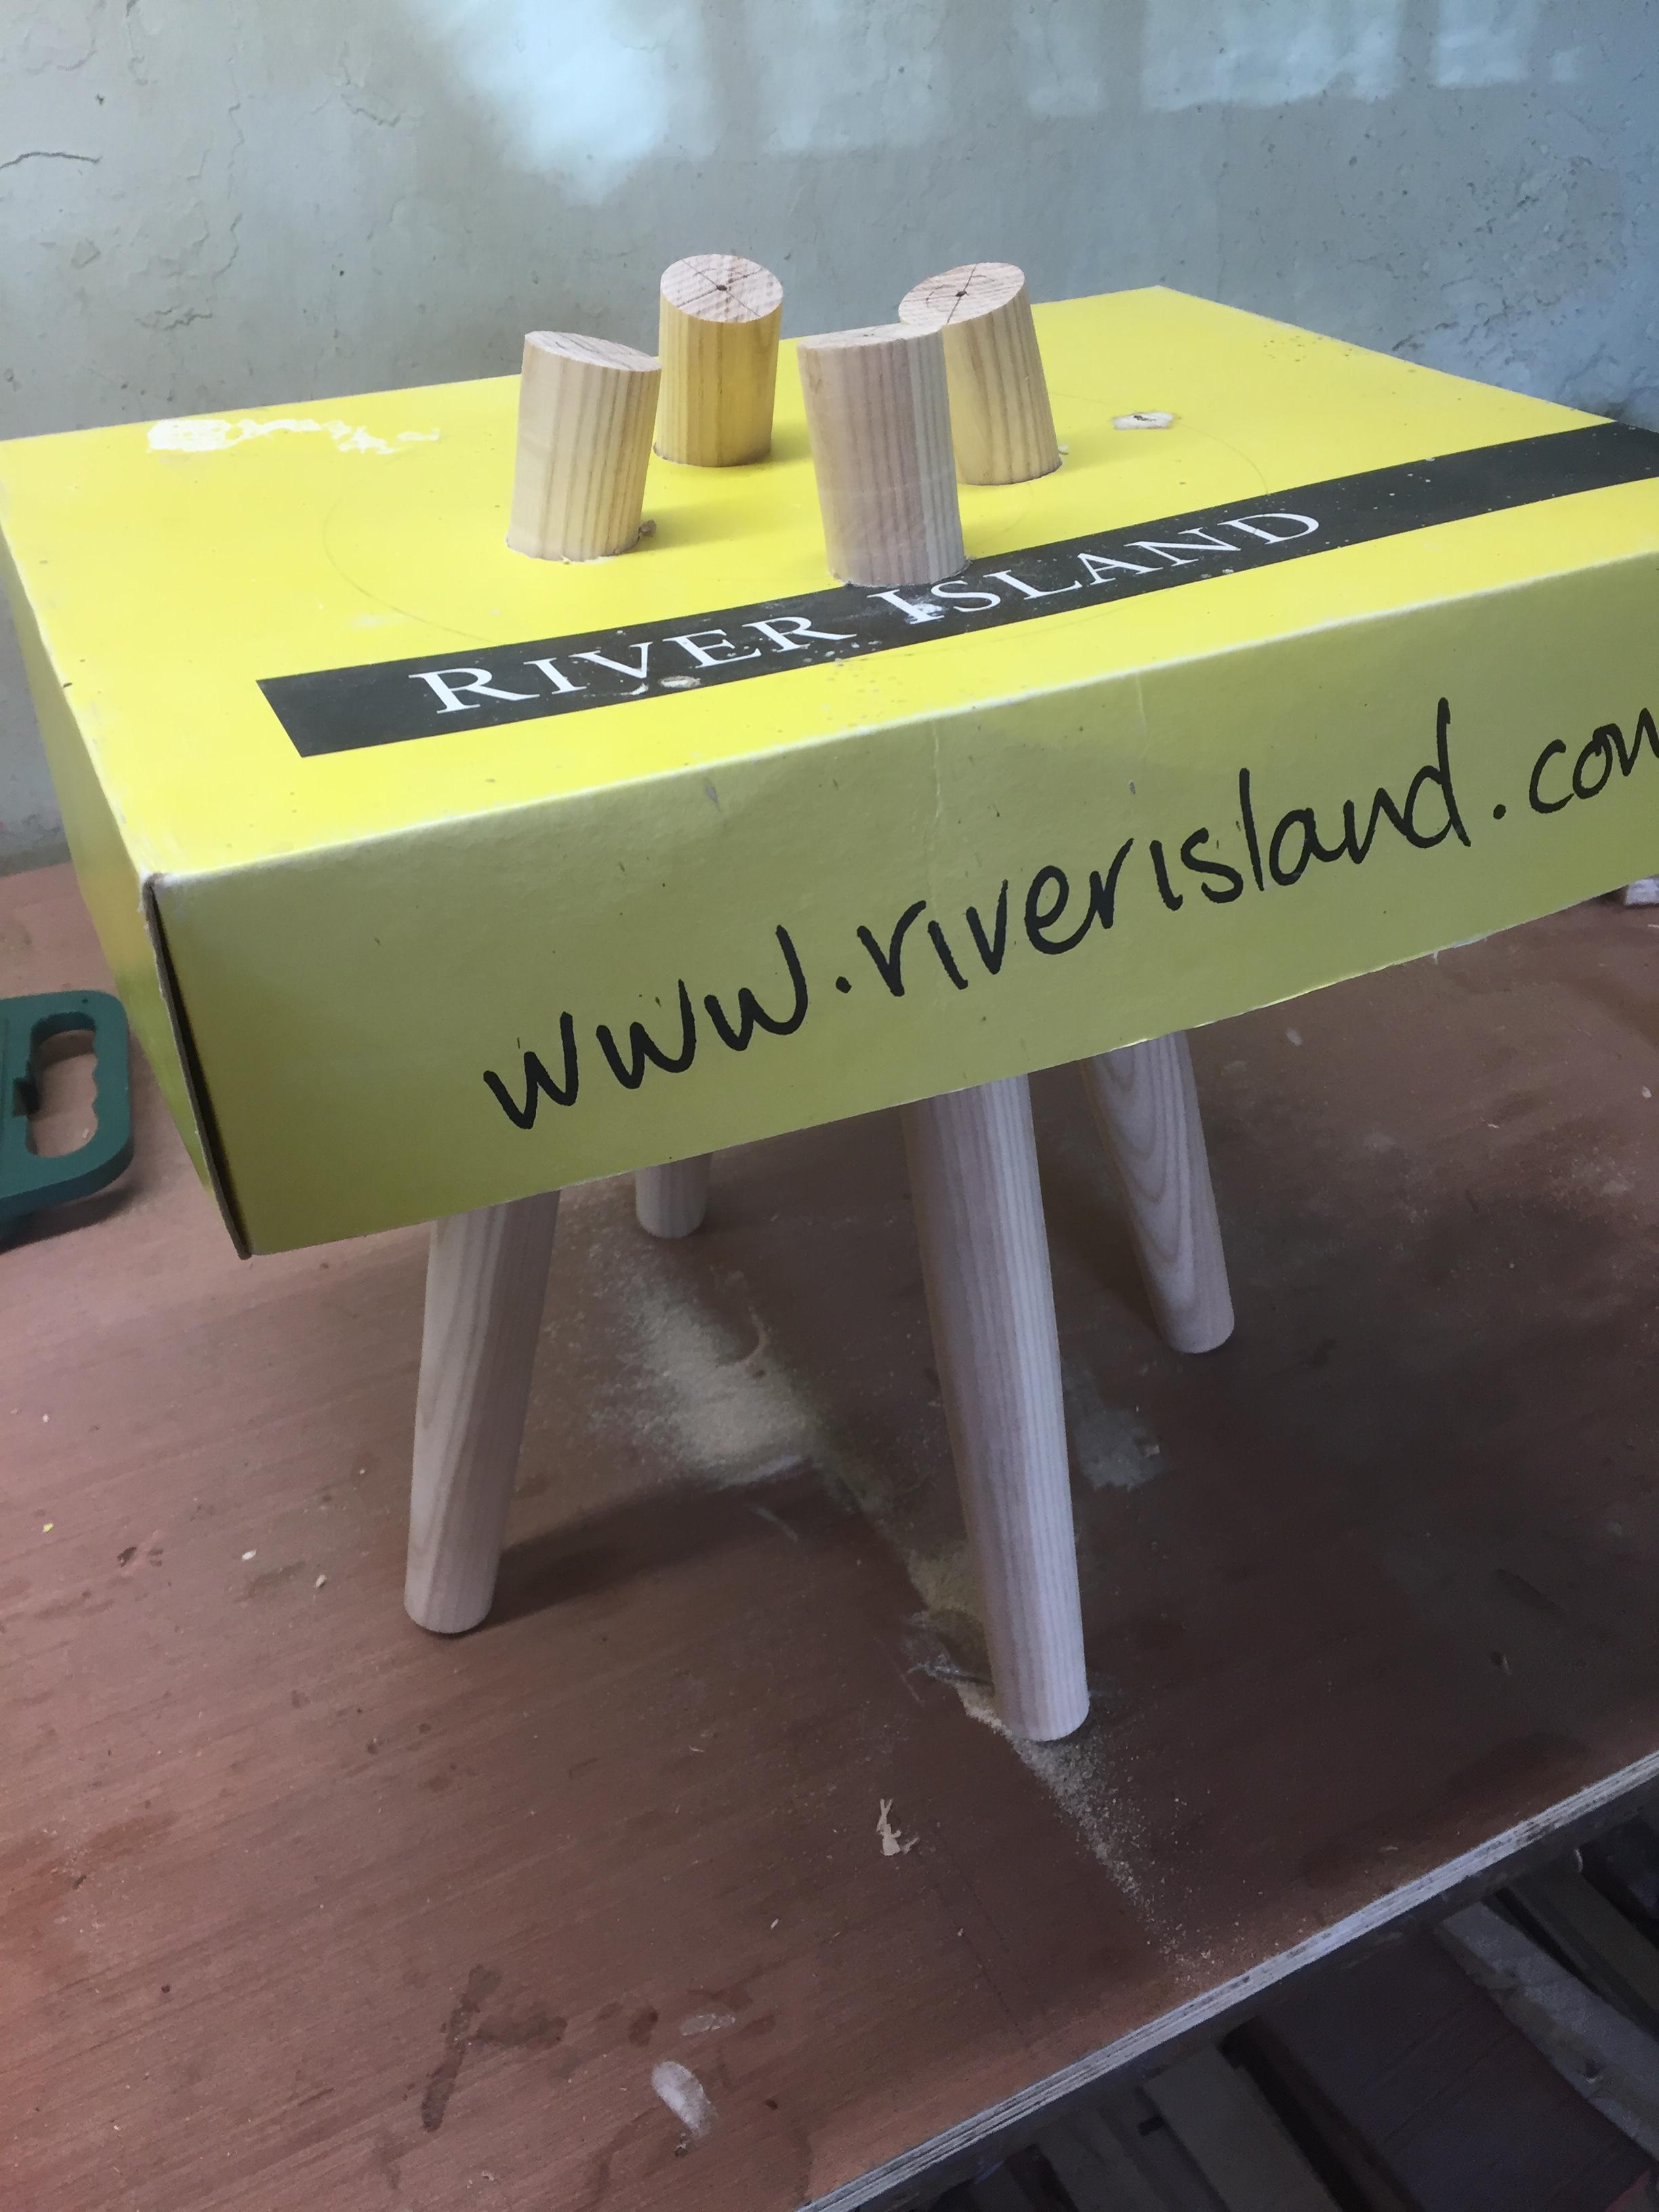
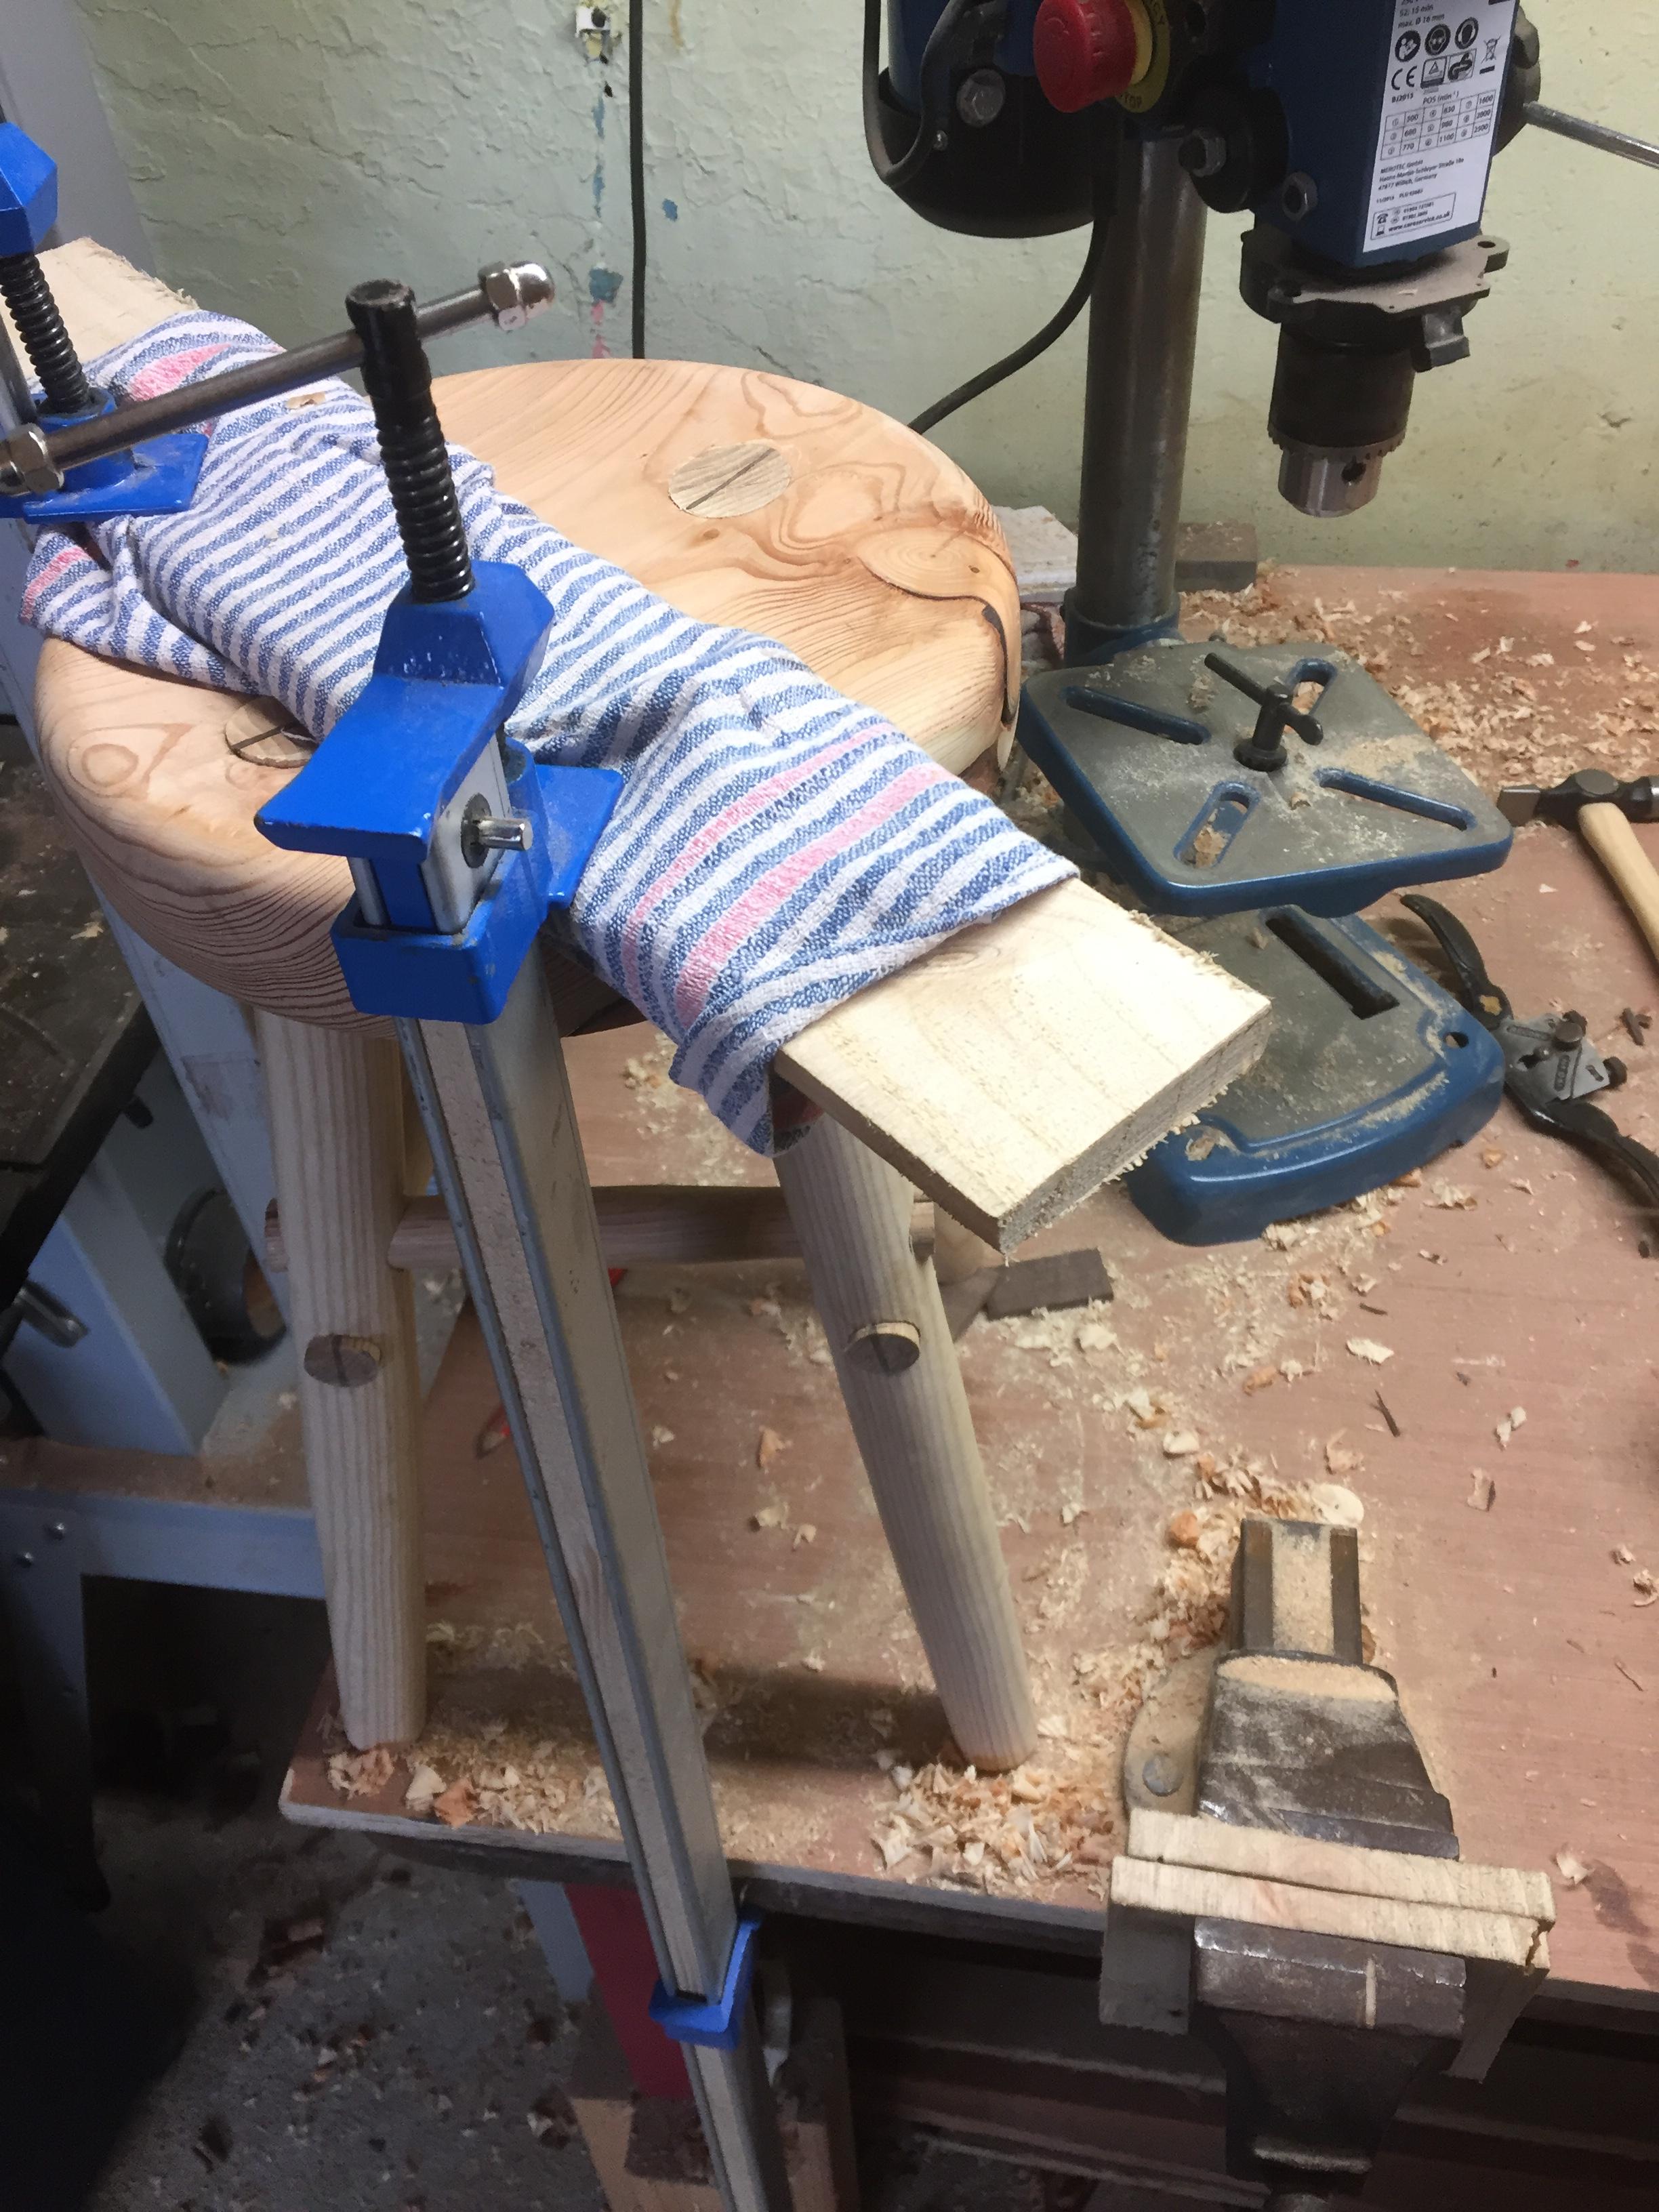
I have a very cheap Aldi pillar drill, but its actually a fantastic piece of kit for the work I need it for. It drills straight down and doesnt waver. I know its limitations but it is very usefull. I did trial run on some scrap timber first and drilled out two holes the correct distance apart and then slotted in two legs to see if the lie and angle looked good.
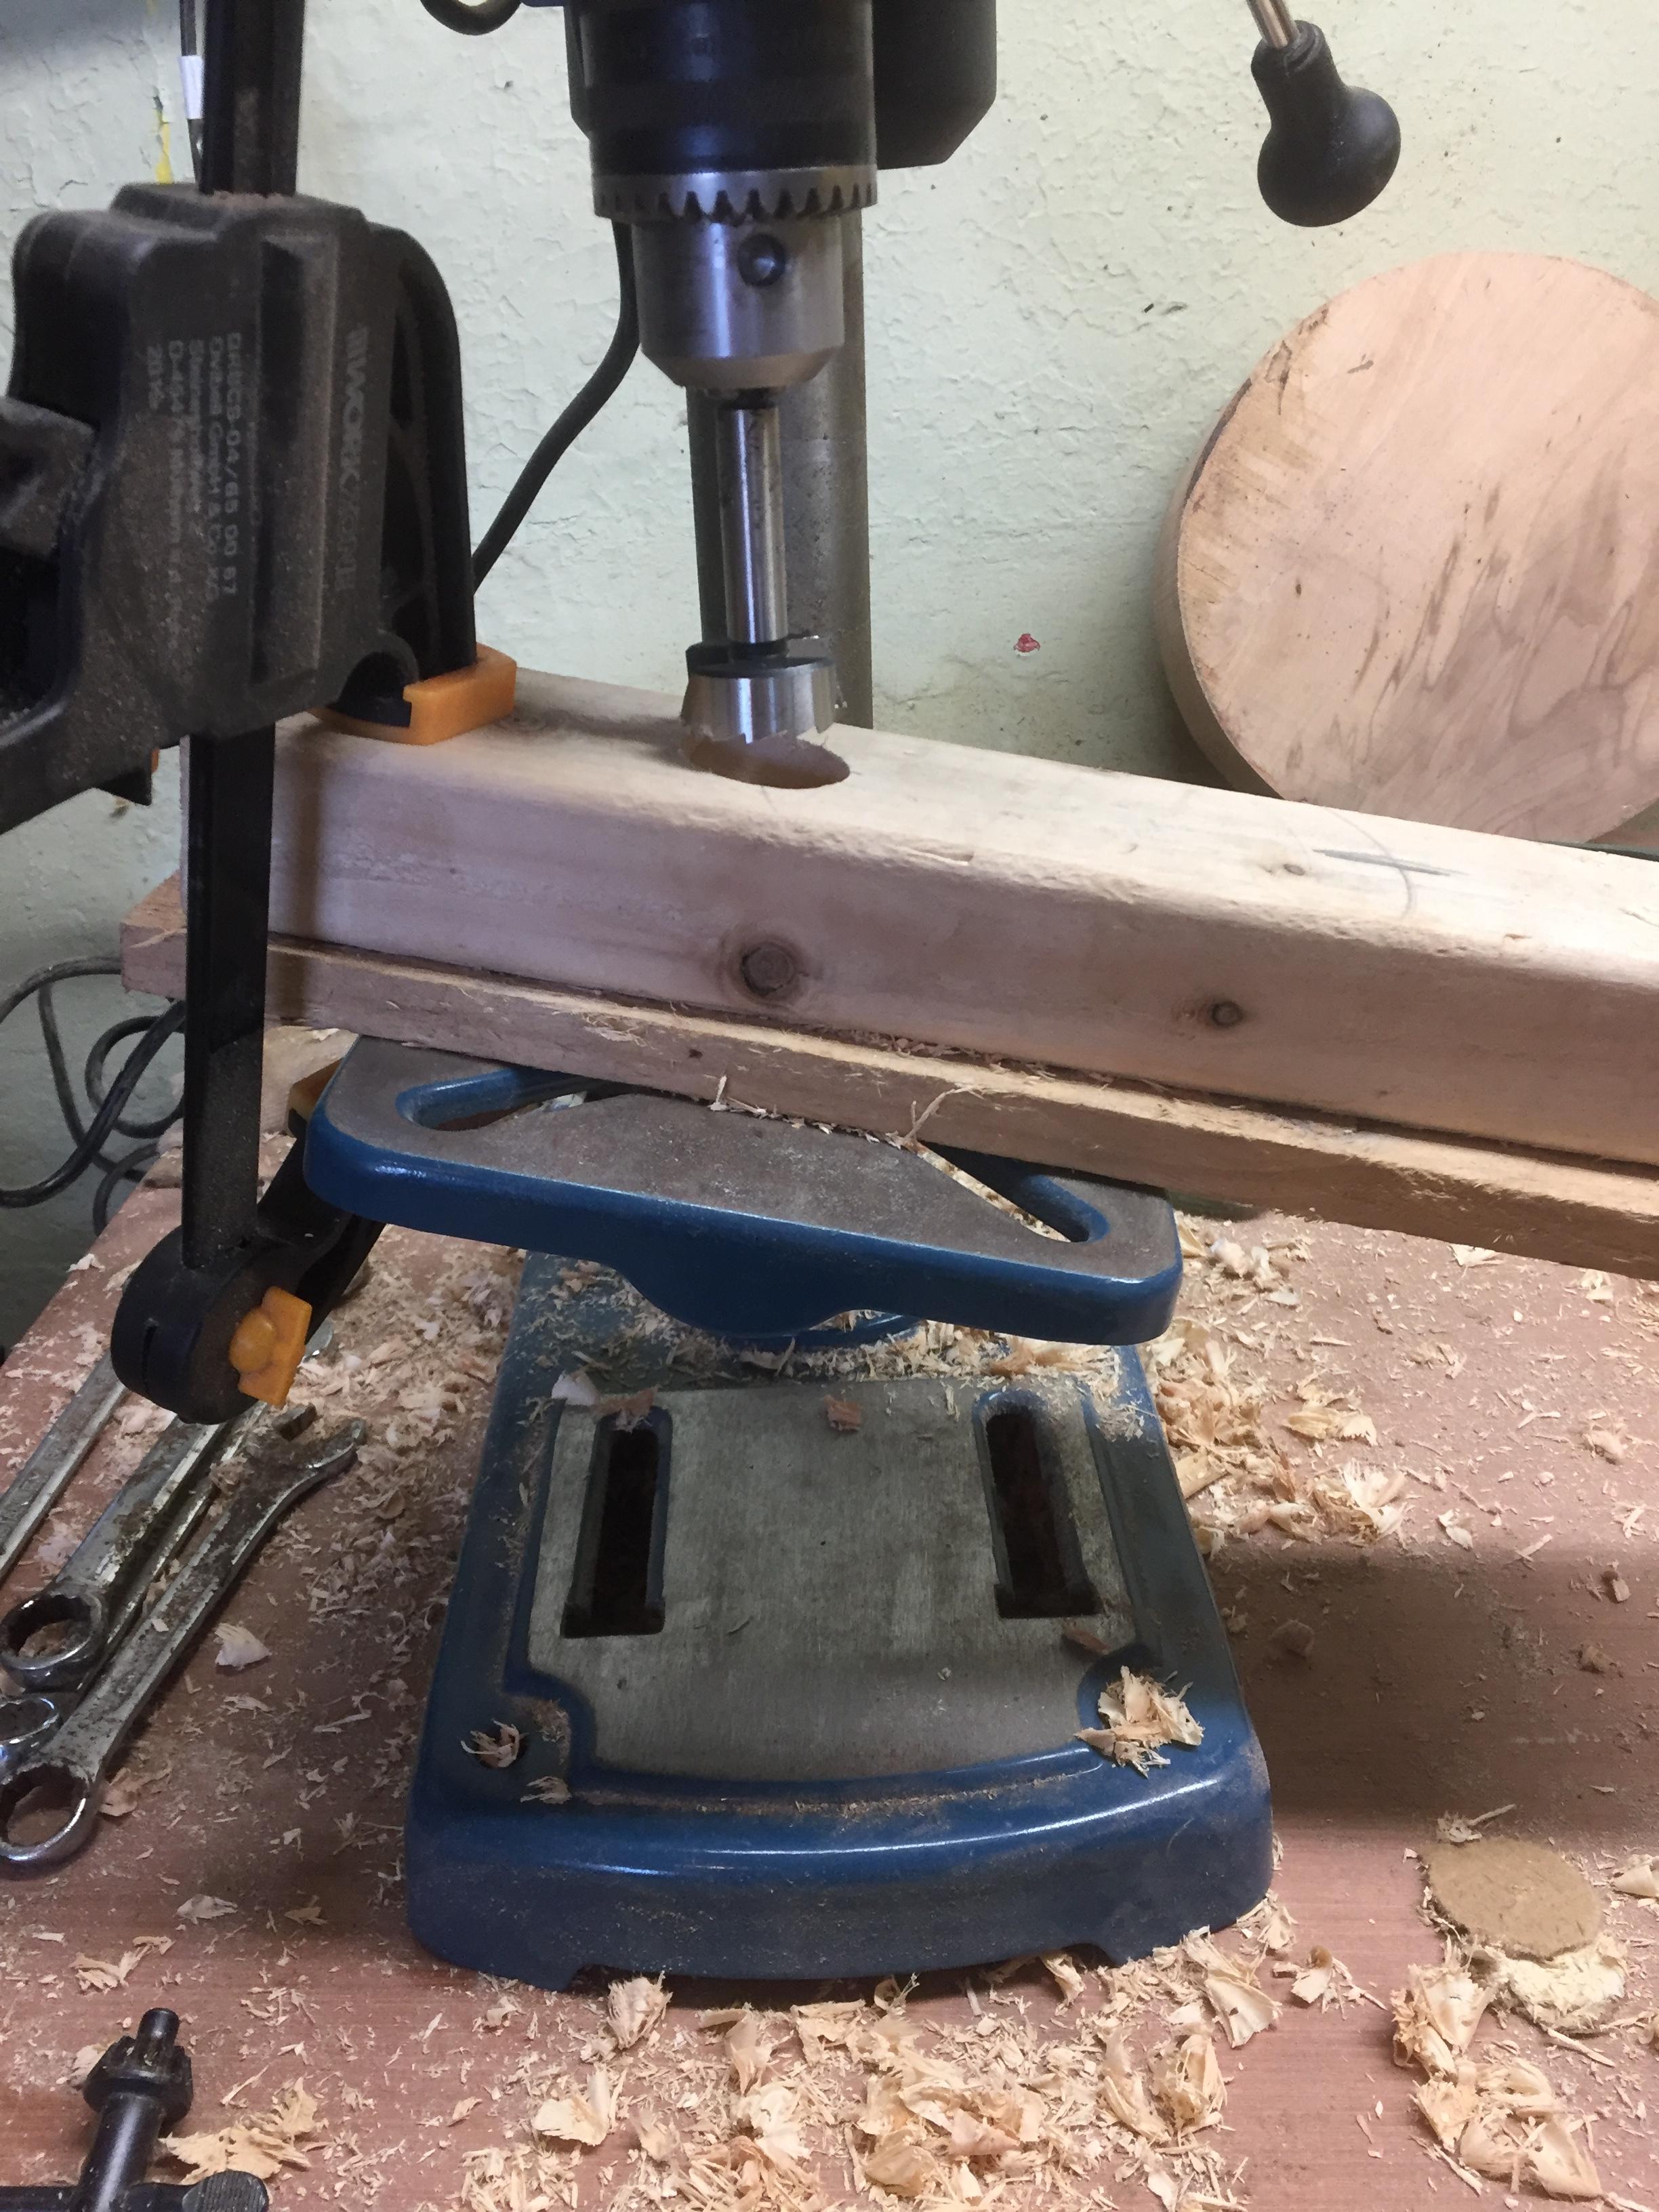

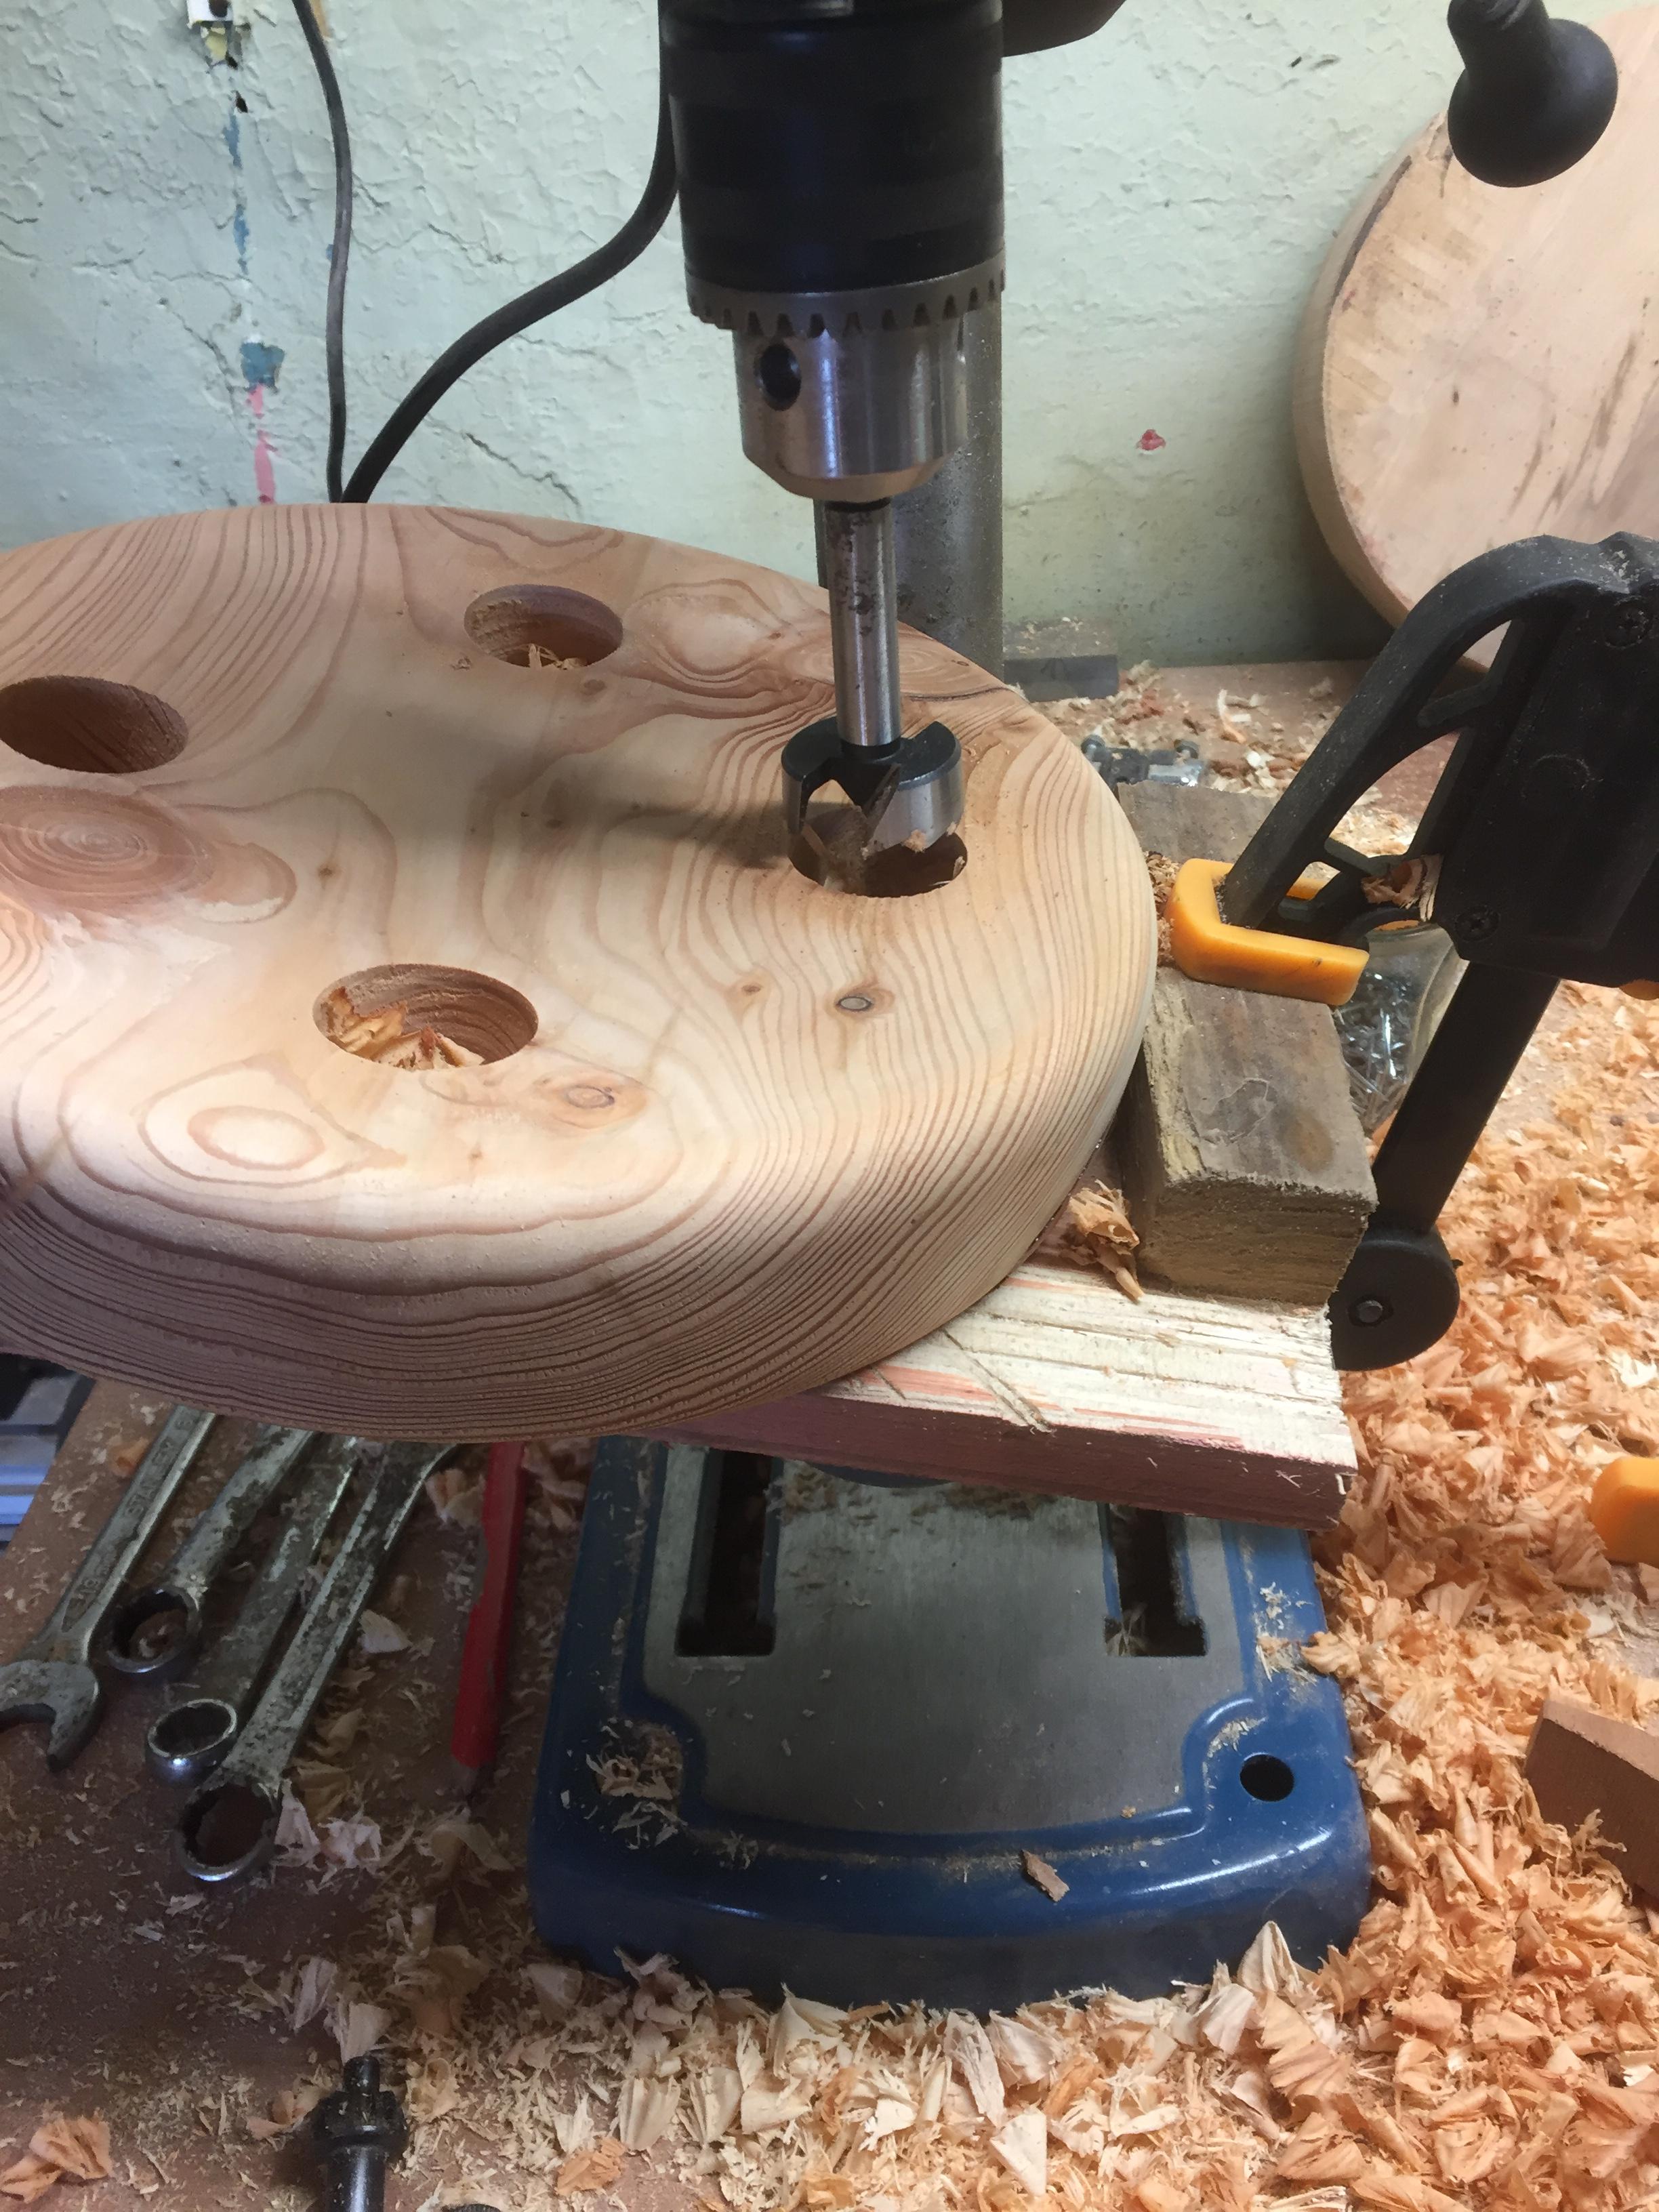
So I set the bed at the correct angle and then clamped on a lat of timber so that I could slide the seat top into position and the bit would always be an equal distance from the edge or centre. This way, all I had to do was make sure and do was rotate the seat top through 90Degrees each time and everything else would be fine. I got all 4 done and it actually worked surprisingly well. I drilled 95% of the way through and then flipped the seat over and finished the job to avoid tear out. The imporant thing to remember when flipping the top over was to position the seat top in the opposite orientation so that the angle of drilling was in the same plane as the hole already drilled from the top.
Thats as much as I have for now.
Feedback always appreciated
Edit - Dont think my pics are showing, I used Imgur - any help on that would also be appreciated
mod edit to add pics - thanks Naz
https://www.youtube.com/watch?v=uJbqA1B ... e=youtu.be
Not sure if the style of stools he makes have a name or are a common style, but I hadnt come across it before. Really liked it, and decided to have a go.
Took some pictures along the way, but forgot at other times - usually the important stressful points... :roll:
So started off with what I think is Oak (open to correction on that). Had two lengths about 900mm long, so that decided the legs on my stool were going to be around the 450mm mark, less the thickness of the stool-top that they were going to go through. My lathe is a 1221 Jet, so it doesnt take much more than 500mm max spindle anyway.
Turned the 4 legs with roughing gouge. Had a simple enough process, marked up 60mm from one end to mark the shoulders of the tennons. Drilled a scrap piece with the 3/4" fostner bit and did a practice run on a scrap piece. Once happy with the fit, used the scrap piece to set the calipers. At the other end of the leg (the bottom), measure up about 200mm and tapered it back to a diameter that looked right.
Turned the top on the lathe, used a faceplate to hold it. I screwed the faceplate on using 6 screws, didnt worry too much about the holes as the underside is so rarely going to be seen. Ive seen lads do the top with an adze, but I dont have one or the skills to use one, so turning on the lathe seemed the best bet. Straight forward enough, turned out the top edge of the seat to what looked like a nice concave. Sanded up to 320 and left it at that for the time being.
Then found some material for the stretchers. I wasnt confident to try and use an X type stretcher layout as Im not sure how you go about crossing the two pieces over each other. So instead I just ran 4 stretchers around the perimeter from leg to leg. Two above and two below, seemed the best way and I liked the look of it. I turned the 4 stretchers in a similar way to the legs. Drilled out a scrap piece with a 3/8s fostner bit and then once I had a scrap piece fitting nicely, used that for the calipers. I dont think I have any pictures of this process, but it was very straight forward. Roughed out with a roughing gouge and then sanded up to 320. Only important measurement was the two ends had the right diameter, and that the piece would be long enough. So made sure to make them plenty long.
Next was the scary bit. I had to drill the seat top to take the legs. If you clicked the link to the youtube video, you'll have seen Ishitani drills his legs through the top and wedge-tennnons them, so not much room for error. The diameter wasnt too important as thats more about the eye and how it appears. It was all about the angle of drilling. To assist in this process, I marked out a cardboard piece to the same measurements of the seat top and drilled out where I thought it looked right. Drilled the cardboard with the fostner bit and then fit the legs into the cardboard piece. I stood the whole thing up and was then able to get an idea of what angle of lie I wanted on the legs. This was a great help in the process. Once I had the angle transferred to a sliding bevel, I used that to transfer the angle to the pillar drill bed.
I have a very cheap Aldi pillar drill, but its actually a fantastic piece of kit for the work I need it for. It drills straight down and doesnt waver. I know its limitations but it is very usefull. I did trial run on some scrap timber first and drilled out two holes the correct distance apart and then slotted in two legs to see if the lie and angle looked good.
So I set the bed at the correct angle and then clamped on a lat of timber so that I could slide the seat top into position and the bit would always be an equal distance from the edge or centre. This way, all I had to do was make sure and do was rotate the seat top through 90Degrees each time and everything else would be fine. I got all 4 done and it actually worked surprisingly well. I drilled 95% of the way through and then flipped the seat over and finished the job to avoid tear out. The imporant thing to remember when flipping the top over was to position the seat top in the opposite orientation so that the angle of drilling was in the same plane as the hole already drilled from the top.
Thats as much as I have for now.
Feedback always appreciated
Edit - Dont think my pics are showing, I used Imgur - any help on that would also be appreciated
mod edit to add pics - thanks Naz