In the groove?

UKworkshop.co.uk

Help Support UKworkshop.co.uk:

This site may earn a commission from merchant affiliate links, including eBay, Amazon, and others.

Froggy

Established Member
UKW Supporter
Joined
6 Apr 2009
Messages
881
Reaction score
8
Location
Twyning, Gloucestershire.
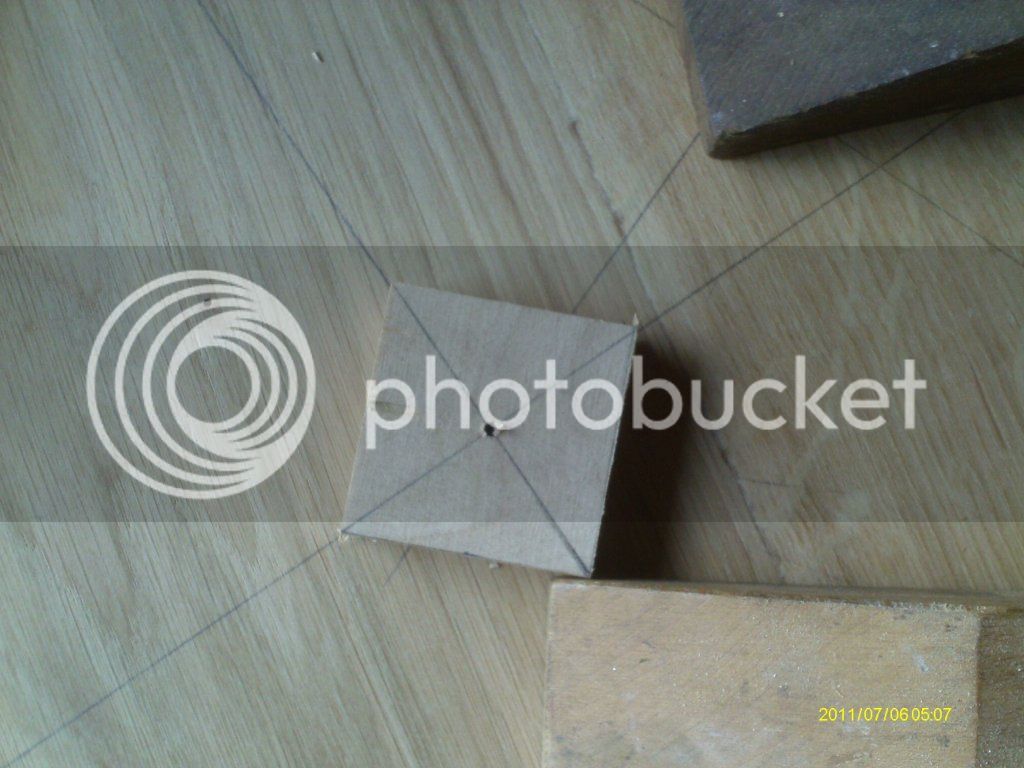
Hi, I'm trying to replace a broken cheese board for a friend. See pic.
IMAG0095.jpg

Th broken one on the right has a groove in it to house a glass dome. How can I replicate that without putting an hole in the centre of the cheese board?

T.I.A. Froggy.
 
I'd do it on a router table - face down onto the router with a couple of blocks clamped to the fence and set apart to allow the edge to come past the bit. Press down, keep the piece tight to the blocks and rotate slowly.

Well, its a plan :shock:
 
I'll just be in before, and say that'll probably end badly. Sounds really good in theory but why you wouldn't do what Mick has said which is really easy and will get you a perfect result. It'll only take one little wobble on the table or lack of pressure to ruin your line. If you don't have any hot melt glue do you have any mitre fast type stuff, the 2 part adhesive? I've used that on wood, it makes a really strong bond but its brittle on wood so you can whack it off and sand away the glue on the workpiece and it leaves no residue. Proper double sided tape not the rubbish from the sheds would also be good. If you don't have any DS I'd be glad to send you some, I've got the industrial stuff in large quantities that is used on the Cyclones.
 
Looks as though it's parted along a joint. Can't you just carefully clean up the mating faces and re-glue it?

I've had to do this a number of times in the past when somebody (no names etc.) has decided to wash the bloody thing instead of a brief wipe over with a damp cloth! :evil:
 
Hi Chems, Having thought about it last night I came to the same conclusion. But the main reason I went for that method was that I have no attachment for the router to make circles and because I don't understand how that can work, if there is a lump of wood in the middle of the board surely this would raise the router off the board? I know I'm missing something and feel a bit stupid about that, which is why I didn't come back after dismissing Hanser's option. But you've prompted me to be brave and admit my confusion.

Hi Tony, You can't see it on the photo but the board is warped which is why it has split in the first place. That's why I agreed to try to make a new one.

Thanks again, Froggy.
 
No such thing as a silly question. I don't think you need a special gadget, provided that the board is big enough for there to be a gap between the base of your router as it cuts the groove and the little 'island' of wood temporarily attached to the middle. If you make the island the same thickness as your router base, all you need is a stick to bridge across the two things, held on with screws through the router base and one screw in the middle as a pivot point. You'll need to find the exact centre.

However, now that you have cut a circle, I think it would be easier to use the router fence to reference off the outer edge, which you can do with the ordinary fence, provided that you put a couple of blocks onto it with a gap between, so there are always two points of contact against the circle.

Then again you could always use a Stanley 71 with the fence in the position for circular work, ie with the two bumps inwards - that's what I would do!
 
I would just get a little offcut of 6mm mdf. Glue a square into the center of the board. Cut another piece the same width as your router and a little longer than the radius of the board. Then I would stick another piece of 6mm mdf to one half of this piece. That would make 12mm at one end which would make up the difference. Pin in the end of the board into the glued 6mm block and spin it around. If that makes sense.. . . . . .
 
Do you have access to a lathe with a rim chuck??
rimchuck.gif


Roy
 

Attachments

  • rimchuck.gif
    rimchuck.gif
    68 KB · Views: 143
Hi Roy,

No I don't have access to a lathe with a rim chuck unfortnately.

Chems, I'm really sorry but I can't follow what you're saying despite reading it over and over again! I think it's similar to Andy's first option, but I just can't follow what you're saying.

Andy, I have a Stanley 71 and I decided to try that method until I realised there is no nut and bolt for the fence and despite the fact I have a massive stock of nuts and bolts I can't find one to fit!! Ahhhhhhhhhh!! So I'm now going to look at the first option with an island in the centre and a stick to attach the router.

Thanks all for your patience (you have more than I have). I'll let you know how I get on.
 
Another option. False base for the router with a couple of dowels in it would allow you to reference consistently off the edge of the board (like a centre finder).
 
Does this help you?

routerTrammel.jpg


Its very straight forward and even if you don't use it this time its worth understanding for future use.
 

Attachments

  • routerTrammel.jpg
    routerTrammel.jpg
    170.5 KB · Views: 148
Trend have just introduced a 7 in one base attachment for a router. It's not cheap, but it will do this job easy-peasey, plus six other regular jobs you normally require special jigs for.

http://www.youtube.com/watch?v=gdGQi22k ... r_embedded

The other answer is to cut a disc of 3mm ply on the bandsaw, and attach with double-sided tape to the bread board. Use Chems's set-up, with successive cuts, until you get through the ply and work the groove, presumably with a coving cutter. After you've routed, detach the plywood, and clean up with a sharp fine-set plane.
HTH :)
 
This might be a daft question, and I shall bow my head in shame for not knowing the answer already, but given that the circle has already been cut, and the suggestion is to temporarily attach a sacrificial block in the centre upon which the circle-cutter-router is to be fitted, how, then, do you accurately mark the centre of the original circle on the raised block?

Perhaps another way would be to tap a small nail into the centre of the circle, use that as a locating point to rotate the router around, and fill in with small splinter of wood - should give only a slight visual mismatch at worst.

Adam S
 
Well you could place the router and circle cutting jig onto the plywood, and cut out the sacrificial disc that way. The router jig would give you its centre .

Or make a quick pair of compasses with two lengths of 30mm square stuff, a nail in one leg and a pencil in the other leg. Hinge-Join them with a bolt and wing-nut.

Draw your circle with that and set the router circle jig using the centre point mark, made with the compasses, and the pencil line.

Hope you can visualise that! :D
 
Well I've done it at last!! I used Chems method in the end ( thanks for your time and trouble taken to put SU pics on for me - you should right a book 'woodworking for Dummies' - I'd buy it (homer) ).

To answer your question Kalimna - once I'd found the centre of the circle I drew 2 lines through the centre at 90 degrees to each other; then made the sacrifical piece for the centre a perfect square (50mm x 50mm) and drew lines on it from corner to corner and then lined these up with the two 90 degree lines on the board. As below:
IMAG0104.jpg


I stuck it down with double sided tape and then drilled a pilot hole in the centre to make it easier to find when screwing down the bridging piece. Then I secured the whole board with doubled sided tape to 'bench' and clamped it for a while to get a good grip:

IMAG0103.jpg


and finally removed the clamps, attached the router and made the groove:

IMAG0105.jpg


and delighted with the results. Thank you all very much it was a good learning excerise.
 
Ah excellent, and the funny thing is isn't that the same exact router from the SU picture? Theres no need for a book, I learnt pretty much everything from this here forum, its an interactive book!

Looks like you got a perfect result too!
 

Latest posts

Back
Top